TheHive#
TheHive is a scalable open-source and free security incident response platform.
Credentials
You can find authentication information for this node here.
Basic Operations#
Alert - Count alerts - Create an alert - Execute a responder on a specified alert - Get an alert - Get all alerts - Mark an alert as read - Mark an alert as unread - Merge an alert into an existing case - Promote an alert into a case - Update an alert
Case - Count cases - Create a case - Execute a responder on a specified case - Get all cases - Get a single case - Update a case
Log - Create a task log - Execute a responder on a selected log - Get all task logs - Get a single log
Observable - Count observables - Create an observable - Execute an analyzer - Execute a responder on selected observable - Get all observables of a specific case - Get a single observable - Search observables - Update an observable
Task - Count tasks - Create a task - Execute a responder on a specified task - Get a single task - Search tasks - Update a task
Example Usage#
This workflow allows you to create, update, and get a case in TheHive. You can also find the workflow on n8n.io. This example usage workflow uses the following nodes. - Start - TheHive
The final workflow should look like the following image.

1. Start node#
The start node exists by default when you create a new workflow.
2. TheHive node (create: case)#
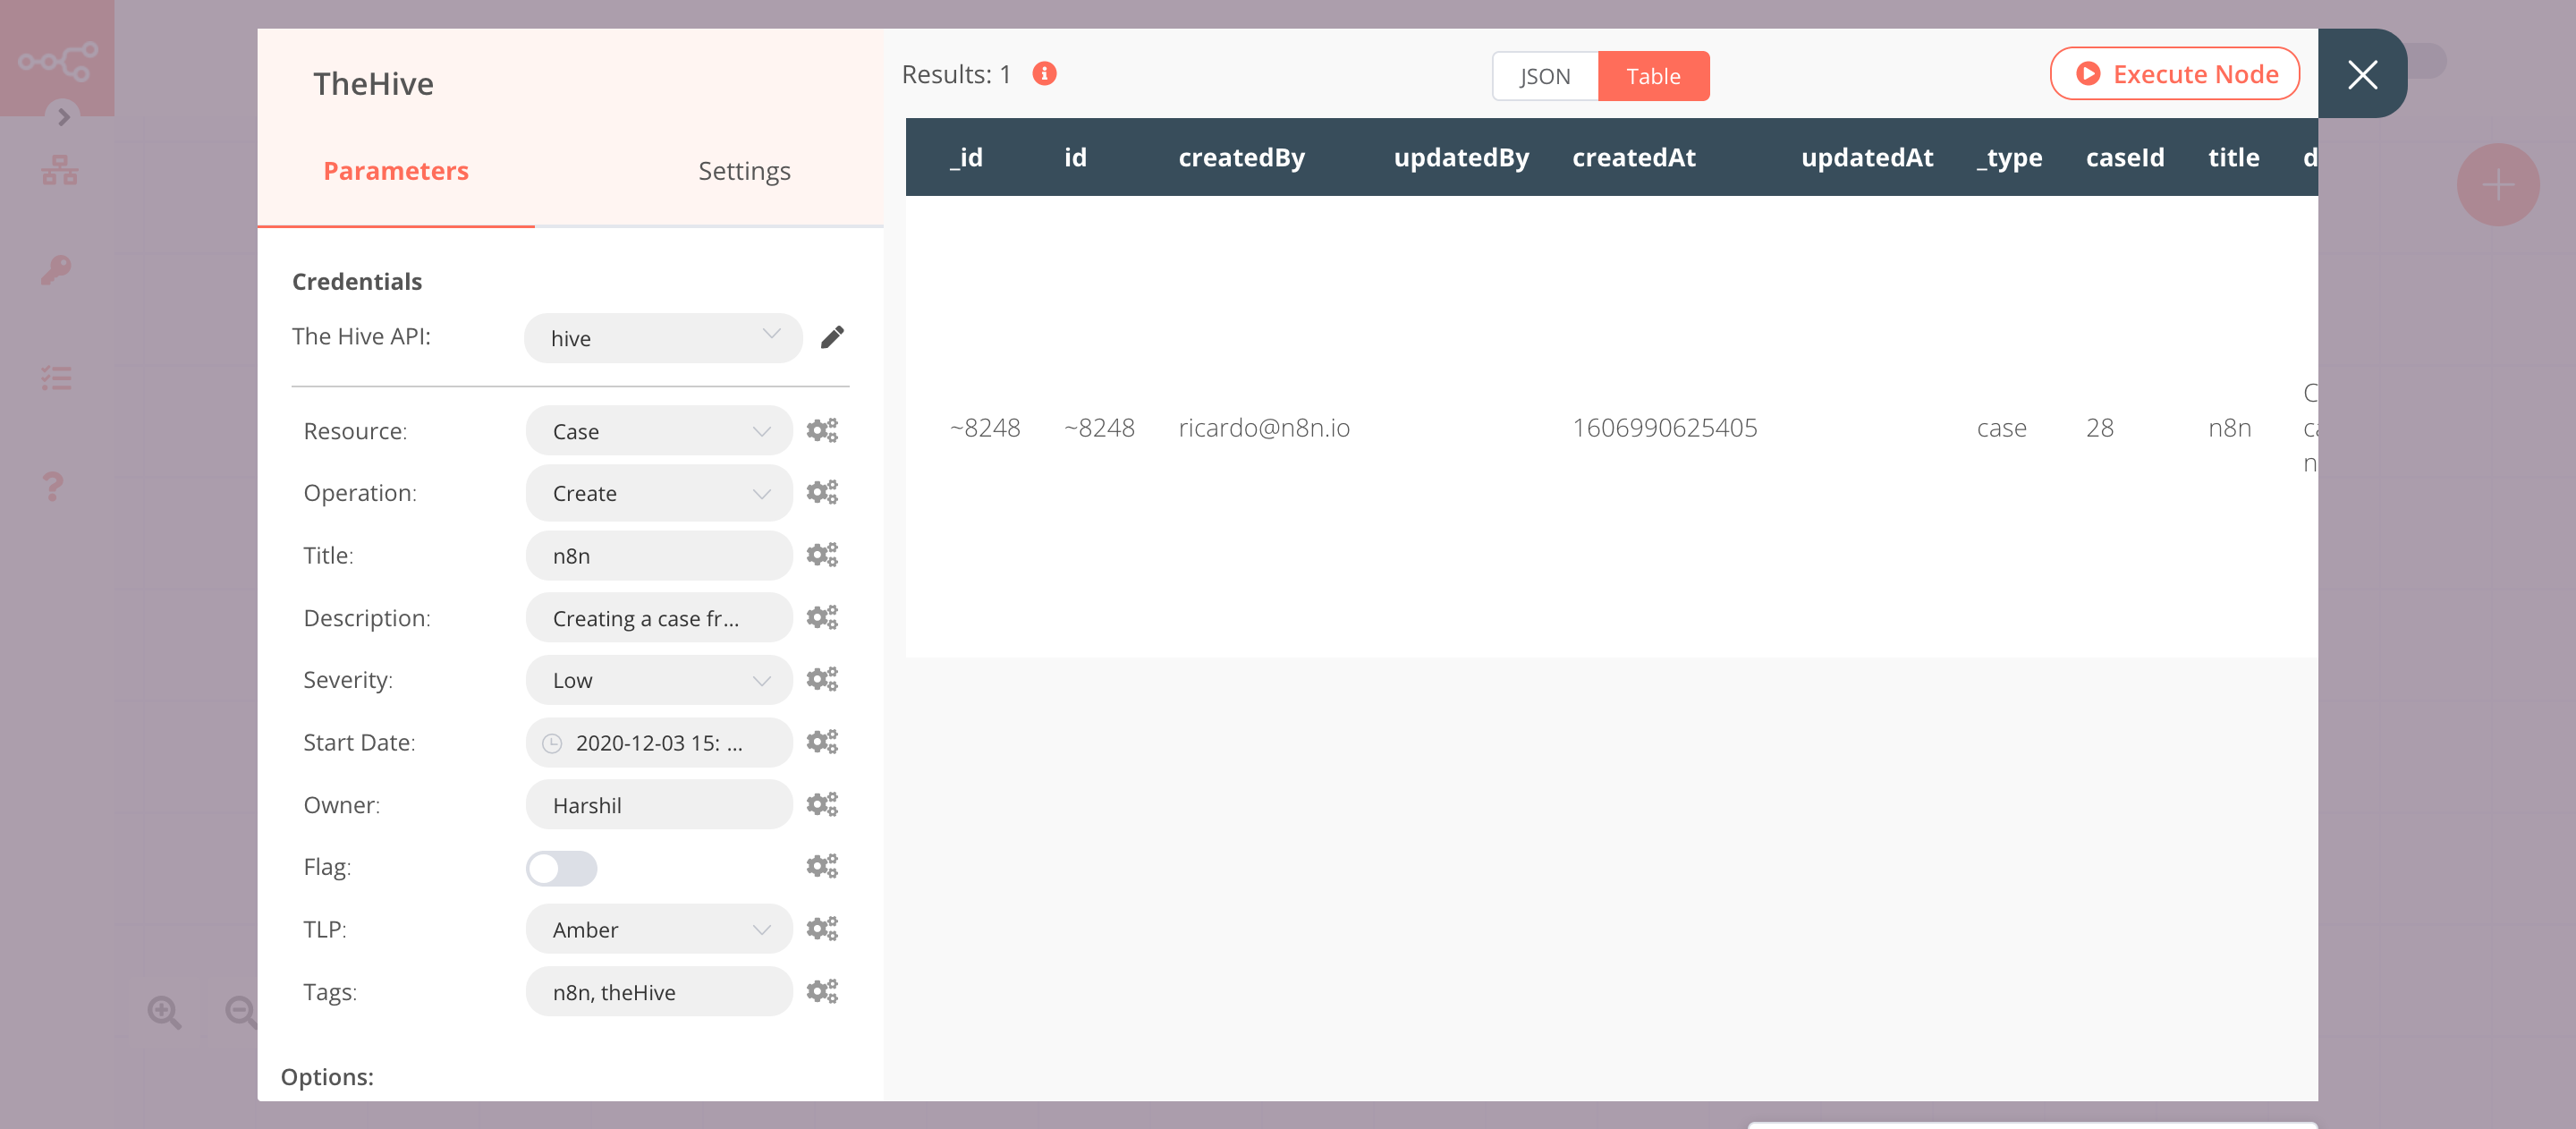
This node will create a new case in TheHive with the title n8n and set its severity to low. You can create a case with a different title and severity.
- First of all, you'll have to enter credentials for the TheHive node. You can find out how to do that here.
- Select 'Case' from the Resource dropdown list.
- Select 'Create' from the Operation dropdown list.
- Enter a title in the Title field.
- Enter a description in the Description field.
- Select 'Low' from the Severity dropdown list.
- Set the start date in the Start Date field.
- Enter a case owner in the Owner field.
- Enter tags in the Tags field. You can enter multiple tags separate by a comma.
- Click on Execute Node to run the node.
In the screenshot below, you will notice that the node creates a new case with the title n8n and low severity .

3. TheHive node (update: case)#
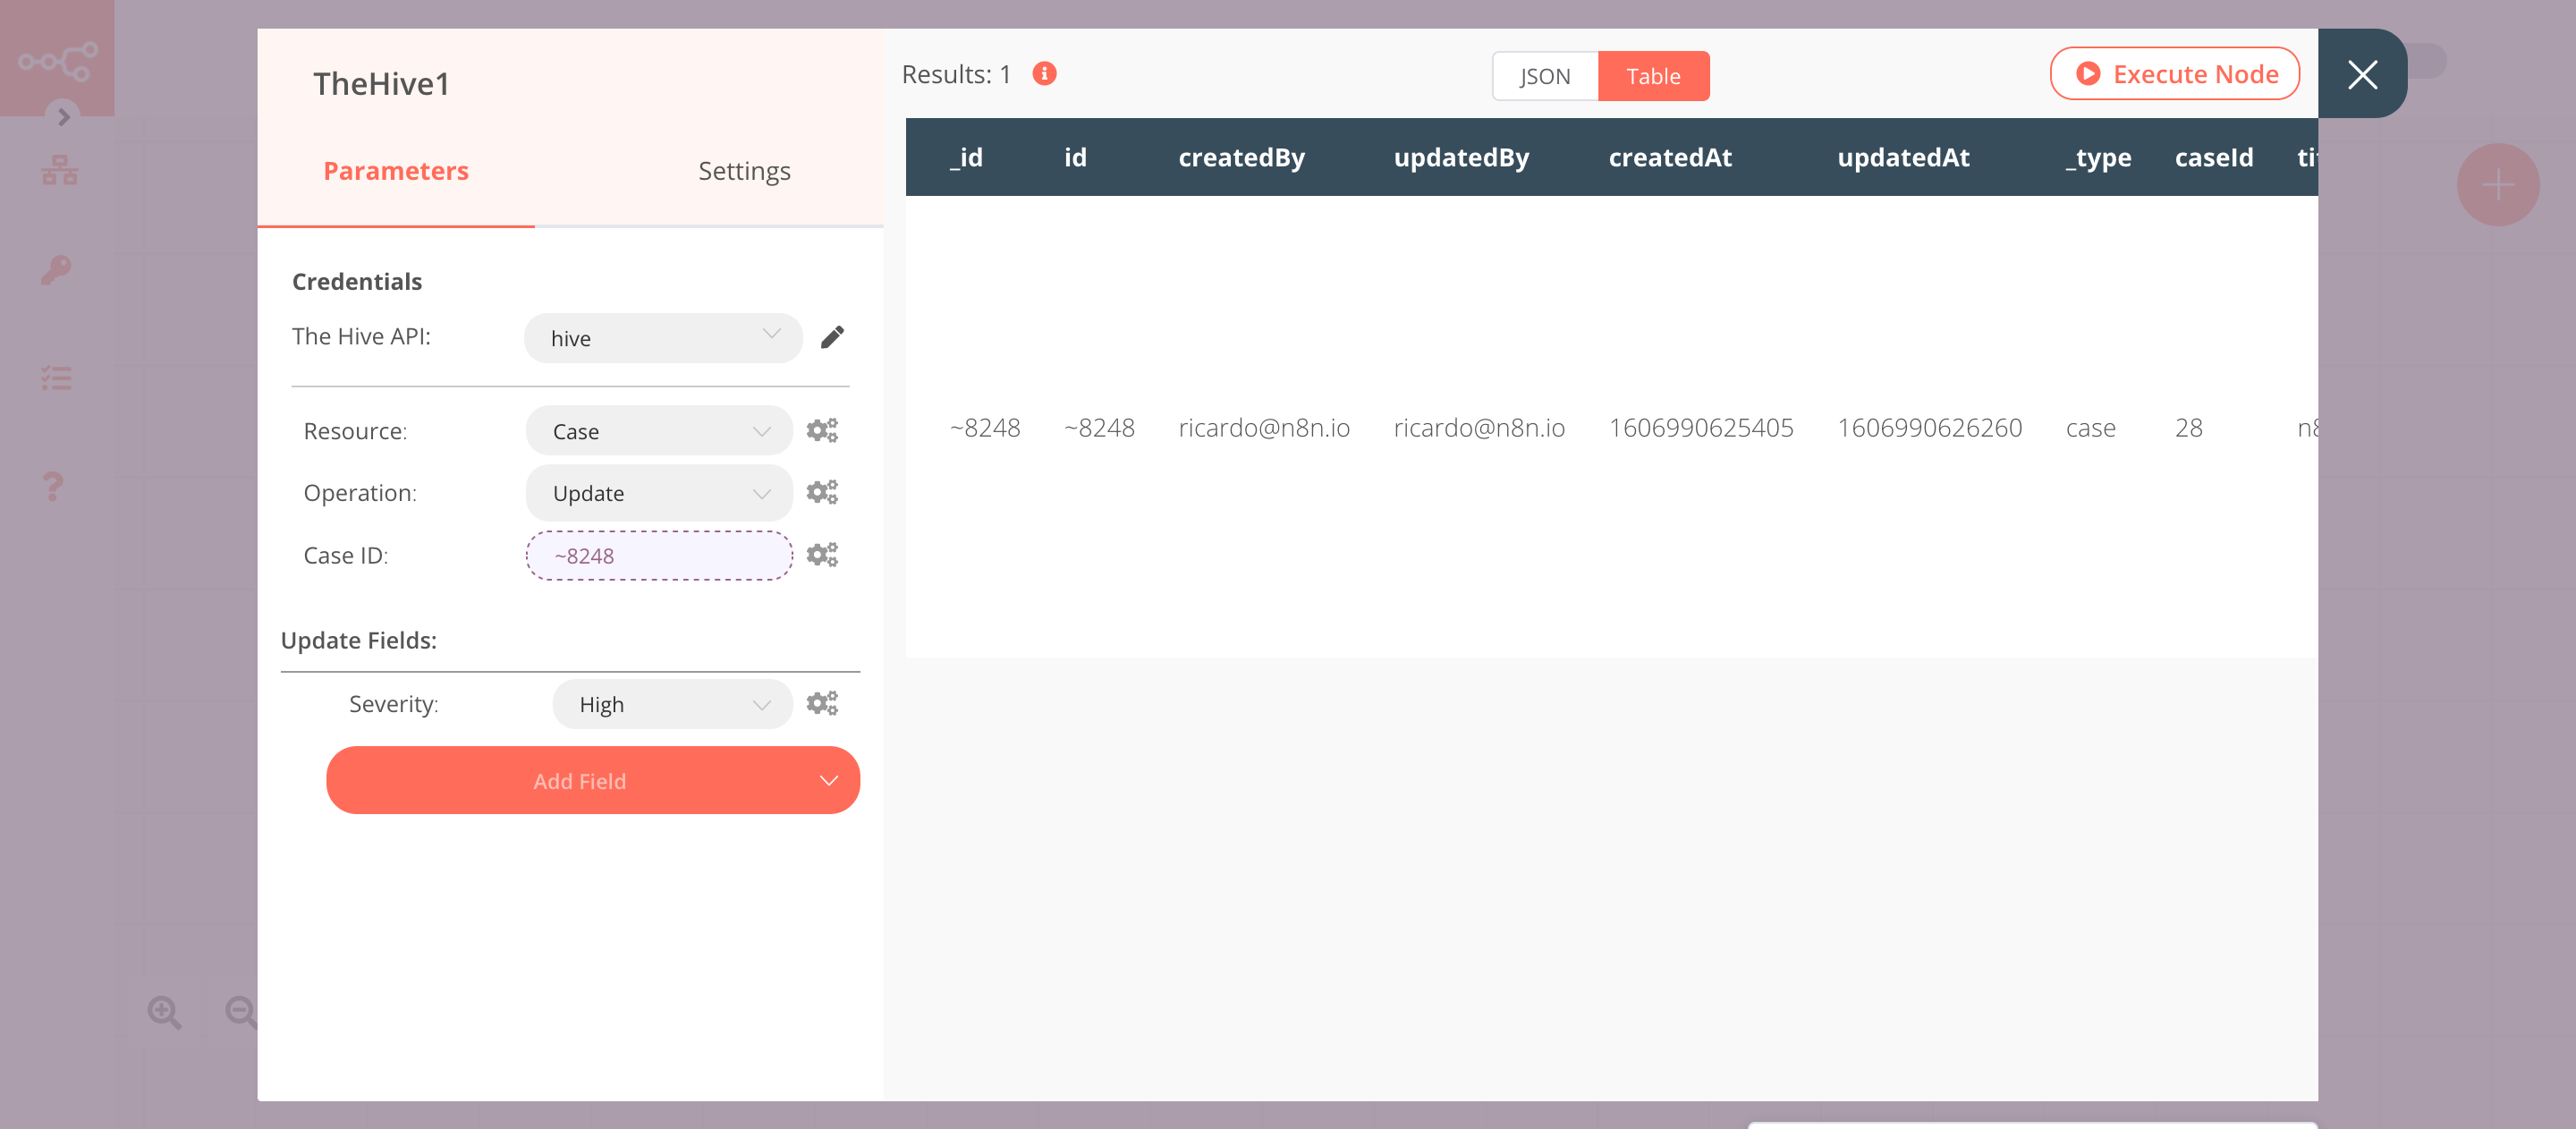
This node will update the case that we created in the previous node. We will update the severity of the case.
- Select the credentials that you entered in the previous node.
- Select 'Case' from the Resource dropdown list.
- Select 'Update' from the Operation dropdown list.
- Click on the gears icon next to the Case ID field and click on Add Expression.
- Select the following in the Variable Selector section: Nodes > TheHive > Output Data > JSON > id. You can also add the following expression:
{{$node["TheHive"].json["id"]}}. - Click on Add Field and select 'Severity' from the dropdown list.
- Select 'High' from the Severity dropdown list.
- Click on Execute Node to run the node.
In the screenshot below, you will notice that the node updates the severity of the case that we created in the previous node.

4. TheHive node (get: case)#
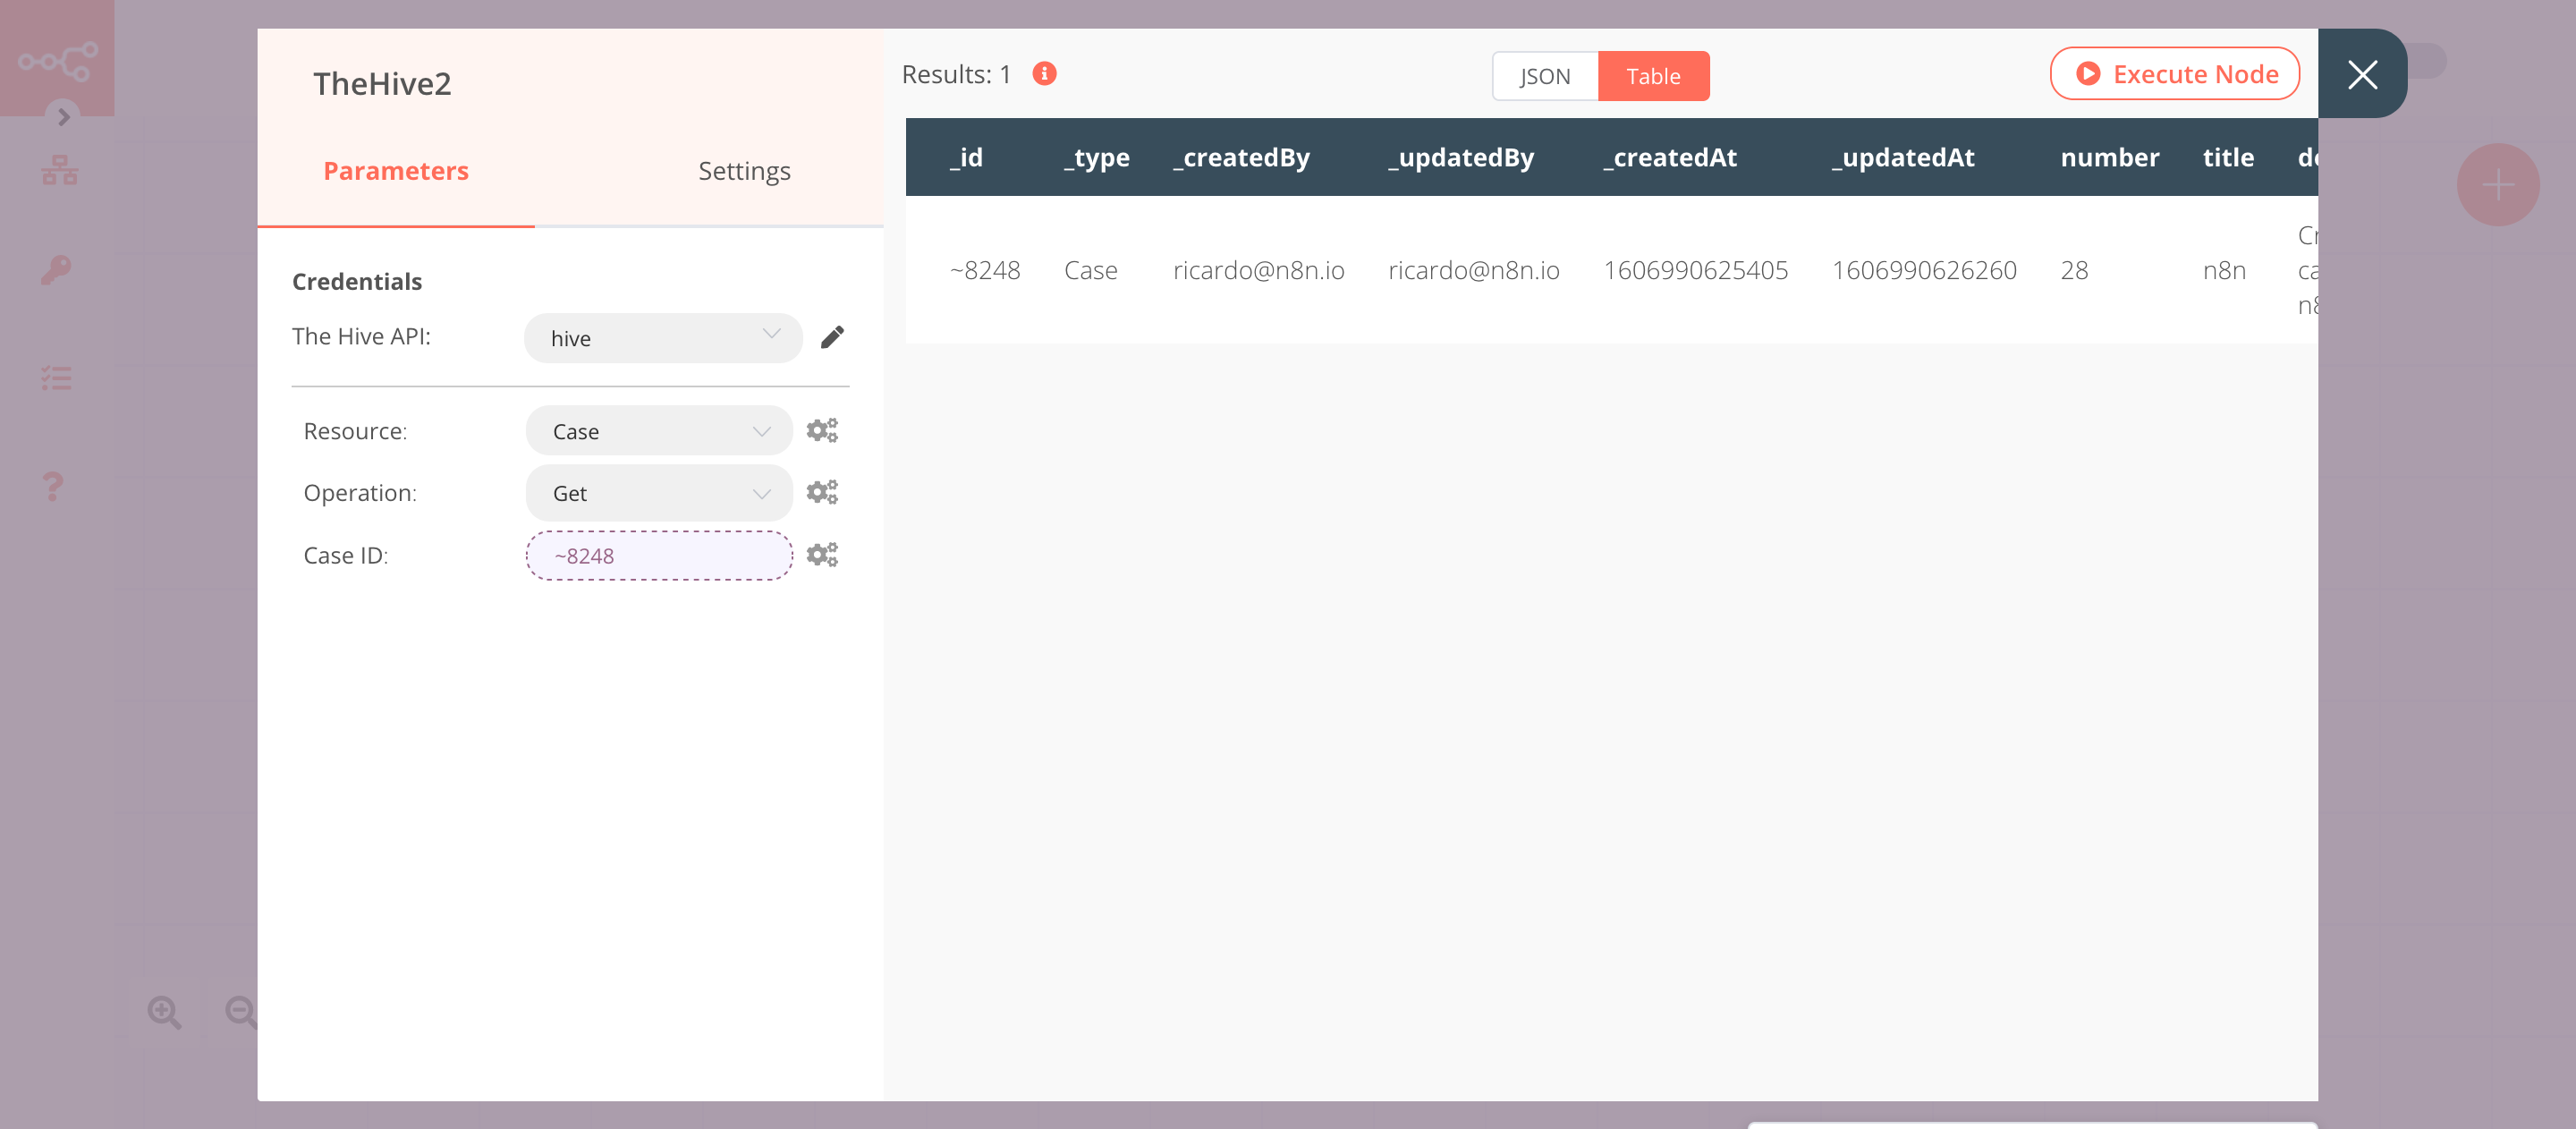
This node will return the information of the case that we created in the previous node.
- Select the credentials that you entered in the previous node.
- Select 'Case' from the Resource dropdown list.
- Select 'Get' from the Operation dropdown list.
- Click on the gears icon next to the Case ID field and click on Add Expression.
- Select the following in the Variable Selector section: Nodes > TheHive > Output Data > JSON > id. You can also add the following expression:
{{$node["TheHive"].json["id"]}}. - Click on Execute Node to run the node.
In the screenshot below, you will notice that the node returns the information of the case that we created earlier.
