Workflow#
A workflow is a collection of nodes connected together to automate a process.
A workflow can be started manually (with the Start node) or by Trigger nodes. When a workflow is started, it executes all the active and connected nodes. The workflow execution ends when all the nodes have processed their data. You can view your workflow executions in the Execution log, which can be helpful for debugging.
Activating a workflow#
Workflows that start with a Trigger node or a Webhook node need to be activated in order to be executed. This is done via the Active toggle in the Editor UI.
Active workflows enable the Trigger and Webhook nodes to receive data whenever a condition is met (for example, Monday at 10:00, an update in a Trello board) and in turn trigger the workflow execution.
All the newly created workflows are deactivated by default.
Export and import a workflow#
n8n saves workflows in JSON format. You can export your workflows as JSON files or import JSON files into your n8n library.
You can export a workflow as a JSON file in two ways:
- Download: Click the Download button under the Workflow menu in the sidebar. This will download the workflow as a JSON file.
- Copy-Paste: Select all the workflow nodes in the Editor UI, copy them (
Ctrl + corcmd +c), then paste them (Ctrl + vorcmd + v) in your desired file.
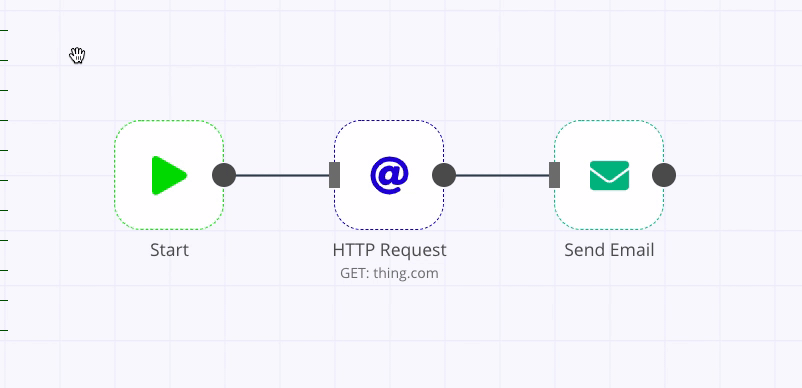
To select all nodes, or a group of nodes, click and drag:
You can import JSON files as workflows in two ways:
- Import: Click Import from File or Import from URL under the Workflow menu in the sidebar and select the JSON file or paste the link to a workflow.
- Copy-Paste: Copy the JSON workflow to the clipboard (
Ctrl + corcmd +c) and paste it (Ctrl + vorcmd + v) into the Editor UI.
Workflow settings#
On each workflow, it's possible to set some custom settings and overwrite some of the global default settings from the Workflow > Settings menu.
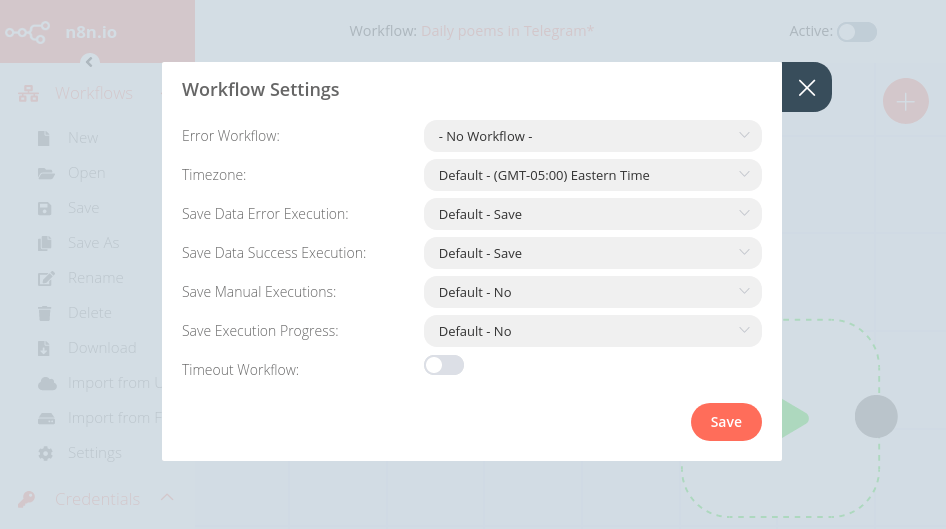
The following settings are available:
- Error Workflow: Select a workflow to trigger if the current workflow fails. See Error Workflow for more details.
- Timezone: Sets the timezone to be used in the workflow. The default timezone is EDT (New York). The Timezone setting is particularly important for the Cron Trigger node.
- Save Data Error Execution: If the execution data of the workflow should be saved when the workflow fails.
- Save Data Success Execution: If the execution data of the workflow should be saved when the workflow succeeds.
- Save Manual Executions: If executions started from the Editor UI should be saved.
- Save Execution Progress: If the execution data of each node should be saved. If set to "Yes", the workflow resumes from where it stopped in case of an error. However, this might increase latency.
- Timeout Workflow: Toggle to enable setting a duration after which the current workflow execution should be cancelled.
- Timeout After: Only available when Timeout Workflow is enabled. Set the time in hours, minutes, and seconds after which the workflow should timeout. For n8n Cloud users a maximum available timeout is enforced for each plan (for example, three minutes for Start level).
Failed workflows#
If your workflow execution fails, you can retry the execution. To retry a failed workflow:
- Open the Executions list from the sidebar.
- For the workflow execution you want to retry, click on the refresh icon under the Status column.
- Select either of the following options to retry the execution:
- Retry with currently saved workflow: Once you make changes to your workflow, you can select this option to execute the workflow with the previous execution data.
- Retry with original workflow: If you want to retry the execution without making changes to your workflow, you can select this option to retry the execution with the previous execution data.
You can also use the Error Trigger node, which triggers a workflow when another workflow has an error. Once a workflow fails, this node gets details about the failed workflow and the errors.
Workflow templates#
When creating a new workflow, you can choose whether to start with an empty workflow, or use an existing template.
Templates provide:
- A way to get started quickly: n8n might already have a template that does what you need.
- Examples of what you can build
- Best practices for creating your own workflows
Use a workflow template#
- In the sidebar, click Templates.
- Browse or search the workflow templates list.
- Click a workflow to view more information. n8n opens the workflow details page.
- On the workflow details page, click Use this workflow. n8n opens the workflow.
- Click Save to add the workflow to your workflows.
Workflow templates are available in 0.165.0 and above
Workflow templates are available on all flavors of n8n. If you can't access workflow templates in n8n, check that your n8n version is 0.165.0 or above, and check whether you are using a self-hosted or embedded version of n8n with templates disabled.