1. Getting Data From the Data Warehouse#
In this part of the workflow you will learn how to get data by making HTTP requests using the HTTP Request node.
First, let's set up the scene for building Nathan's workflow. Open your Editor UI and create a new workflow with one of the two possible commands:
- Click Ctrl + Alt + N or Cmd + Option + N on your keyboard
- Open the left menu and click on New under the Workflow section
Name this new workflow “Nathan's workflow”.
The first thing you need to do is get data from ABCorp's old data warehouse.
In the previous chapter, you used a regular node for a specific app (YCombinator). However, not all apps or services have dedicated nodes – like the legacy data warehouse from Nathan's company.
Though it's not possible to directly export the data, the data warehouse has a couple of API endpoints. That's all we need to access the data via the HTTP Request node in n8n.
No node for that service?
The HTTP Request node is one of the most versatile nodes, allowing you to make HTTP requests which can be used to query data from apps and services. You can use it to access data from apps or services that don't have a dedicated node in n8n.
Now, in your Editor UI, add an HTTP Request node like you learned in the lesson Adding nodes. The node window will open, where you need to configure some parameters.
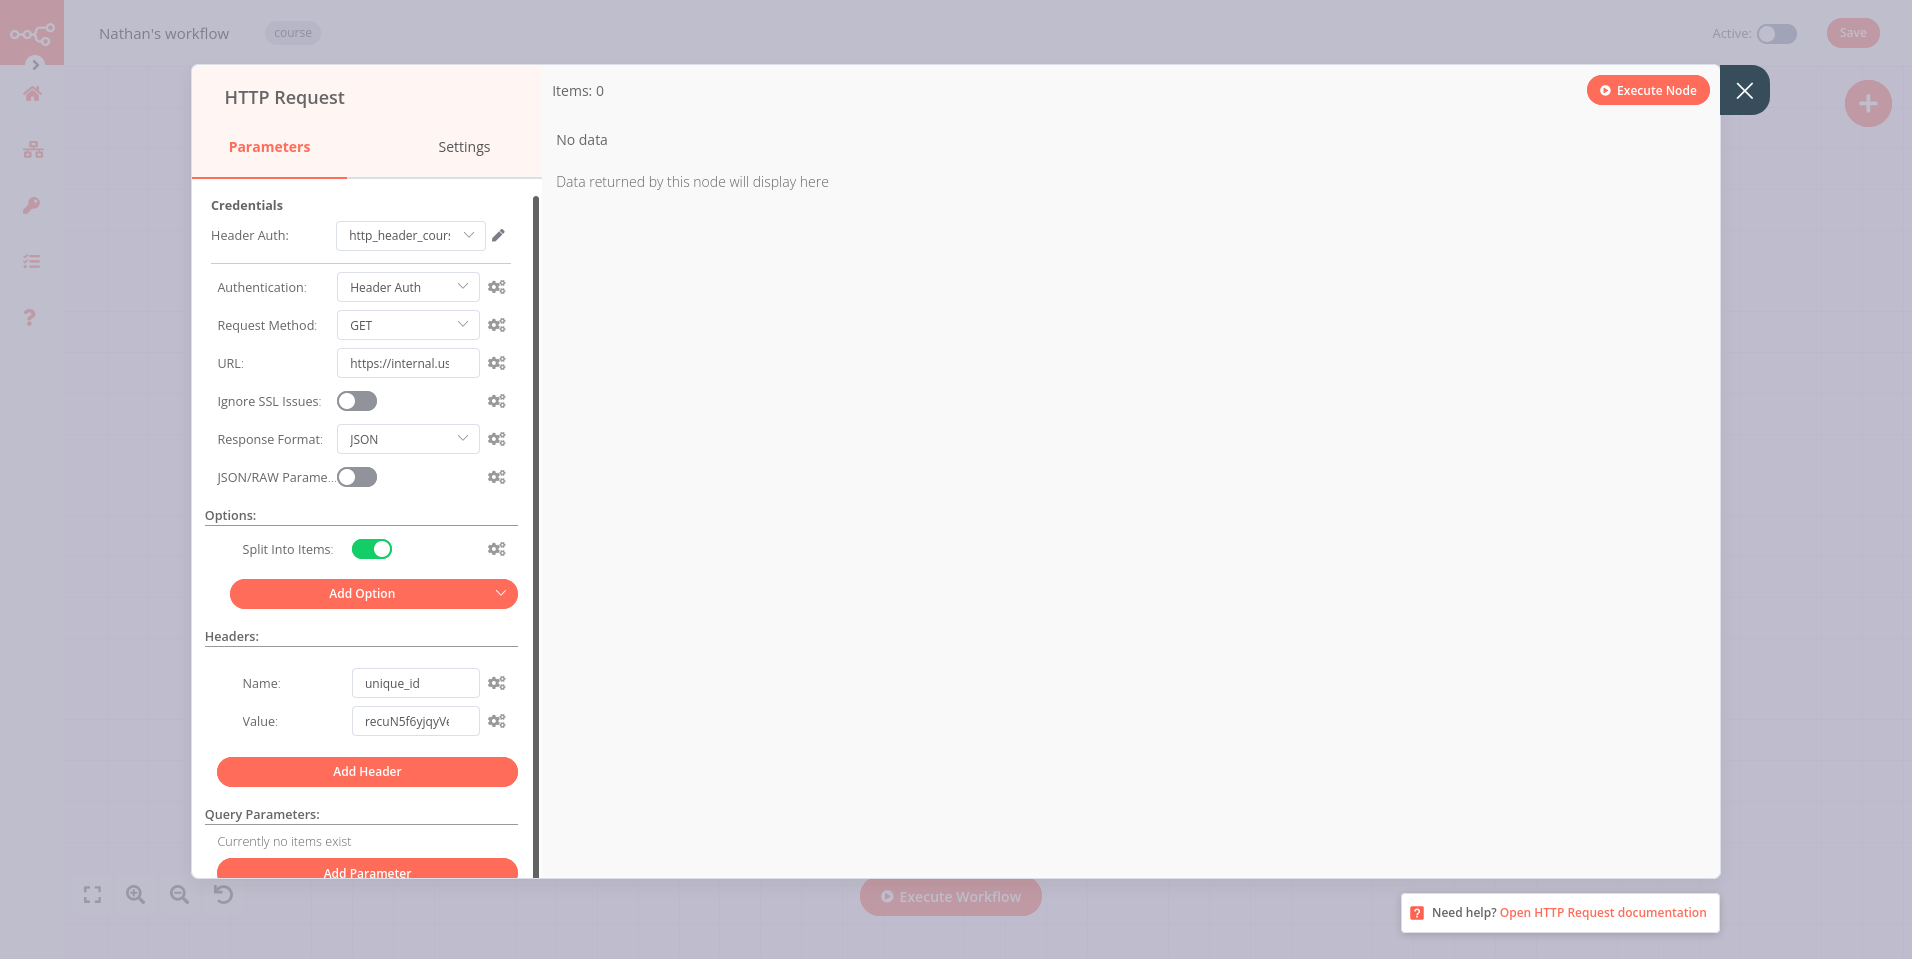
In the left panel, select:
- URL: The Dataset URL your received in the email when you signed up for this course.
- Options > Add Option > Split Into Items: toggle to true.
This option will output each element of an array as its own item. - Headers > Add Header:
- Name:
unique_id - Value: The Unique ID your received in the email when you signed up for this course.
- Authentication > Generic Credential Type > Generic Auth Type: Header Auth
This option requires credentials to allow you to access the data.
Credentials
Credentials are unique pieces of information that identify a user or a service and enable them to access apps or services (in our case, represented as n8n nodes). A common form of credentials is a username and a password, but they can take other forms depending on the service.
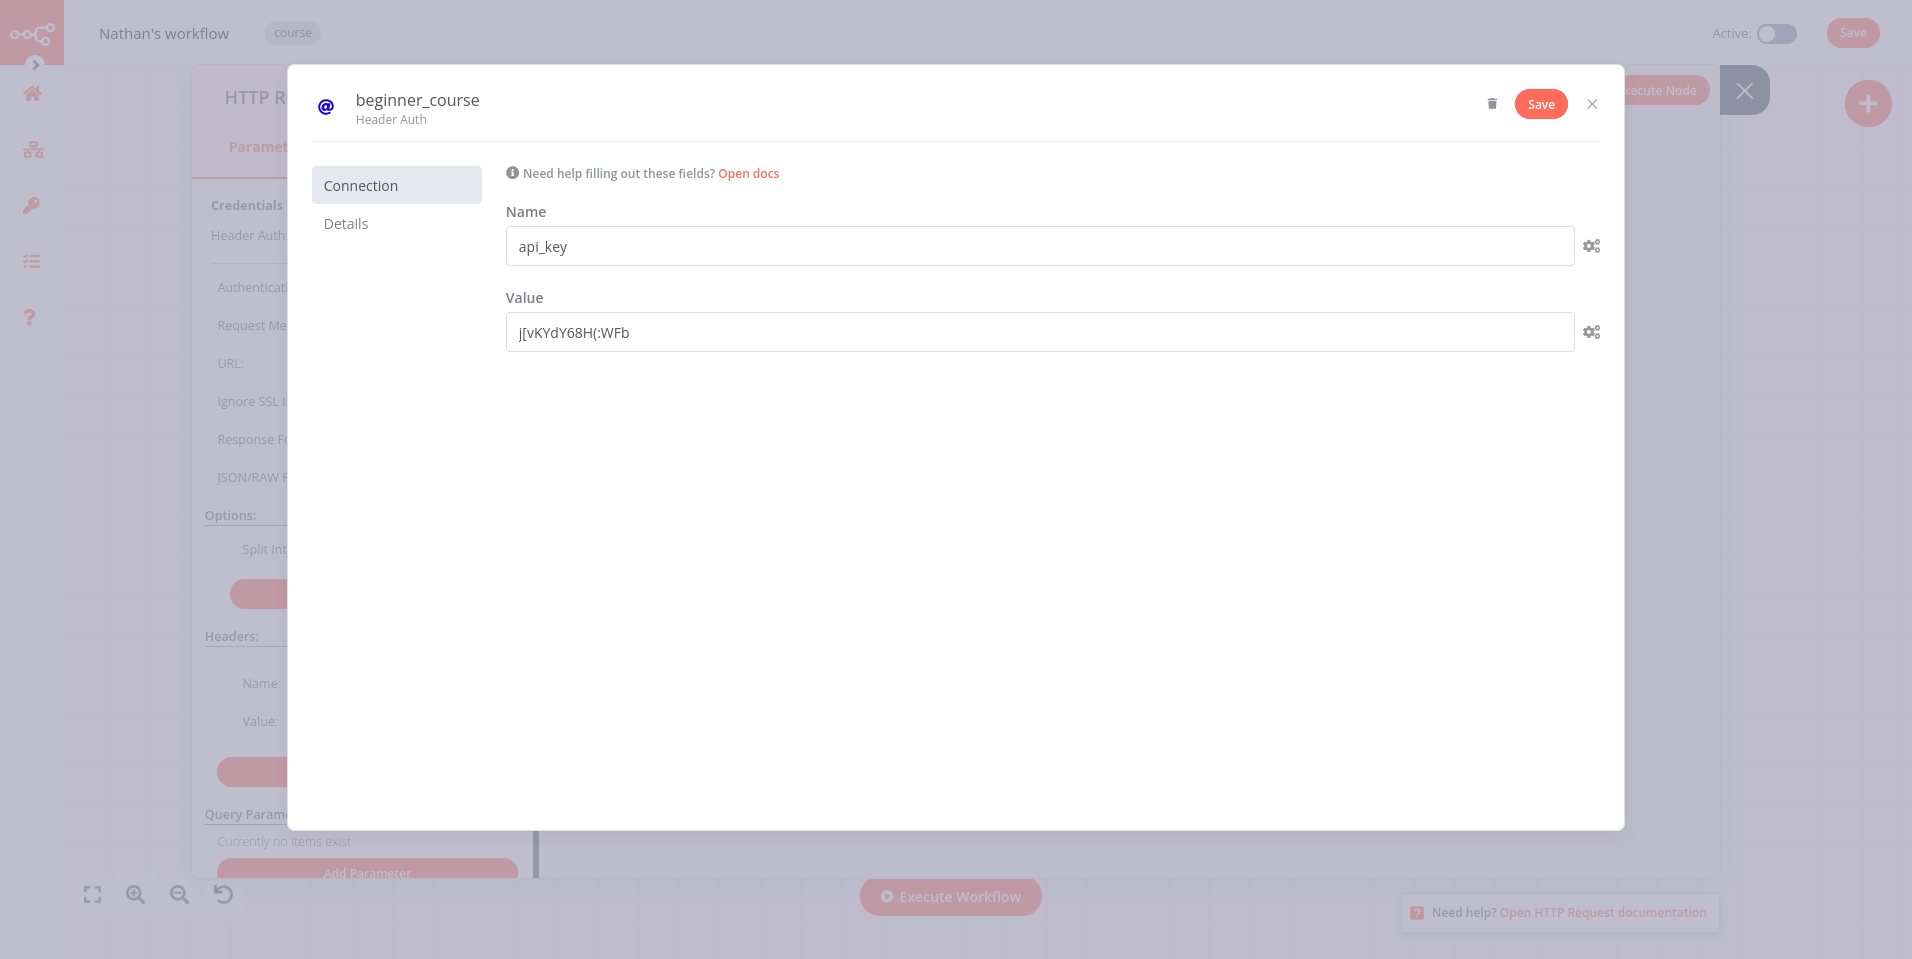
To add your credentials, click on the field Credential for Header Auth and select Create New. This will open the Credentials window.
In the Connection tab, fill in the two fields:
- Name: The Header Auth name you received in the email when you signed up for this course.
- Value: The Header Auth value you received in the email when you signed up for this course.
Credentials naming
New credentials are named "node name account" by default. You can rename the credentials by clicking on the name, similarly to renaming nodes. It's good practice to give them names that identify the app/service, type, and purpose of the credential. A naming convention makes it easier to keep track of and identify your credentials.
Click on the Save button in the top right corner to save your credentials. Your Credentials Connection window should look like this:
Now click the Save button in the bottom right corner of the window.
In the HTTP Request node window, click the Execute Node button. The result of the HTTP request should look like this:
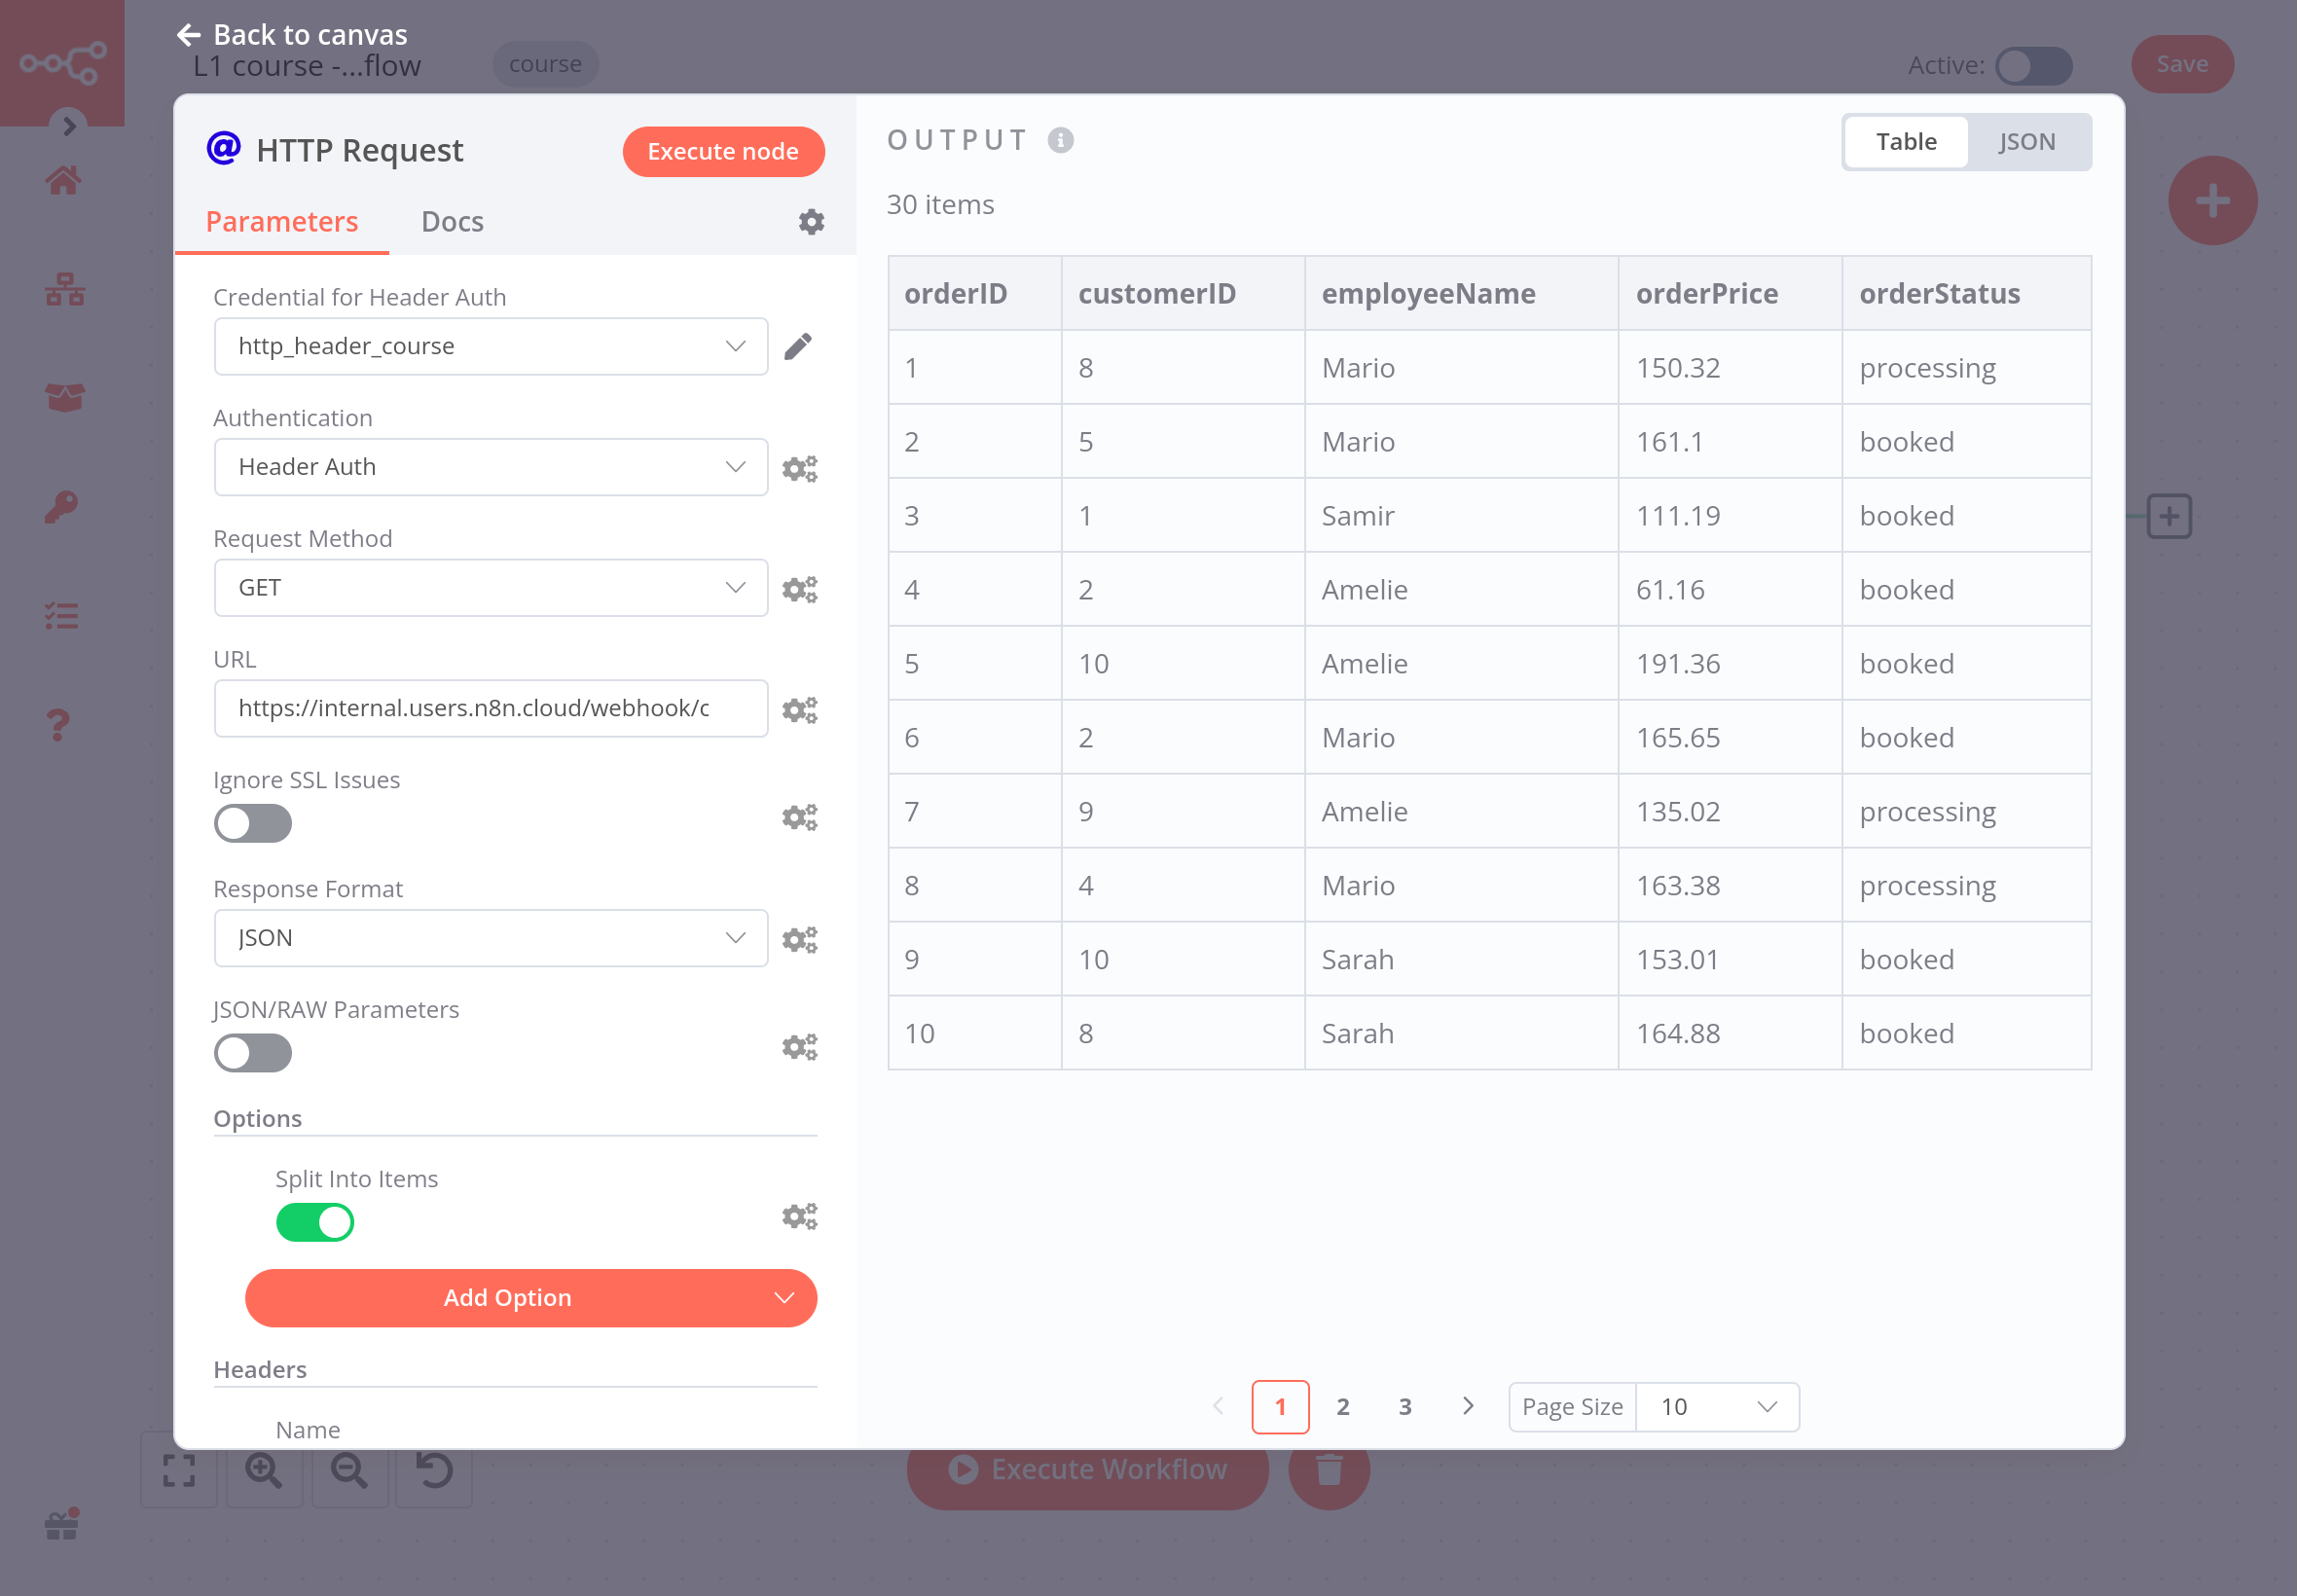
This view should be familiar to you from the Hacker News mini-workflow. This is the data from ABCorp's data warehouse that Nathan needs to work with. This data set includes sales information of 30 customers with 5 features:
- orderID: The unique id of each order.
- customerID: The unique id of each customer.
- employeeName: The name of Nathan's colleagues who are responsible for each client.
- orderPrice: The total price of the customer's order.
- orderStatus: Whether the customer's order is booked or still in processing.
What's next?#
Nathan 🙋: This is great! You already automated an important part of my job with only one node. Now instead of manually accessing the data every time I need it, I can use the HTTP Node to automatically get the information.
You 👩🔧: Exactly! In the next step, I'll help you one step further and insert the received data into Airtable, as you need it.