Navigating the Editor UI#
In this lesson you will learn how to navigate the Editor UI. We will walk through the canvas and show you what each icon means and where to find things you will need while building workflows in n8n.
Getting started#
First of all, you need to get n8n. There are different ways to set up n8n, choose the option that best suits your skills and needs.
n8n version
This course was developed on n8n version 0.175.1. In other versions, the Editor UI might look different, but the core functionality of the workflows should not be impacted.
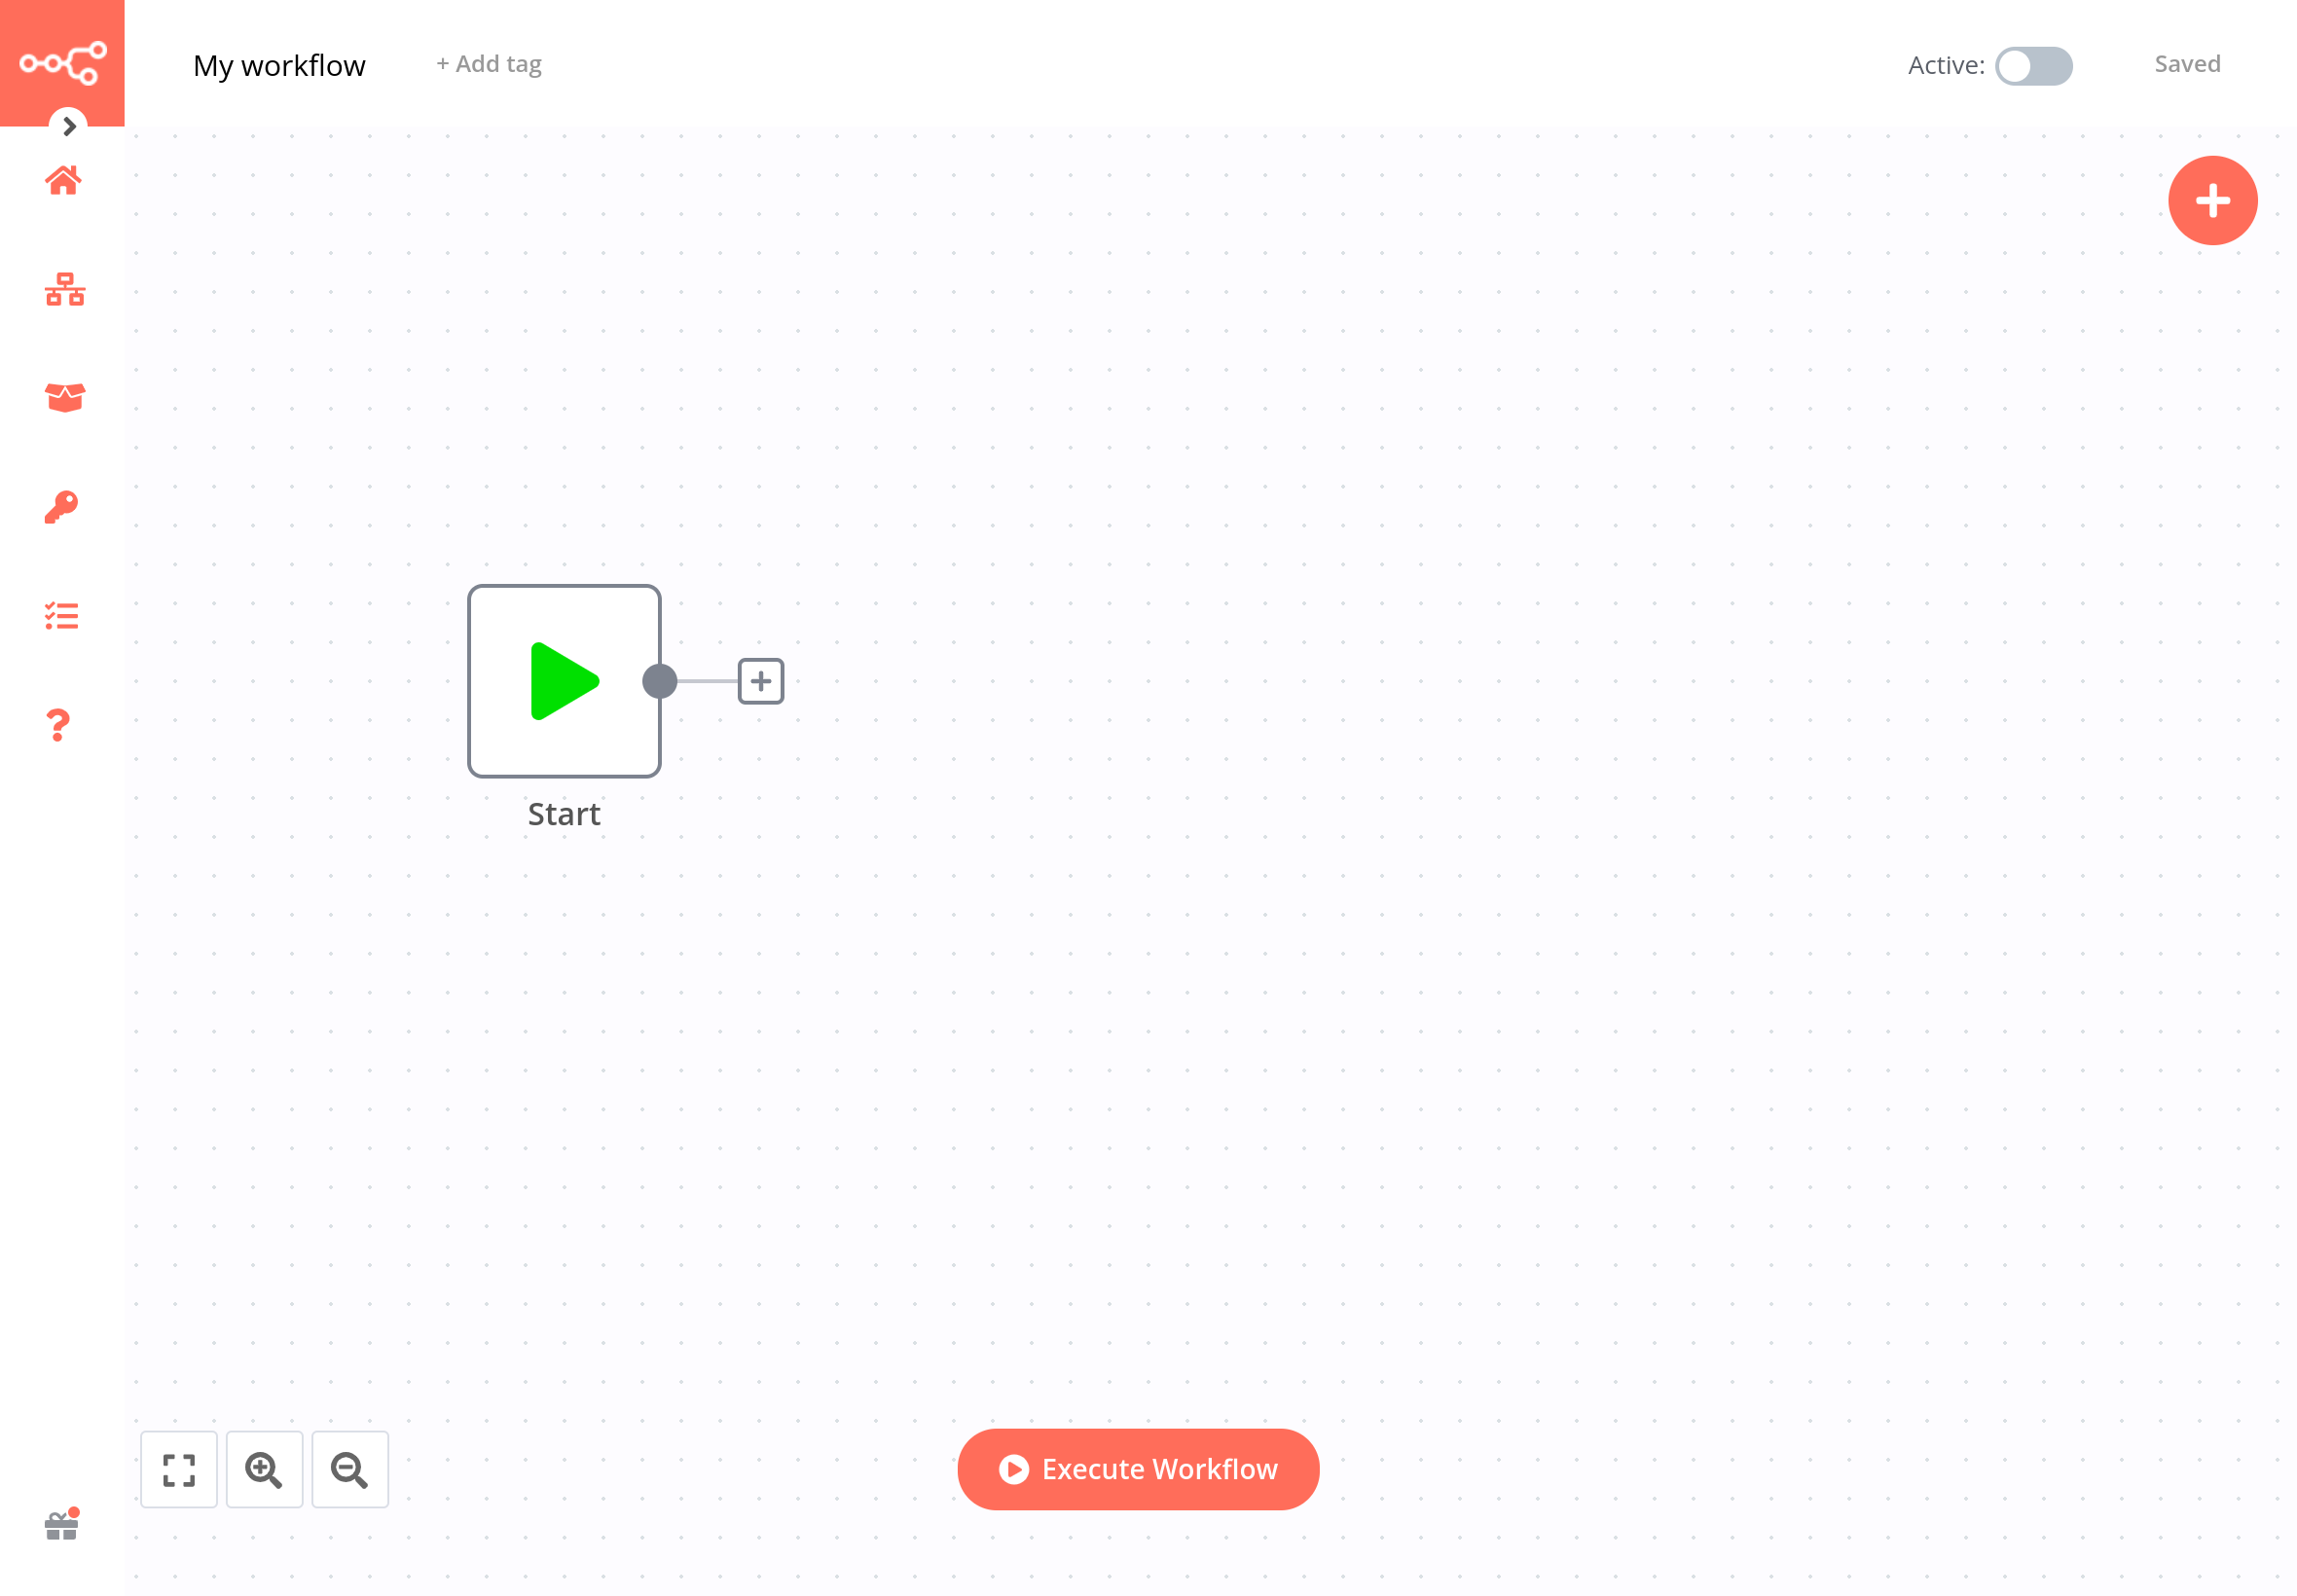
Once you have n8n running, open the Editor UI in a browser window. It should look like this:
Next, you'll learn how to navigate the Editor UI.
Editor UI settings#
The Editor UI represents the web interface where you build workflows. Think of it as a canvas on which the artist in you designs automations. From the Editor UI you can access all your workflows and credentials, as well as support pages.
Left-side panel#
In the upper left corner, click on the round arrow icon. This will open the left-side menu, which contains the core functionalities and settings for managing workflows.
The panel contains the following sections:
- Admin Panel: Access the management Dashboard (for n8n Cloud users).
- Workflows: Contains operations for creating and editing workflows.
- Templates: Contains pre-built workflows that can be searched.
- Credentials: Contains operations for creating credentials.
- Executions: Contains information about your workflow executions.
- Settings: Contains editable configuration for the account and other things.
- Help: Contains resources around n8n product and community.

Top bar#
The top bar of the Editor UI contains the following information:
- Name of the current workflow. By default, a new workflow is named "My Workflow", but can edit this name anytime.
- Tag of the current workflow. Tags help you organize your workflows by category, use case, or whatever is relevant for you. Tags are optional.
- Save button that saves the current workflow.
- Toggle button that activates or deactivates the current workflow. By default, workflows are deactivated.

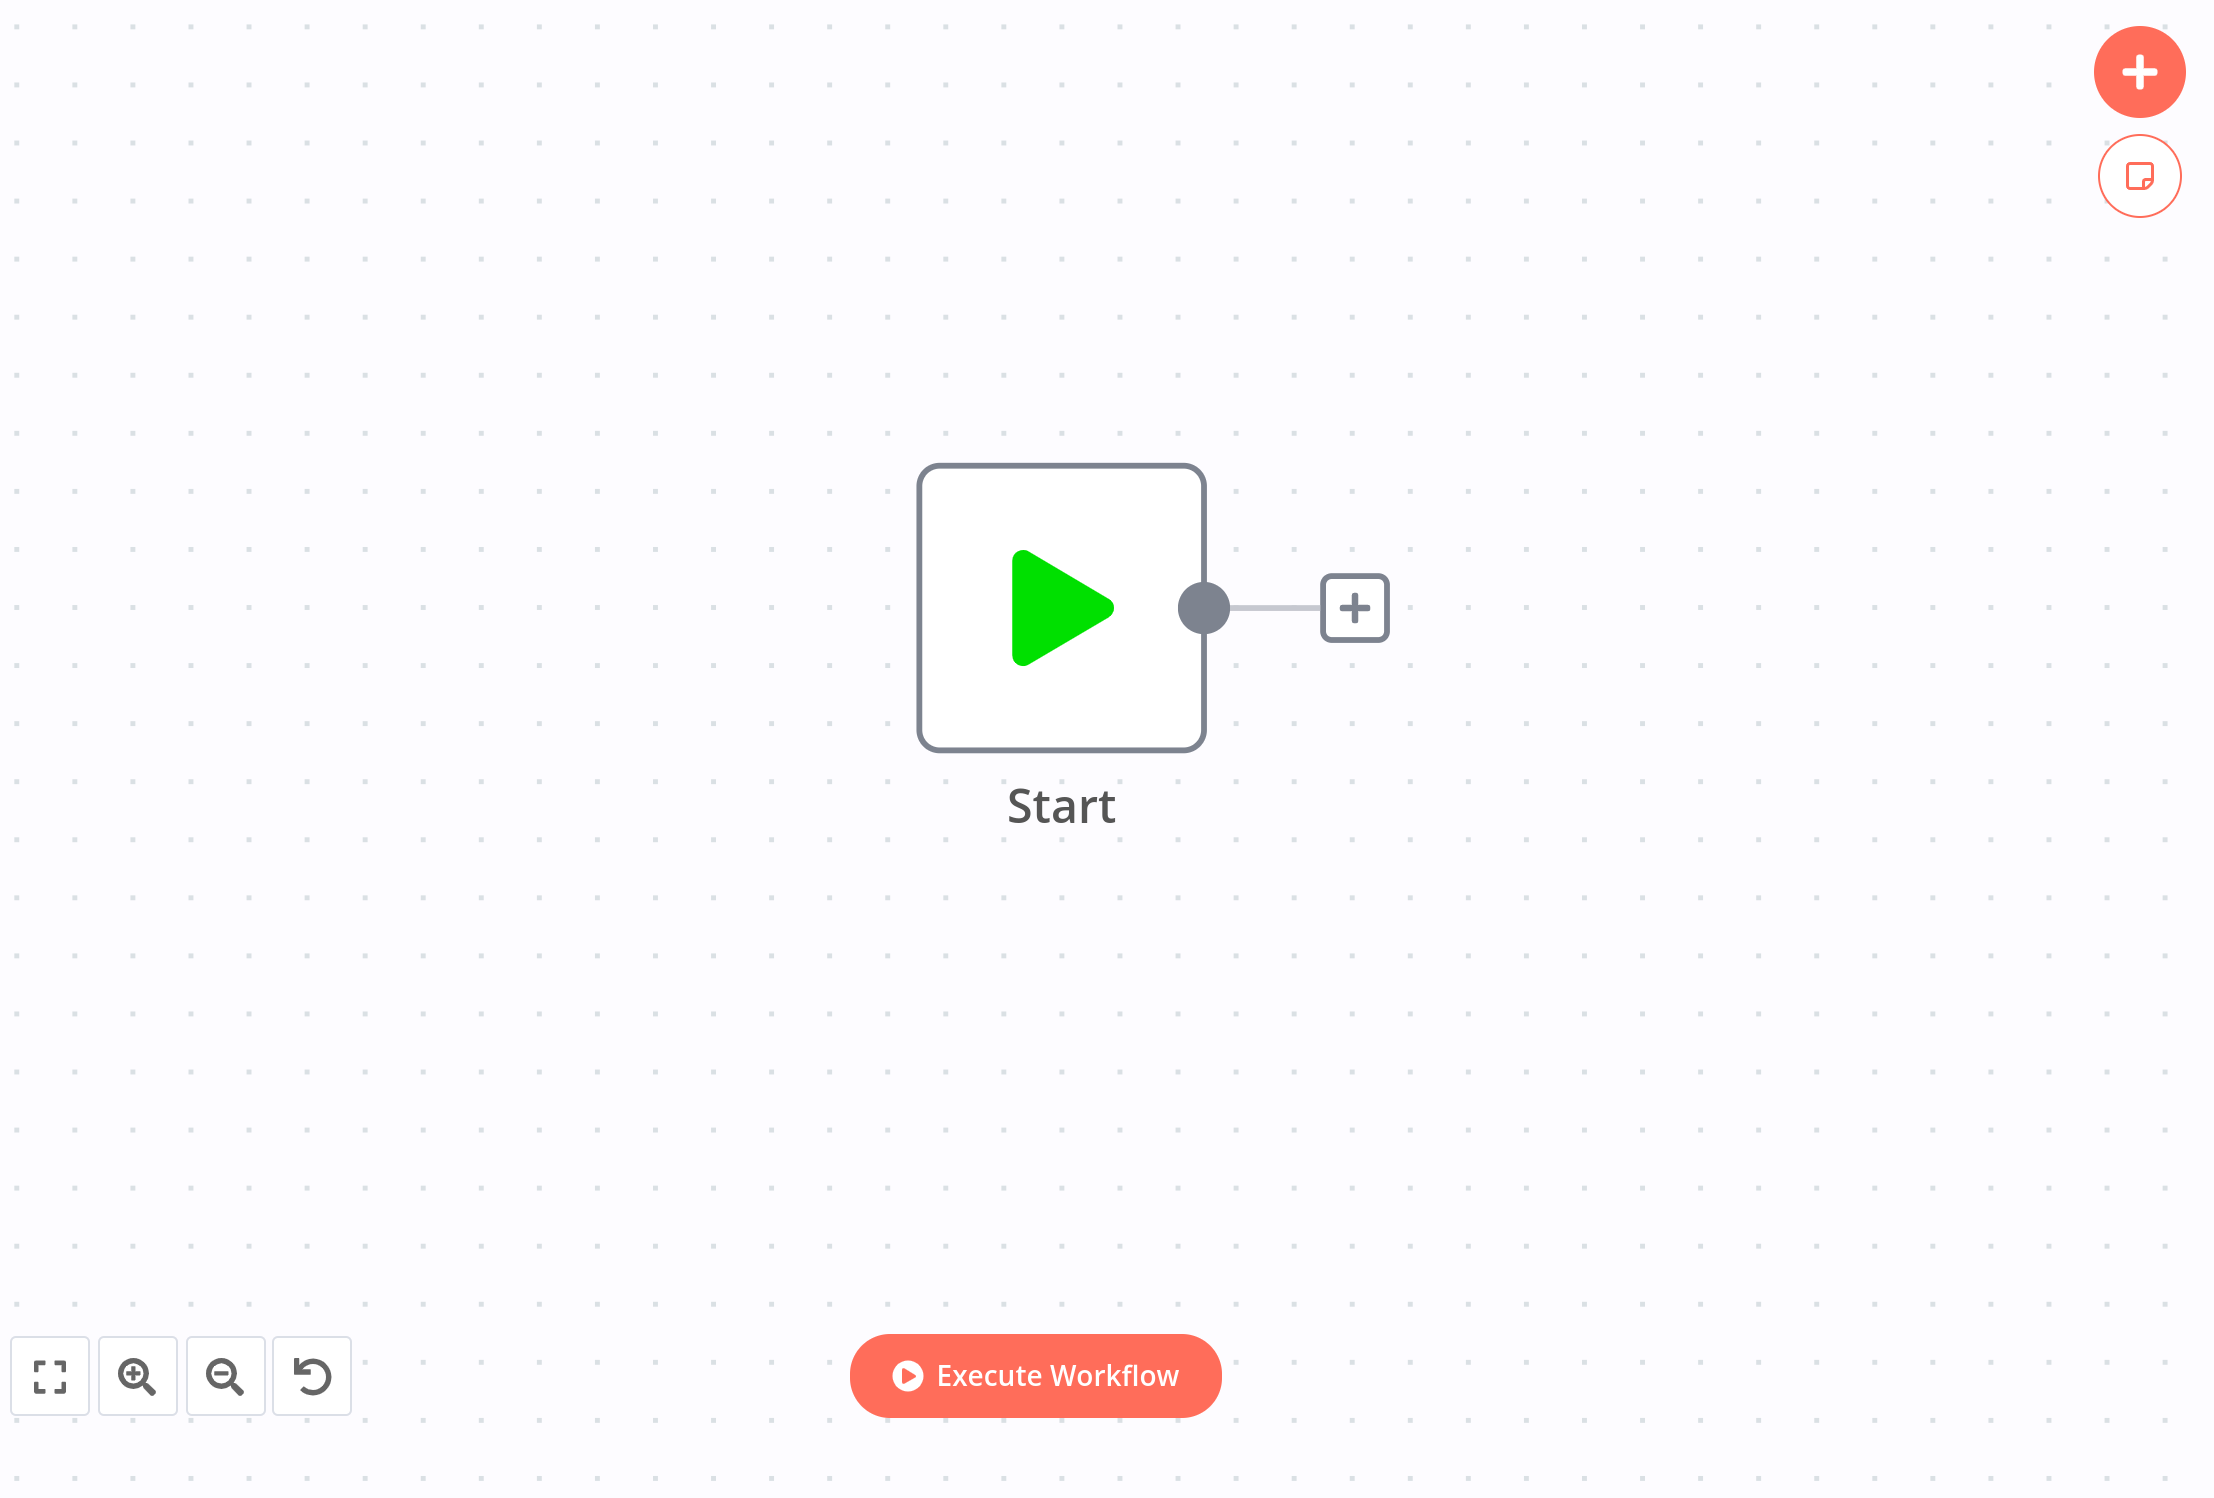
Canvas#
The canvas is the gray grid background in the Editor UI. On the canvas, there are several icons and a node with different functionalities:
- Buttons to zoom the canvas to fit the screen, zoom in or out of the canvas, and reset the canvas to the original resolution.
- A button to Execute Workflow. When you click on it, all nodes on the canvas are executed.
- A button with a + sign inside. This button opens the nodes panel.
- A button with a note icon inside. This button adds a sticky note to the canvas.
- A square with a green play icon inside. This is the Start node. You will learn more about nodes in the next section.
Moving the canvas
You can move the workflow canvas around in two ways:
- Click Ctrl + Left Mouse Button on the canvas and move it around
- Place two fingers on your touchpad and slide
Don't worry about workflow execution and activation for now, we will explain these concepts later on in the course.
Nodes#
You can think of nodes as building blocks that serve different functions but, when put together, they make up a functioning machinery – an automated workflow.
Node
A node is an individual step in your workflow — one that either (a) loads, (b) processes or (c) sends data.
Based on their function, nodes can be classified into two types:
- Regular Nodes add, remove, and edit data, as well as request and send external data.
- Trigger Nodes start a workflow and supply the initial data.
Keep in mind
Among the Regular and Trigger nodes there are some nodes that do not represent any app or service, instead they serve general functions like scheduling workflows (e.g. Cron and Interval nodes) or adding JavaScript functions (e.g. Function and Function Item nodes). We refer to these as Core Nodes.
Start node#
The Start node is the default starting point in any workflow. Every time you create a new workflow, a Start node will be included by default.
The Start node cannot be deleted or duplicated. If you have a workflow in which you don't use the Start node, you can remove the connection, deactivate it, and move it away from the workflow. If you need more than one Start node, you probably need to use other Trigger nodes or create separate workflows.
You've probably figured out already that the Start node is a Core Trigger node. Apart from it, there are over 290 other Regular and Trigger nodes for various functions, apps, and services.
Finding nodes#
You can find all available nodes in the nodes panel on the right side of the Editor UI. There are three ways in which you can open the nodes panel:
- Click the + icon in the top right corner of the canvas.
- Click the gray dot on the right side of an existing node on the canvas (the node to which you want to add another one) and pull the connection line to the right.
- Click the Tab key on your keyboard.
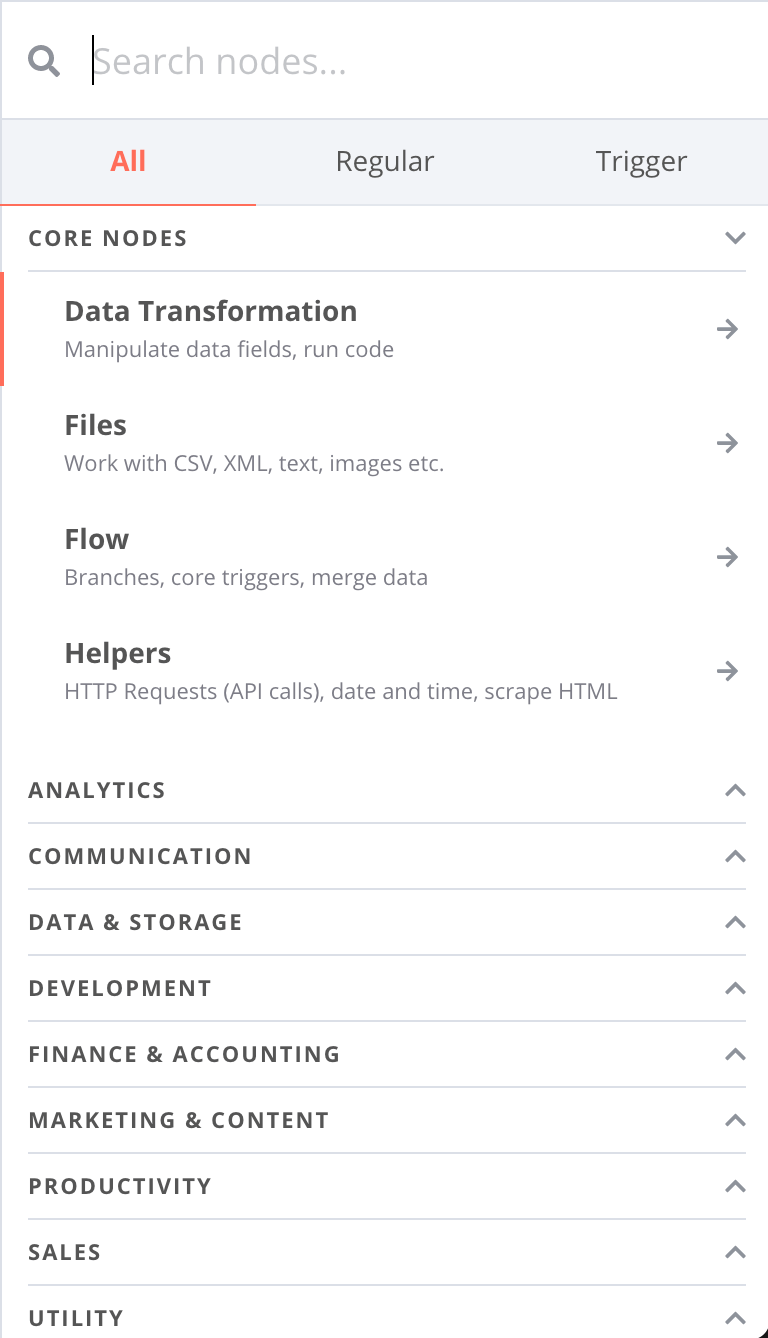
In the nodes panel, notice that the nodes are grouped in three tabs: All, Regular, and Trigger. In addition, nodes are also grouped by their functionality domain (like Analytics or Sales). This makes it easier to find the nodes you need.
If you want to get a specific node, type in the name of the node, app, or service in the search field and select the respective tab.
Adding nodes#
There are two ways to add nodes to your canvas:
- Click on the node you want in the nodes panel. The new node will automatically be connected to the selected node on the canvas.
- Drag and drop the node from the nodes panel to the canvas.
To review, here's a walkthrough of the Editor UI touching on all the settings you've learned so far:
Node buttons#
If you hover on a node, you'll notice that four icons appear on top:
- Delete the node
- Deactivate/Activate the node
- Duplicate the node
- Execute the node
Moving a workflow
To move a workflow around the canvas, select all nodes with your mouse or by clicking Ctrl + A, click and hold on a node, then drag it to any point you want on the canvas.
Summary#
In this lesson you learned how to navigate the Editor UI, what the icons mean, how to access the left-side and node panels, and how to add nodes to the canvas and interpret their execution results.
In the next lesson, you will build a mini-workflow to put into practice what you've learned so far.