Building a Mini-workflow#
In this lesson, you will build a small workflow that gets 10 articles about automation from Hacker News. The workflow consists of four steps:
1. Add the Hacker News node
2. Configure the Hacker News node
3. Save the workflow
4. Execute the node
1. Add the Hacker News node#
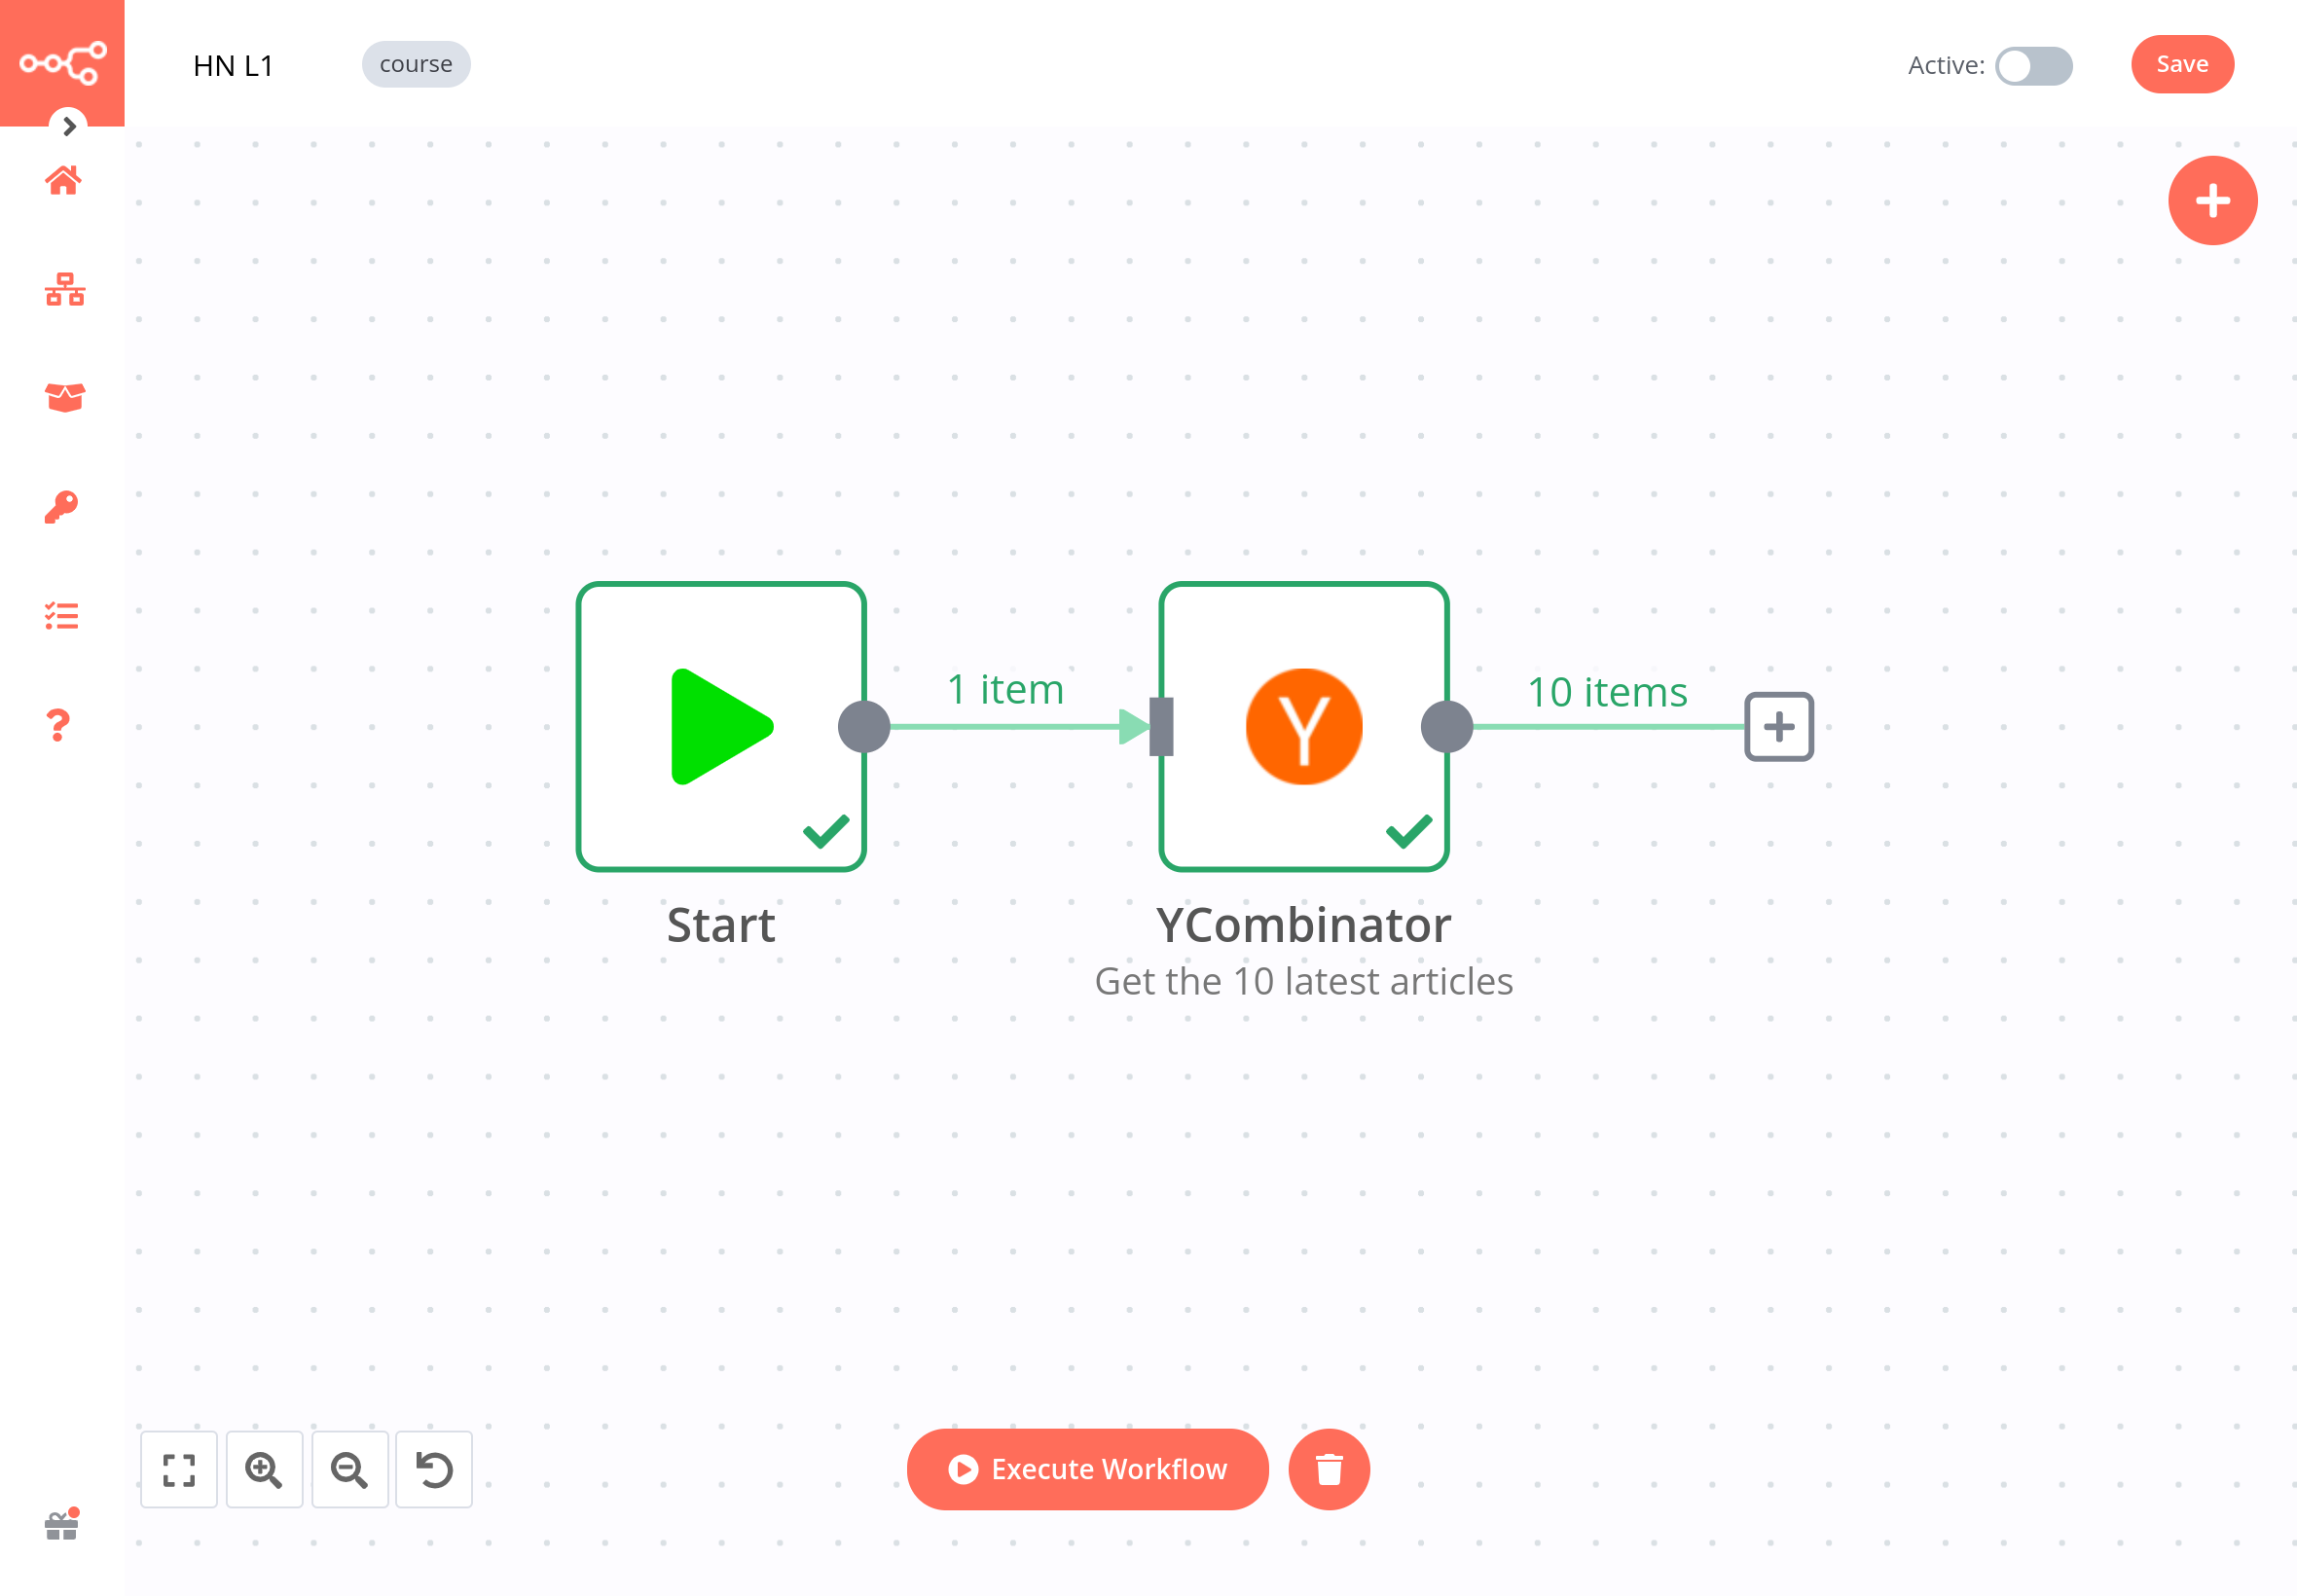
Open the nodes panel, search for the Hacker News node, and click on it to add it to the Editor UI. Connect the Hacker News node to the Start node.
2. Configure the Hacker News node#
When you add a new node to the Editor UI, the node will be automatically activated and open a window with two tabs on the left side: Parameters and Settings.
Parameters vs Settings
Parameters are different for each node, depending on its functionality.
Settings are the same for all nodes.
Parameters#
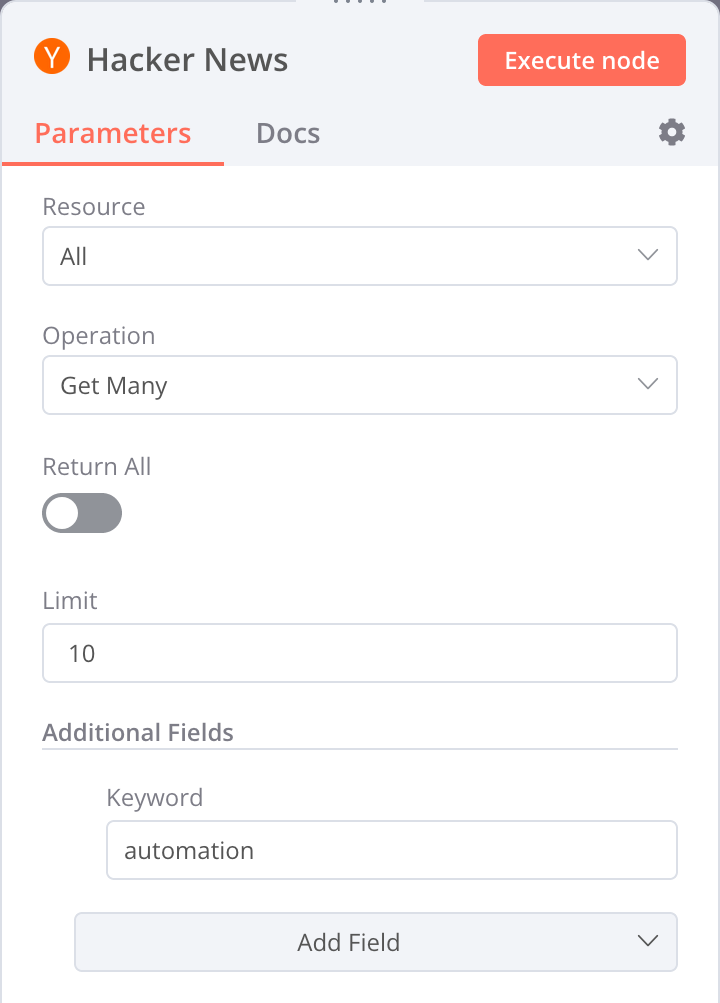
The Hacker News node has several parameters that need to be configured in order to make it work:
- Resource: All
This resource selects all data records (articles). - Operation: Get Many
This operation fetches all the selected articles. - Limit: 10
This parameter sets a limit to how many results are returned by the Get Many operation. - Additional fields > Add Field > Keyword: automation
Additional fields are options that you can add to certain nodes to make your request more specific or filter the results. In our case, we want to get only articles that include the keyword “automation”.
The configuration of the parameters for the Hacker News node should now look like this:
Settings#
The Settings section includes several options for node design and executions. In this case, we'll configure only the first two settings, which set the node's appearance in the Editor UI. In the Hacker News node settings, edit:
- Notes: Get the 10 latest articles
Node notes
It is often helpful, especially for complex or shared workflows, to add a short description in the node about what it does.
- Display note in flow?: toggle to true
This option will display the description note under the node in the Editor UI.
The configuration of the settings for the Hacker News node looks like this:
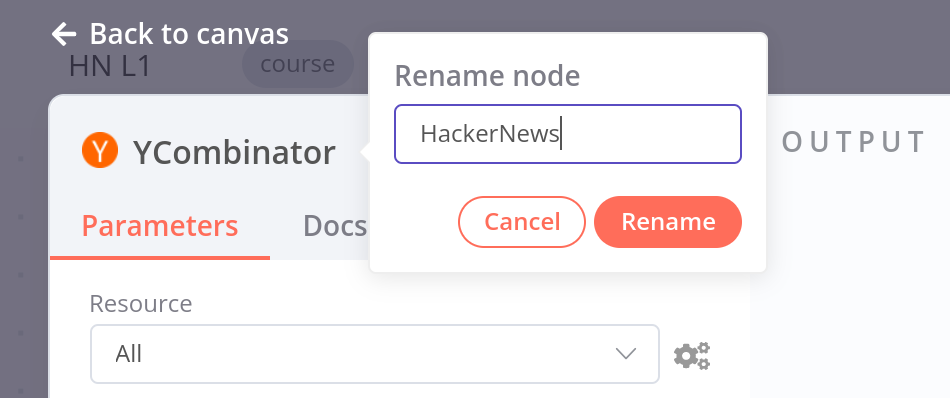
Renaming a node
You can rename the node with a name that's more descriptive for your use case. There are two ways to do this:
- Select the node you want to rename and at the same time press the F2 key on your keyboard.
- Double-click on the node to open the node window. Click on the name of the node in the top left corner of the window, rename it as you like, then click Rename to save the node under the new name.
3. Save the workflow#
Save the workflow under the name “Hacker News workflow” By default, your workflow is automatically saved as “My workflow”.
There are two ways in which you can save a workflow:
- From the Canvas in Editor UI, click Ctrl + S or Cmd + S on your keyboard
- Click the Save button in the top right corner of the Editor UI
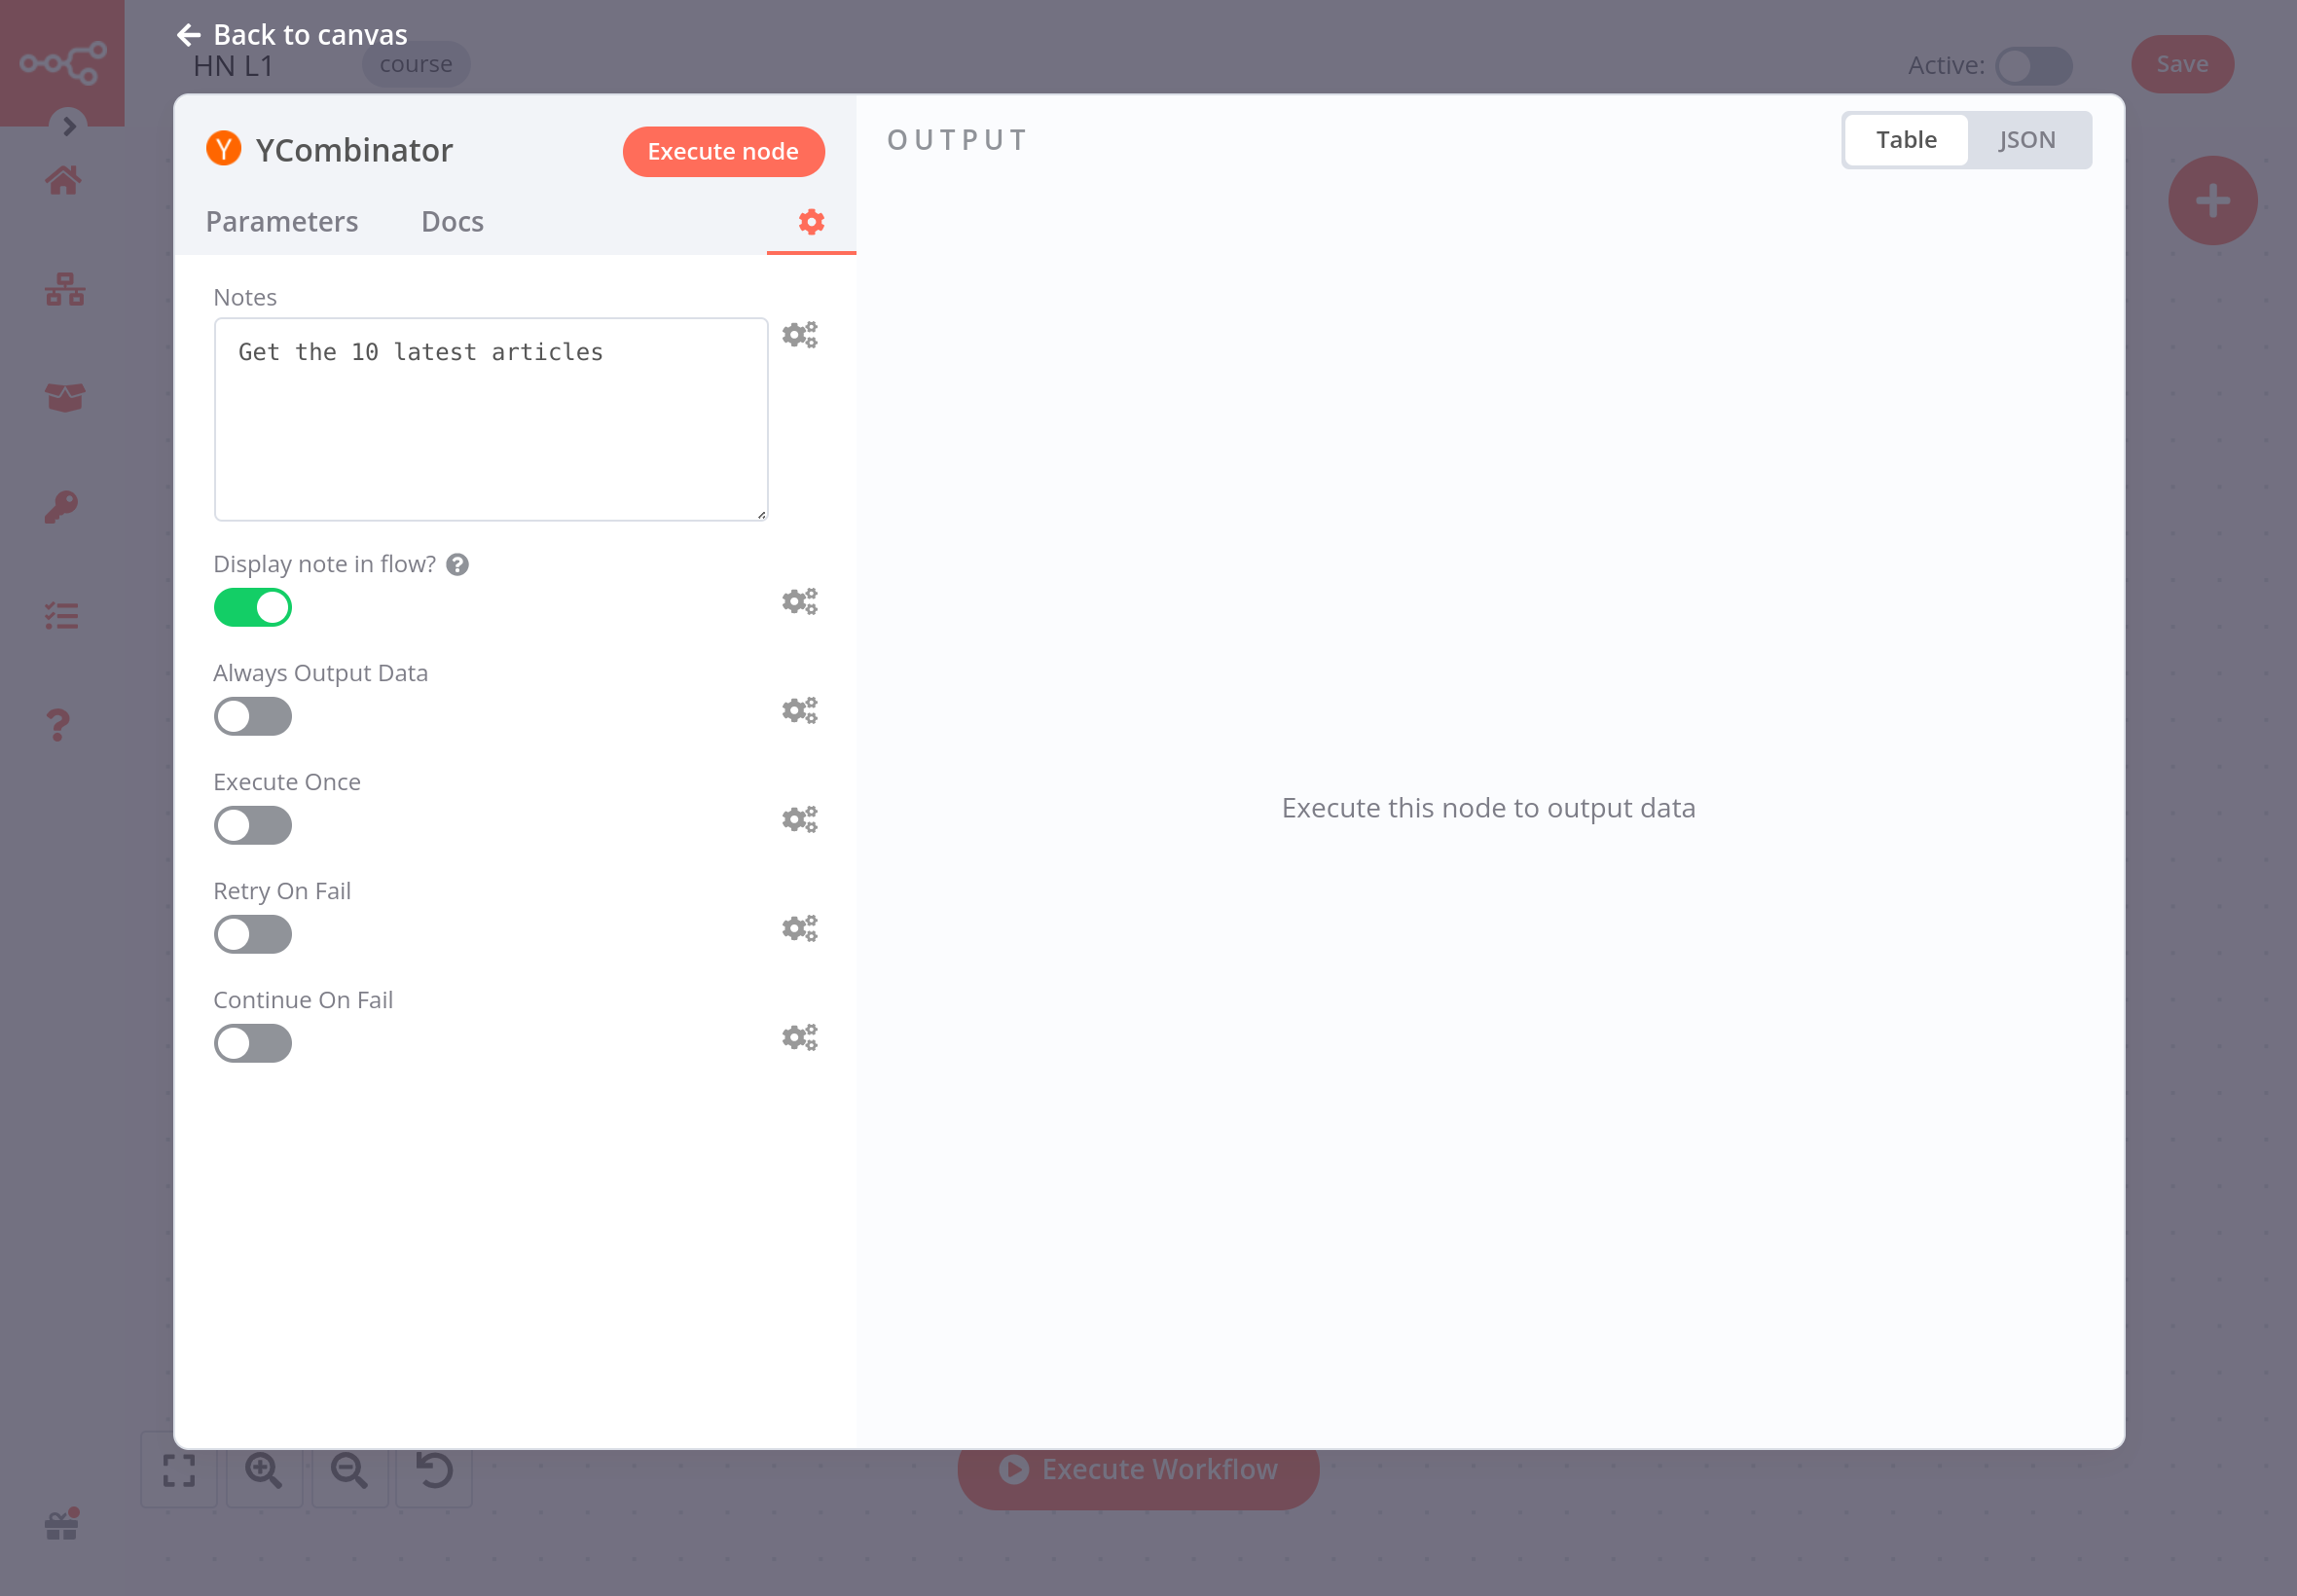
4. Execute the node#
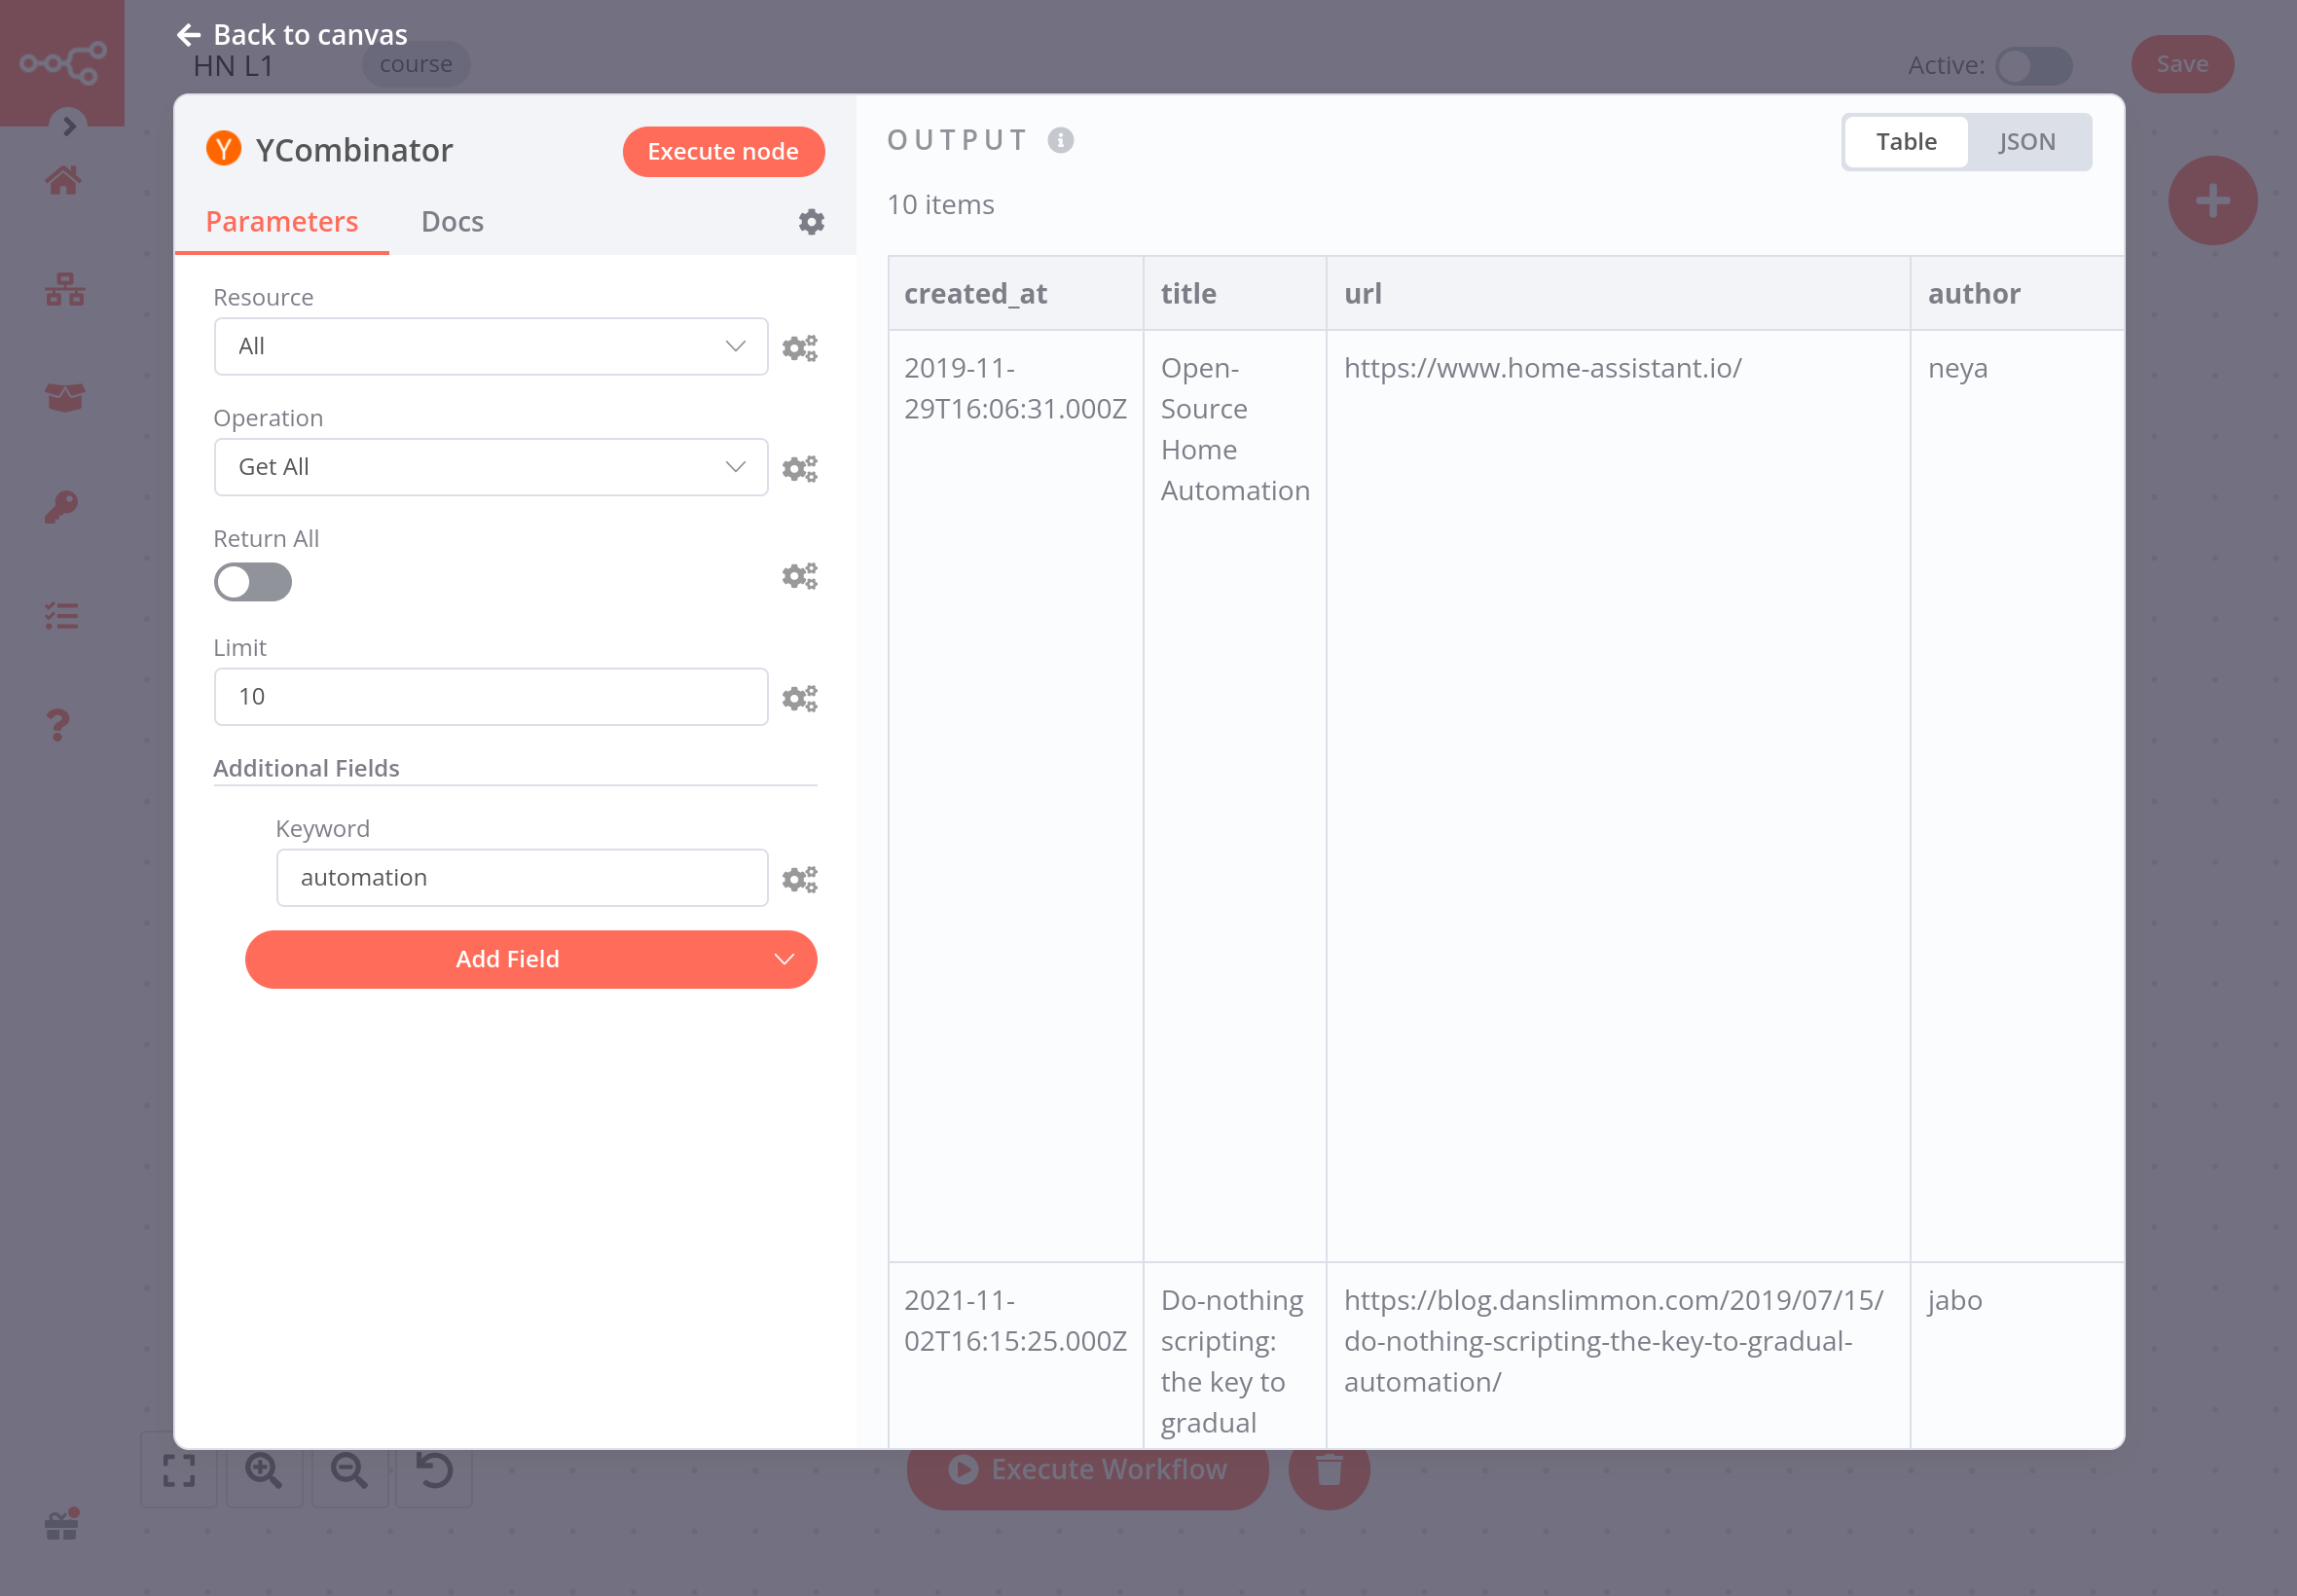
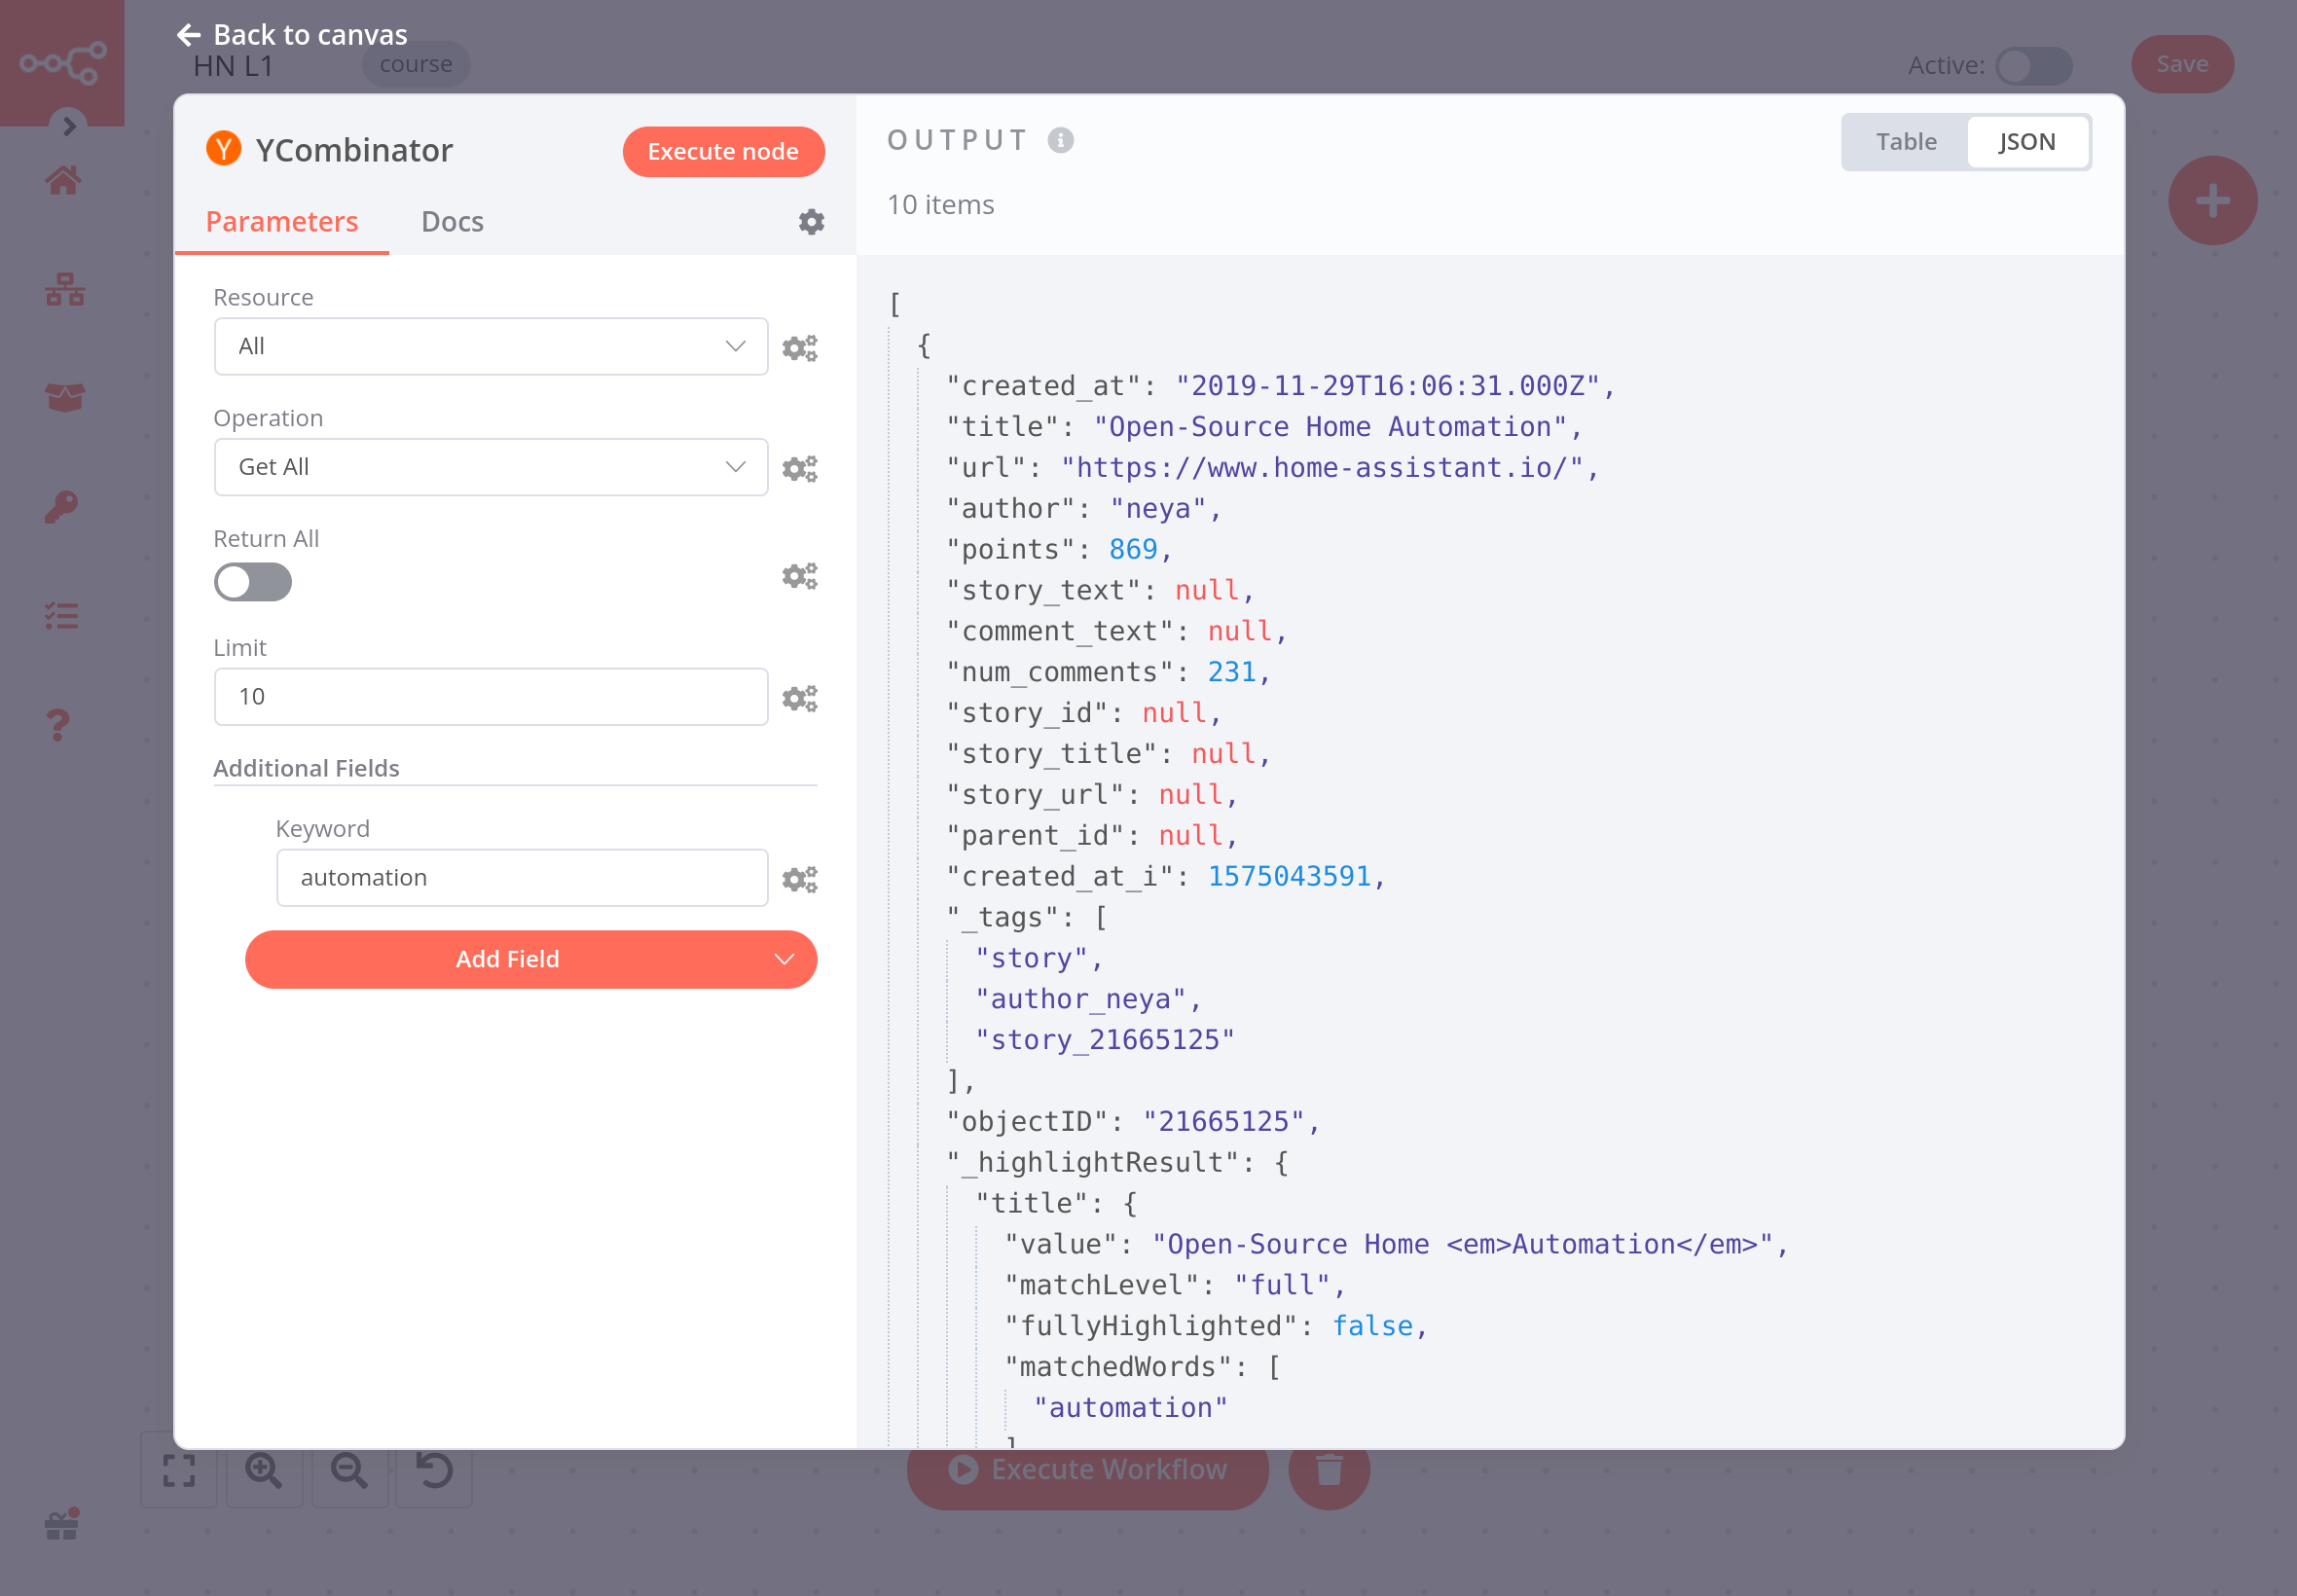
Click on the Execute Node button in the top right corner of the node window. You should see 10 results in Table view.
Node executions#
Node execution
A node execution represents a run of that node to retrieve the specified data.
If a node executed successfully a small green circle with a number inside will appear on top of the node.
If the parameters are configured correctly and everything works fine, the requested data will be displayed in the node window in Table and JSON format. You can switch between these views by selecting the one you want from the JSON|Table button at the top of the node window.
Table vs JSON views
The Table view is the default. It displays the requested data in a table, where the rows are the records and the columns are the available attributes of those records.
The node window displays more information about the node execution:
- In the top left corner of the results window, you'll notice another piece of information: Items: 10. This field displays the number of items (records) that are returned by the node request. In our case, it's expected to be 10, since this is the limit we set in the node. But if you don't set a limit, it's useful to see how many records are actually returned.
- Next to the Items information, notice a small orange i icon. If you hover on it, you'll get two more pieces of information: Start Time (when the node execution started) and Execution Time (how long it took for the node to return the results from the moment it started executing). Start Time and Execution Time can provide insights into the performance of each individual node.
- Under the node name beside the Parameters tab, there is a link to the node's Docs. Check it out if you run into trouble or are not sure how to configure the node's parameters.
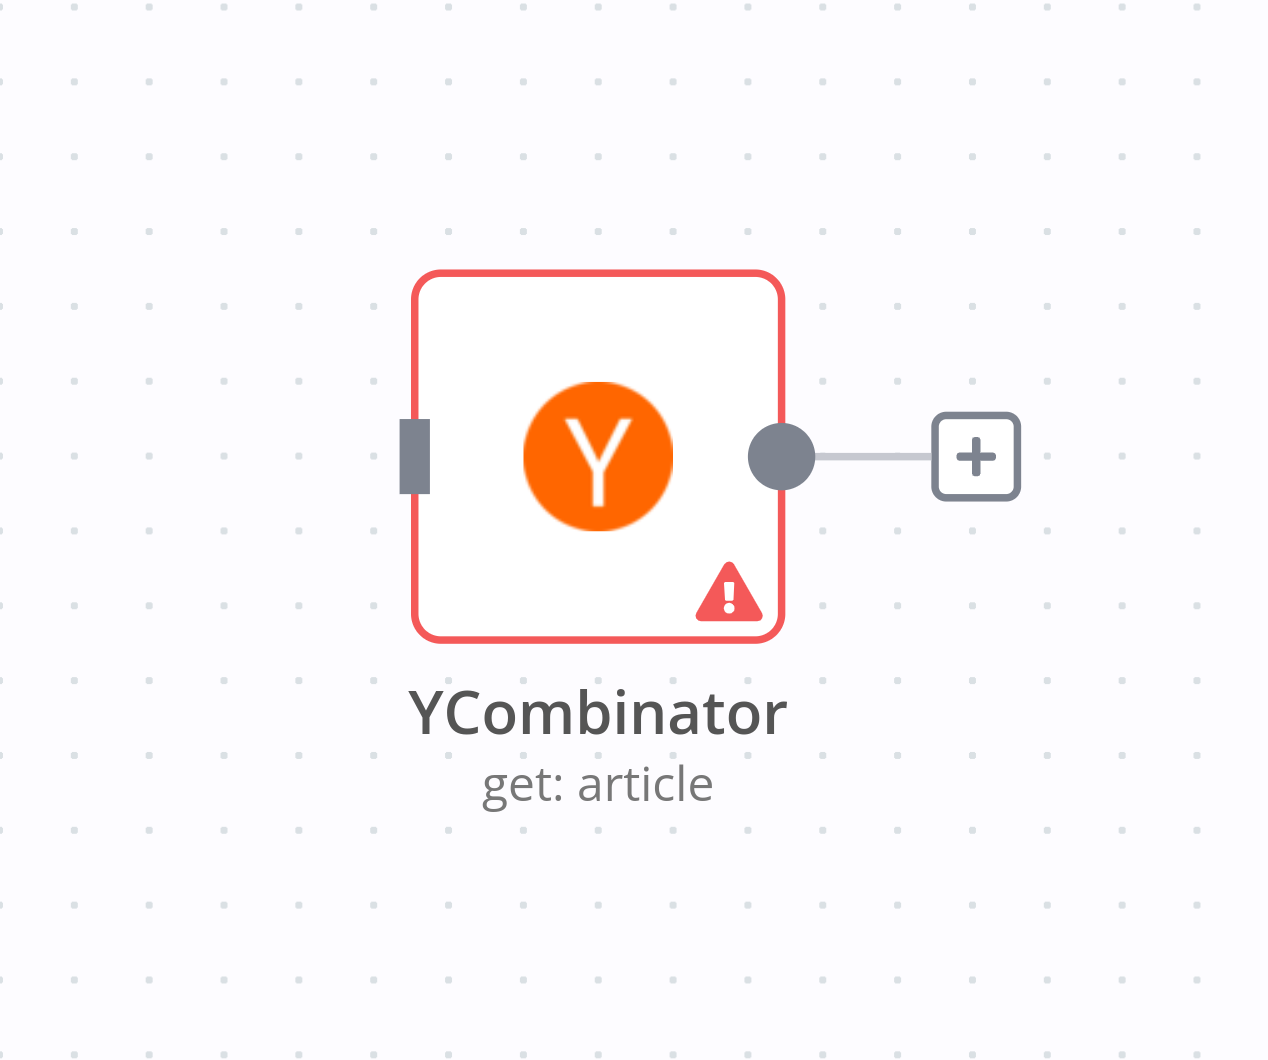
Error in nodes
A red warning icon on a node means that the node has errors. This might happen if the node credentials are missing or incorrect, or the node parameters are not configured correctly.
Summary#
Congratulations, you just built your first workflow! In this lesson, you learned how to use Regular nodes, configure their parameters and settings, and save and execute your workflow.
In the next lesson you will be introduced to your client, Nathan, who needs to automate his sales reporting work. You will build a more complex workflow for his use case, helping him become more productive at work.