3. Filtering Orders#
In this step of the workflow you will learn how to filter data using conditional logic and how to use expressions in nodes using the IF node.
To insert only processing orders into Airtable we need to filter our data by orderStatus. Basically, we want to tell the program that if the orderStatus is processing, then insert all records with this status into Airtable; else, i.e. if the orderStatus is not processing, calculate the sum of all orders with the other orderStatus (booked).
This if-then-else command is conditional logic. In n8n workflows, conditional logic can be implemented with the IF node, which splits a workflow conditionally based on comparison operations.
IF vs Switch
If you need to filter data on more than two conditional routes that are possible with the IF node (true and false), use the Switch node. The Switch node is similar to the IF node, but supports up to four conditional routes.
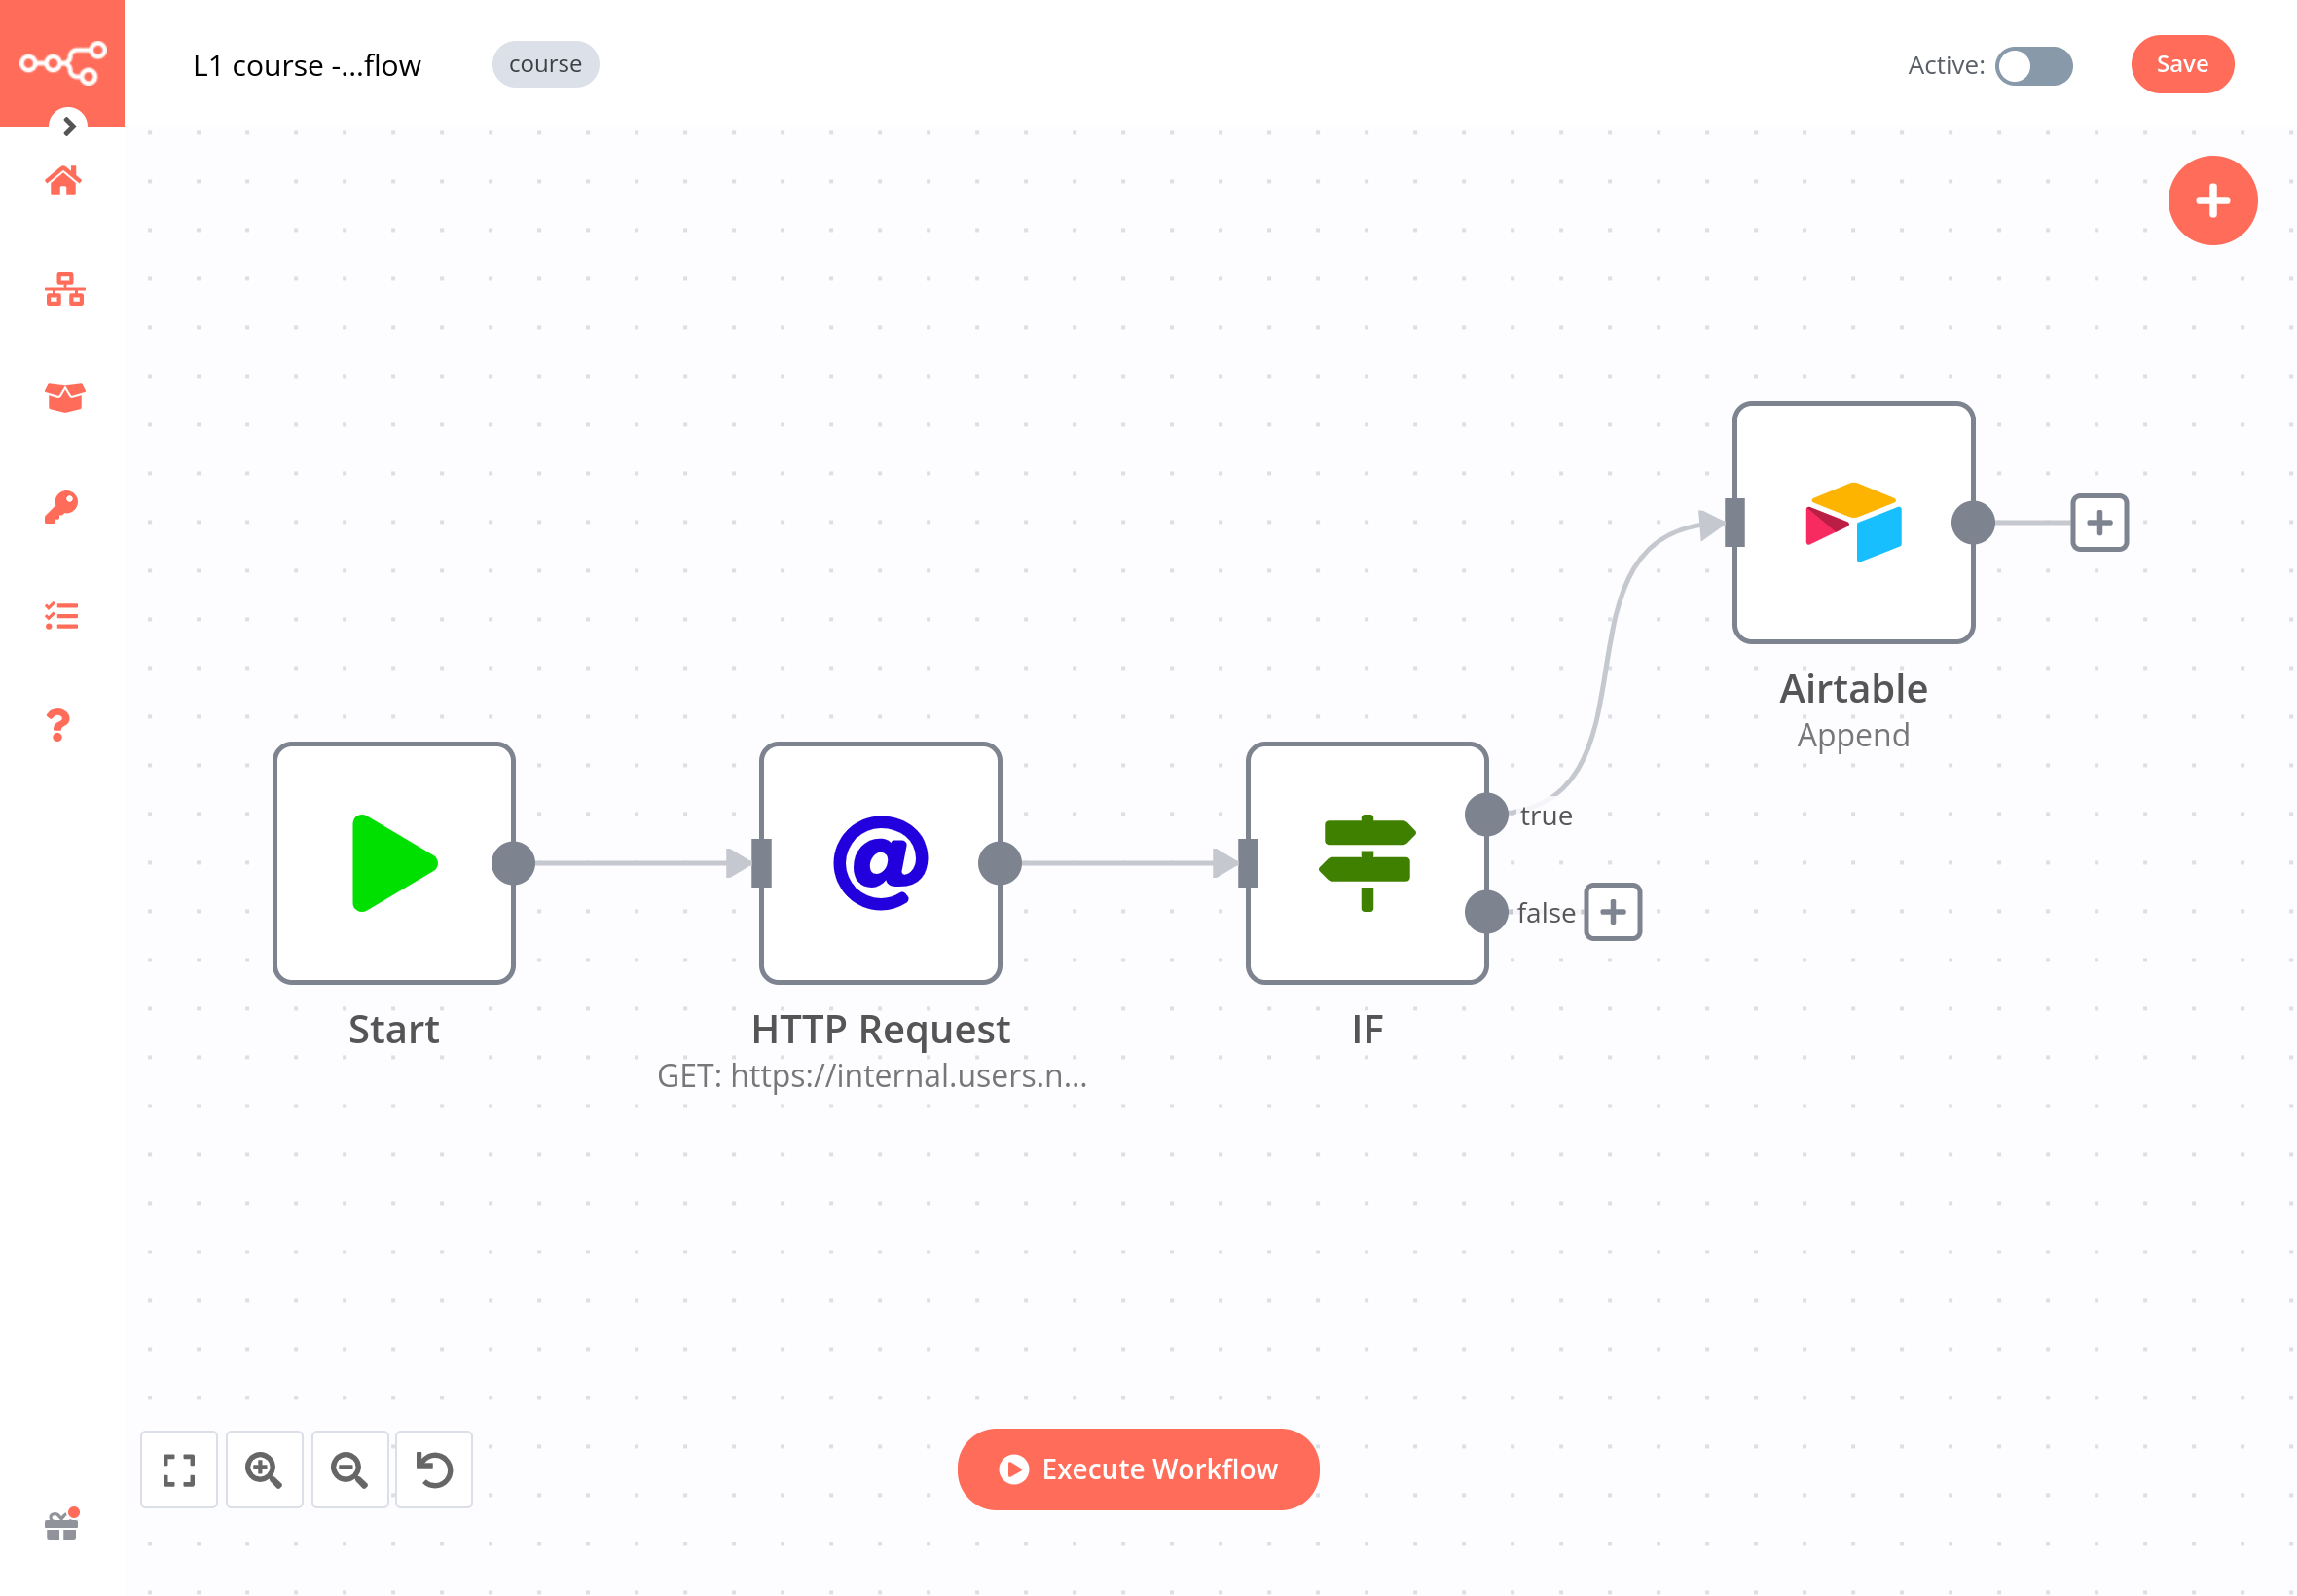
Back to your workflow, remove the connection between the HTTP Request node and the Airtable node. Add an IF node connected to the HTTP Request node.
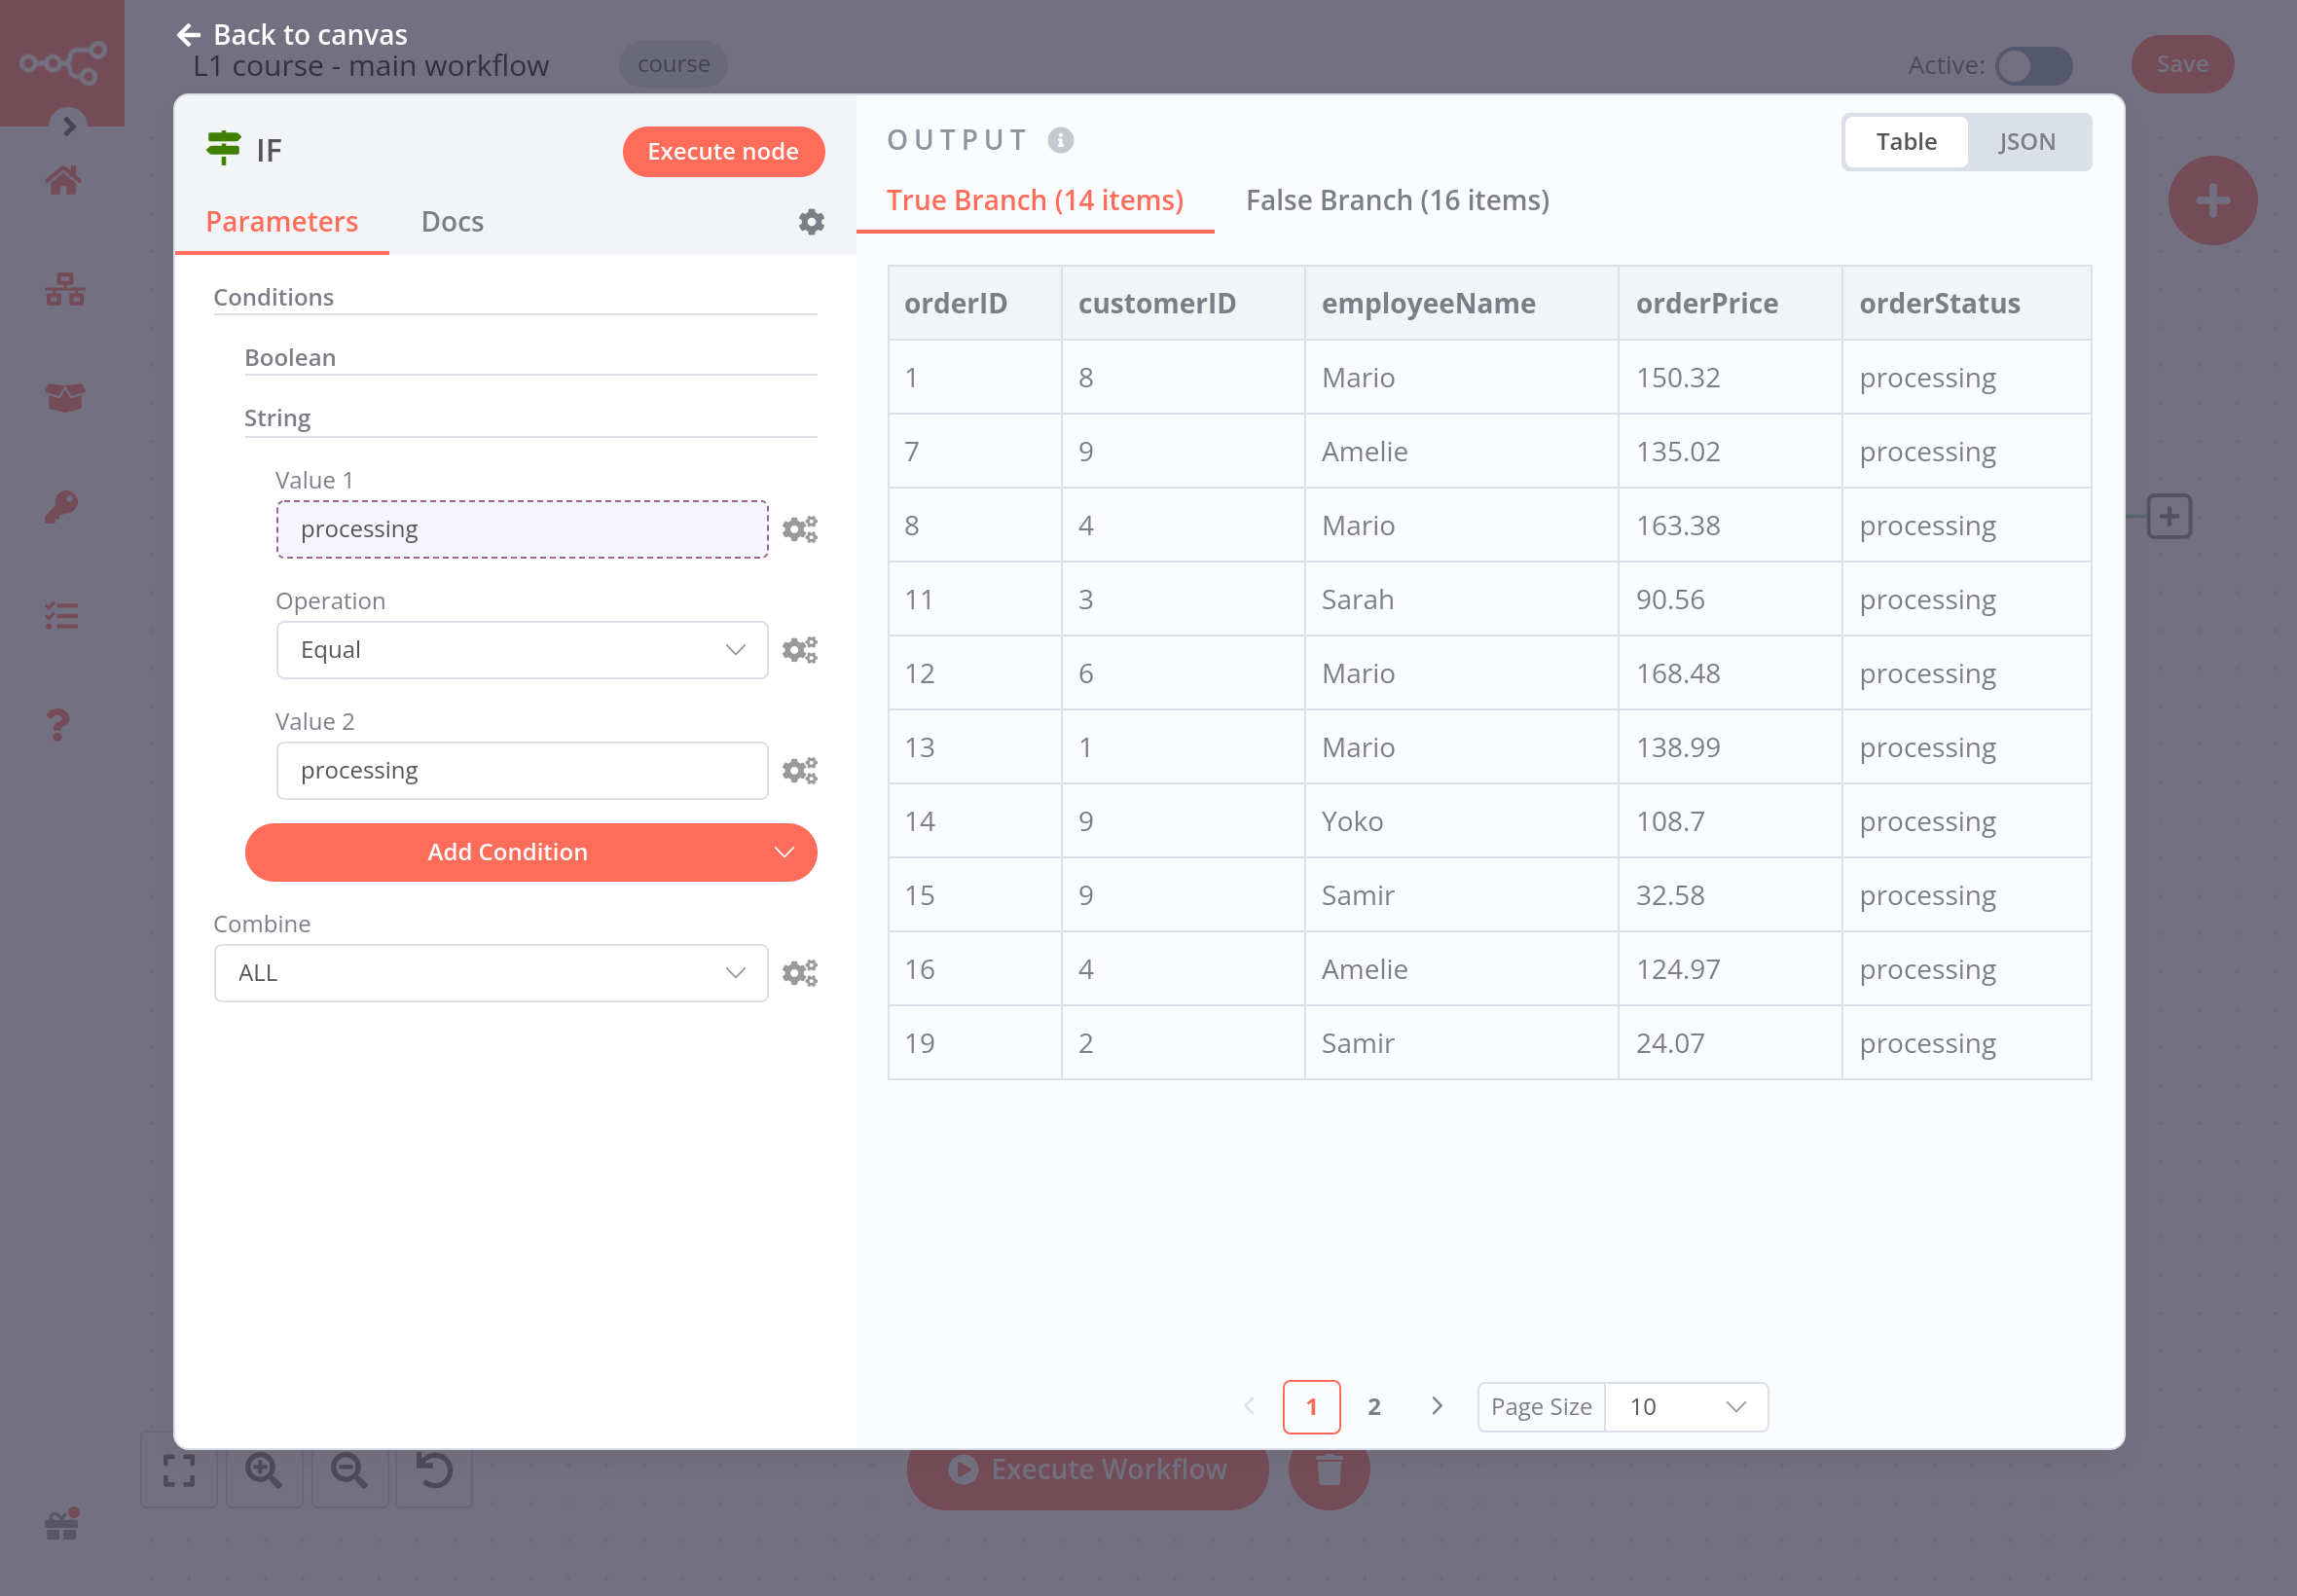
In the IF node window click on Add Condition > string and configure the parameters:
-
Value 1: Current Node > Input Data > JSON > orderStatus →
{{$json["orderStatus"]}}
To select this value, click the Expression tab on the right side of the Value 1 field.Expressions
An expression is a string of characters and symbols in a programming language that represents a value depending upon its input. In n8n workflows, you can use expressions in a node to refer to another node for input data. In our example, the IF node references the data output by the HTTP Request node.
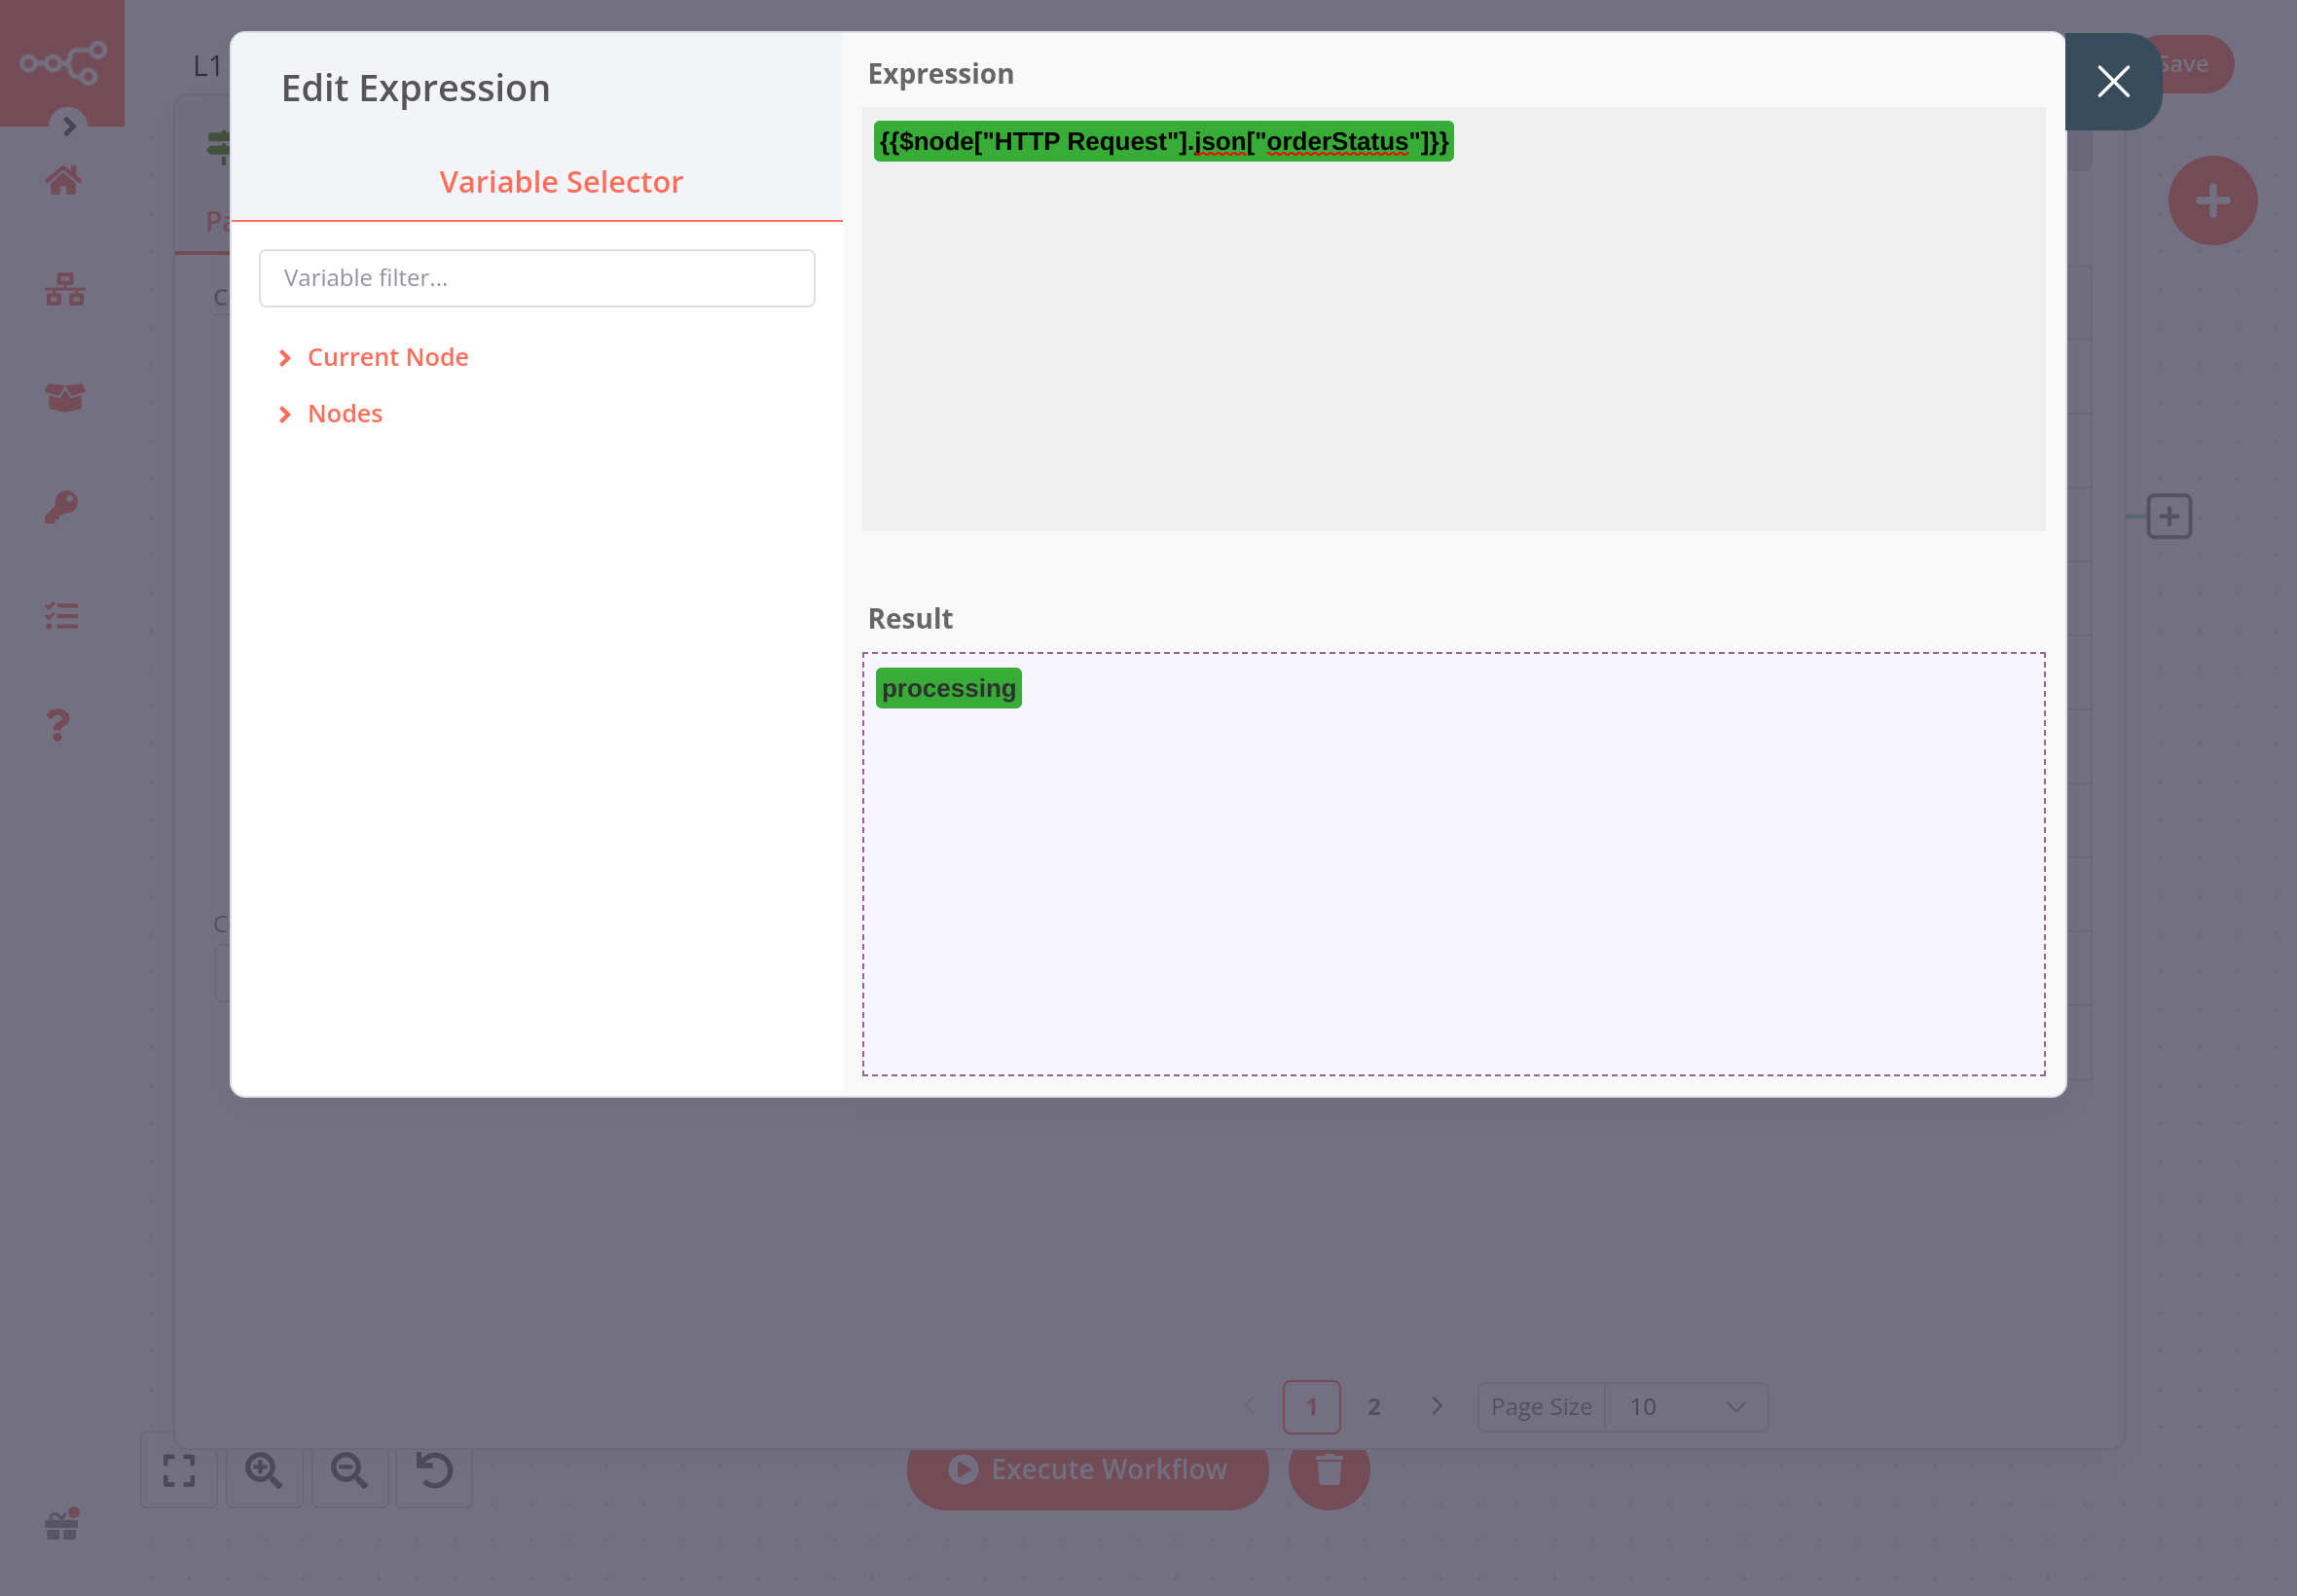
Expression Editor in the IF node -
Operation: equal
- Value 2: processing
Data Type
Make sure to select the correct data type (boolean, date & time, number, or string) of the referenced data in Add Condition.
Now execute the IF node and have a look at the resulting data, which should look like this:
Next, we want to insert this data into Airtable. You already know how to do this from the previous chapter where we inserted all data into the orders table.
At this stage, your workflow should look like this:
What's next?#
Nathan 🙋: This IF node is really useful for filtering data! Now I have all the information about processing orders. I actually only need the employeeName and orderId, but I guess I can keep all the other fields just in case.
You 👩🔧: Actually, I wouldn't recommend doing that. Inserting more data requires more computational power, the data transfer is slower and takes longer, and takes up more storage resources in your table. In this particular case, 14 records with 5 features might not seem like a lot to make a significant difference, but if your business grows to thousands of records and tens of features, things add up and even one extra column can affect performance.
Nathan 🙋: Oh, that's good to know. So, can you select only two fields from the processing orders?
You 👩🔧: Sure, I'll do that in the next step.