G Suite Admin#
G Suite Admin helps you administer domain and app resources, create reports, and manage subscriptions and alerts for your G Suite organization.
Credentials
You can find authentication information for this node here.
Basic Operations#
- Group
- Create a group
- Delete a group
- Get a group
- Get all groups
- Update a group
- User
- Create a user
- Delete a user
- Get a user
- Get all users
- Update a user
Example Usage#
This workflow allows you to create, update, and get a user using the G Suite Admin node. You can also find the workflow on n8n.io. This example usage workflow uses the following nodes. - Start - G Suite Admin
The final workflow should look like the following image.
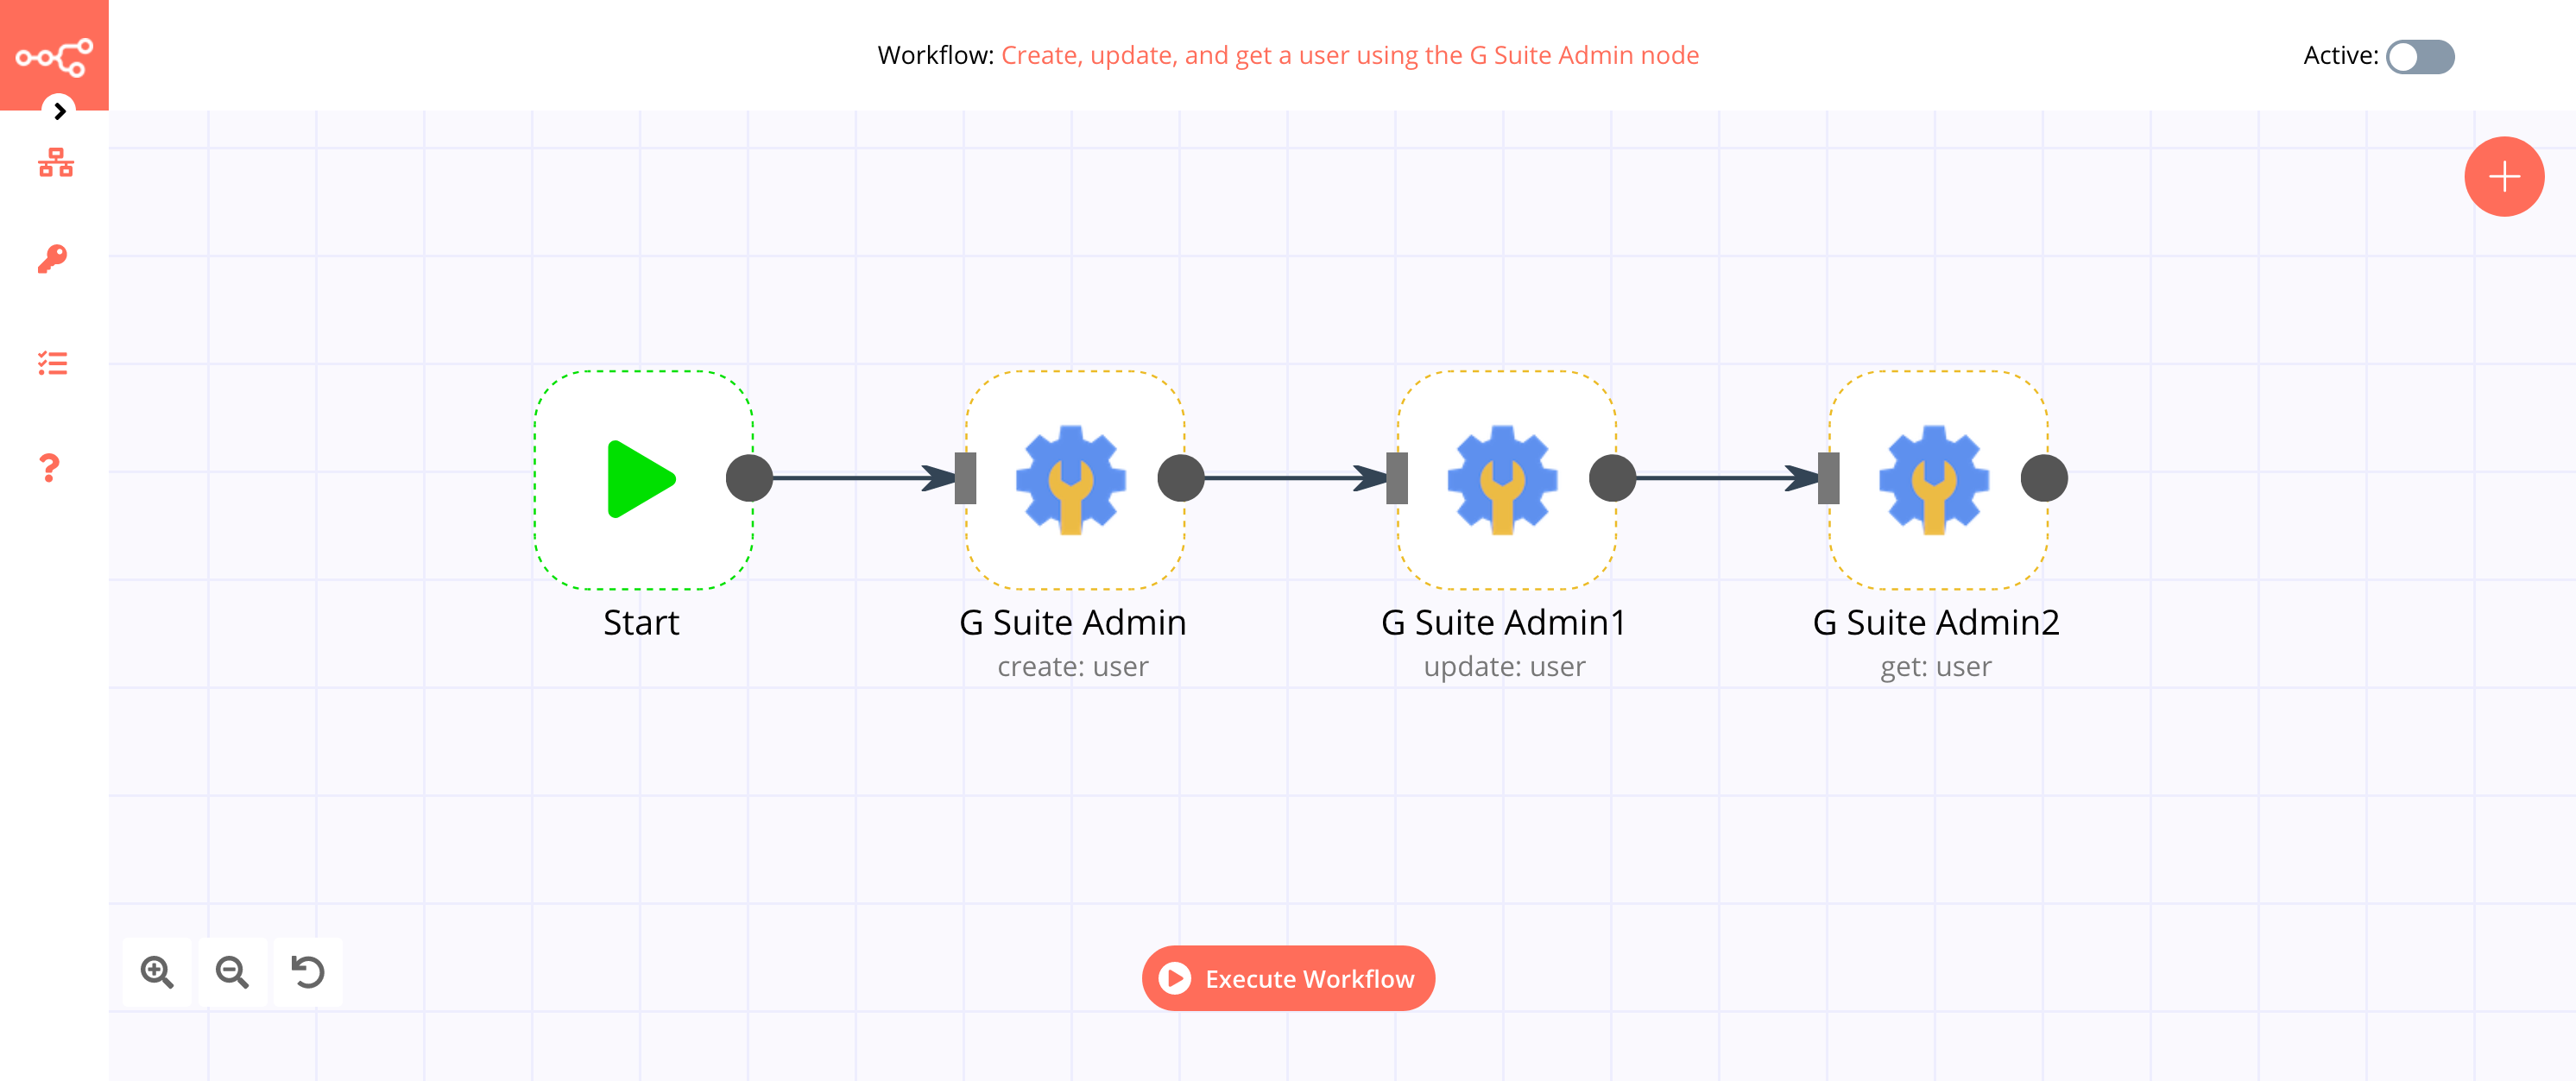
1. Start node#
The Start node exists by default when you create a new workflow.
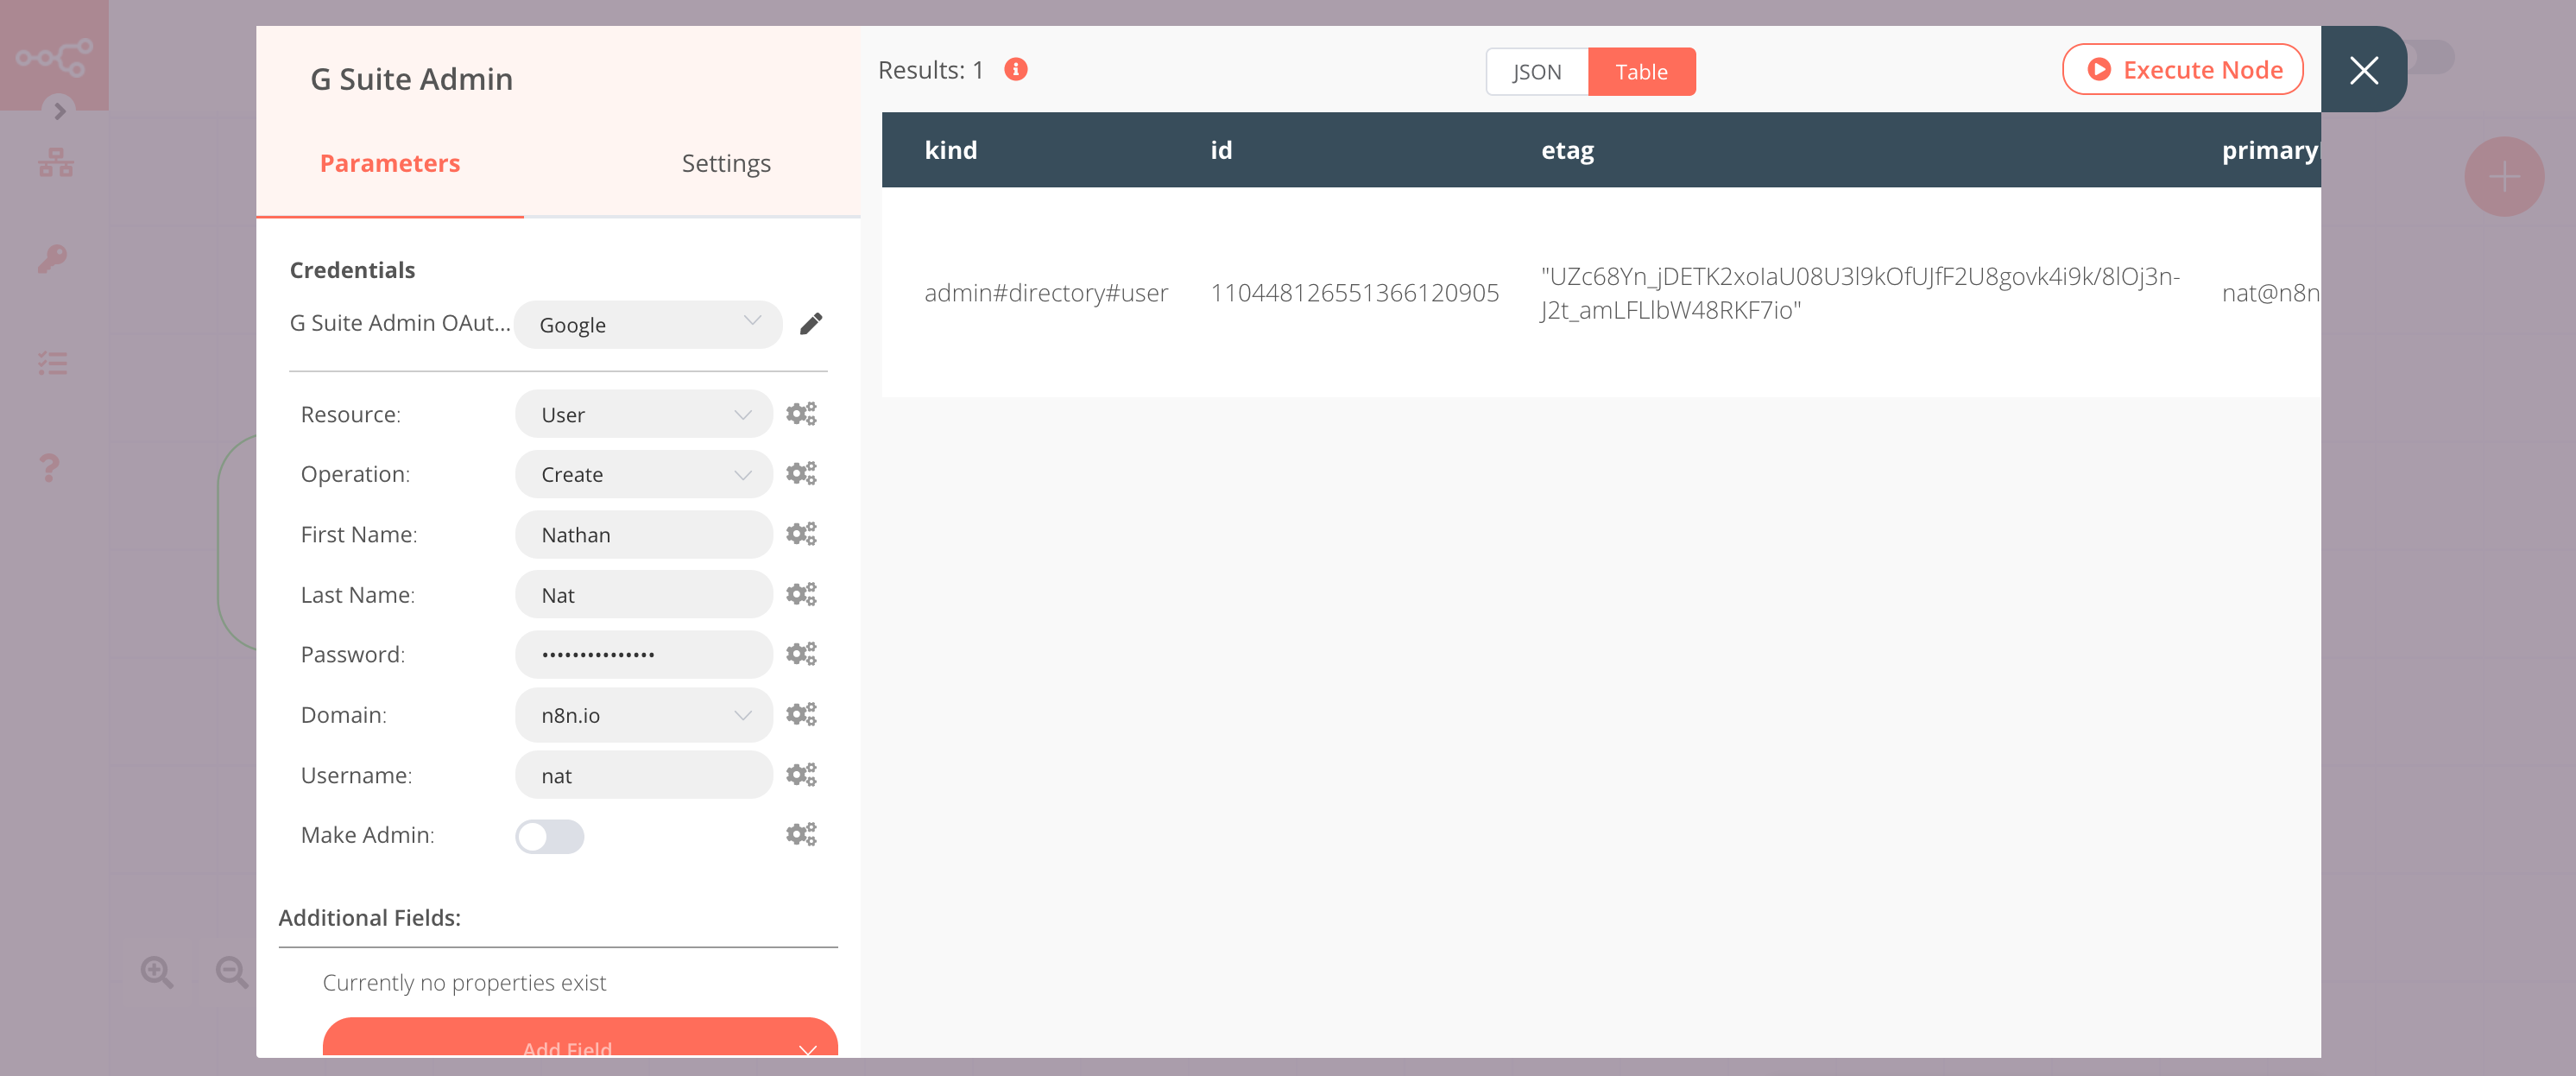
2. G Suite Admin node (create: user)#
This node will create a user in G Suite with the following information: first name, last name, password, domain, and username.
- First of all, you'll have to enter credentials for the G Suite Admin node. You can find out how to do that here.
- Enter the first name of the user in the First Name field.
- Enter the last name of the user in the Last Name field.
- Enter a password for the user in the Password field.
- Select the domain from the Domain dropdown list.
- Enter the username for the user in the Username field.
- Click on Execute Node to run the workflow.
In the screenshot below, you will observe that the node has created a new user with the first name Nathan, last name Nat, domain n8n.io, username nat, and a password, in G Suite.
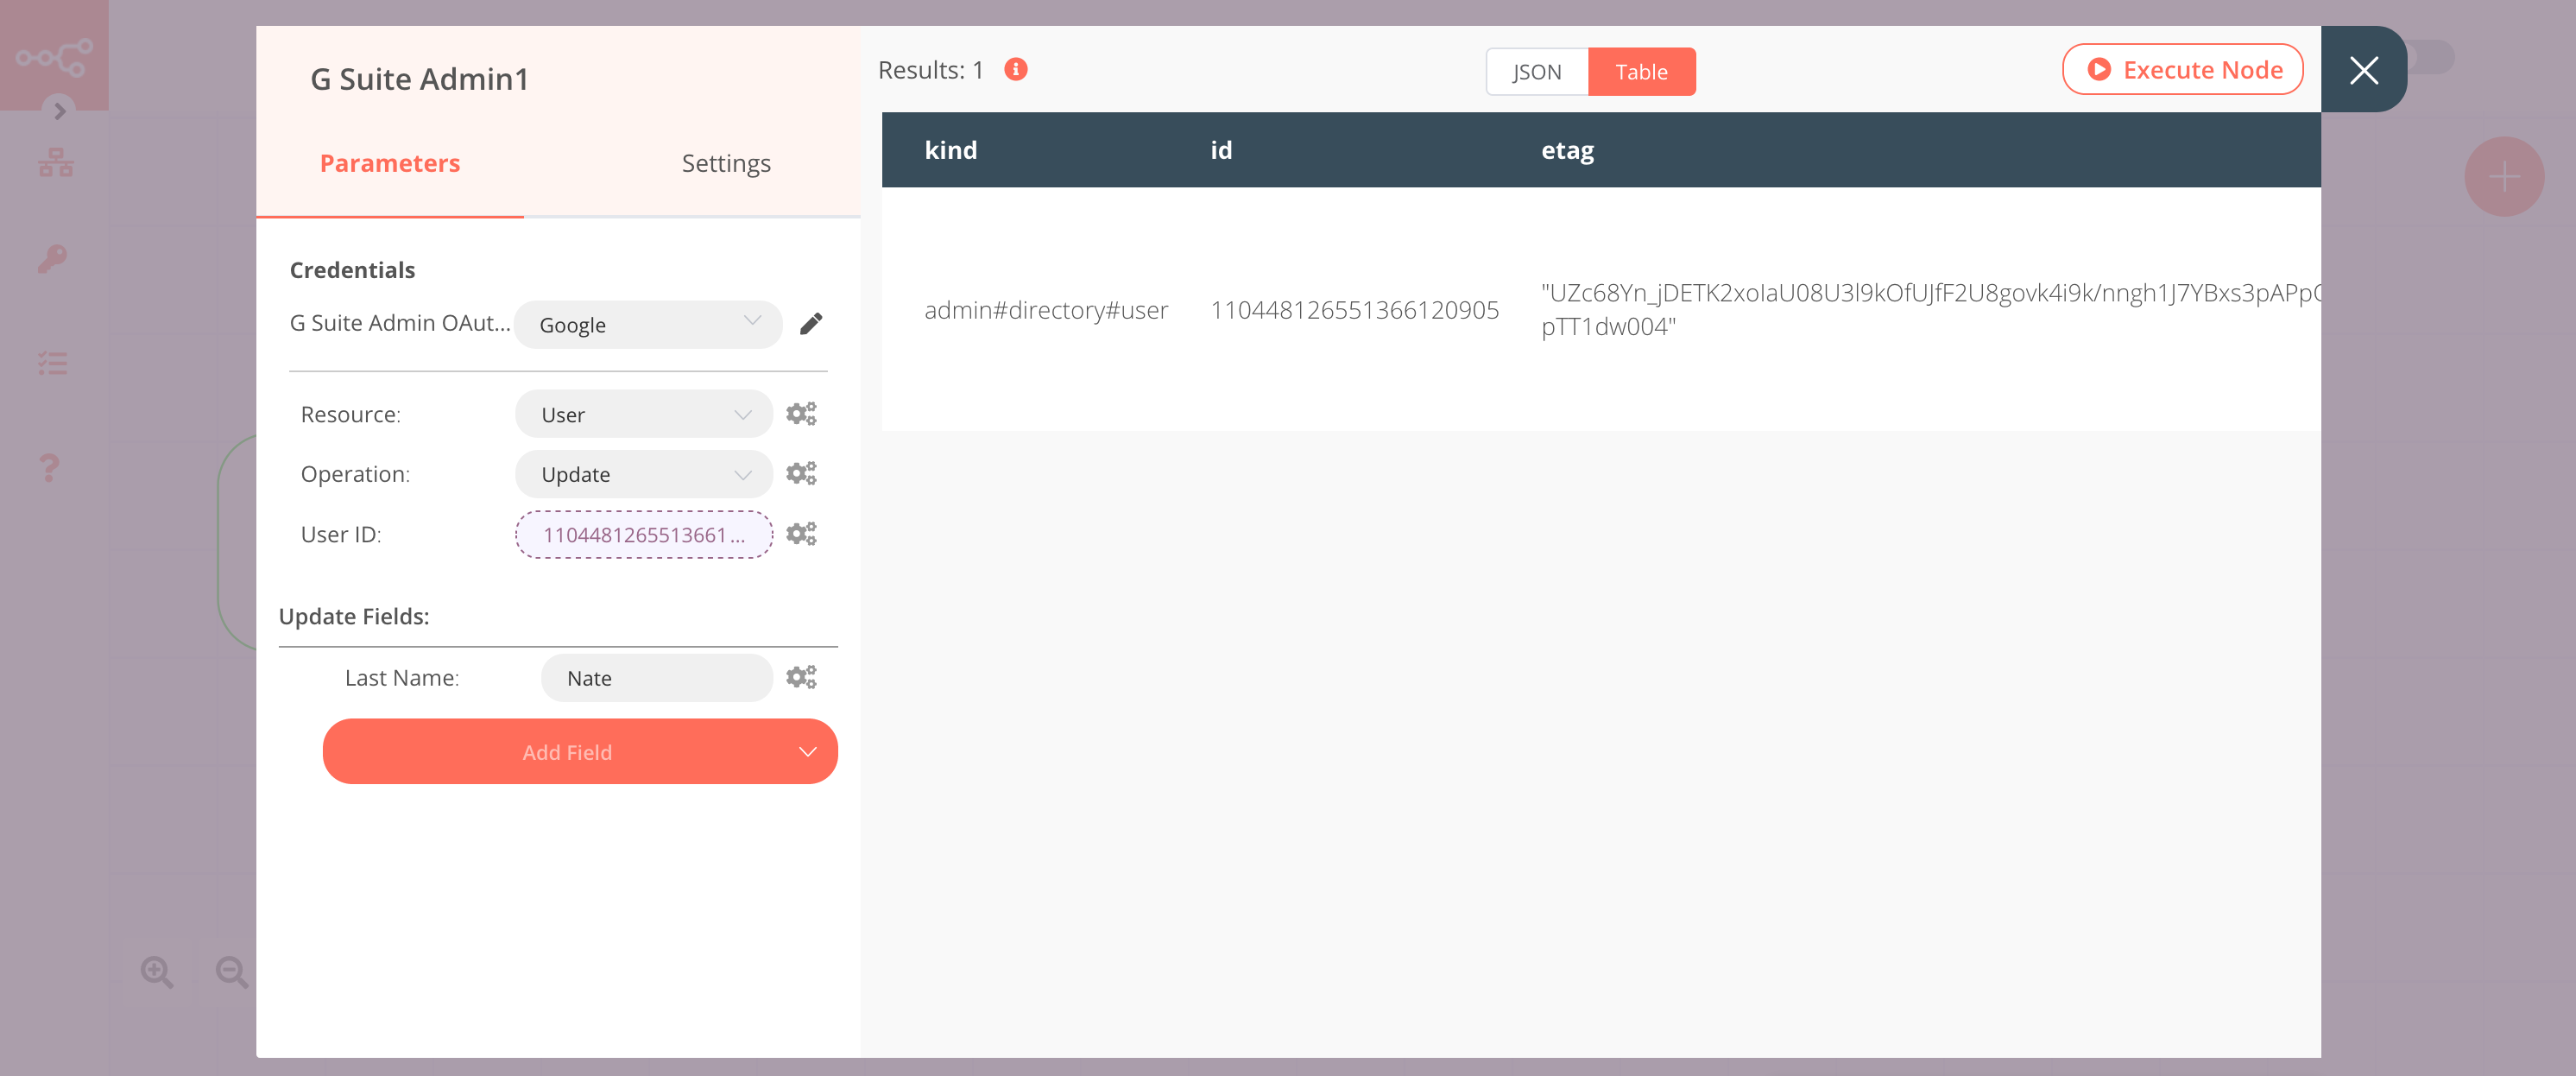
3. G Suite Admin1 node (update: user)#
This node will get the User ID from the previous node and update the user's last name to Nate.
- Select the credentials that you entered in the previous G Suite Admin node.
- Select 'Update' from the Operation dropdown list.
- Click on the gears icon next to the User ID field and click on Add Expression.
- Select the following in the Variable Selector section: Nodes > G Suite Admin > Output Data > JSON > id. You can also add the following expression:
{{$node["G Suite Admin"].json["id"]}}. - Click on the Add Field button and select 'Last Name' from the dropdown list.
- Enter the last name in the Last Name field.
- Click on Execute Node to run the workflow.
In the screenshot below, you will notice that the node has updated the last name of the user that we created in the previous node.
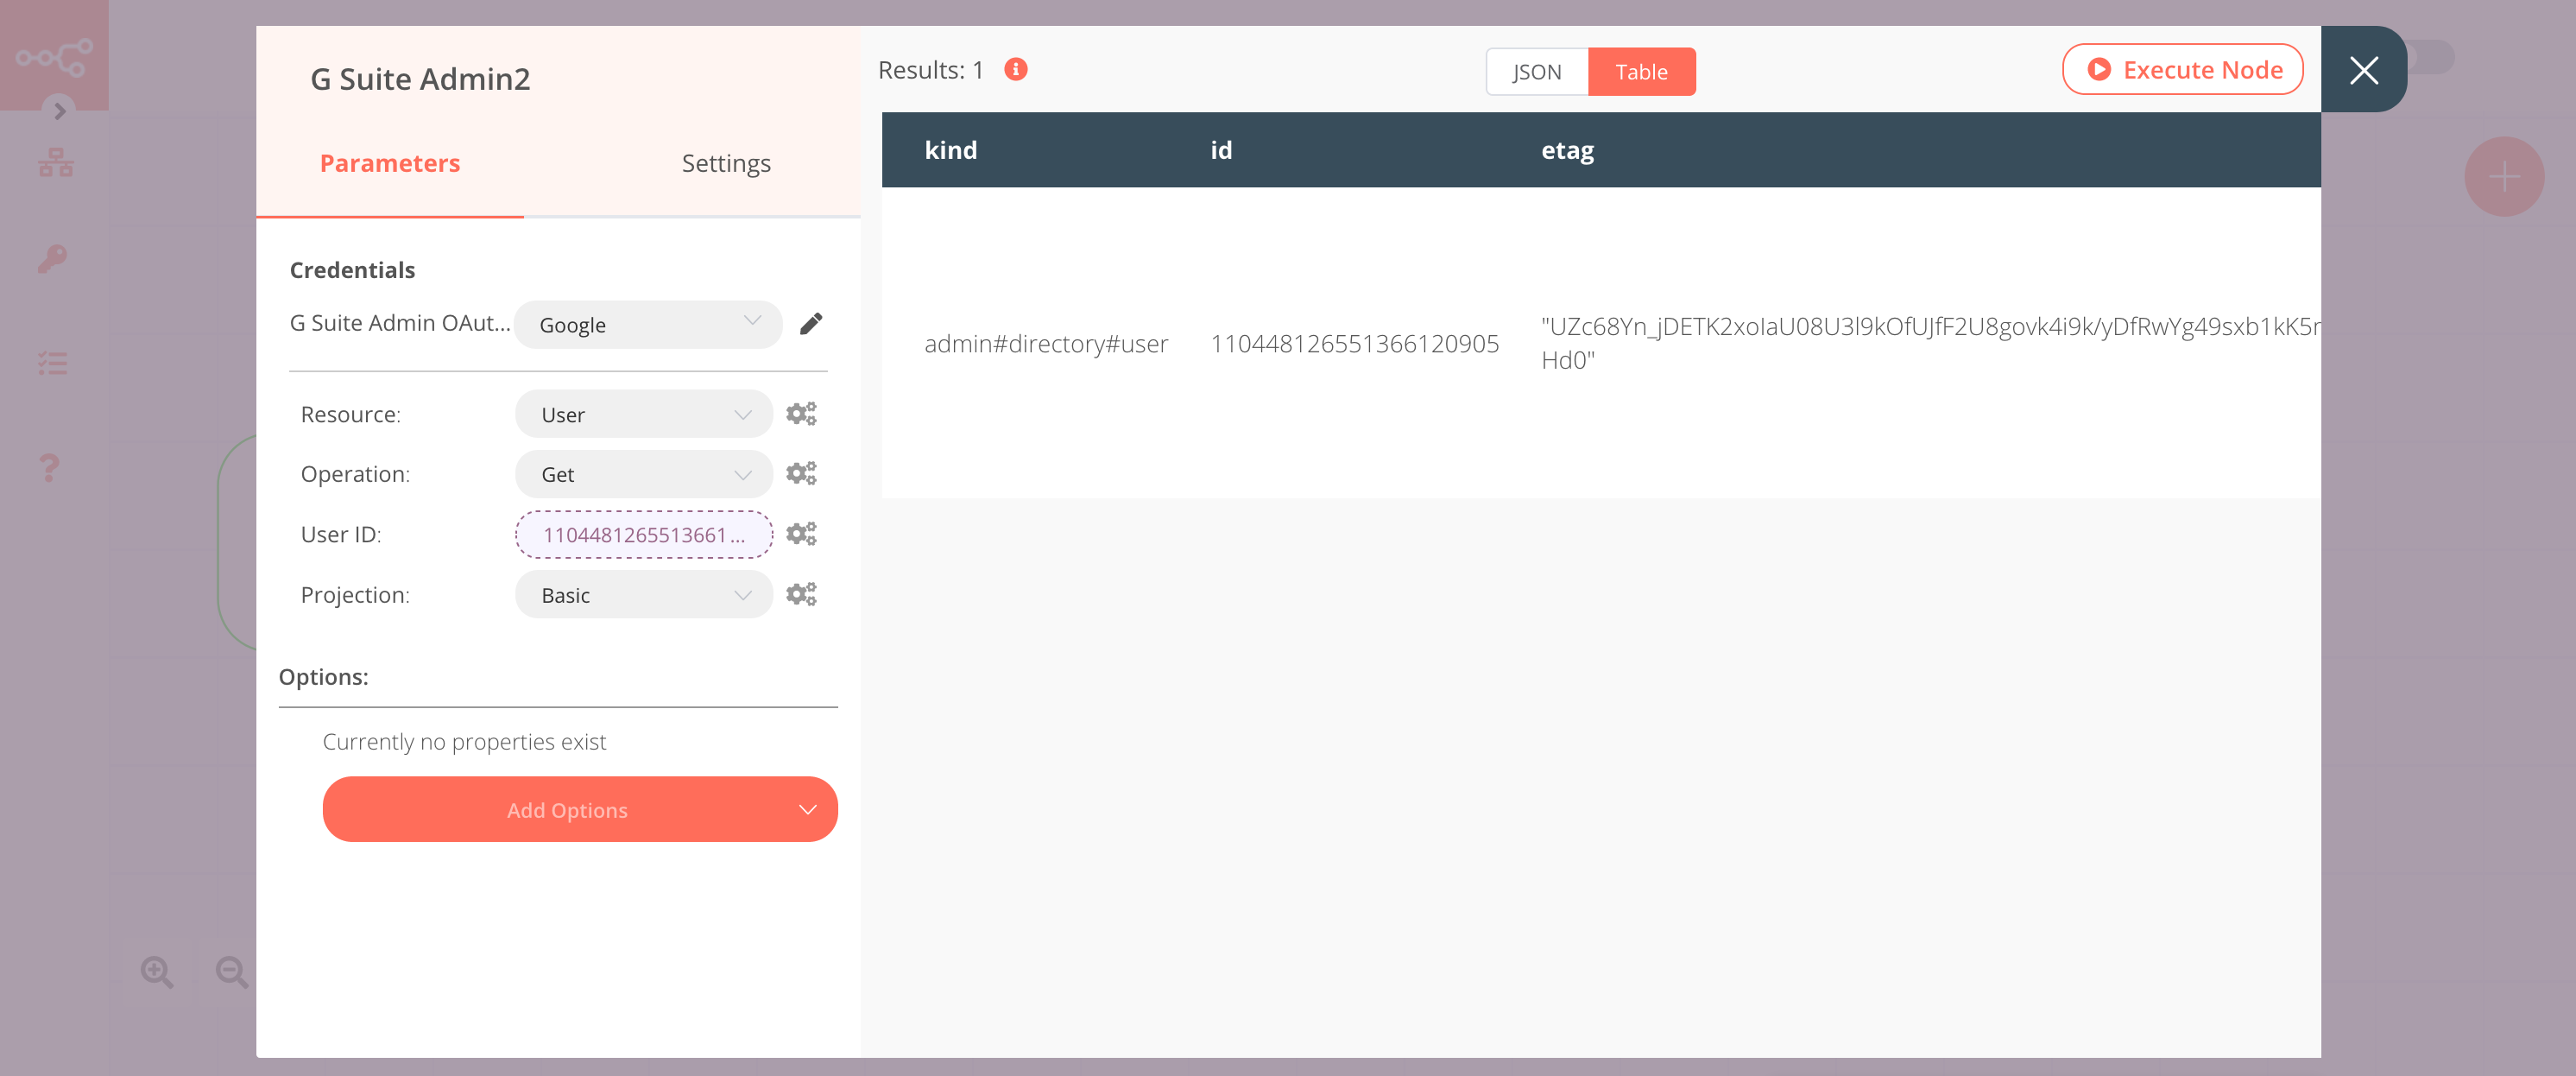
4. G Suite Admin2 (get: user)#
This node will get the information of the user we created in the G Suite Admin node.
- Select the credentials that you entered in the previous G Suite Admin node.
- Select 'Get' from the Operation dropdown list.
- Click on the gears icon next to the User ID field and click on Add Expression.
- Select the following in the Variable Selector section: Nodes > G Suite Admin > Output Data > JSON > id. You can also add the following expression:
{{$node["G Suite Admin"].json["id"]}}. - Click on Execute Node to run the workflow.
In the screenshot below, you will notice that the node returns the information of the user we created in the G Suite Admin node.
FAQs#
What are the different ways to project a user's information?#
There are three different ways to project a user's information:
- Basic: Does not include any custom fields.
- Custom: Includes the custom fields from schemas in customField.
- Full: Include all the fields associated with the user.
You can include custom fields by following the steps mentioned below. 1. Select 'Custom' from the Projection dropdown list. 2. Click on the Add Options button and select 'Custom Schemas' from the dropdown list. 3. Select the schema names you want to include from the Custom Schemas dropdown list.