Grist#
Grist combines the flexibility of a spreadsheet with the robustness of a database to organize your data, your way.
Credentials
You can find authentication information for this node here.
Basic operations#
- Create rows in a table
- Delete rows from a table
- Read rows from a table
- Update rows in a table
Example usage#
This workflow allows you to insert and update data from a table in Grist. You can also find the workflow on n8n.io. This example usage workflow uses the following nodes:
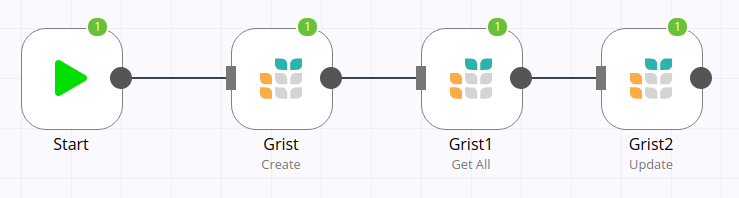
The final workflow should look like the following:
1. Start node#
The start node exists by default when you create a new workflow.
2. Grist node (Create)#
This workflow assumes there is a document with a table in your Grist workspace.
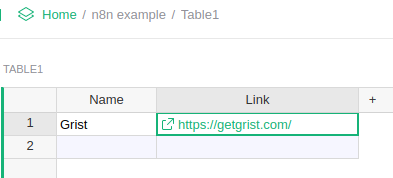
This node will create a new record in a table.
- First enter your credentials for the Grist node. You can find out how to do that here.
- Select 'Create' from the Operation dropdown list.
- Enter that ID of your document into the Document ID field.
- Enter the ID of your table in the Table ID field.
- Under Fields to Send click the Add Field button twice.
- For the first field, choose Name from the Field ID dropdown, and type a name in the Field Value.
- For the second field, choose
Linkfrom the Field ID dropdown, and enter a URL in the Field Value. - Click on Execute Node to run the node.
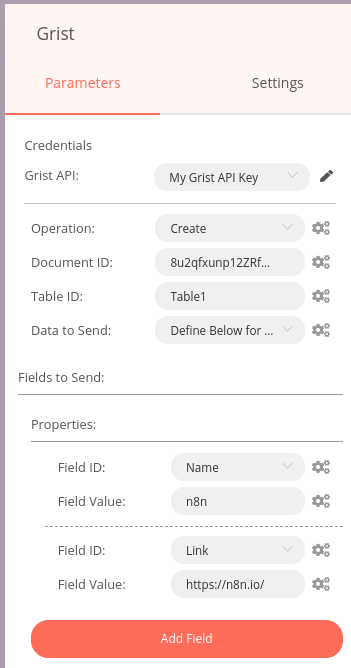
Here is an example of how the configuration should look:
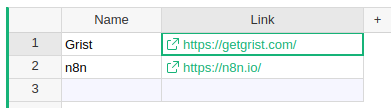
And here's the result of adding the record to the Grist table:
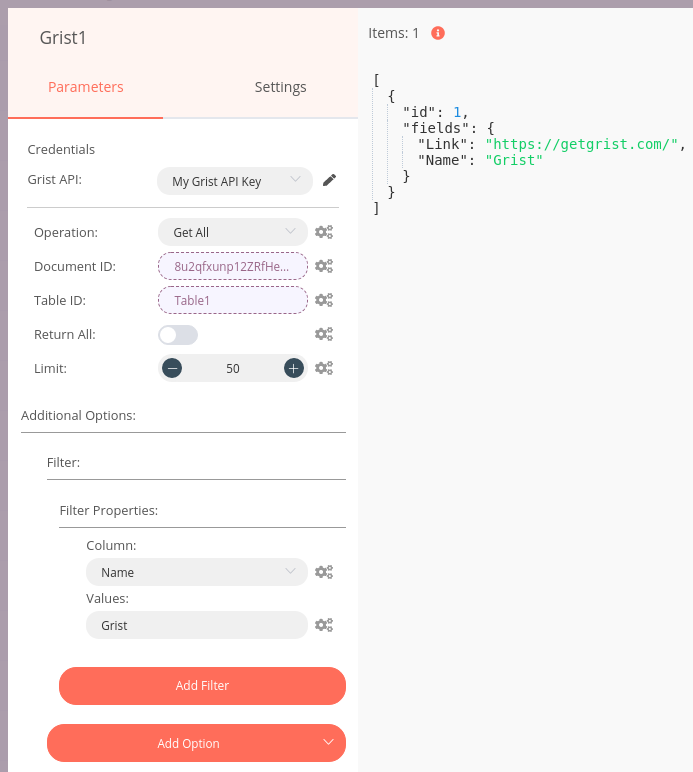
3. Grist1 node (Get All)#
This node will list all the records with a particular Name value.
- Select the credentials that you entered in the previous node.
- Select the 'Get All' option from the Operation dropdown list.
- Click on the gears icon next to the Document ID field and click on Add Expression.
- Select the following in the Variable Selector section: Nodes > Grist > Parameters > docId.
- Click on the gears icon next to the Table field and click on Add Expression.
- Select the following in the Variable Selector section: Nodes > Grist > Parameters > tableId.
- Click on Add Option and select 'Filter' from the dropdown list.
- Click the Add Filter button.
- Select
Namefrom the Column dropdown. - Type a name in the Values field.
- Click on Execute Node to run the node.
In the screenshot below, the node only returned the record with the name 'Grist':
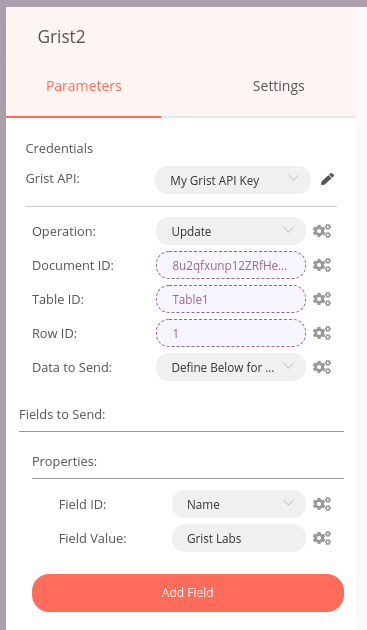
4. Grist2 node (Update)#
This node will update the Name field of the record that we received from the previous Grist node.
- Select the Grist1 node in your workflow and click 'Duplicate Node'. Now you won't need to specify the credentials, Document ID, and Table ID again.
- Double click the newly duplicated node (Grist2) to edit it.
- Select 'Update' from the Operation dropdown list.
- Click on the gears icon next to the Row ID field and click on Add Expression.
- Select the following in the Variable Selector section: Nodes > Grist1 > Output Data > JSON > id.
- Under Fields to Send click the Add Field button.
- Choose
Namefrom the Field ID dropdown, and type a name in the Field Value. - Click on Execute Node to run the node.
Here is an example of how the configuration should look:
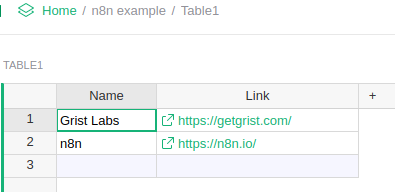
The result is that the Name in the first record changed from 'Grist' to 'Grist Labs':
FAQs#
How to get the Row ID?#
To update or delete a particular record, you need the Row ID. There are two ways to get the Row ID.
Create a Row ID column in Grist
Create a new column in your Grist table with the formula $id.
Use the Get All operation
The Get All operation returns the Row ID of each record along with the fields.
You can obtain it with the expression {{$node["GristNodeName"].json["id"]}}.
How to filter records when using the Get All operation?#
- Click on Add Option and select 'Filter' from the dropdown list.
- You can add filters for any number of columns. The result will only include records which match all the columns.
- For each column, you can enter any number of values separated by commas. The result will include records which match any of the values for that column.