Google Sheets#
Google Sheets is a web-based spreadsheet program that is part of Google's office software suite within its Google Drive service.
Credentials
You can find authentication information for this node here.
Basic Operations#
- Spreadsheet
- Create a spreadsheet
- Sheet
- Append data to a sheet
- Clear data from a sheet
- Create a new sheet
- Delete columns and rows from a sheet
- Look up a specific column value and return the matching row
- Read data from a sheet
- Remove a sheet
- Update rows in a sheet
Example Usage#
This workflow allows you to append, lookup, update, and read data from Google Sheets. You can also find the workflow on n8n.io. This example usage workflow uses the following nodes. - Start - Set - Google Sheets
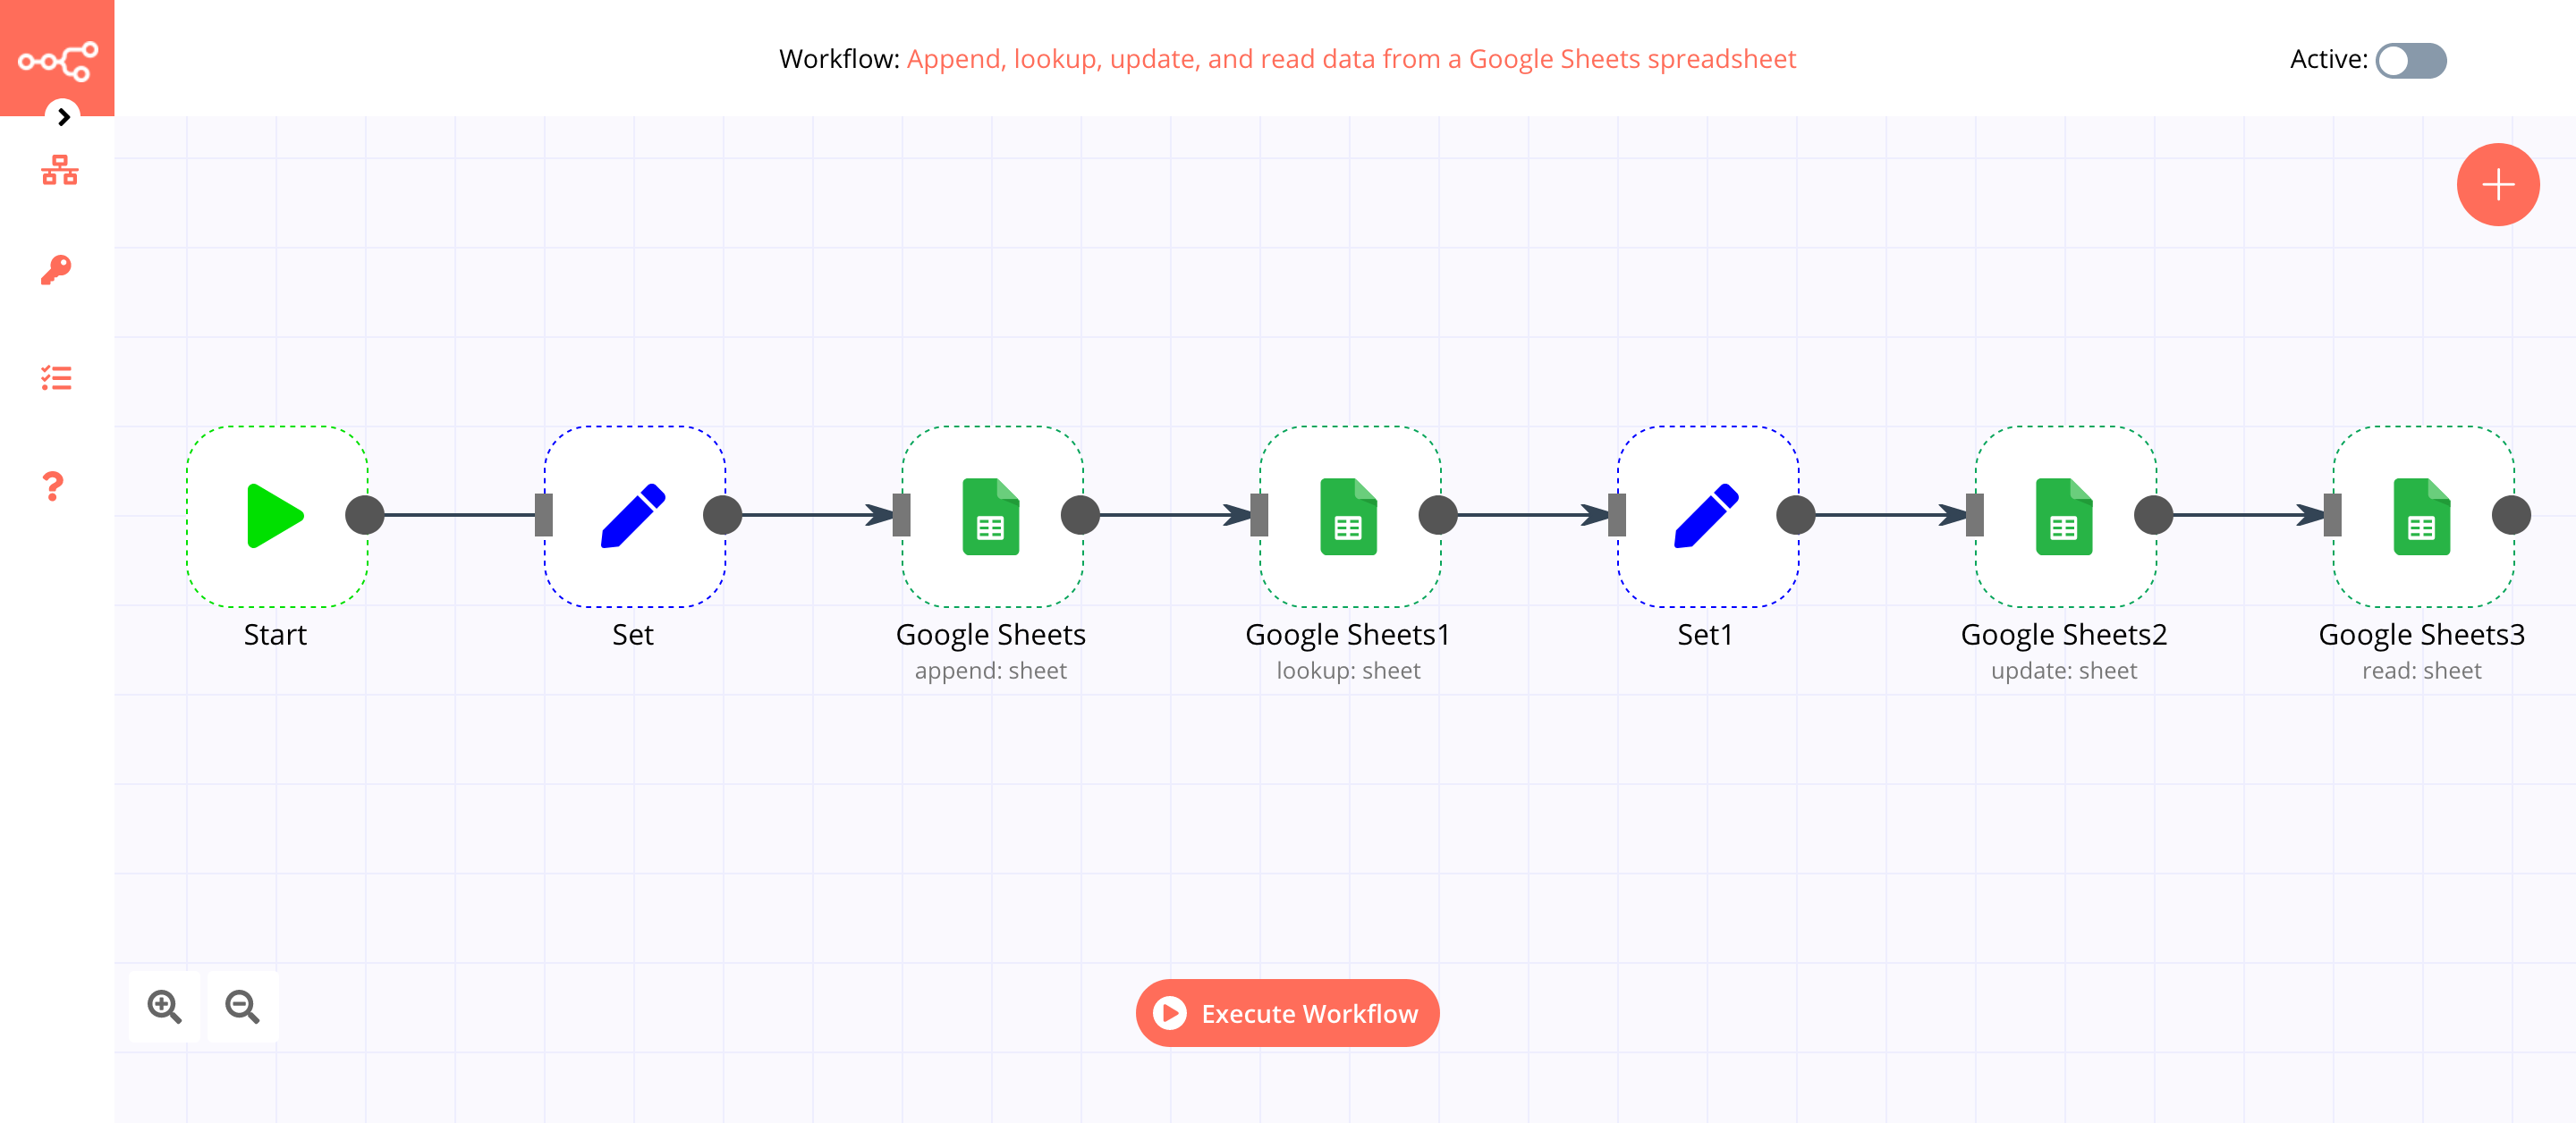
The final workflow should look like the following image.
1. Start node#
The Start node exists by default when you create a new workflow.
2. Set node#
This example workflow uses the Set node to generate data that we want to add to Google Sheets. You can also use other nodes, for example, the HTTP Request node, to get the data you want to add to the Google Sheets.
- Click on the Add Value button and select 'String' from the dropdown list.
- Enter
Namein the Name field. - Enter the name for a house in the Value field.
- Click on the Add Value button and select 'String' from the dropdown list.
- Enter
Rentin the Name field. - Enter the rent of the house along with the currency in the Value field. For example,
$1000. - Click on the Add Value button and select 'String' from the dropdown list.
- Enter
Cityin the Name field. - Enter the name of the city in the Value field.
- Click on the Add Value button and select 'Number' from the dropdown list.
- Enter
IDin the Name field. - Click on the gears icon next to the Value field and click on Add Expression.
- Paste the following expression:
{{Math.floor(Math.random()*1000)}}. This expression will generate a three-digit random number. - Click on Execute Node to run the node.
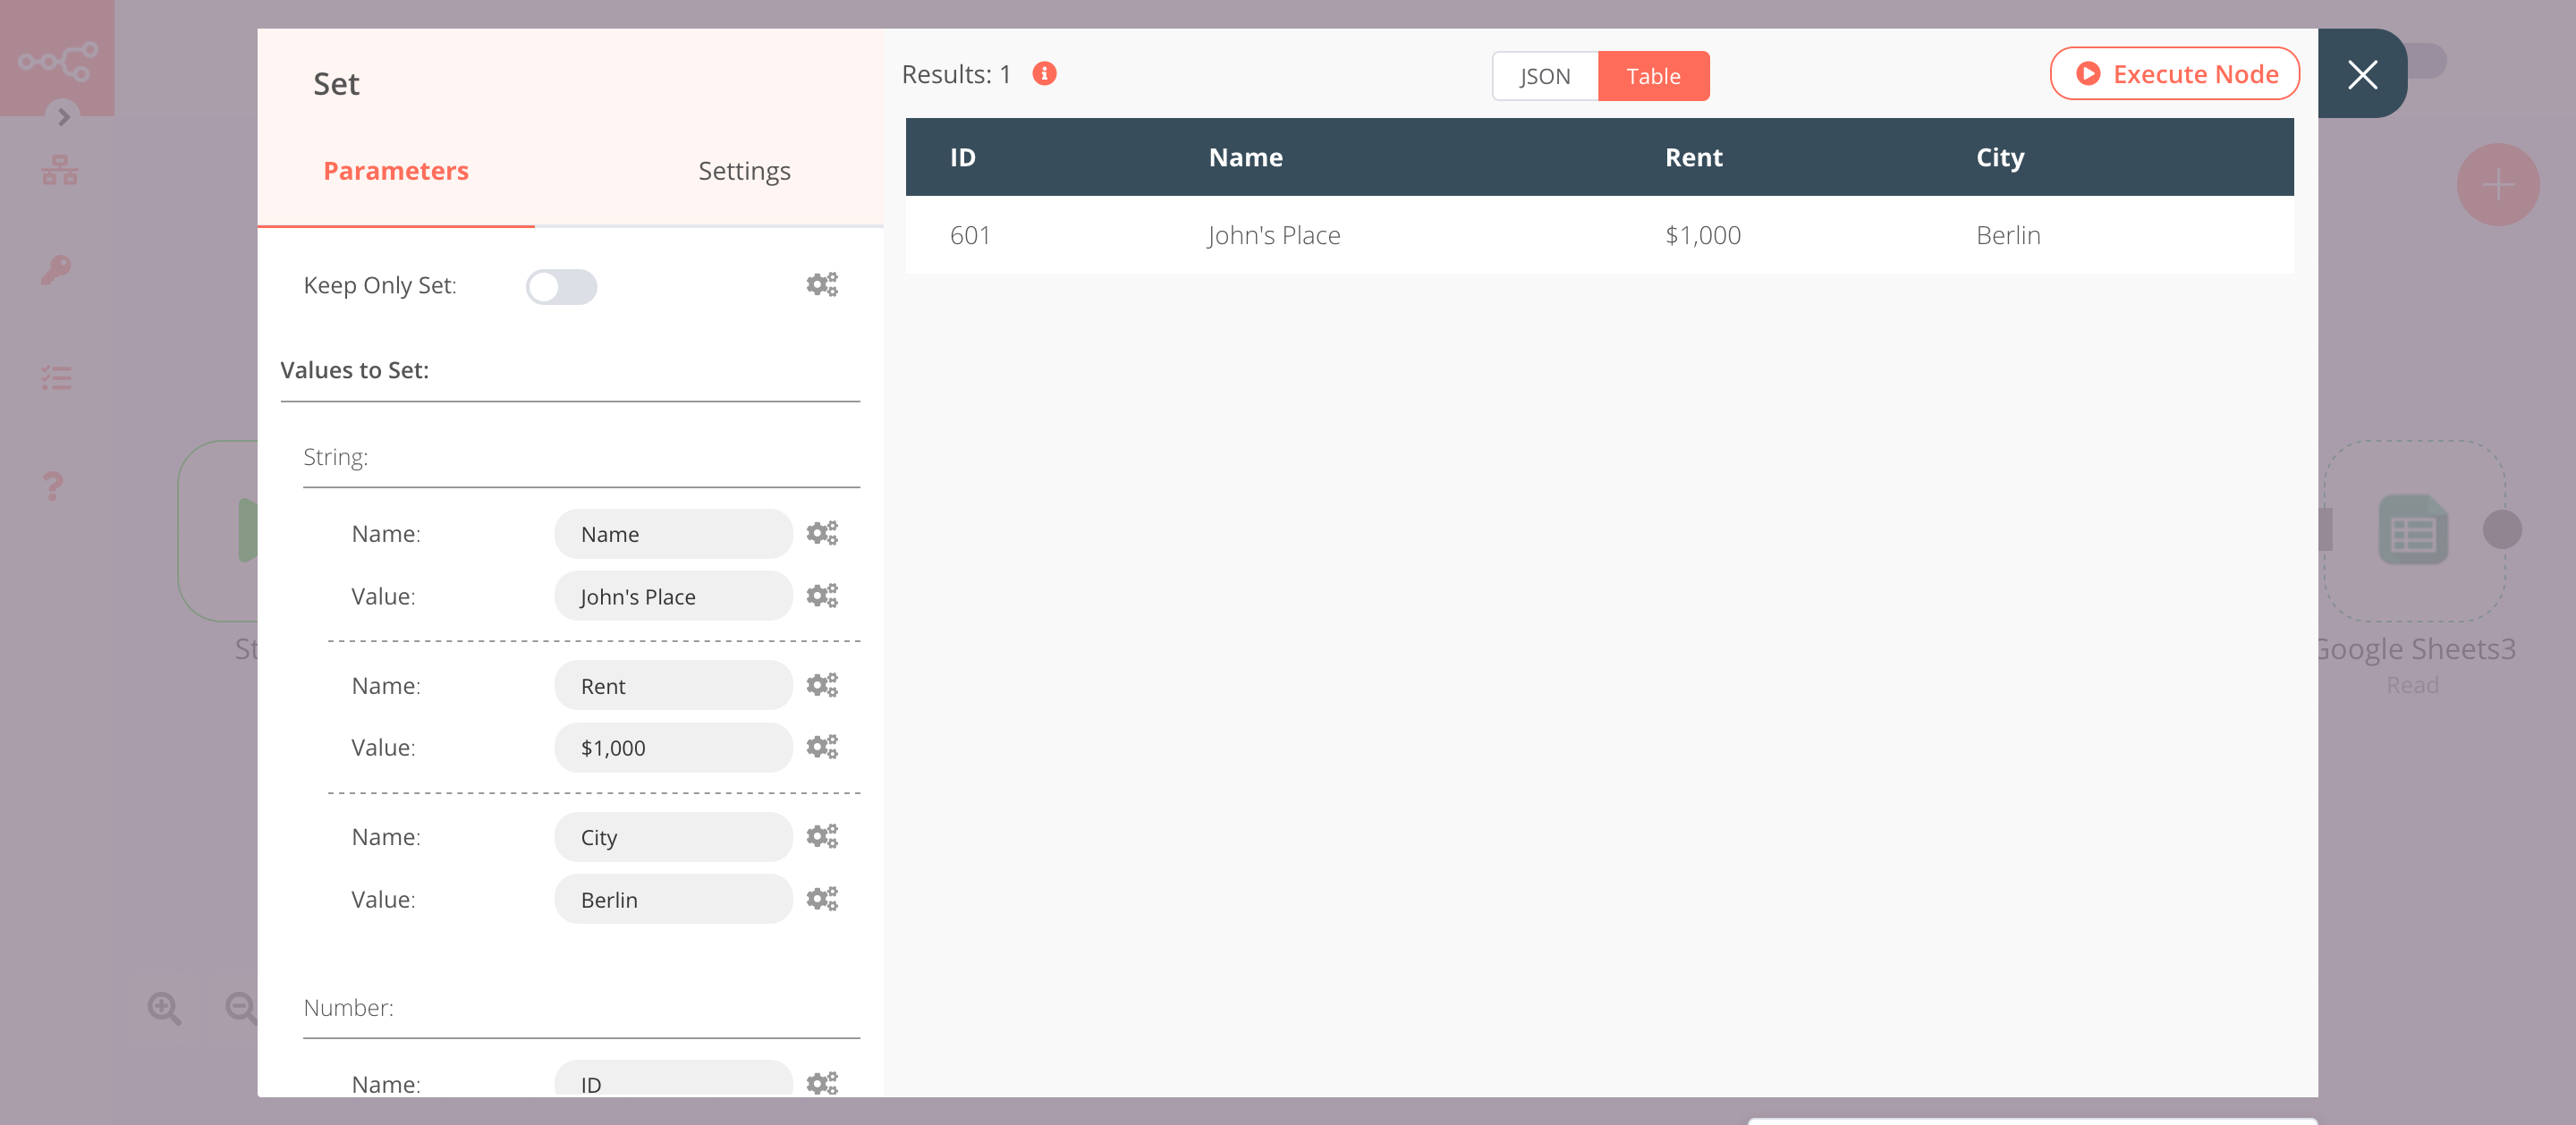
In the screenshot below, you will notice that the Set node has created data that will be passed to the next nodes in the workflow. Also, the output shows a random three-digit number as the ID, created by the expression.
3. Google Sheets node (Append)#
Creating a Google Sheets spreadsheet#
- Create a new Google Sheets spreadsheet.
- In your spreadsheet, enter
ID,Name,Rent, andCityin the cells A1, B1, C1, and D1, respectively. - Copy the string of characters located between
/d/and/editin your spreadsheet URL. This string is the Spreadsheet ID, which we will use in the Google Sheets node.
Configure the Google Sheets node#
This Google Sheets node will add the data from the Set node in a new row to the Google Sheets that we will specify using the Spreadsheet ID.
- Select 'OAuth2' from the Authentication dropdown list.
- First of all, you'll have to enter credentials for the Google Sheets node. You can find out how to enter credentials for this node here.
- Select 'Append' from the Operation dropdown list.
- Paste the Spreadsheet ID you copied in the previous step, in the Spreadsheet ID field.
- In the Range field, enter the range of columns to append the data to your spreadsheet. Make sure that your range includes enough columns for all the data in the Set node. For this workflow, enter
A:Din the Range field. - Click on the Add Option button and select 'Value Input Mode' from the dropdown list.
- Select 'User Entered' from the Value Input Mode dropdown list. Refer to the FAQs for more information on why we used this option.
- Click on Execute Node to run the workflow.
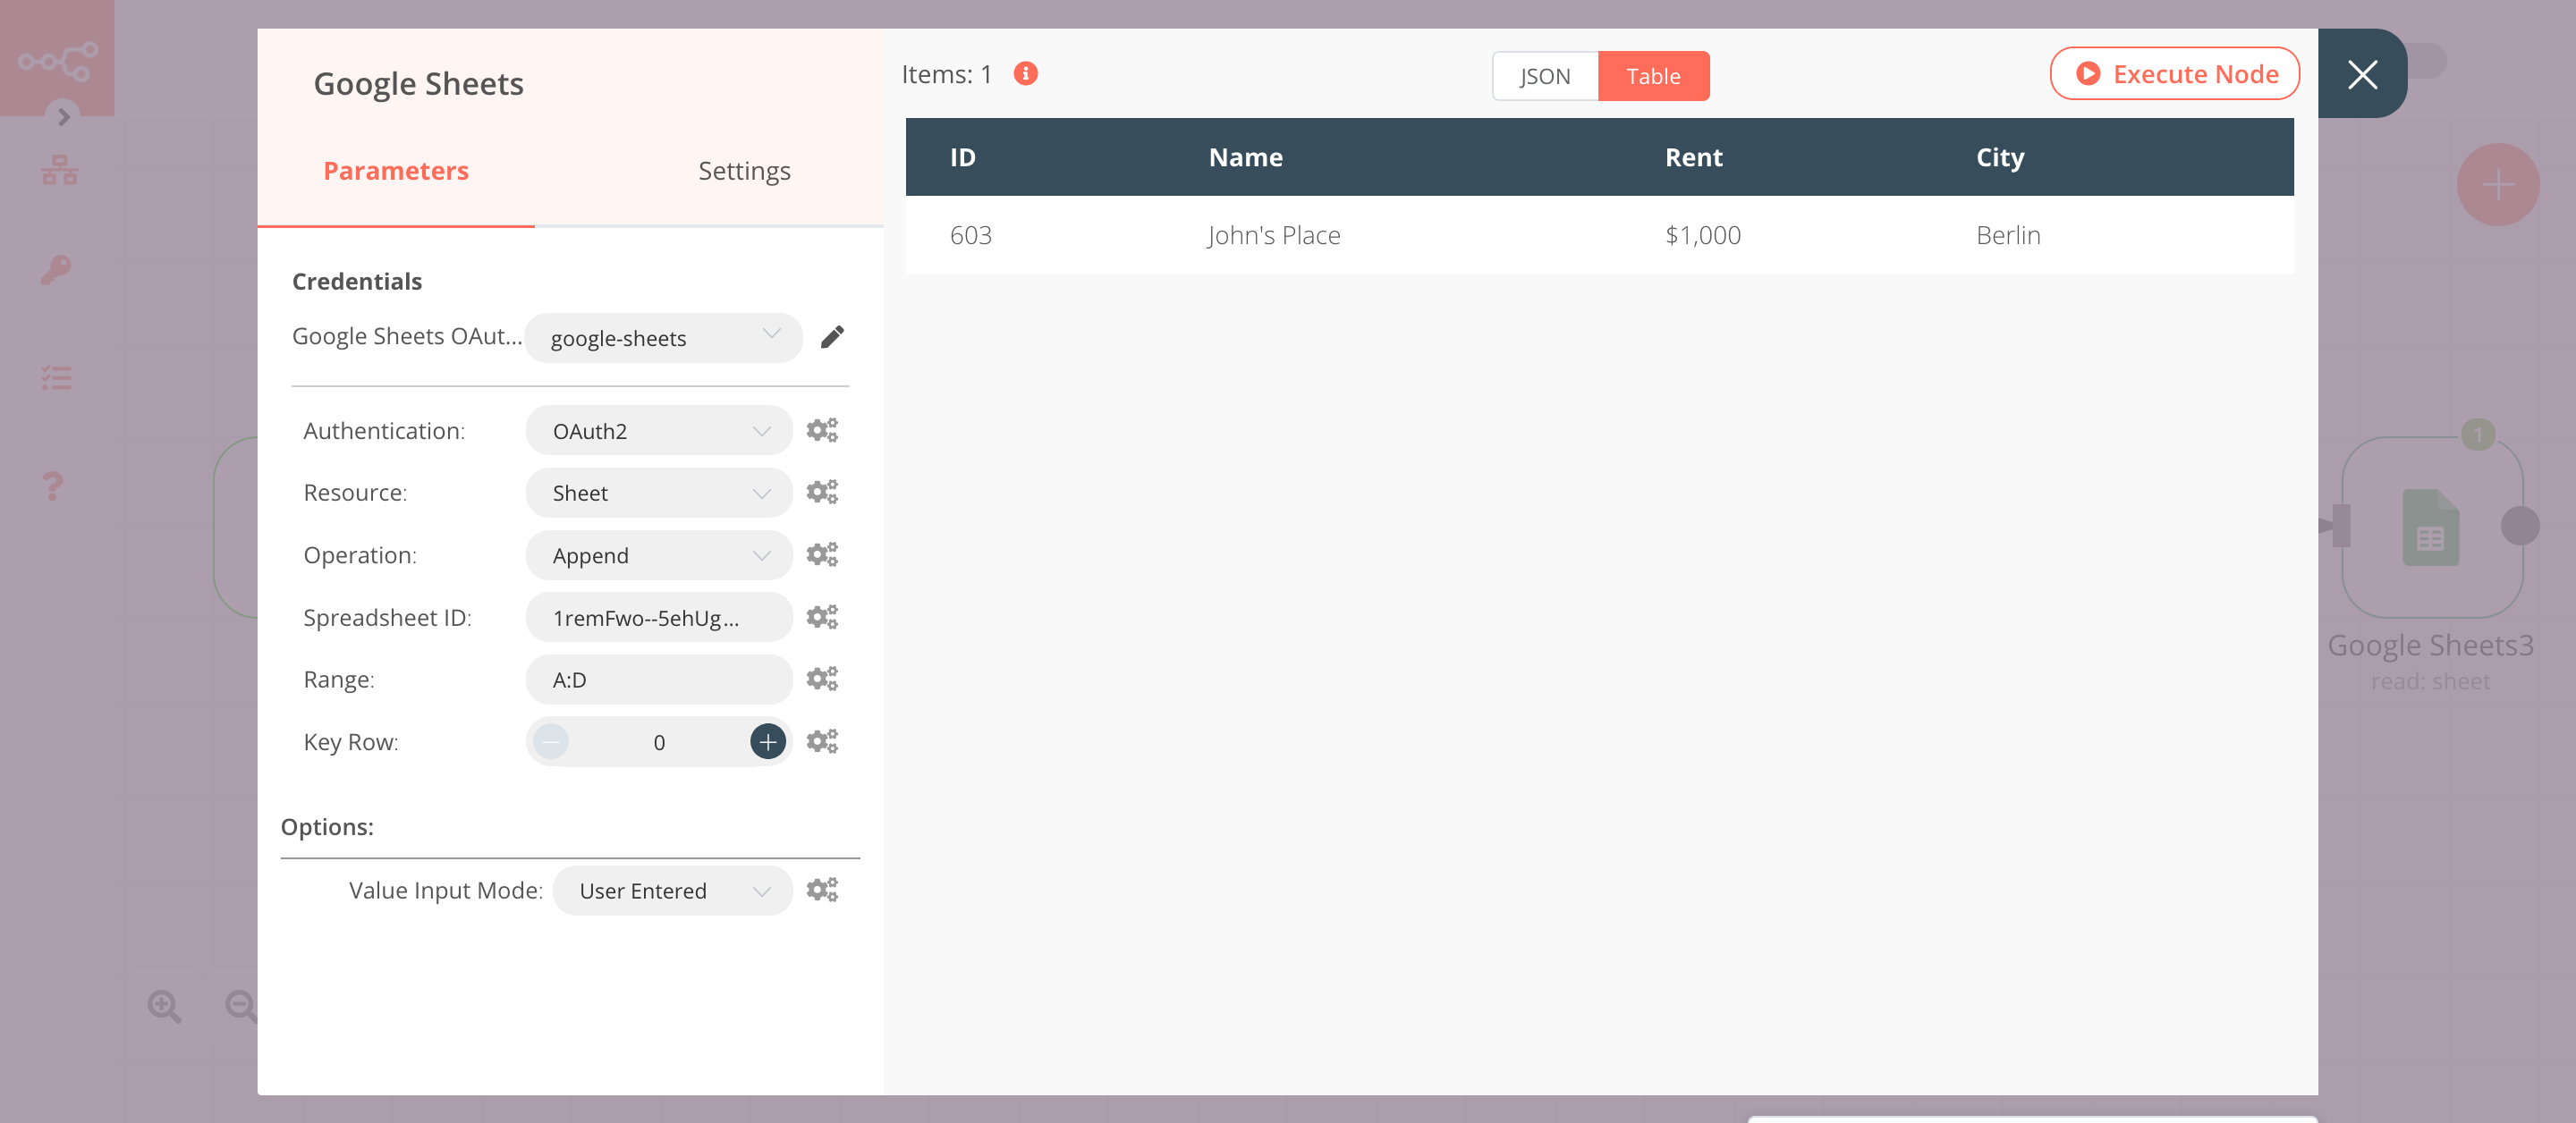
In the screenshot below, you will observe that the node adds the data from the Set node to the Google Sheets. You will also notice that the values get added in the format they are set.
4. Google Sheets1 node (Lookup)#
This node will return the entries from the Google Sheets that have Berlin as the City. Feel free to change the city name to something else but make sure you have at least one record with the city name you look for in your Google Sheets spreadsheet.
- Select 'OAuth2' from the Authentication dropdown list.
- Select the credentials that you entered in the previous Google Sheets node.
- Select 'Lookup' from the Operation dropdown list.
- In the Spreadsheet ID field, enter the same string used in the previous Google Sheets node.
- Enter
Cityin the Lookup Column field. - Enter
Berlinin the Lookup Value field. - Click on the Add Option button and select 'Return All Matches' from the dropdown list.
- Toggle Return All Matches to true. This option returns all the entries that contain
Berlinas the City. Refer to the FAQs for more information. - Click on the Add Option button and select 'Value Render Mode' from the dropdown list. This option determines how the values should render in the output. The 'Unformatted Value' option returns the data without formatting it. Refer to the FAQs for more information on why we used this option.
- Click on Execute Node to run the workflow.
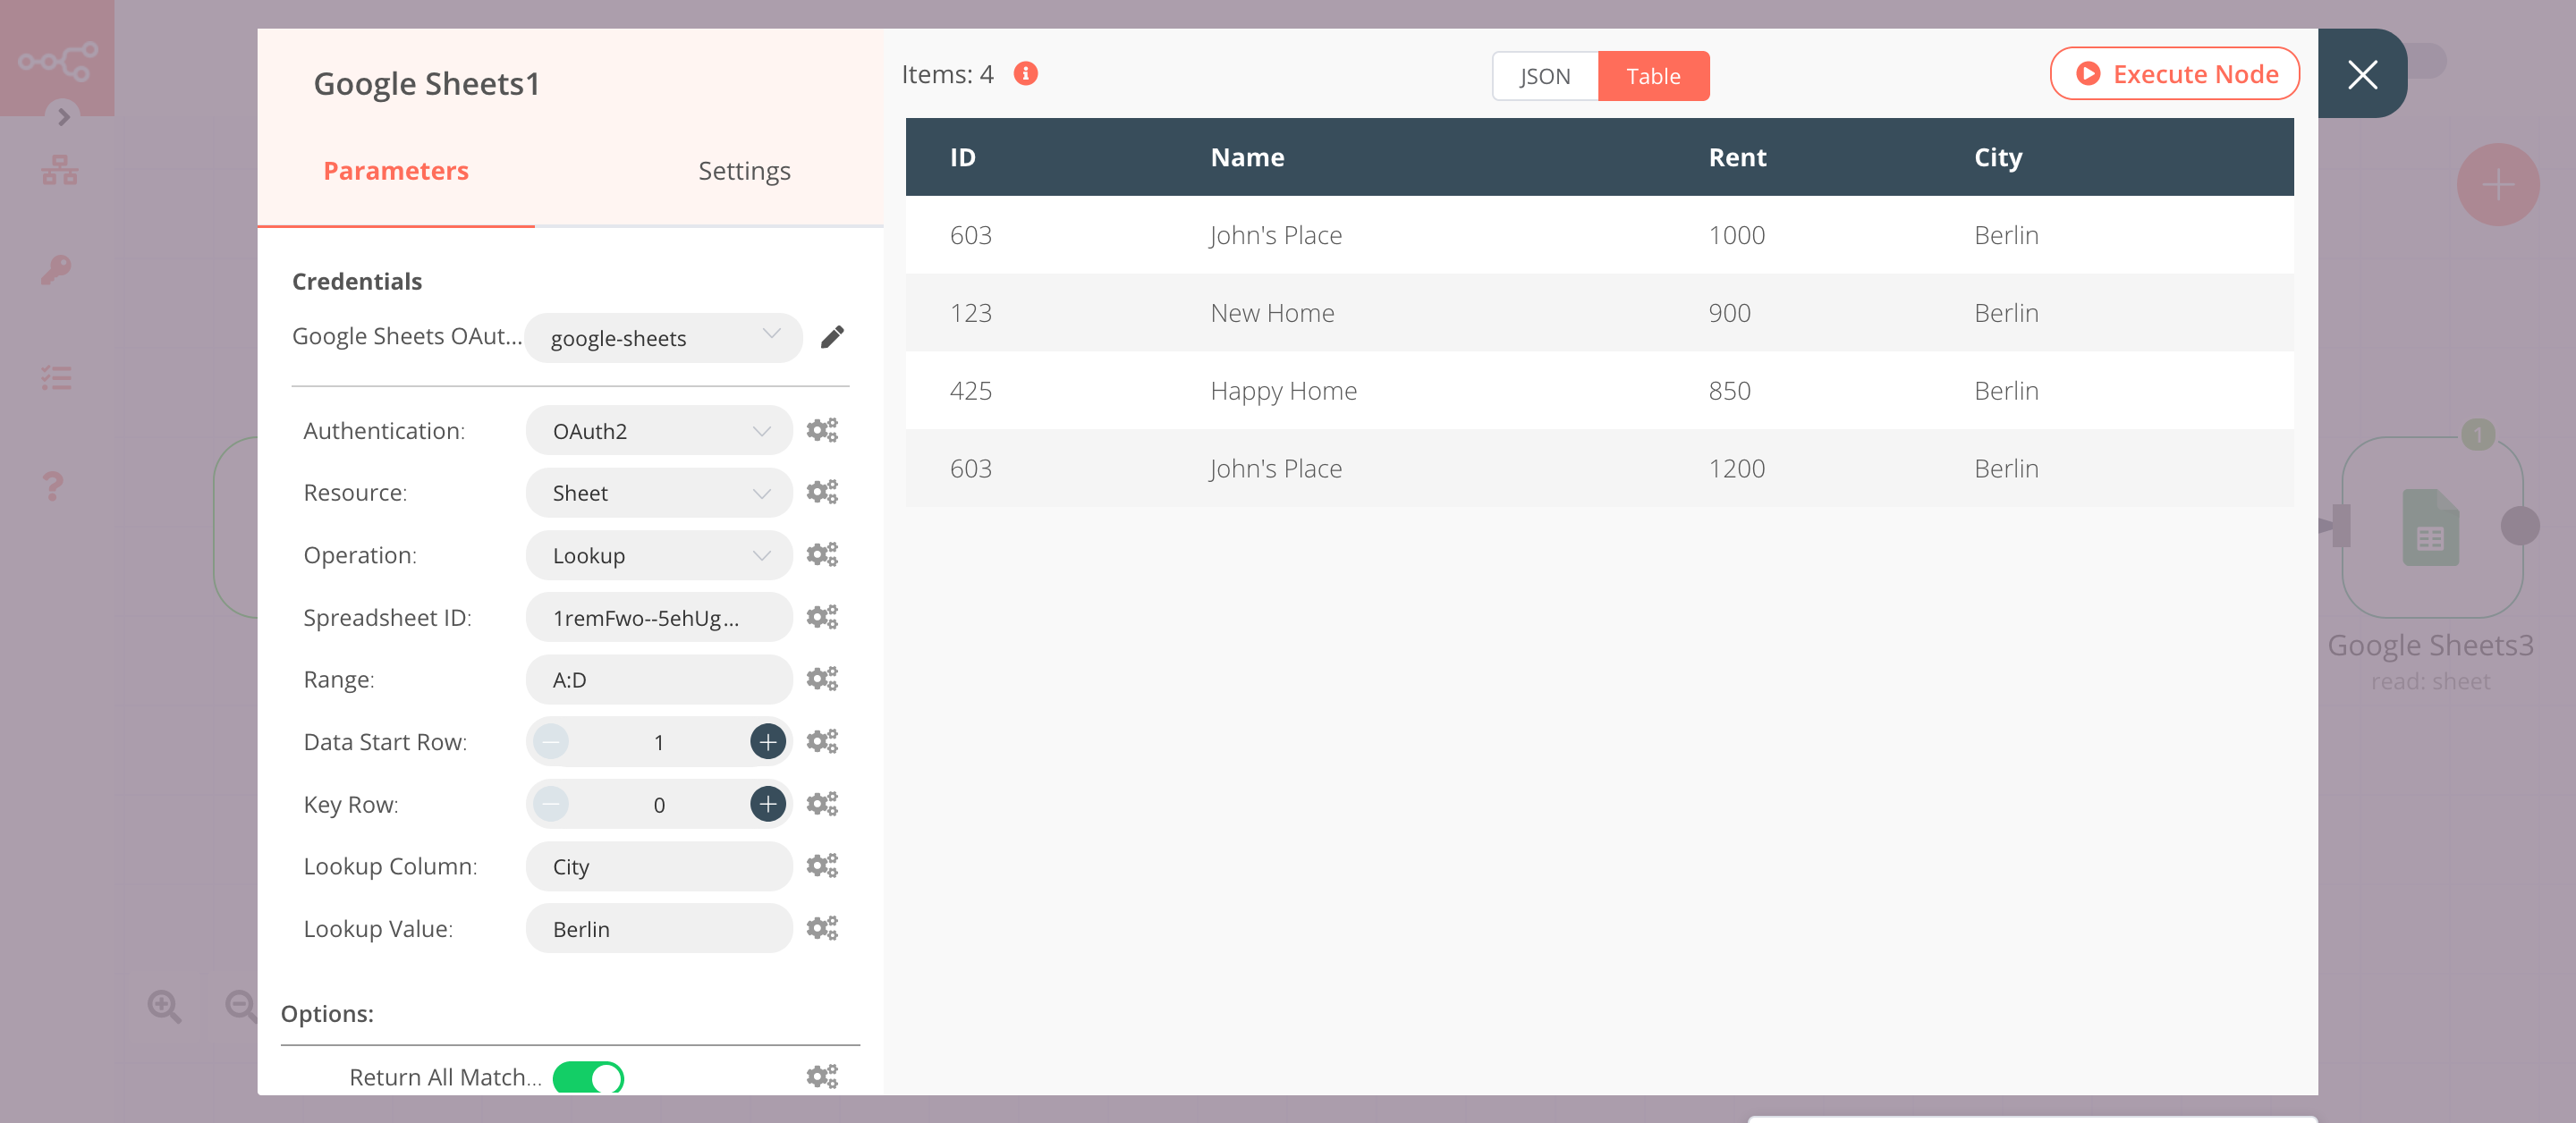
In the screenshot below, you will notice that the node returns all the entries that contain Berlin as the City. The output is unformatted and is passed on to the next nodes in the workflow.
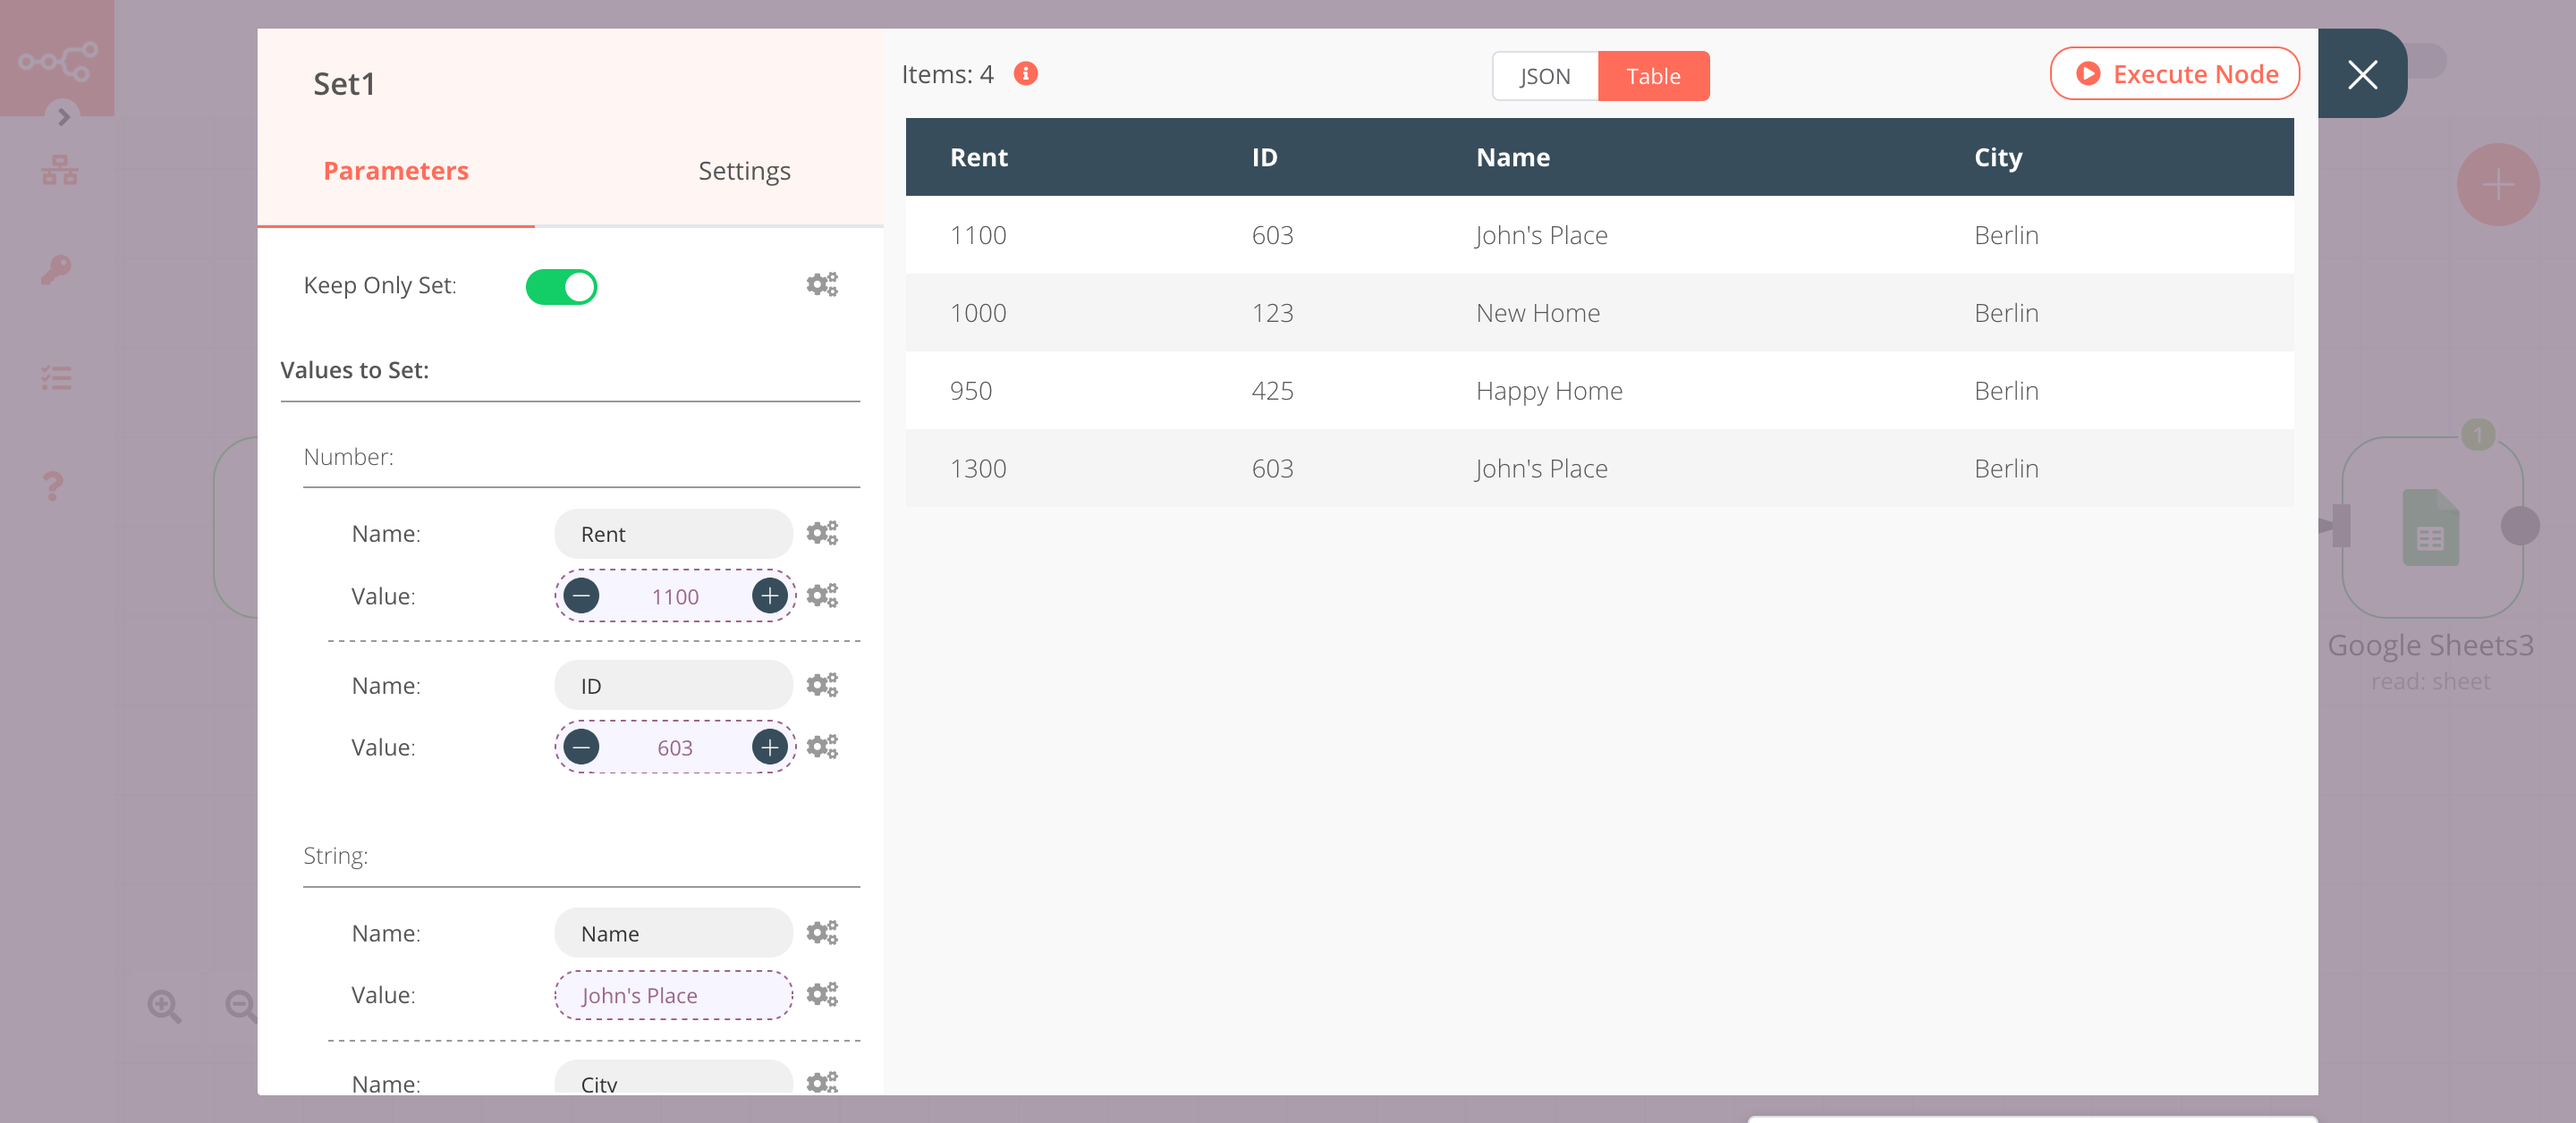
5. Set1 node#
We will use expressions to get the data from the previous node and increase the rent by $100 for the houses in Berlin.
- Click on the Add Value button and select 'String' from the dropdown list.
- Enter
Namein the Name field. - Click on the gears icon next to the Value field click on Add Expression.
- Select the following in the Variable Selector section: Nodes > Google Sheets1 > Output Data > JSON > Name. You can also add the following expression:
{{$node["Google Sheets1"].json["Name"]}}. - Click on the Add Value button and select 'String' from the dropdown list.
- Enter
Cityin the Name field. - Click on the gears icon next to the Value field click on Add Expression.
- Select the following in the Variable Selector section: Nodes > Google Sheets1 > Output Data > JSON > City. You can also add the following expression:
{{$node["Google Sheets1"].json["City"]}}. - Click on the Add Value button and select 'Number' from the dropdown list.
- Click on the gears icon next to the Value field click on Add Expression.
- Paste the following expression:
{{$node["Google Sheets1"].json["Rent"]+100}}. This expression will increase the rent by $100. - Click on the Add Value button and select 'Number' from the dropdown list.
- Enter
IDin the Name field. - Click on the gears icon next to the Value field click on Add Expression.
- Select the following in the Variable Selector section: Nodes > Google Sheets1 > Output Data > JSON > ID. You can also add the following expression:
{{$node["Google Sheets1"].json["ID"]}}. - Click on Execute Node to run the node.
In the screenshot below, you will notice that the node uses an expression to get the data from the previous node and increases the rent of the houses by $100. This new data will be passed to the next nodes in the workflow.
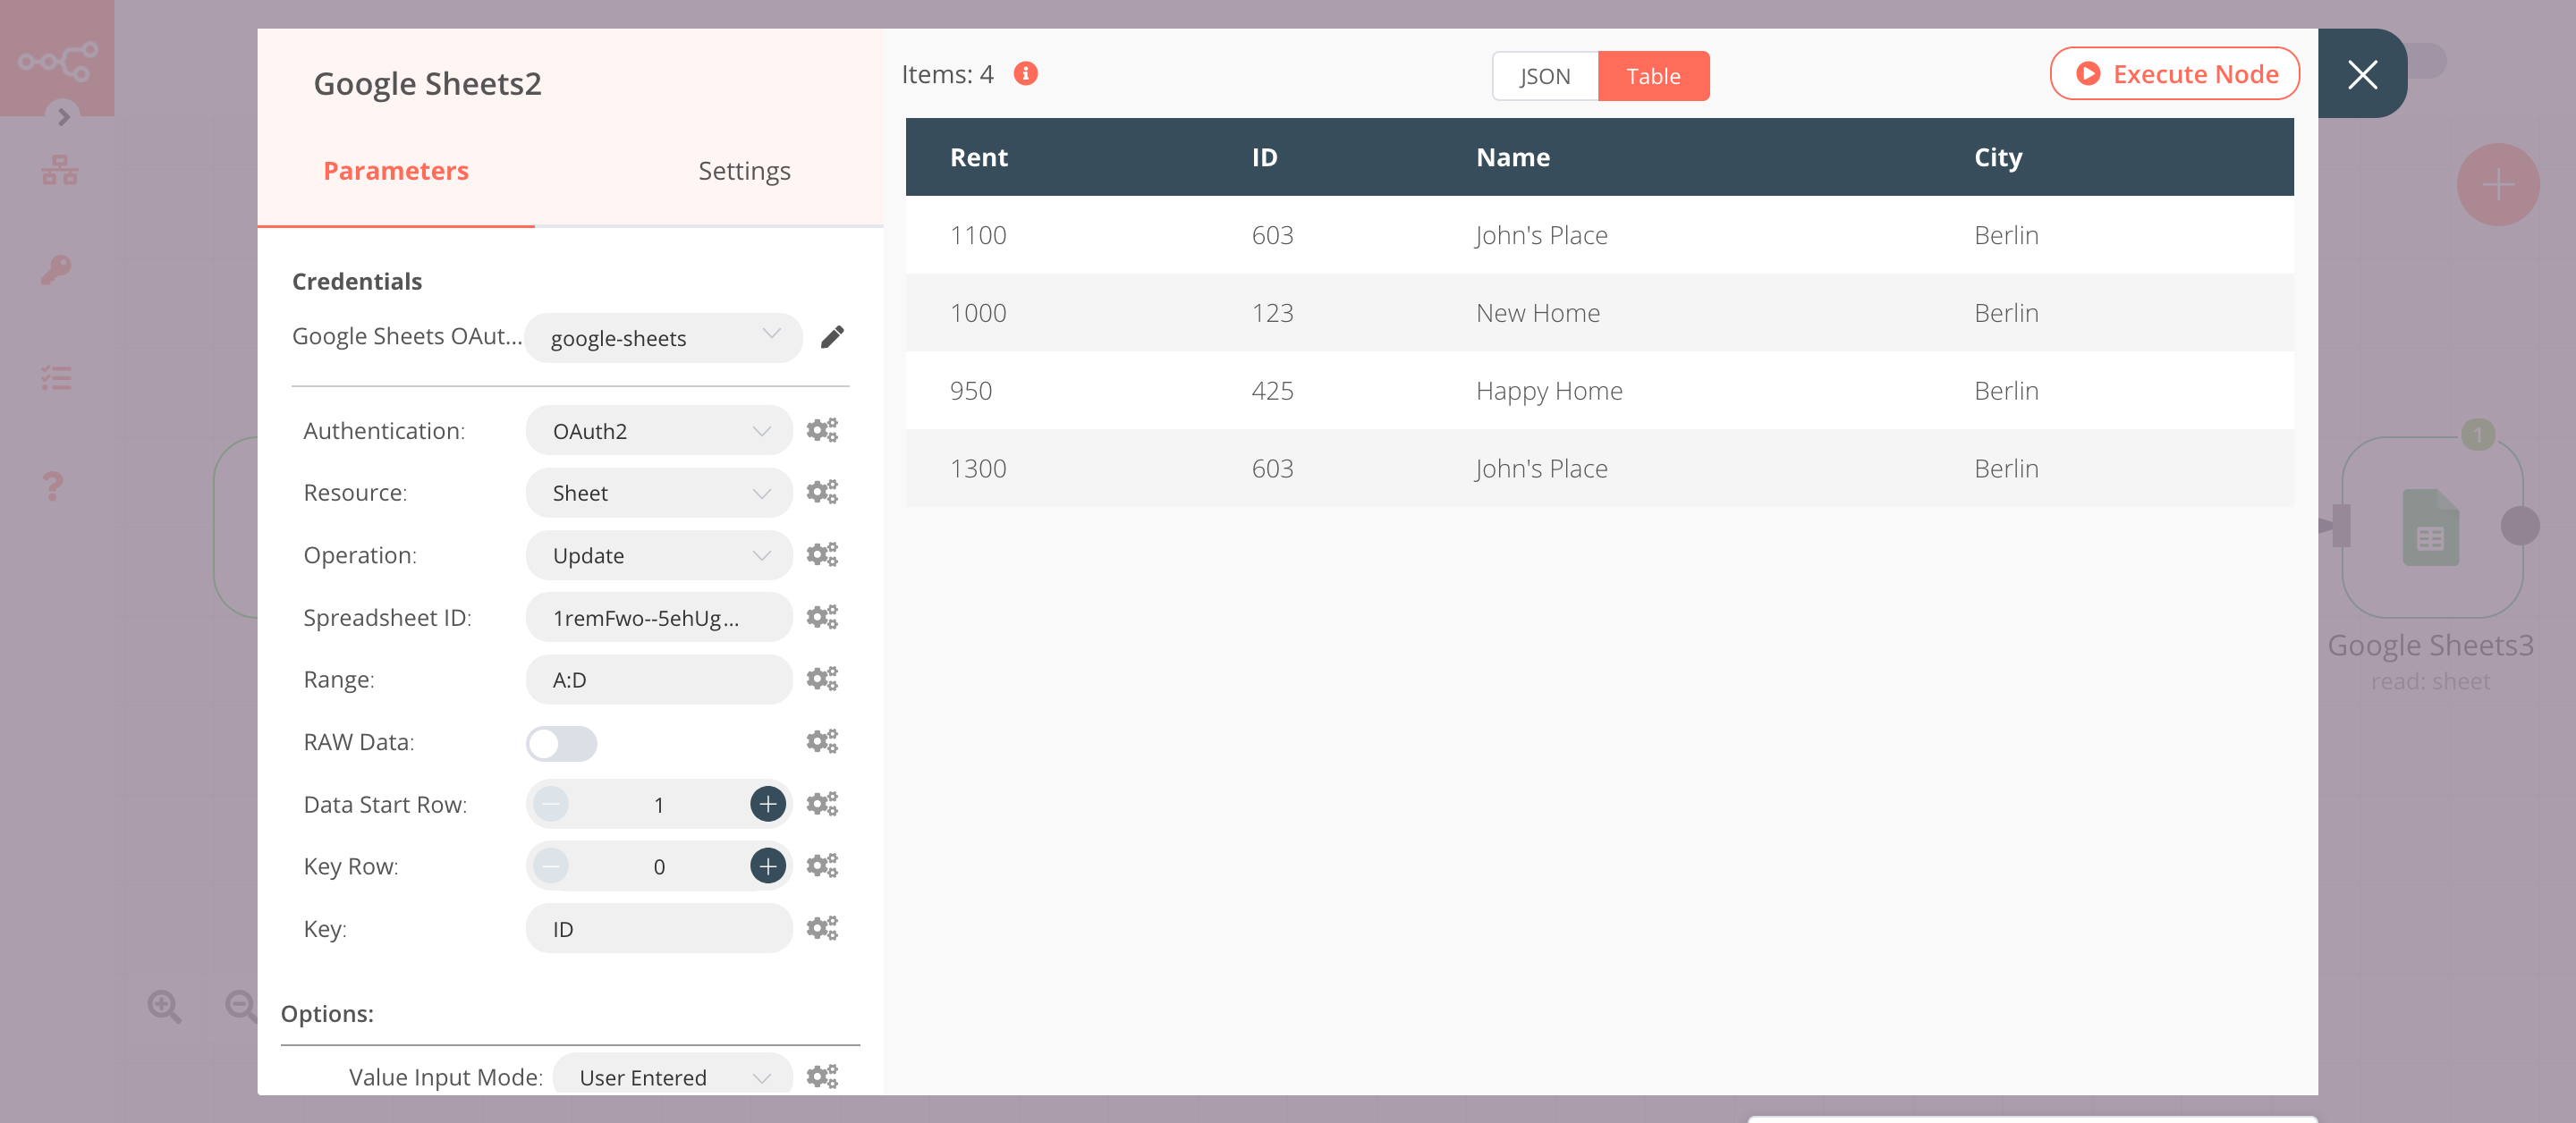
6. Google Sheets2 node (Update)#
This node will update the rent for the houses in Berlin with the new rent set in the previous node.
- Select 'OAuth2' in the Authentication field.
- Select the credentials that you entered in the previous Google Sheets node.
- Select 'Update' from the Operation dropdown list.
- In the Spreadsheet ID field, enter the same string used in the previous Google Sheets node.
- In the Range field, enter the same range used in the previous Google Sheets node.
- Enter
IDin the Key field. - Click on the Add Option button and select 'Value Input Mode' from the dropdown list.
- Select 'User Entered' from the Value Input Mode dropdown list. Refer to the FAQs for more information on why we used this option.
- Click on Execute Node to run the workflow.
In the screenshot below, you will notice that this node updates the rent values of the houses in Berlin based on the ID in the Google Sheets. You will also see that the updated values are in the correct format.
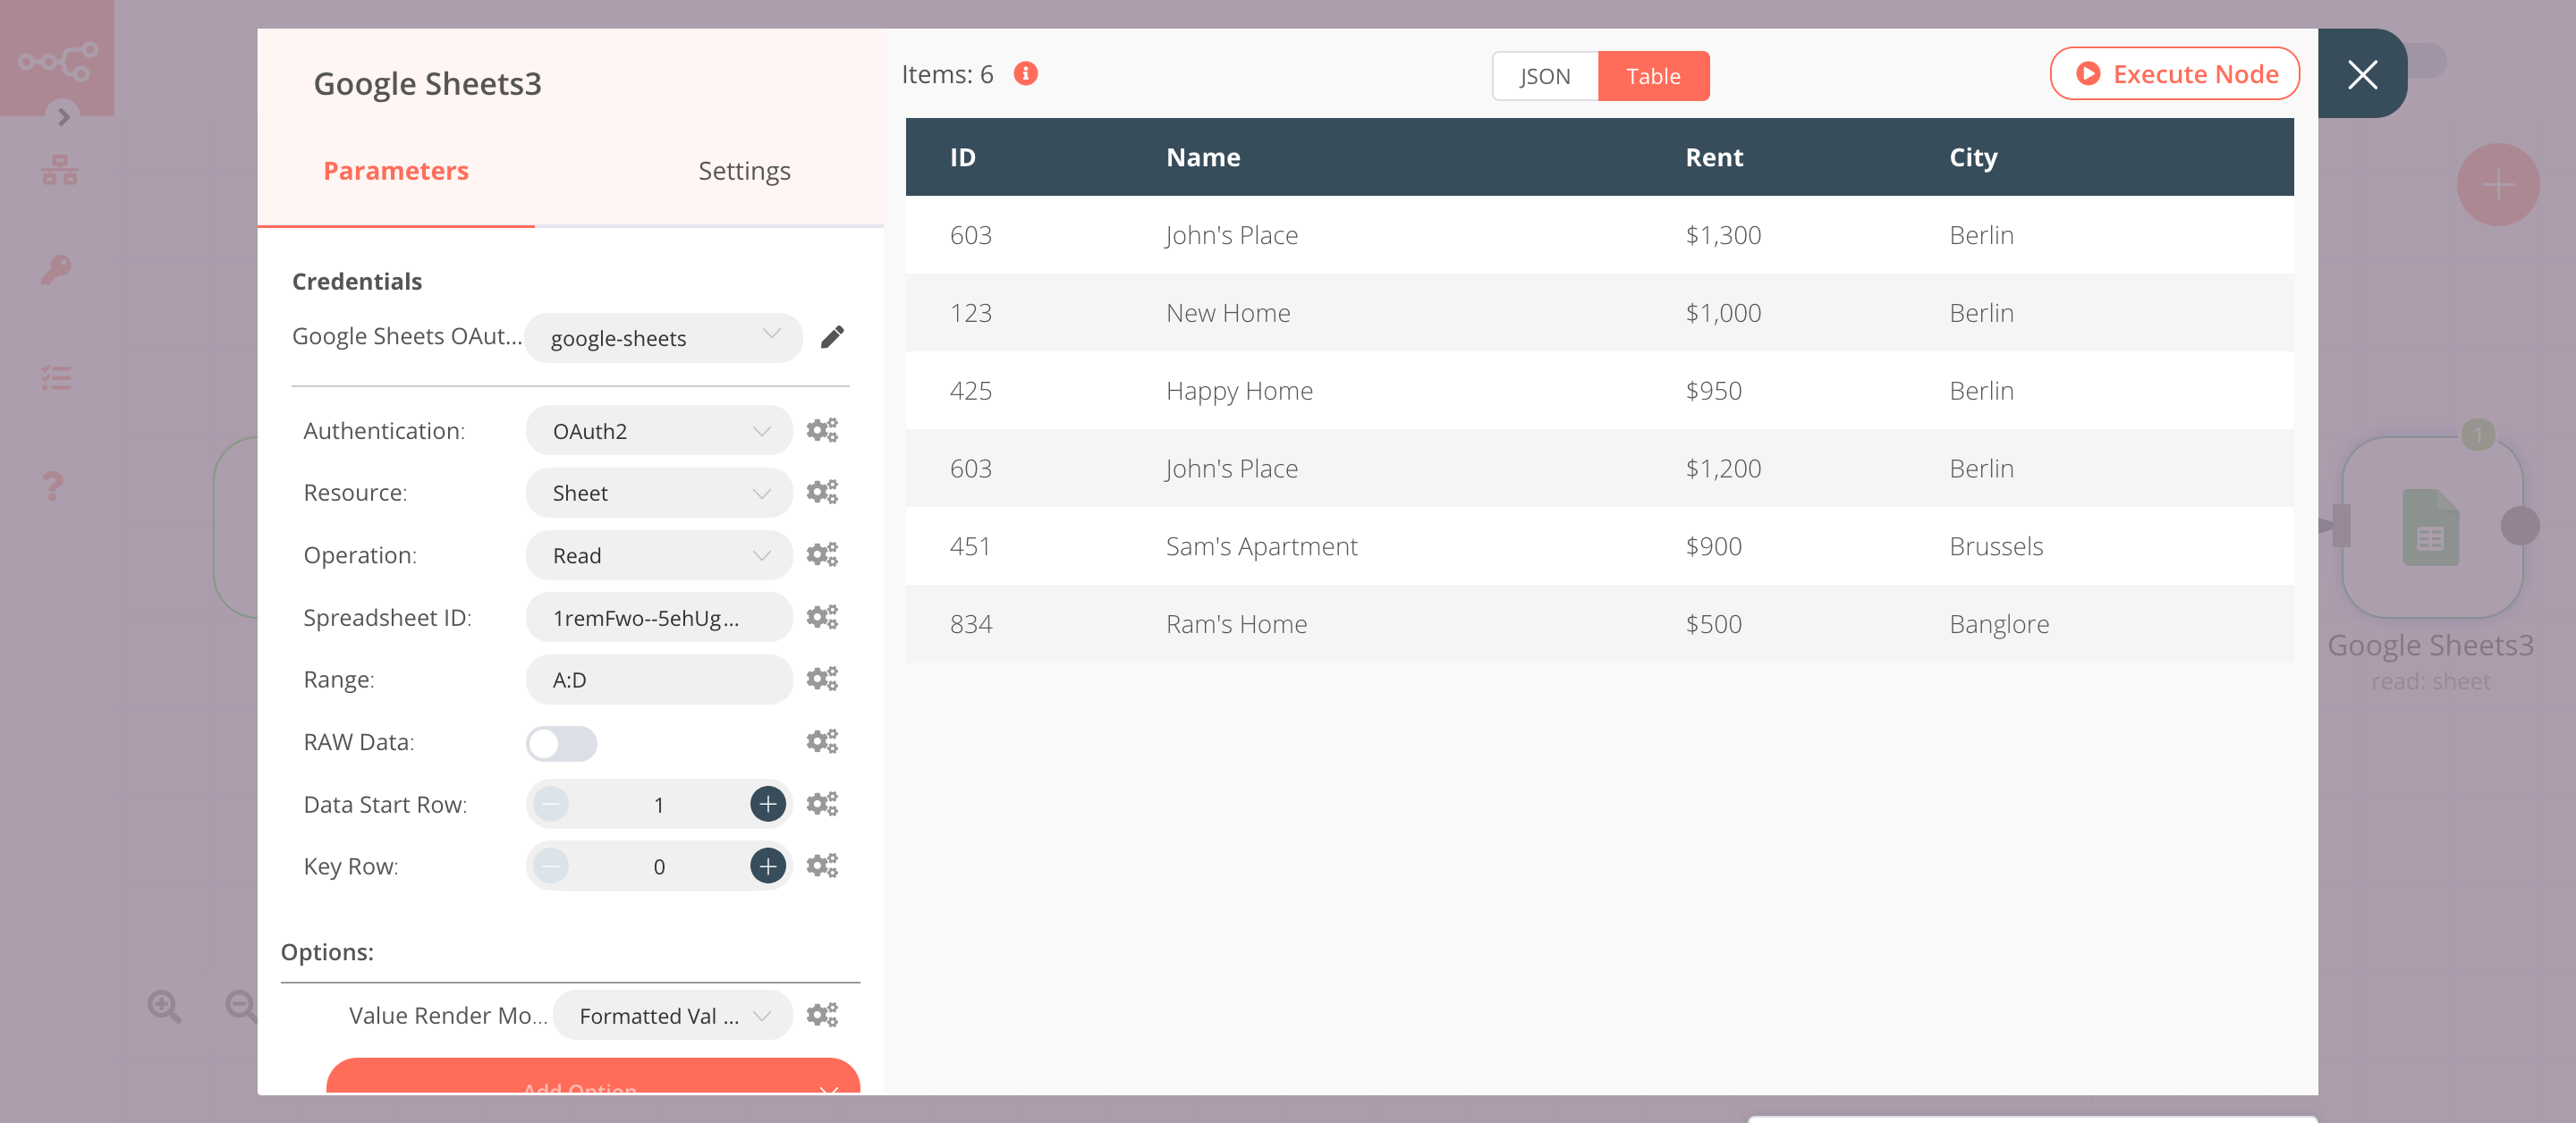
7. Google Sheets3 node (Read)#
This node will read the data from Google Sheets.
- Select 'OAuth2' in the Authentication field.
- Select the credentials that you entered in the previous Google Sheets node.
- Select 'Read' from the Operation dropdown list.
- In the Spreadsheet ID field, enter the same string used in the previous Google Sheets node.
- In the Range field, enter the same range used in the previous Google Sheets node.
- Click on the Add Option button and select 'Value Render Mode' from the dropdown list.
- Select 'Formatted Value' from the Value Render Mode dropdown list. Refer to the FAQs for more information on why we used this option.
- Click on Execute Node to run the workflow.
In the screenshot below, you will notice that this node returns all the values from the Google Sheets in the appropriate format.
FAQs#
What are the various formats to read the data from the Google Sheets?#
There are three different formats to read the data from the Google Sheets.
- Unformatted Value: In this mode, the node calculates the values, but doesn't format them. For example, if cell A1 is 1.23, and cell A2 is =A1, and the format of these cells is currency, then values returned will be of the format number. For cell A1 and A2, the values returned will be 1.23.
- Formula: In this mode, the node will return the formula. The node does not calculate the values. For example, if cell A1 is 1.23, and cell A2 is =A1, and the format of these cells is currency, then the value returned will be of the format number. The value returned for cell A2 will be =A1.
- Formatted Value: In this mode, the node calculates the values and returns the values with the cells' format. For example, if cell A1 is 1.23, and cell A2 is =A1, and the format of these cells is currency, then the values returned will be $1.23.
To change the format, click on Add Option and select 'Value Render Mode' from the dropdown list. Select the appropriate option you want your output to be returned to from the Value Render Mode dropdown list.
How to enter values in the correct format?#
There are two different formats you can use to add/update data in Google Sheets.
- Raw: This is the default format. In this format, the values are stored as-is and not parsed. For example, the node stores the text 2020-10-01 as a string in the Google Sheets.
- User Entered: In this format, the node parse the values. It follows the rules that are applied when entering text into the cell via the Google Sheet UI. For example, the node stores the text 2020-10-01 as a date in the Google Sheets.
To change the format, click on Add Option and select 'Value Input Mode' from the dropdown list. Select the appropriate option you want your data to be stored in, from the Value Input Mode dropdown list.
How to append an array in the Google Sheets?#
To insert the data in Google Sheets, you have to first convert the data in a valid JSON (key, value) format. You can use the Function node to convert the array into JSON format.
How to return all the values with the Lookup operation?#
By default, the Lookup operation returns only the first value that it matches. To return all the values that match, click on Add Option and select 'Return All Matches'. Toggle Return All Matches to true.
How to specify a sheet?#
By default, the Google Sheets node will operate on the default sheet, Sheet 1. If you rename the sheet or want to use a different sheet, you have to specify the name of the sheet. You can do that in the Range field. For example, if you need to use a sheet named n8n for the range A to H, enter n8n!A:H in the Range field.