Sendy#
Sendy is a self-hosted email newsletter application that lets you send trackable emails via AWS SES.
Credentials
You can find authentication information for this node here.
Basic Operations#
- Campaign
- Create a campaign
- Subscriber
- Add a subscriber to a list
- Count subscribers
- Delete a subscriber from a list
- Unsubscribe user from a list
- Get the status of subscriber
Example Usage#
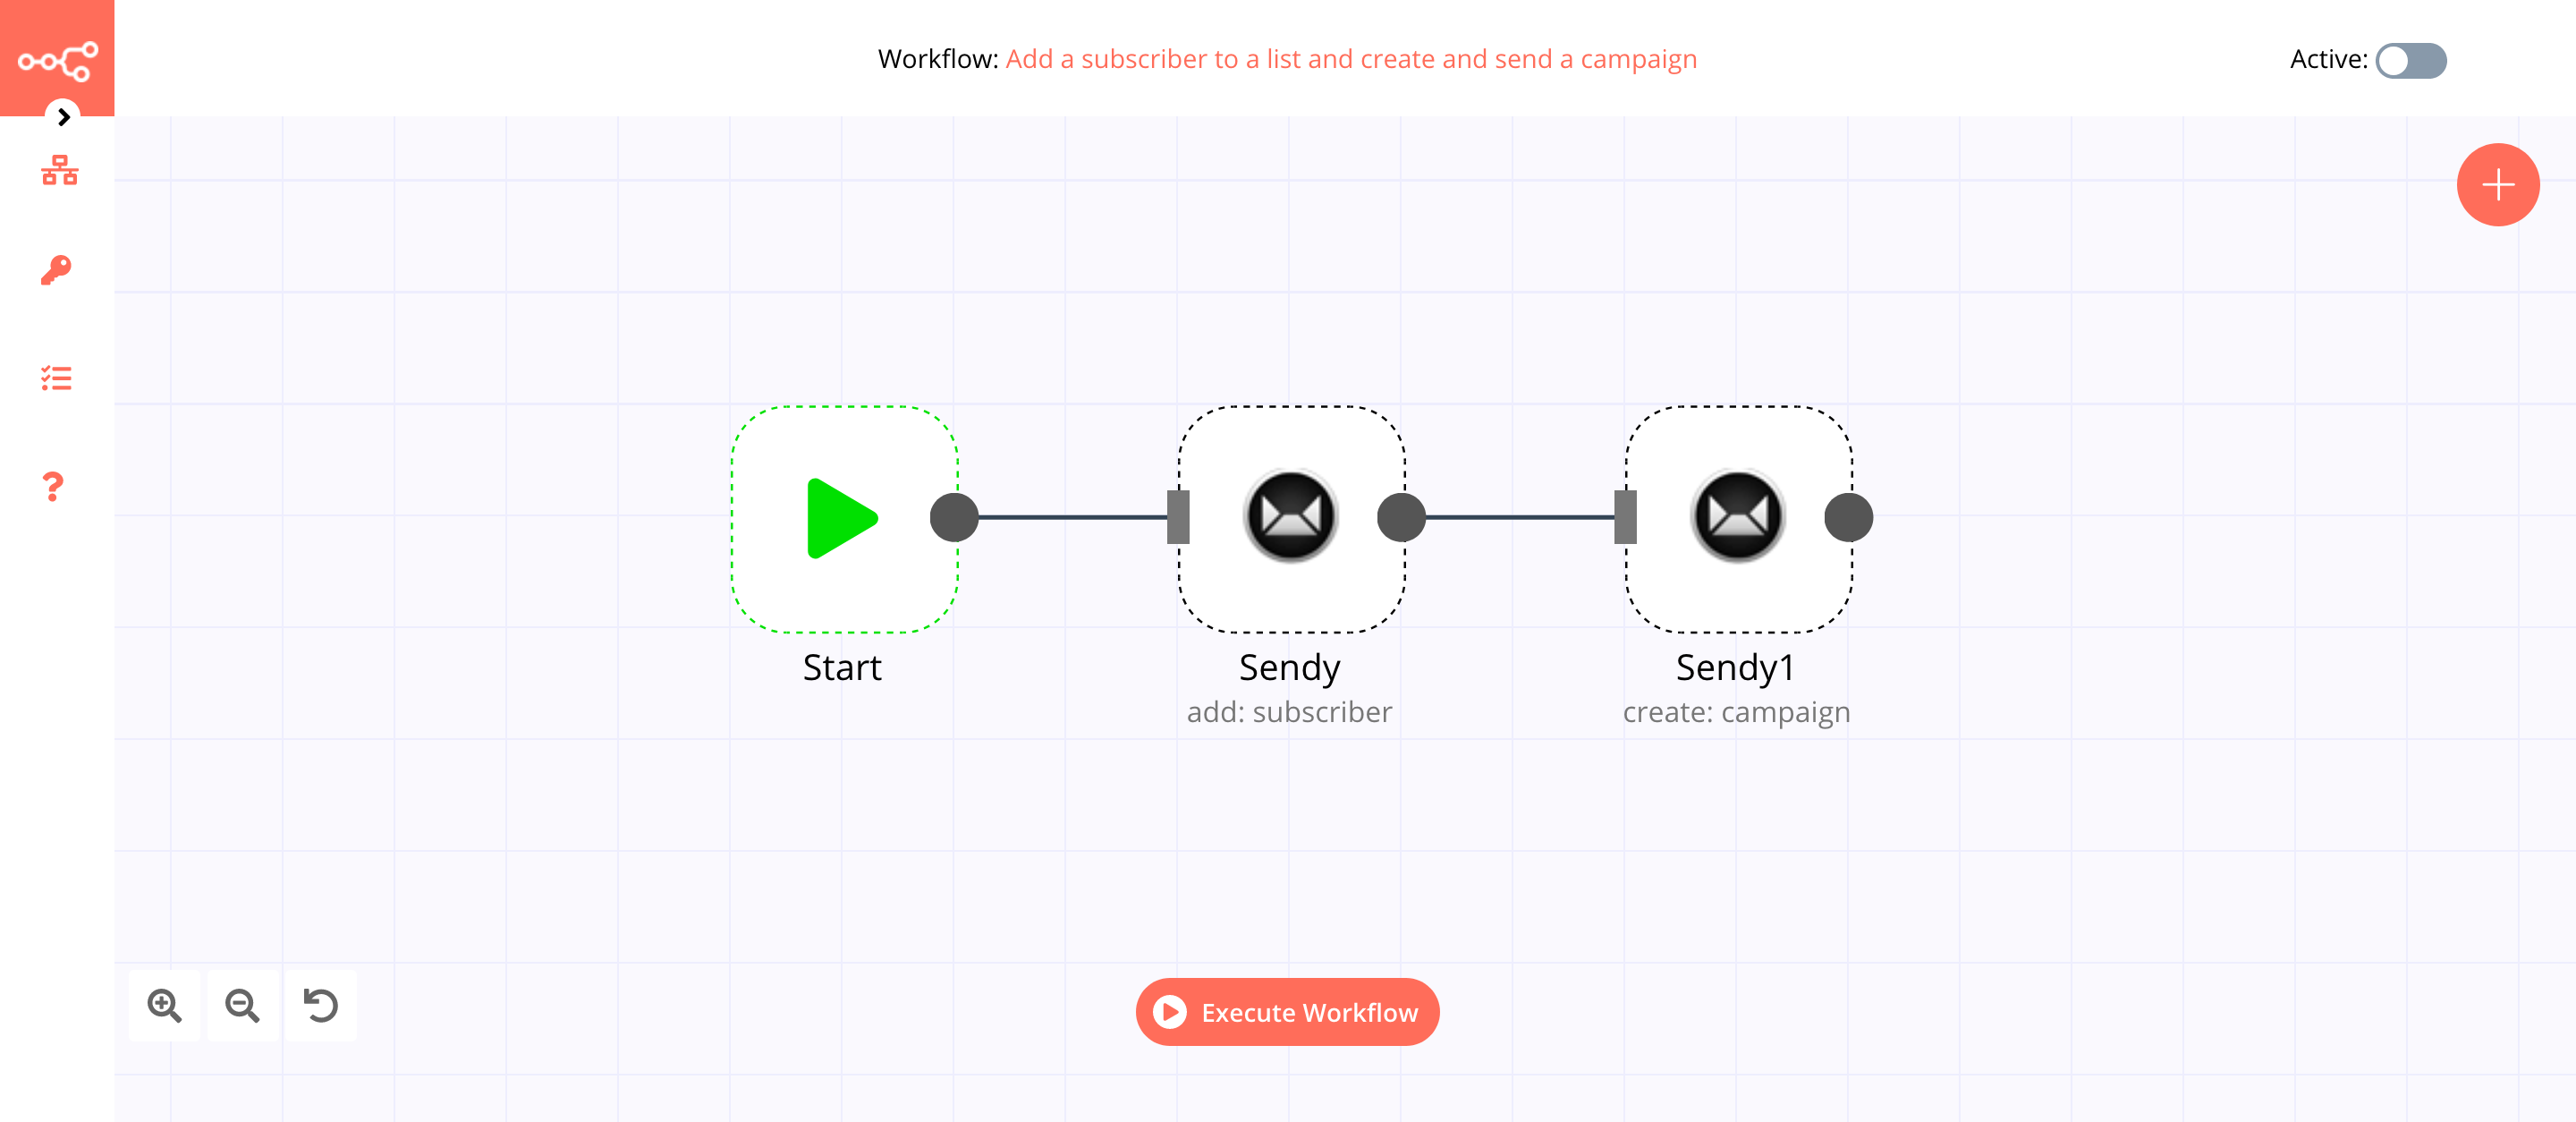
This workflow allows you to add a subscriber to a list and create and send a campaign using the Sendy node. You can also find the workflow on n8n.io. This example usage workflow uses the following nodes. - Start - Sendy
The final workflow should look like the following image.
1. Start node#
The Start node exists by default when you create a new workflow.
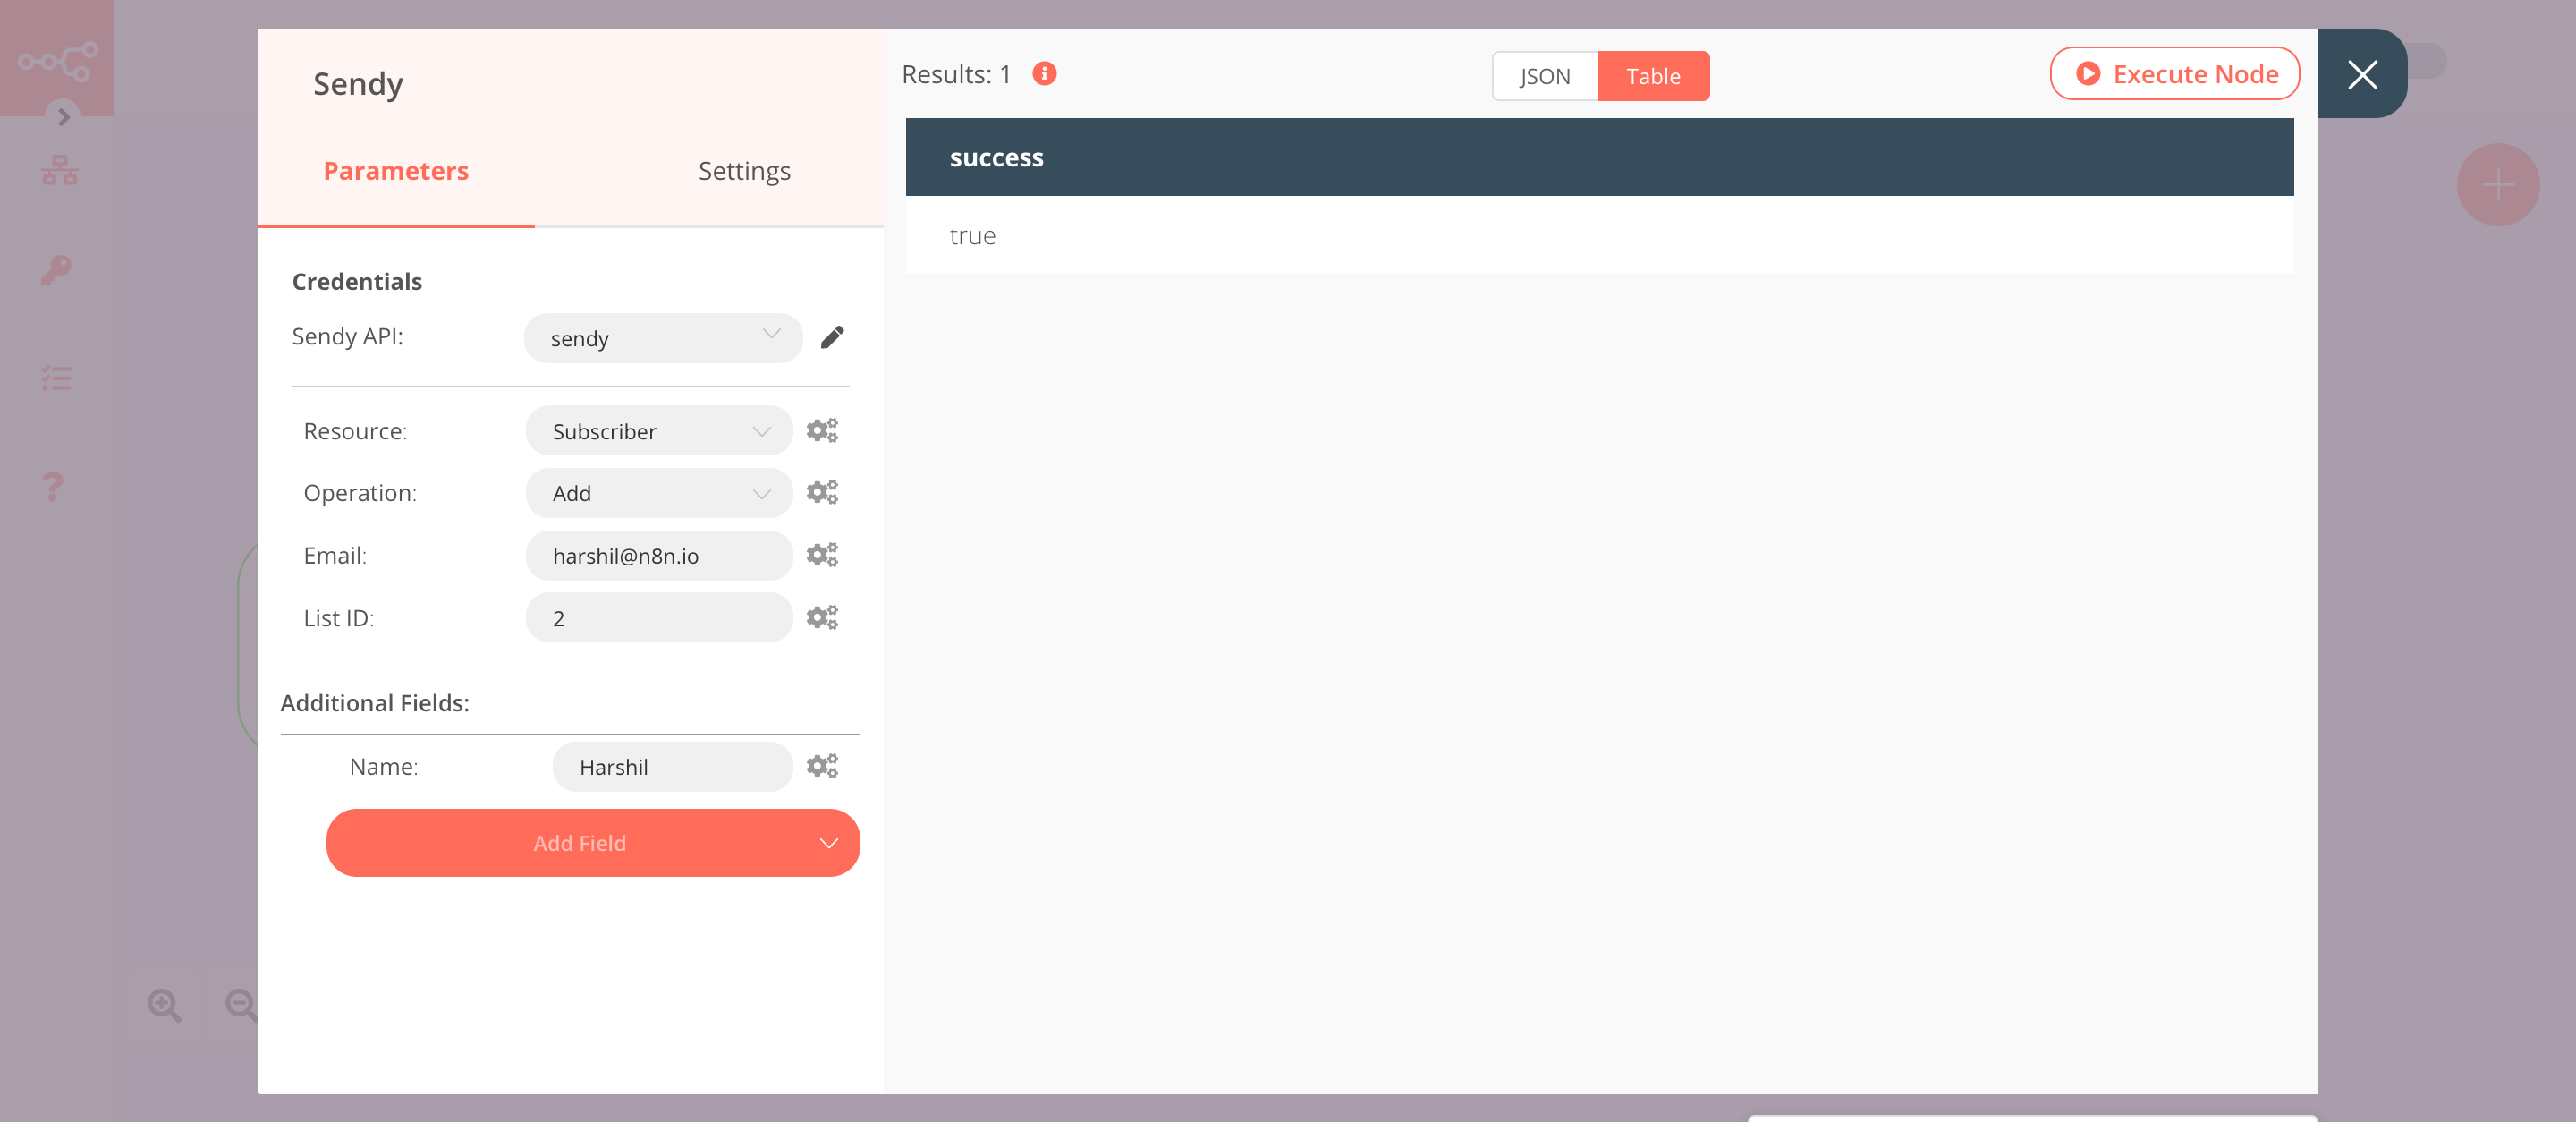
2. Sendy node (add: subscriber)#
This node will add a subscriber to a list in Sendy. If you don't already have a list in Sendy, make sure to create one.
- First of all, you'll have to enter credentials for the Sendy node. You can find out how to do that here.
- Enter the subscriber's email address in the Email field.
- In your Sendy dashboard, click on 'View all lists' and copy the ID of the list to which you want to add the subscriber. Paste this list ID in the List ID field in n8n.
- Click on the Add Field button and select 'Name'.
- Enter the name of the subscriber in the Name field.
- Click on Execute Node to run the node.
In the screenshot below, you will notice that the node adds a subscriber with their name to the list that we specify.
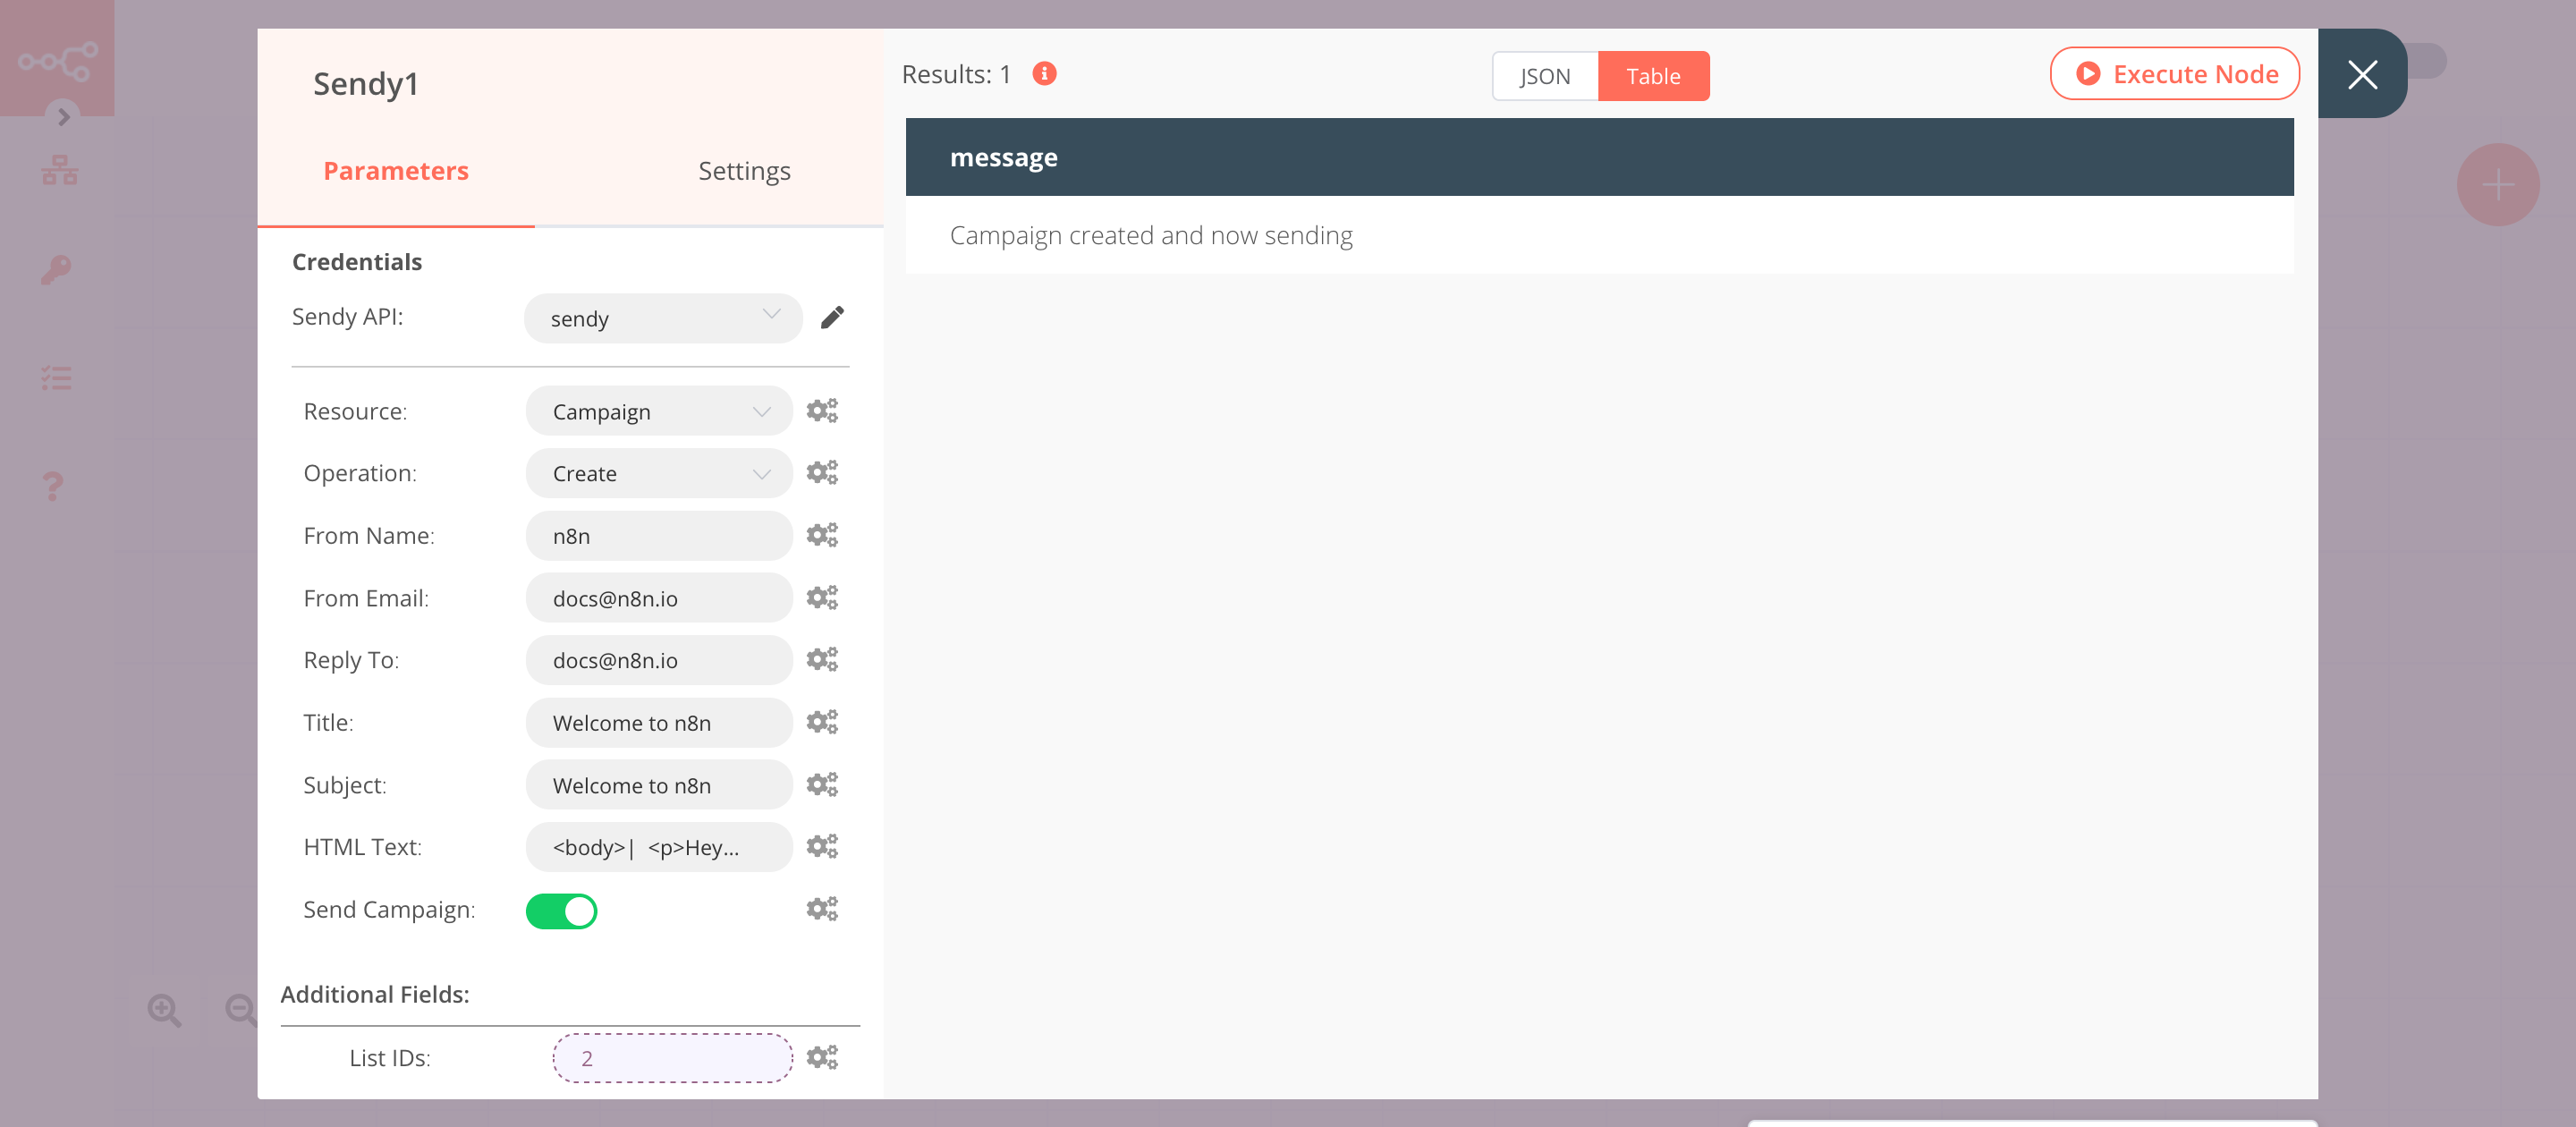
3. Sendy1 node (create: campaign)#
This node will create a campaign with the title 'Welcome to n8n' and send it to the subscribers of the list that we specify.
- Select the credentials that you entered in the previous node.
- Select 'Campaign' from the Resource dropdown list.
- Enter the name of the sender in the From Name field.
- Enter the email address of the sender in the From Email field.
- Enter the email address where the subscribers can reply to in the Reply To field.
- Enter the title of the campaign in the Title field.
- Enter the subject of the email in the Subject field.
- Enter the HTML snippet of the email campaign in the HTML Text field.
- Toggle Send Campaign to true.
- Click on the Add Field button and select 'List IDs'.
- Click on the gears icon next to the List IDs field and click on Add Expression.
- Select the following in the Variable Selector section: Nodes > Sendy > Parameters > listId. You can also add the following expression:
{{$node["Sendy"].parameter["listId"]}}. - Click on Execute Node to run the node.
In the screenshot below, you will notice that the node creates the campaign with the title Welcome to n8n and sends it to the list that we specify.