Git#
Git is a free and open-source distributed version control system designed to handle everything from small to large projects with speed and efficiency.
Credentials
You can find authentication information for this node here.
Basic Operations#
- Add a file or folder to commit
- Add configuration property
- Clone a repository
- Commit files or folders to git
- Fetch from remote repository
- Return current configuration
- Return git commit history
- Pull from remote repository
- Push to remote repository
- Push Tags to remote repository
- Return status of current repository
- Create a new tag
- Set the user
Example Usage#
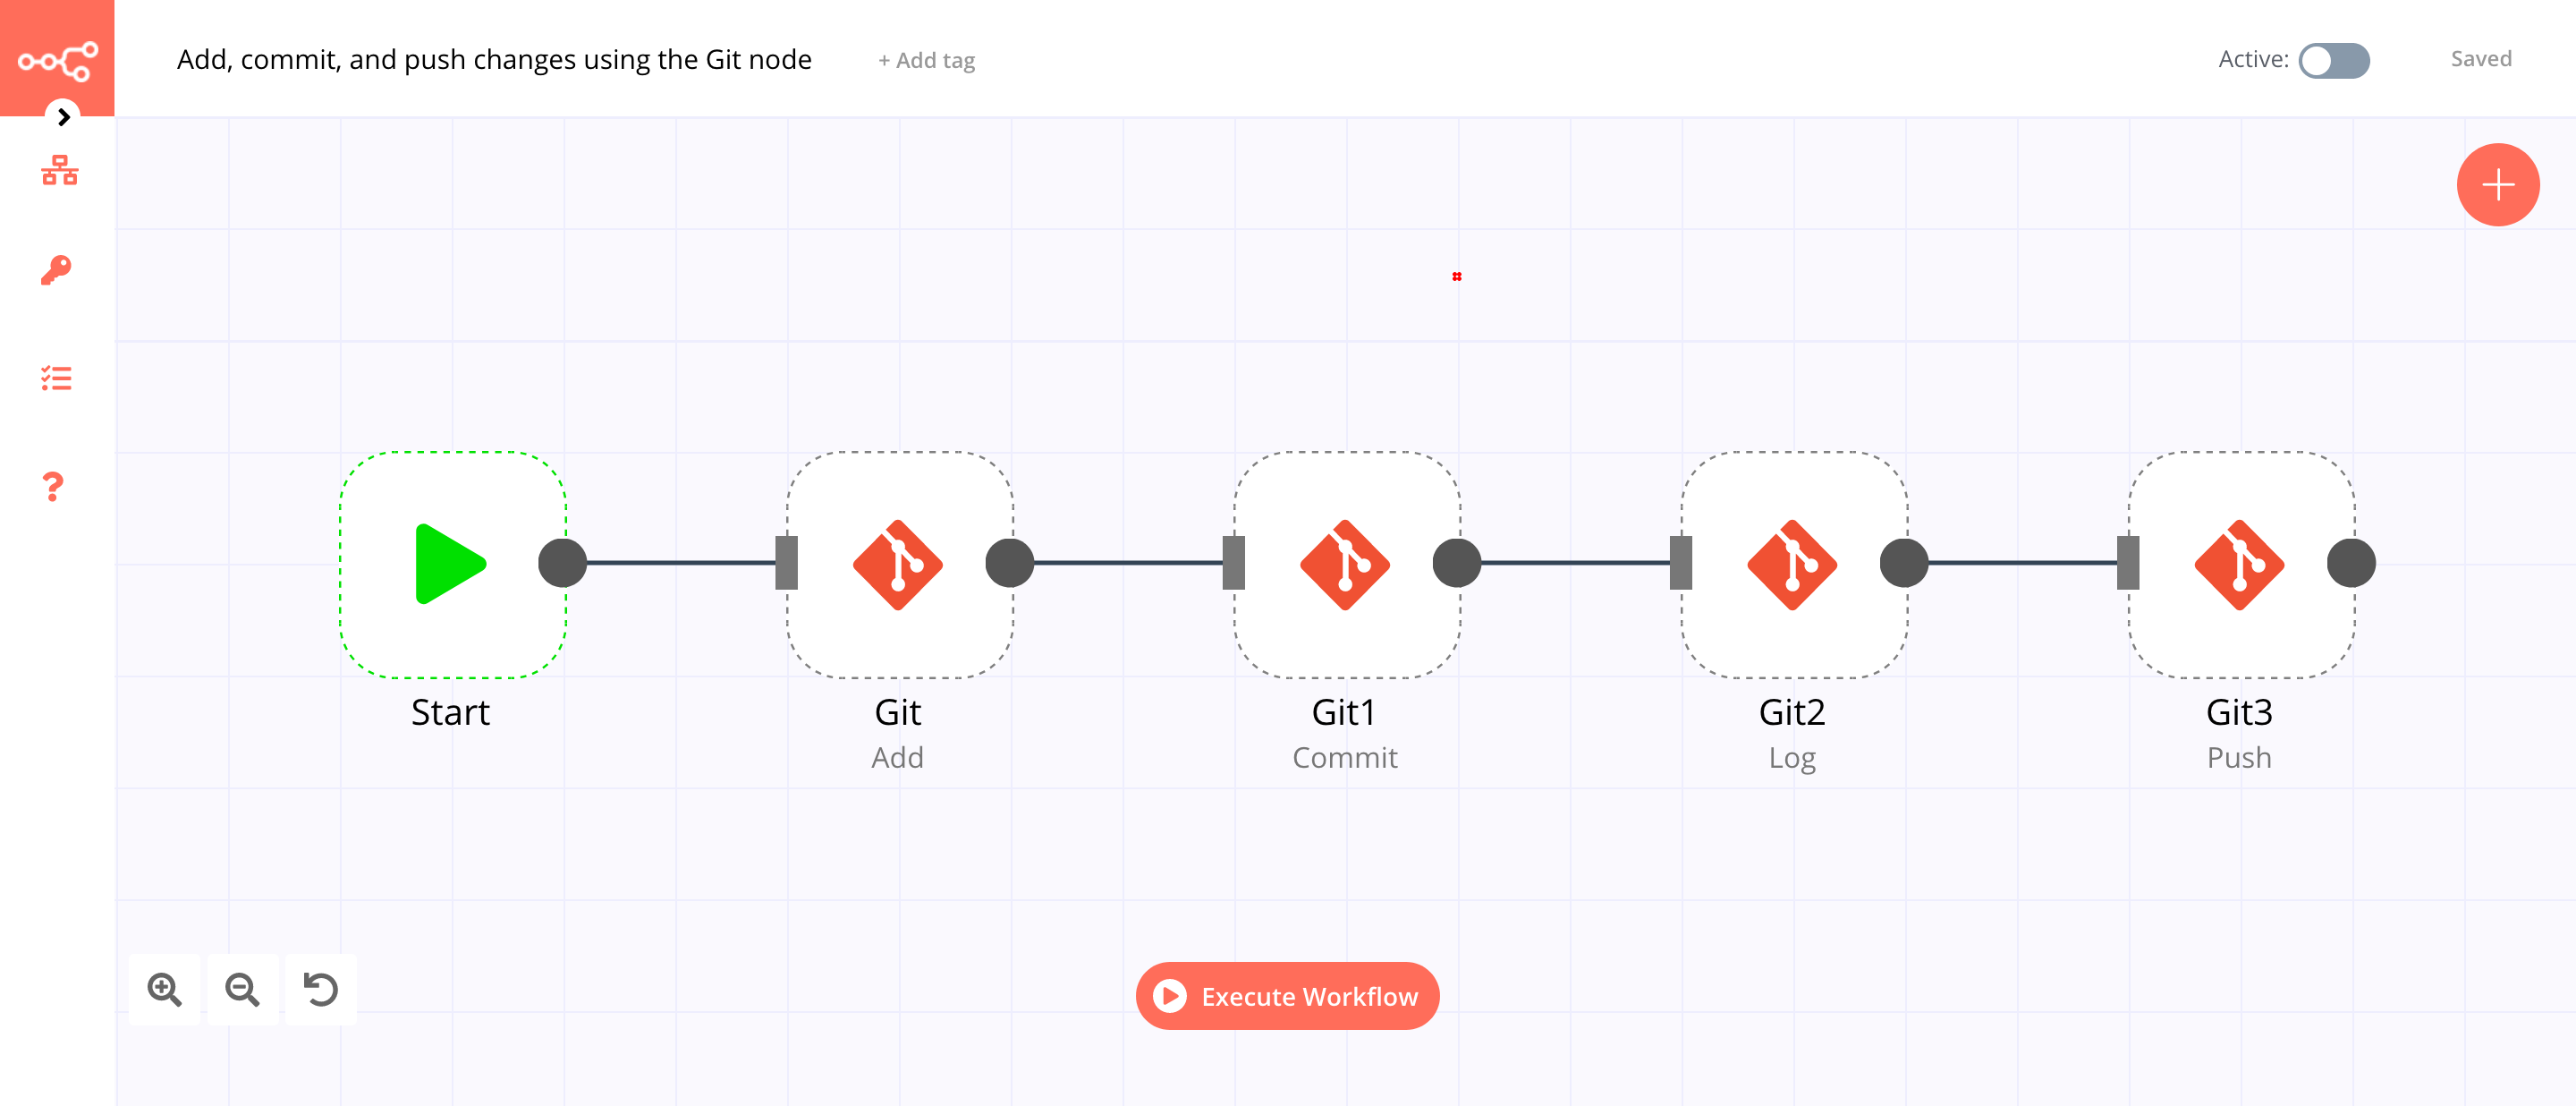
This workflow allows you to add, commit, and push changes to a git repository. You can also find the workflow on n8n.io. This example usage workflow would use the following nodes. - Start - Git
The final workflow should look like the following image.
1. Start node#
The start node exists by default when you create a new workflow.
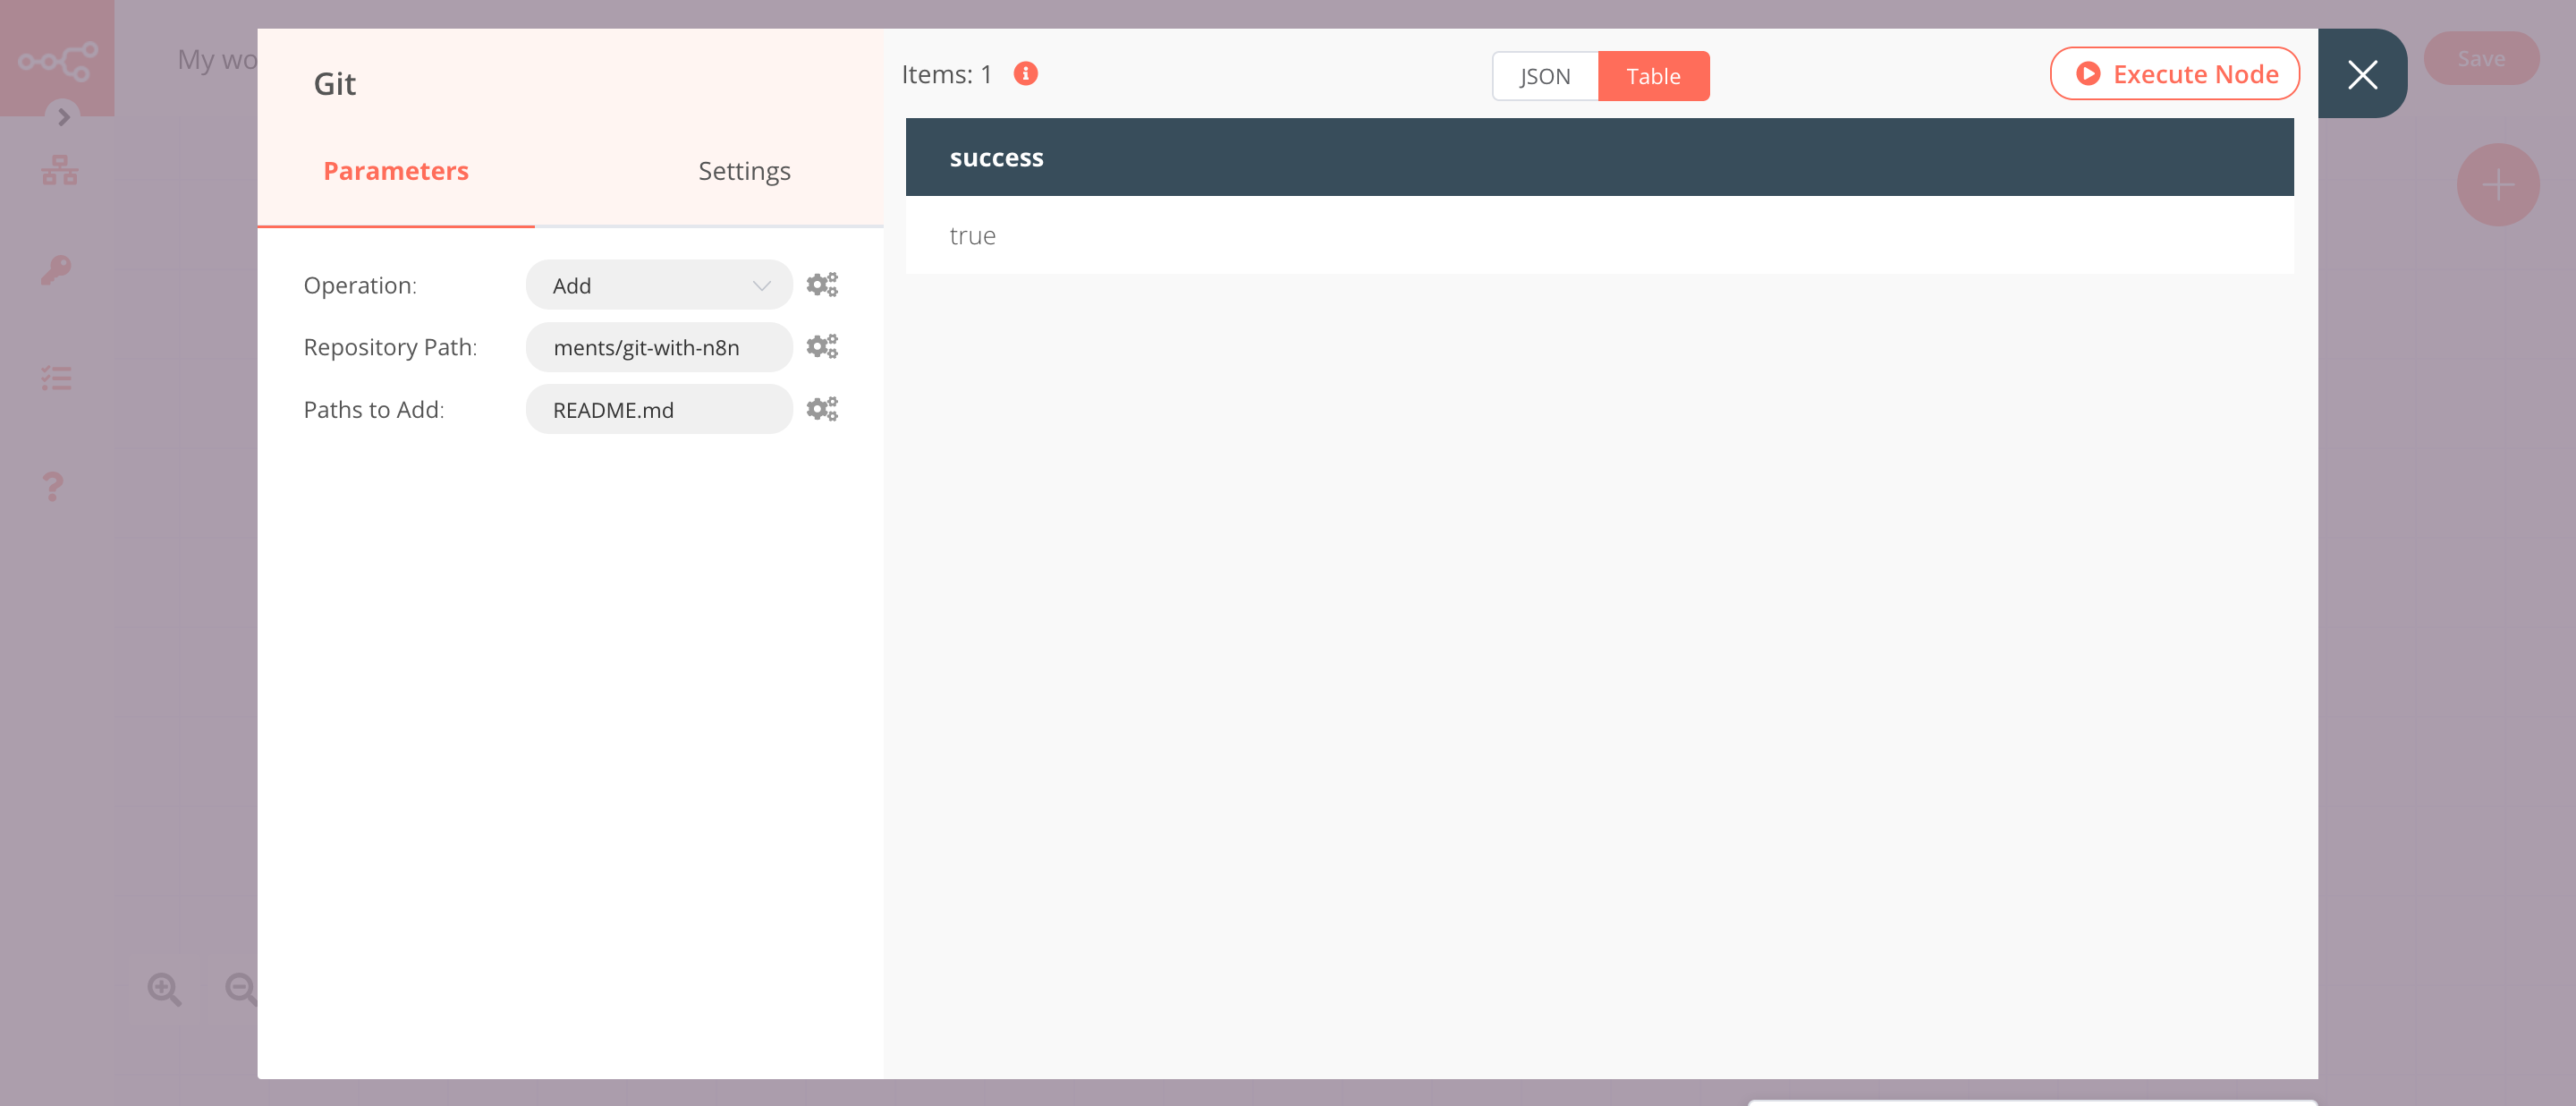
2. Git node (Add)#
This node will add the README.md file to the staging area. If you want to add a different file, enter the path of that file instead.
- Select 'Add' from the Operation dropdown list.
- Enter the repository path in the Repository Path field.
- Enter the file path in the Paths to Add field.
- Click on Execute Node to run the node.
In the screenshot below, you will notice that the node adds the README.md file to the staging area.
3. Git1 node (Commit)#
This node will commit all the changes that were added to the staging area by the previous node.
- Select 'Commit' from the Operation dropdown list.
- Click on the gears icon next to the Repository Path field and click on Add Expression.
- Select the following in the Variable Selector section: Nodes > Git > Parameters > repositoryPath. You can also add the following expression:
{{$node["Git"].parameter["repositoryPath"]}}. - Enter a commit message in the Message field.
- Click on Execute Node to run the node.
In the screenshot below, you will notice that the node creates a new commit.

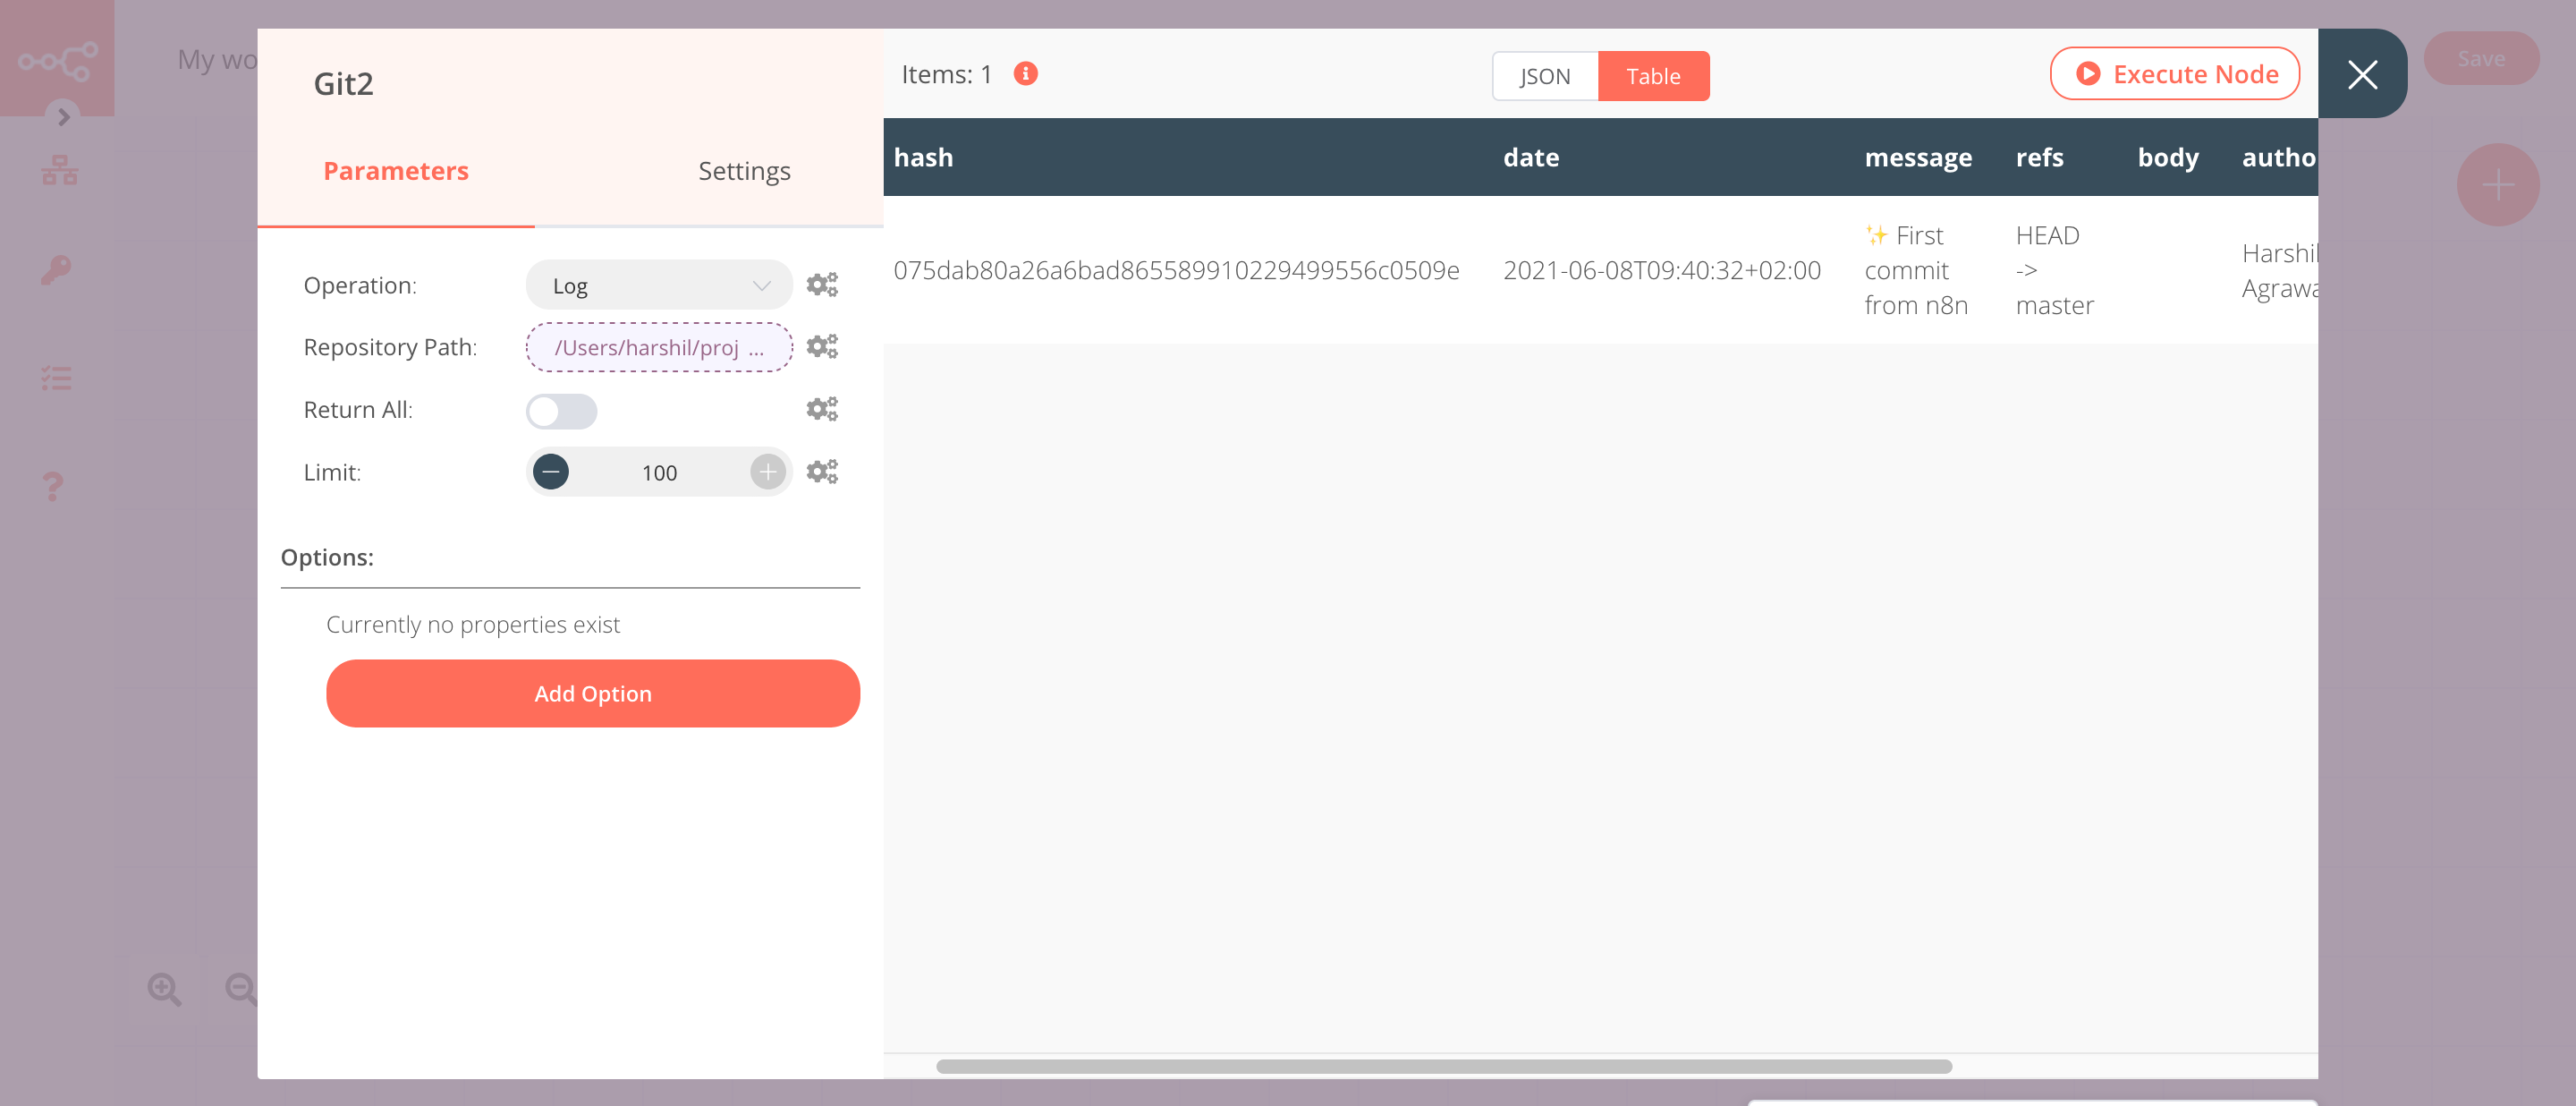
4. Git2 node (Log)#
This node will return the commit logs of your repository.
- Click on the gears icon next to the Repository Path field and click on Add Expression.
- Select the following in the Variable Selector section: Nodes > Git > Parameters > repositoryPath. You can also add the following expression:
{{$node["Git"].parameter["repositoryPath"]}}. - Toggle Return All to
true. This option will return all the logs. - Click on Execute Node to run the node.
In the screenshot below, you will notice that the node creates a new commit.
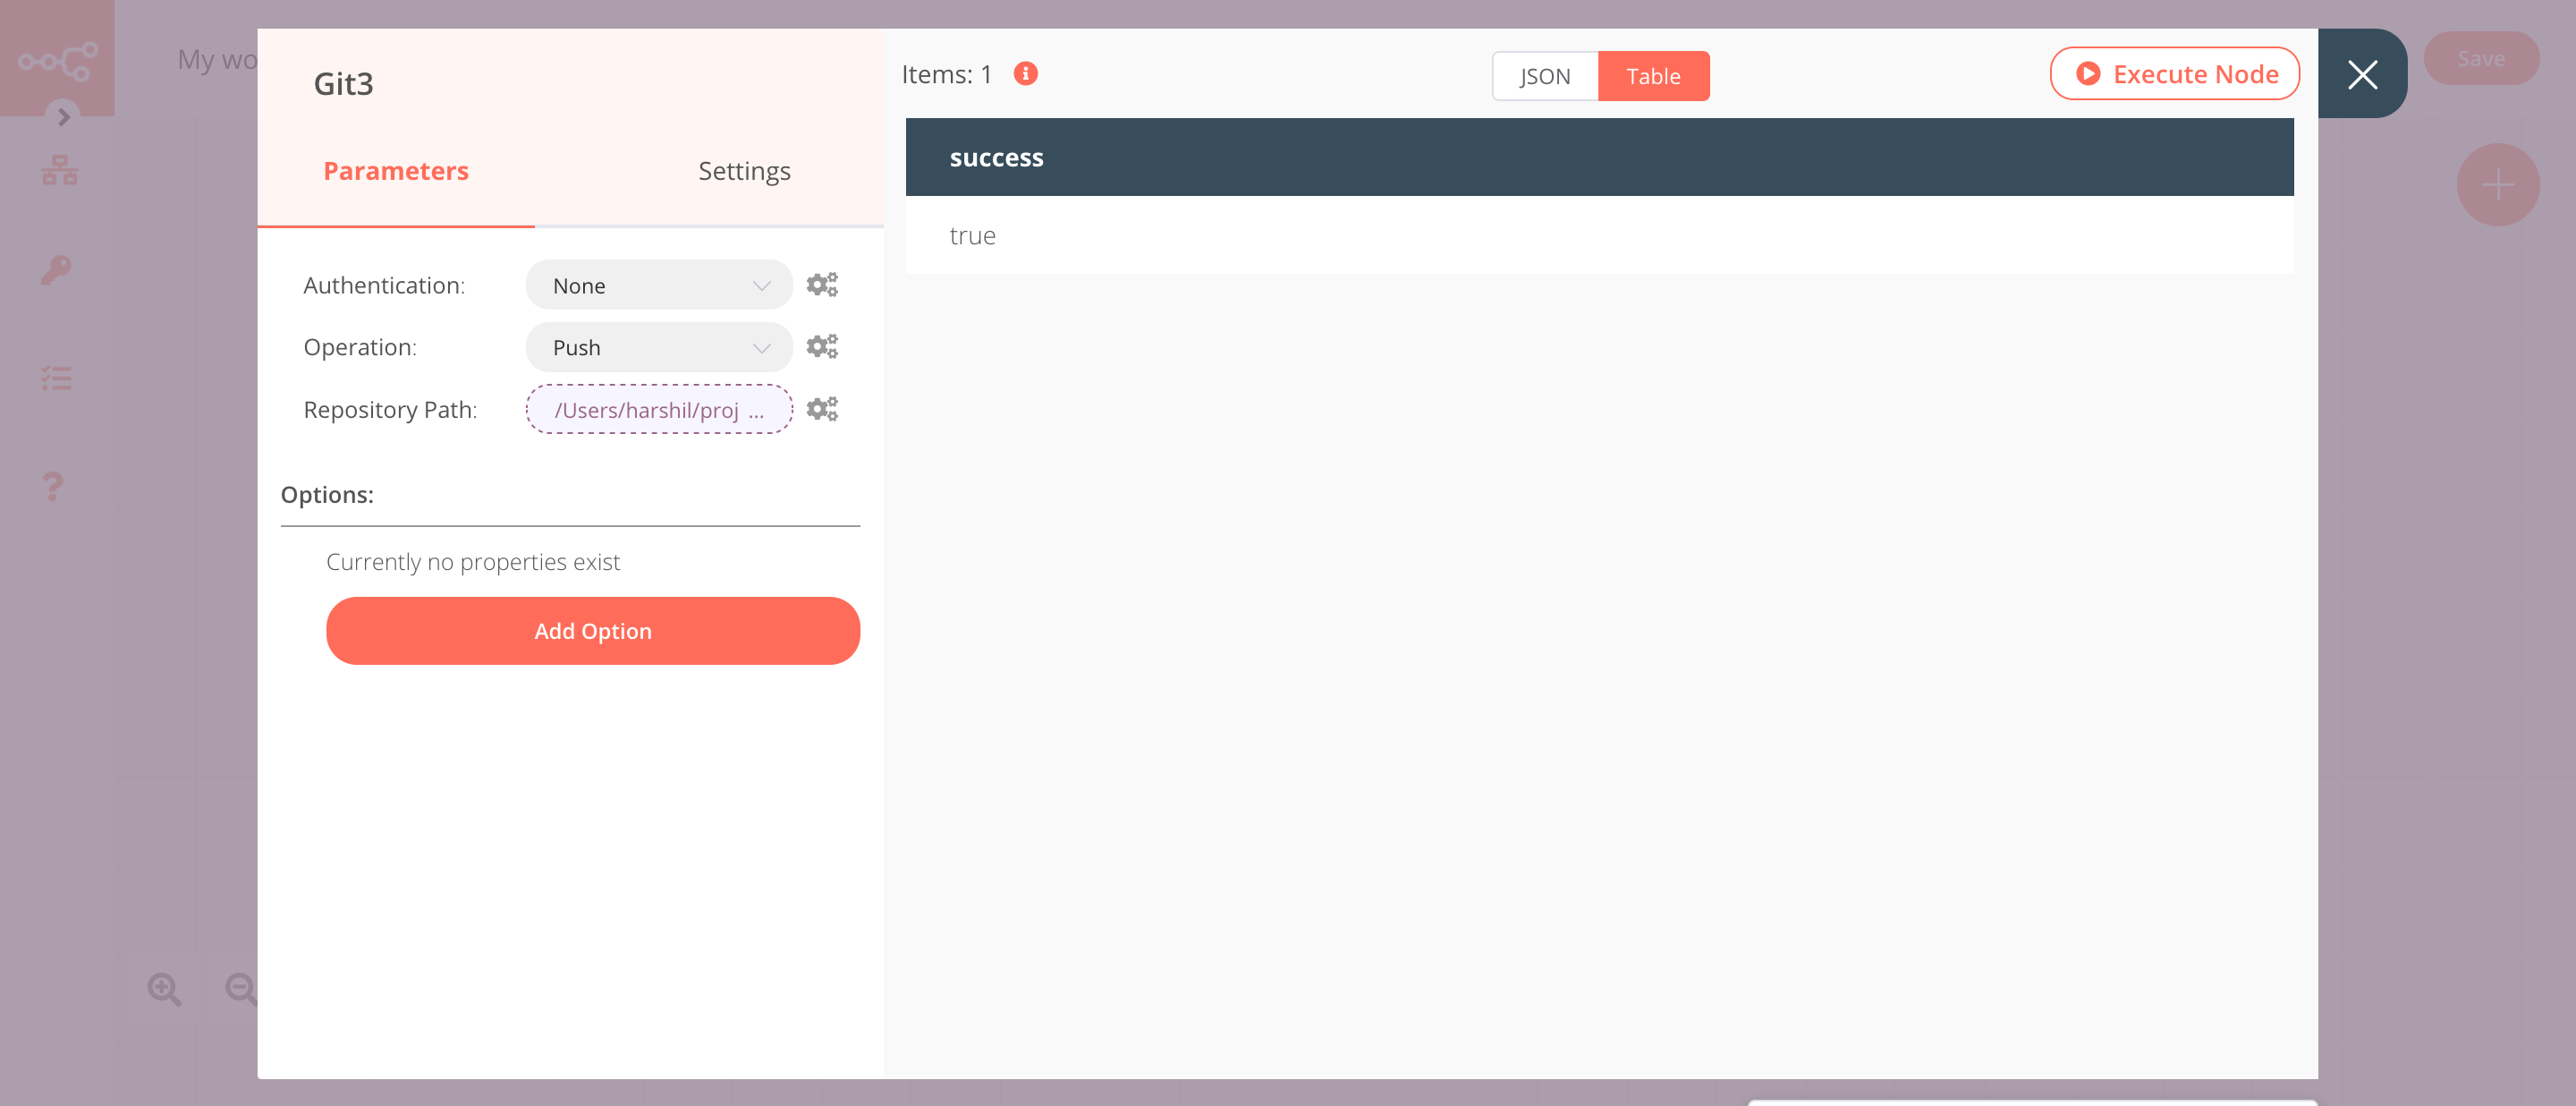
5. Git3 node (Push)#
This node will push the changes to a cloud repository.
- Select 'Push' from the Operation dropdown list.
- Click on the gears icon next to the Repository Path field and click on Add Expression.
- Select the following in the Variable Selector section: Nodes > Git > Parameters > repositoryPath. You can also add the following expression:
{{$node["Git"].parameter["repositoryPath"]}}. - Click on Execute Node to run the node.
Note: If you're not using SSH, you will have to create credentials to authenticate yourself. You also need to set an upstream branch to push the changes. This is required only once. You can set up an upstream branch by executing the command git push -u origin master from a terminal.
In the screenshot below, you will notice that the node pushes the local changes to a cloud repository.