PostHog#
PostHog is an open-source product analytics platform. It provides tools to improve your product, such as session recording, heatmaps, and feature flags.
Credentials
You can find authentication information for this node here.
Basic Operations#
- Alias
- Create an alias
- Event
- Create an event
- Identity
- Create
- Track
- Track a page
- Track a screen
Example Usage#
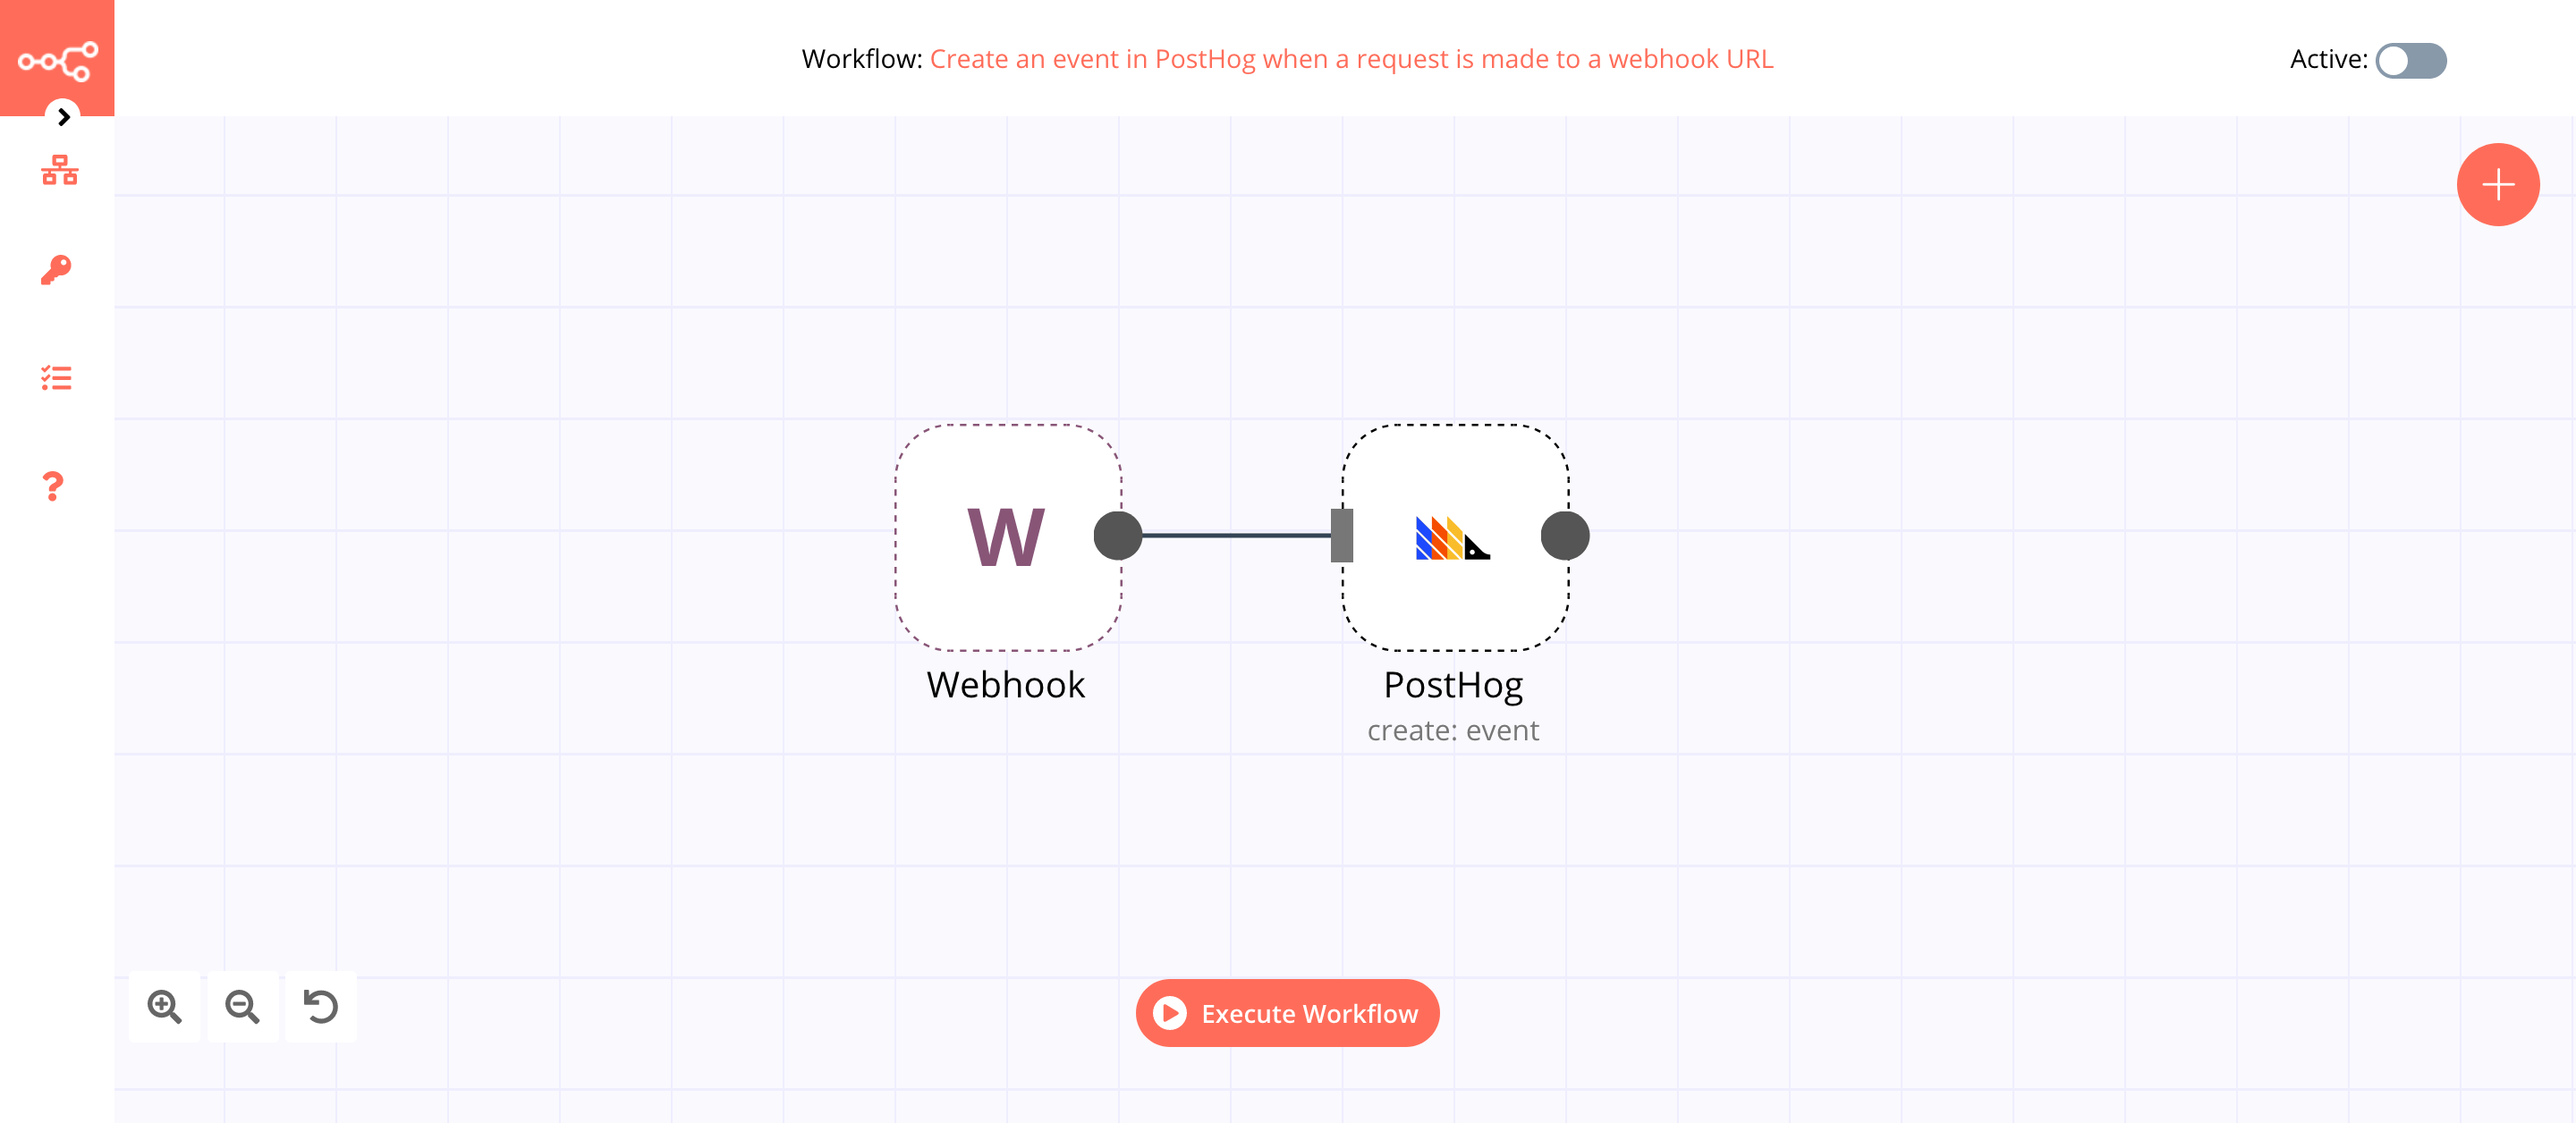
This workflow allows you to create an event in PostHog when a request is made to a webhook URL. You can also find the workflow on n8n.io. This example usage workflow uses the following nodes. - Webhook - PostHog
The final workflow should look like the following image.
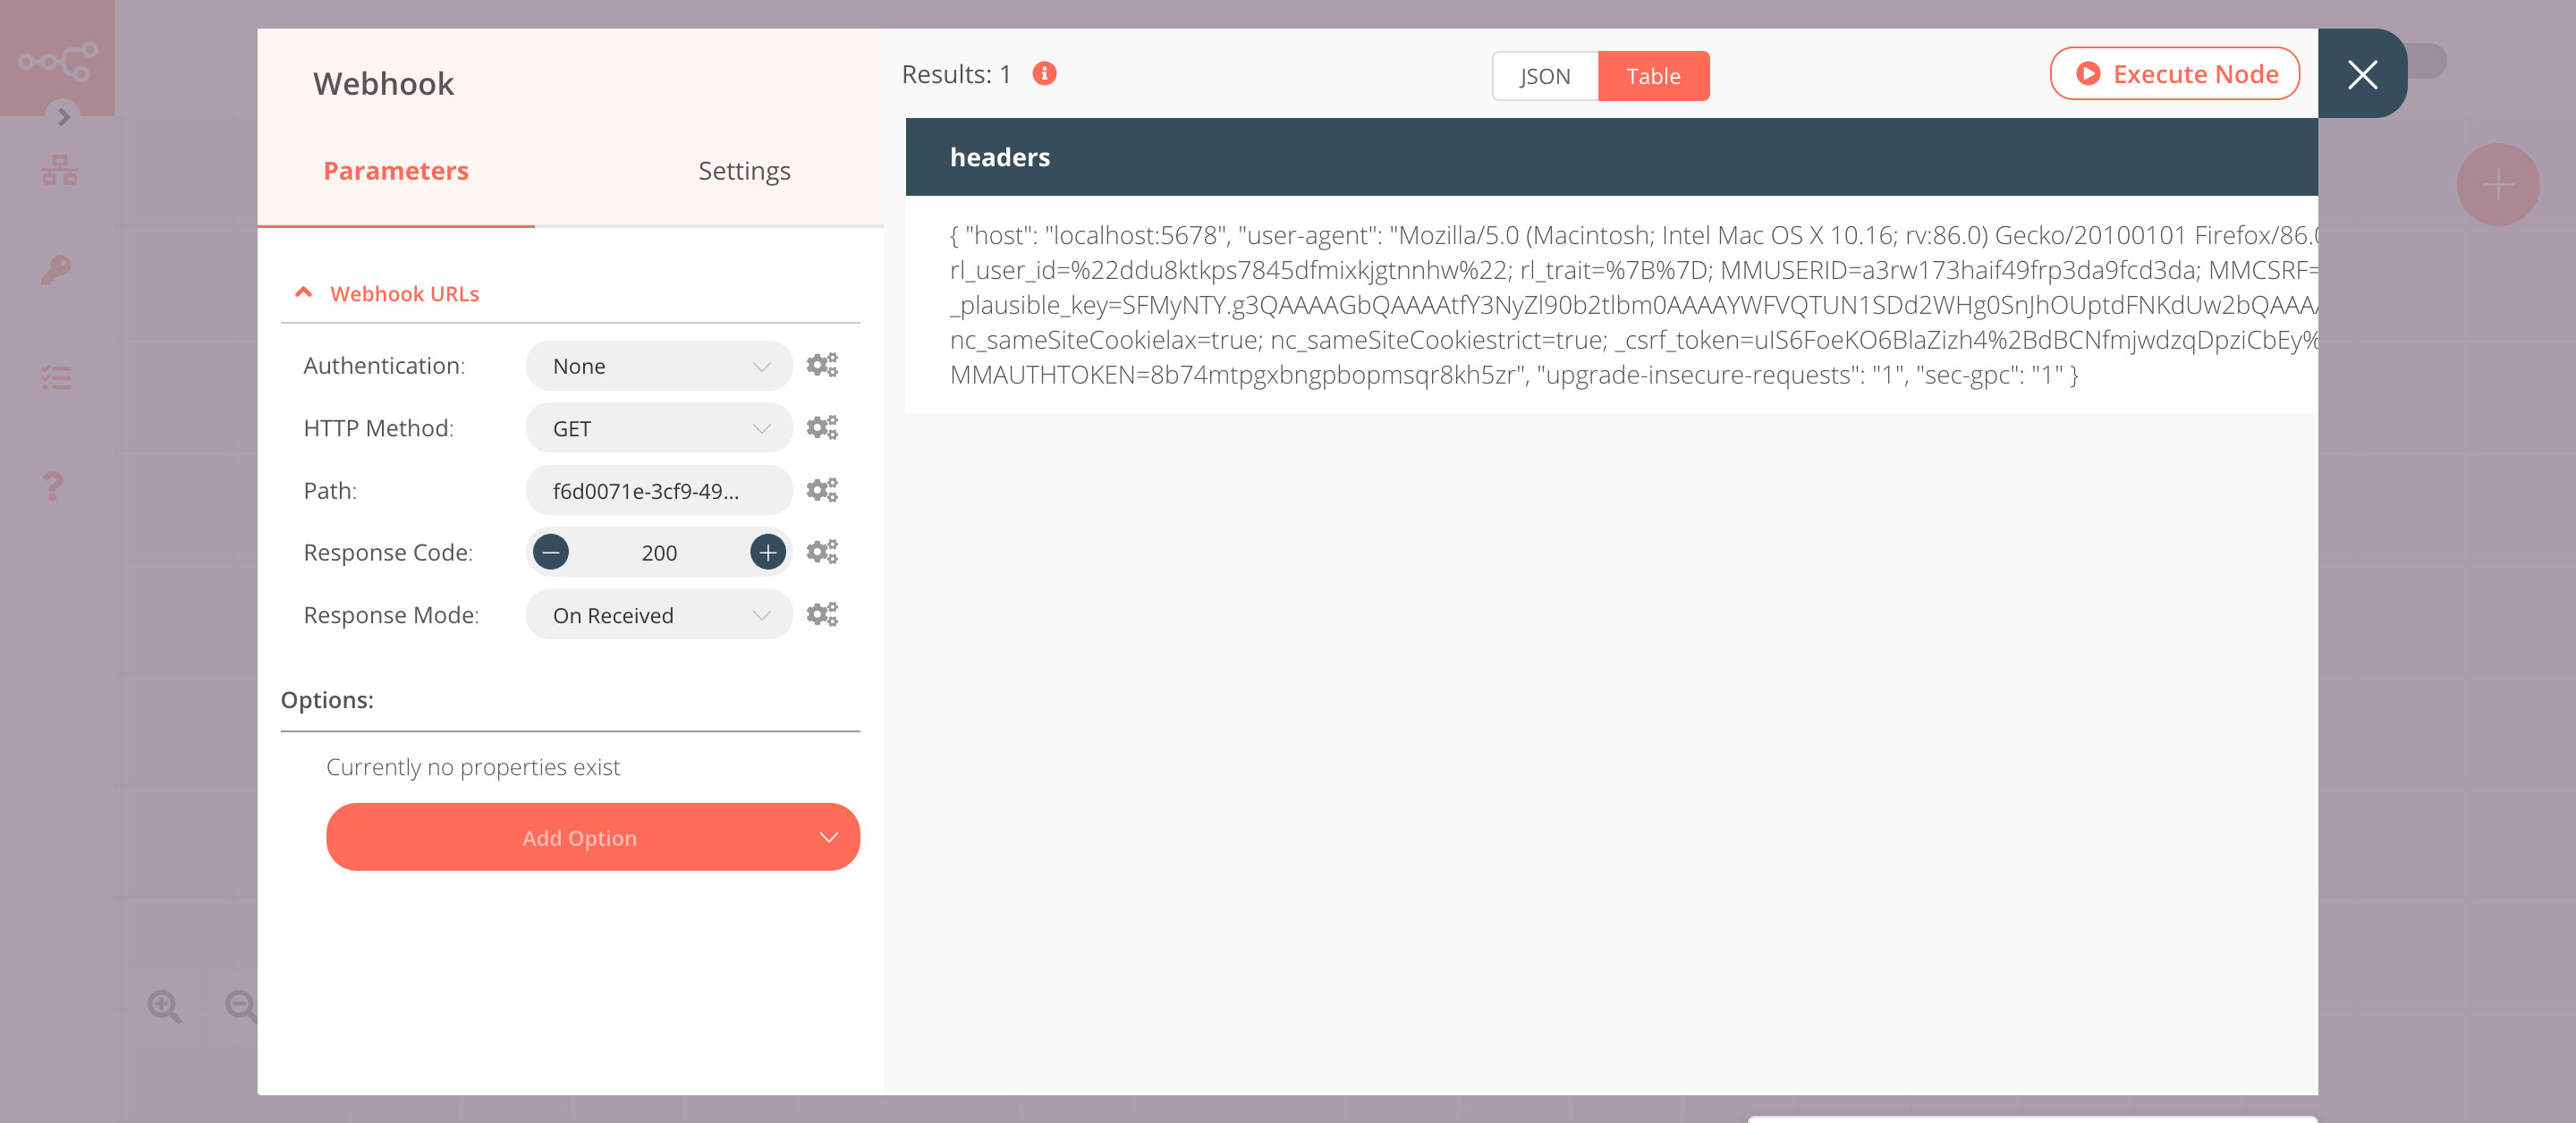
1. Webhook node#
This node will trigger the workflow. We will make a GET request to the test webhook URL and pass on a query parameter called event.
- Click on Webhook URLs and select the 'Test' tab.
- Copy the displayed URL. We will make a GET request to this URL later on.
- Save the workflow to register the webhook.
- Click on Execute Node to run the node.
- In a new browser tab, paste the URL that you copied in the previous step and append
?event=loginto it. Your URL should look similar to the following URL:https://your-n8n.url/webhook/path?event=login. Here, we are passing a query parameter calledeventand assigning the valueloginto it. - Press Enter (or Return) to make a request to the test webhook URL.
In the screenshot below, you will notice that the node triggers the workflow and receives a query parameter. We will use the value of the query parameter in the next node in the workflow.
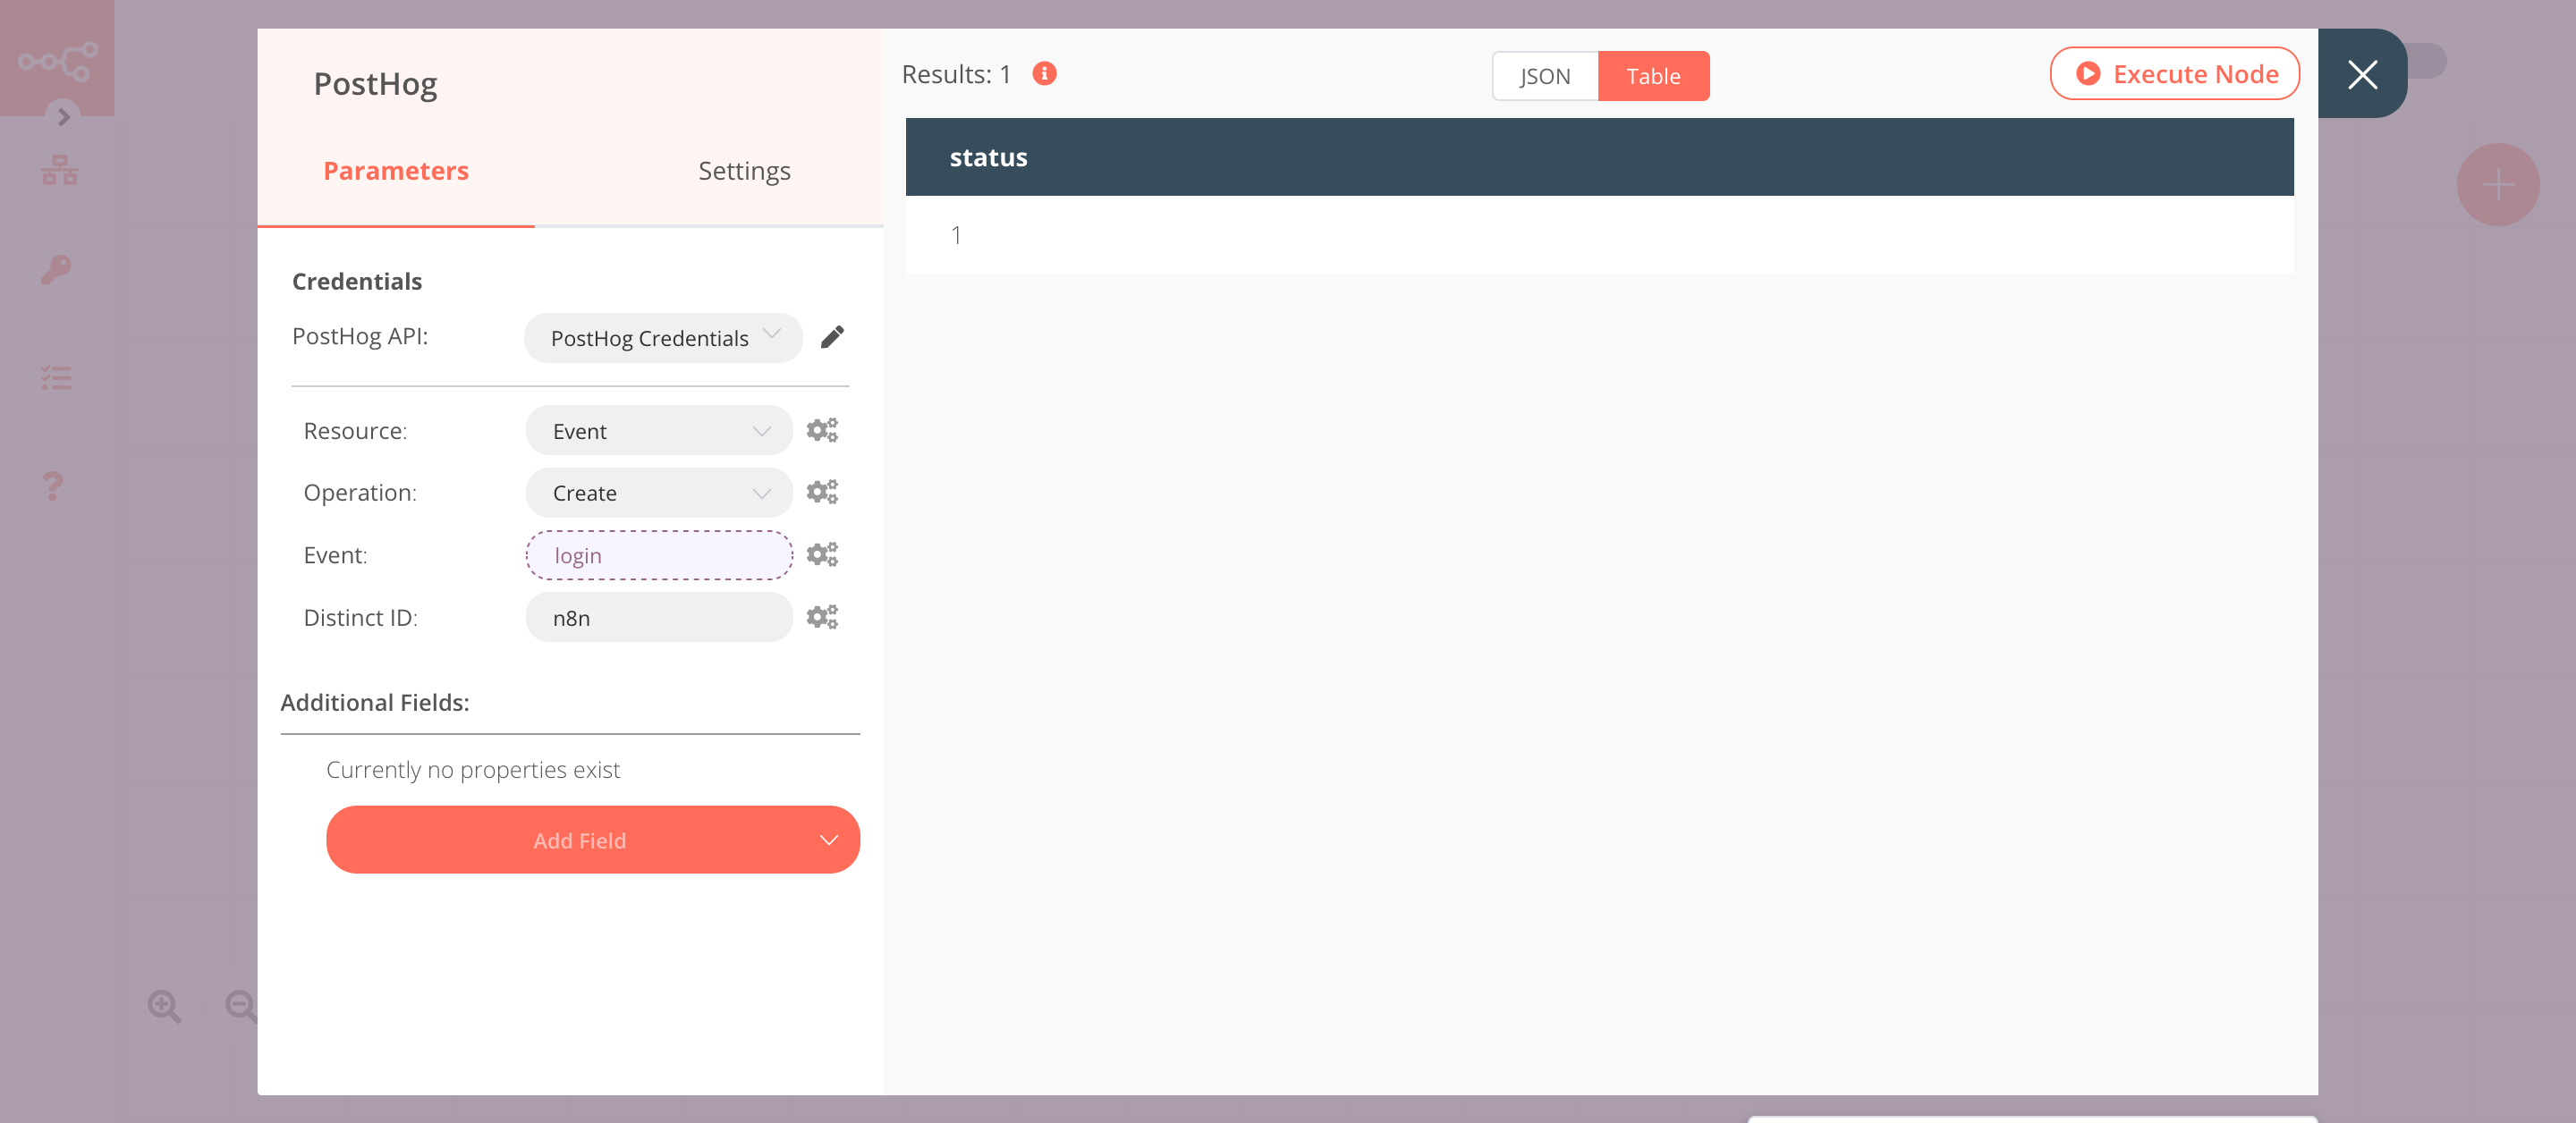
2. PostHog node (create:customer)#
This node will create a new event in PostHog.
- First of all, you'll have to enter credentials for the PostHog node. You can find out how to do that here.
-
Click on the gears icon next to the Event field and click on Add Expression.
-
Select the following in the Variable Selector section: Current Node > Input Data > JSON > query > event. You can also add the following expression:
{{$json["query"]["event"]}}. -
Enter a distinct id in the Distinct ID field.
- Click on Execute Node to run the node.
In the screenshot below, you will notice that the node creates a new event in PostHog.
Activate workflow for production
This example workflow uses the Webhook node, which is a Trigger node. You'll need to save the workflow and then click on the Activate toggle on the top right of the screen to activate the workflow. Your workflow will then be triggered every time a GET request is sent to the Production webhook URL.