Cortex#
Cortex offers a powerful observable (URL, file, IP, etc) analysis mechanism. It allows you to analyze collected observables using a single tool, respond to threats, and interact with the constituency and other teams.
Credentials
You can find authentication information for this node here.
Basic Operations#
- Analyzer
- Execute Analyzer
- Job
- Get job details
- Get job report
- Responder
- Execute Responder
Example Usage#
This workflow allows you to analyze a URL and get the job details using the Cortex node. You can also find the workflow on n8n.io. This example usage workflow would use the following nodes. - Start - Cortex
The final workflow should look like the following image.
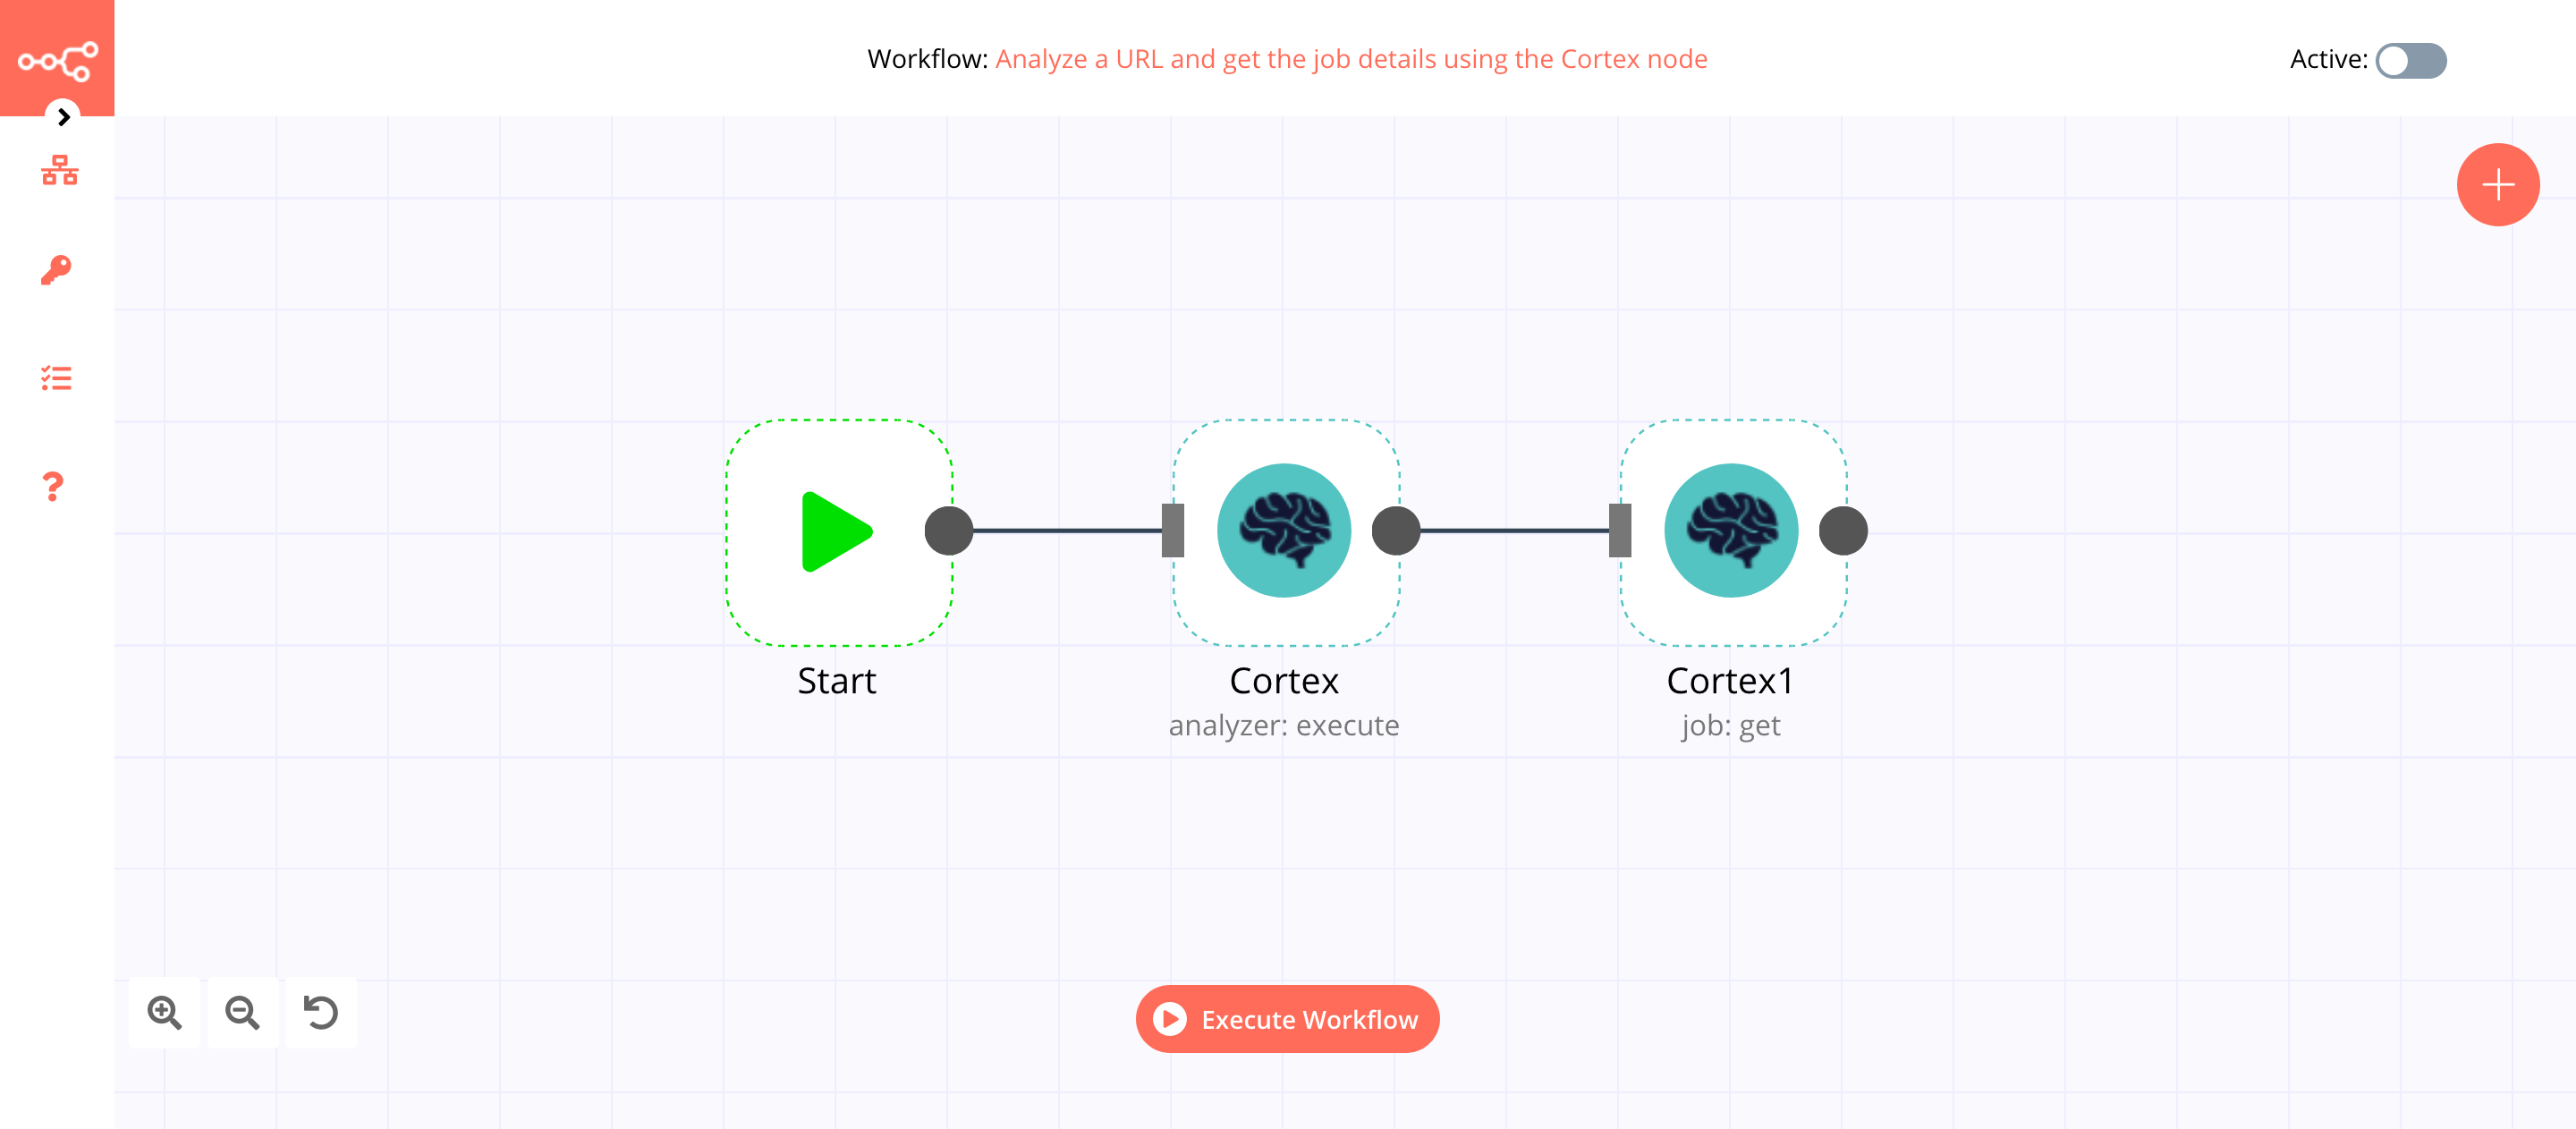
1. Start node#
The start node exists by default when you create a new workflow.
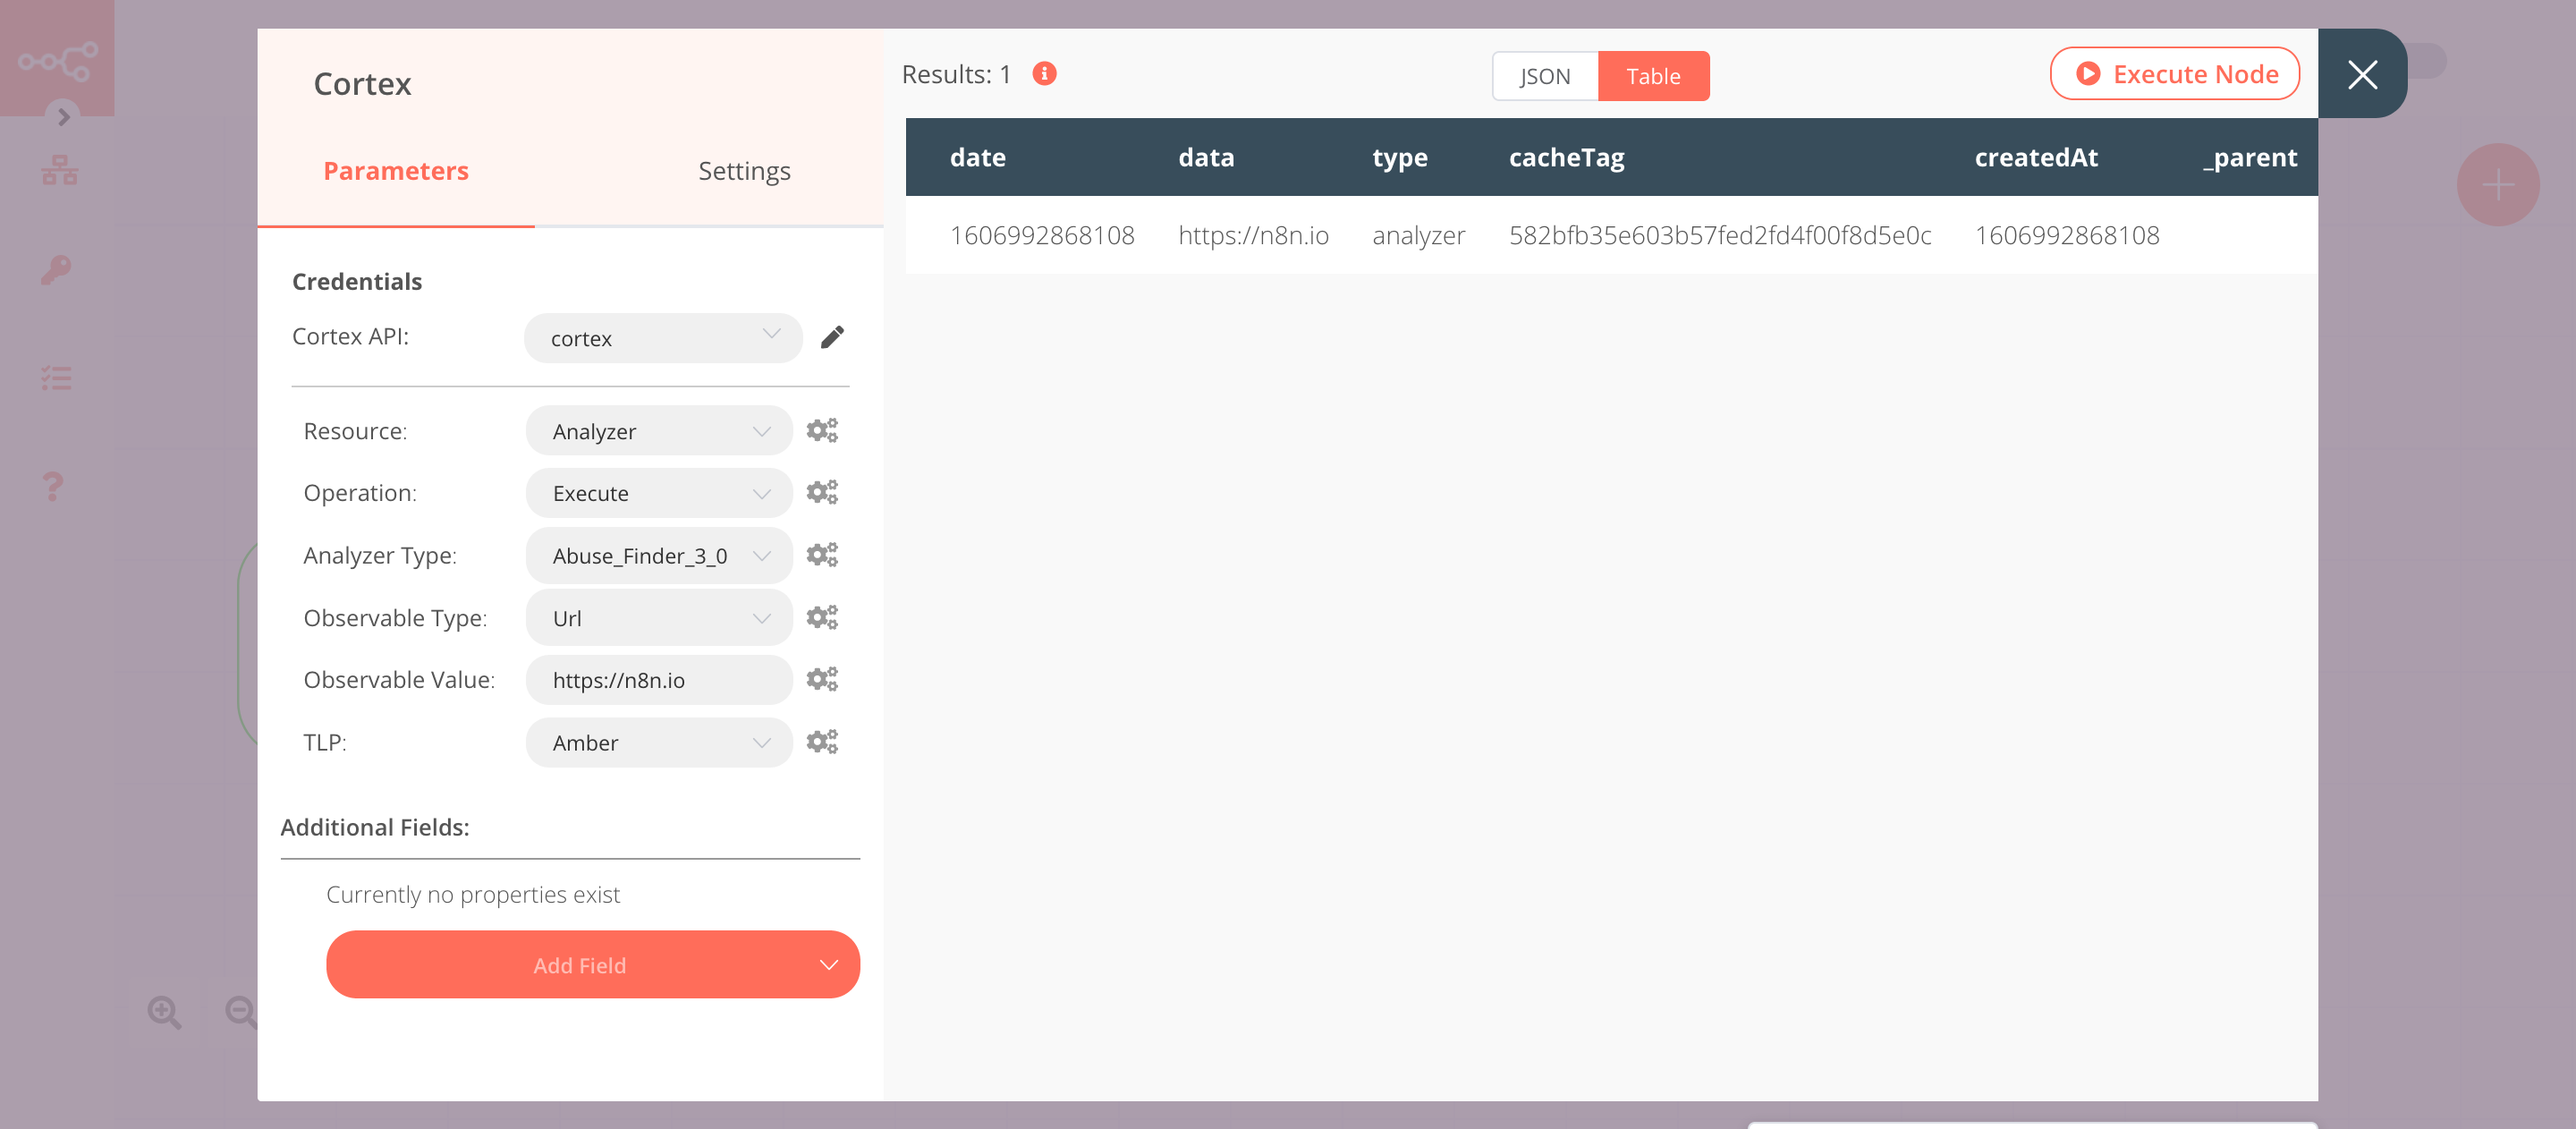
2. Cortex node (analyzer: execute)#
This node will analyze a URL. If you want to analyze a different observable type, select that instead.
- First of all, you'll have to enter credentials for the Cortex node. You can find out how to do that here.
- Select 'Abuse_Finder_3_0' from the Analyzer Type dropdown list.
- Select 'URL' from the Observable Type dropdown list.
- Enter the URL you want to analyze in the Observable Value field.
- Click on Execute Node to run the node.
In the screenshot below, you will notice that the node starts the analysis of the URL.
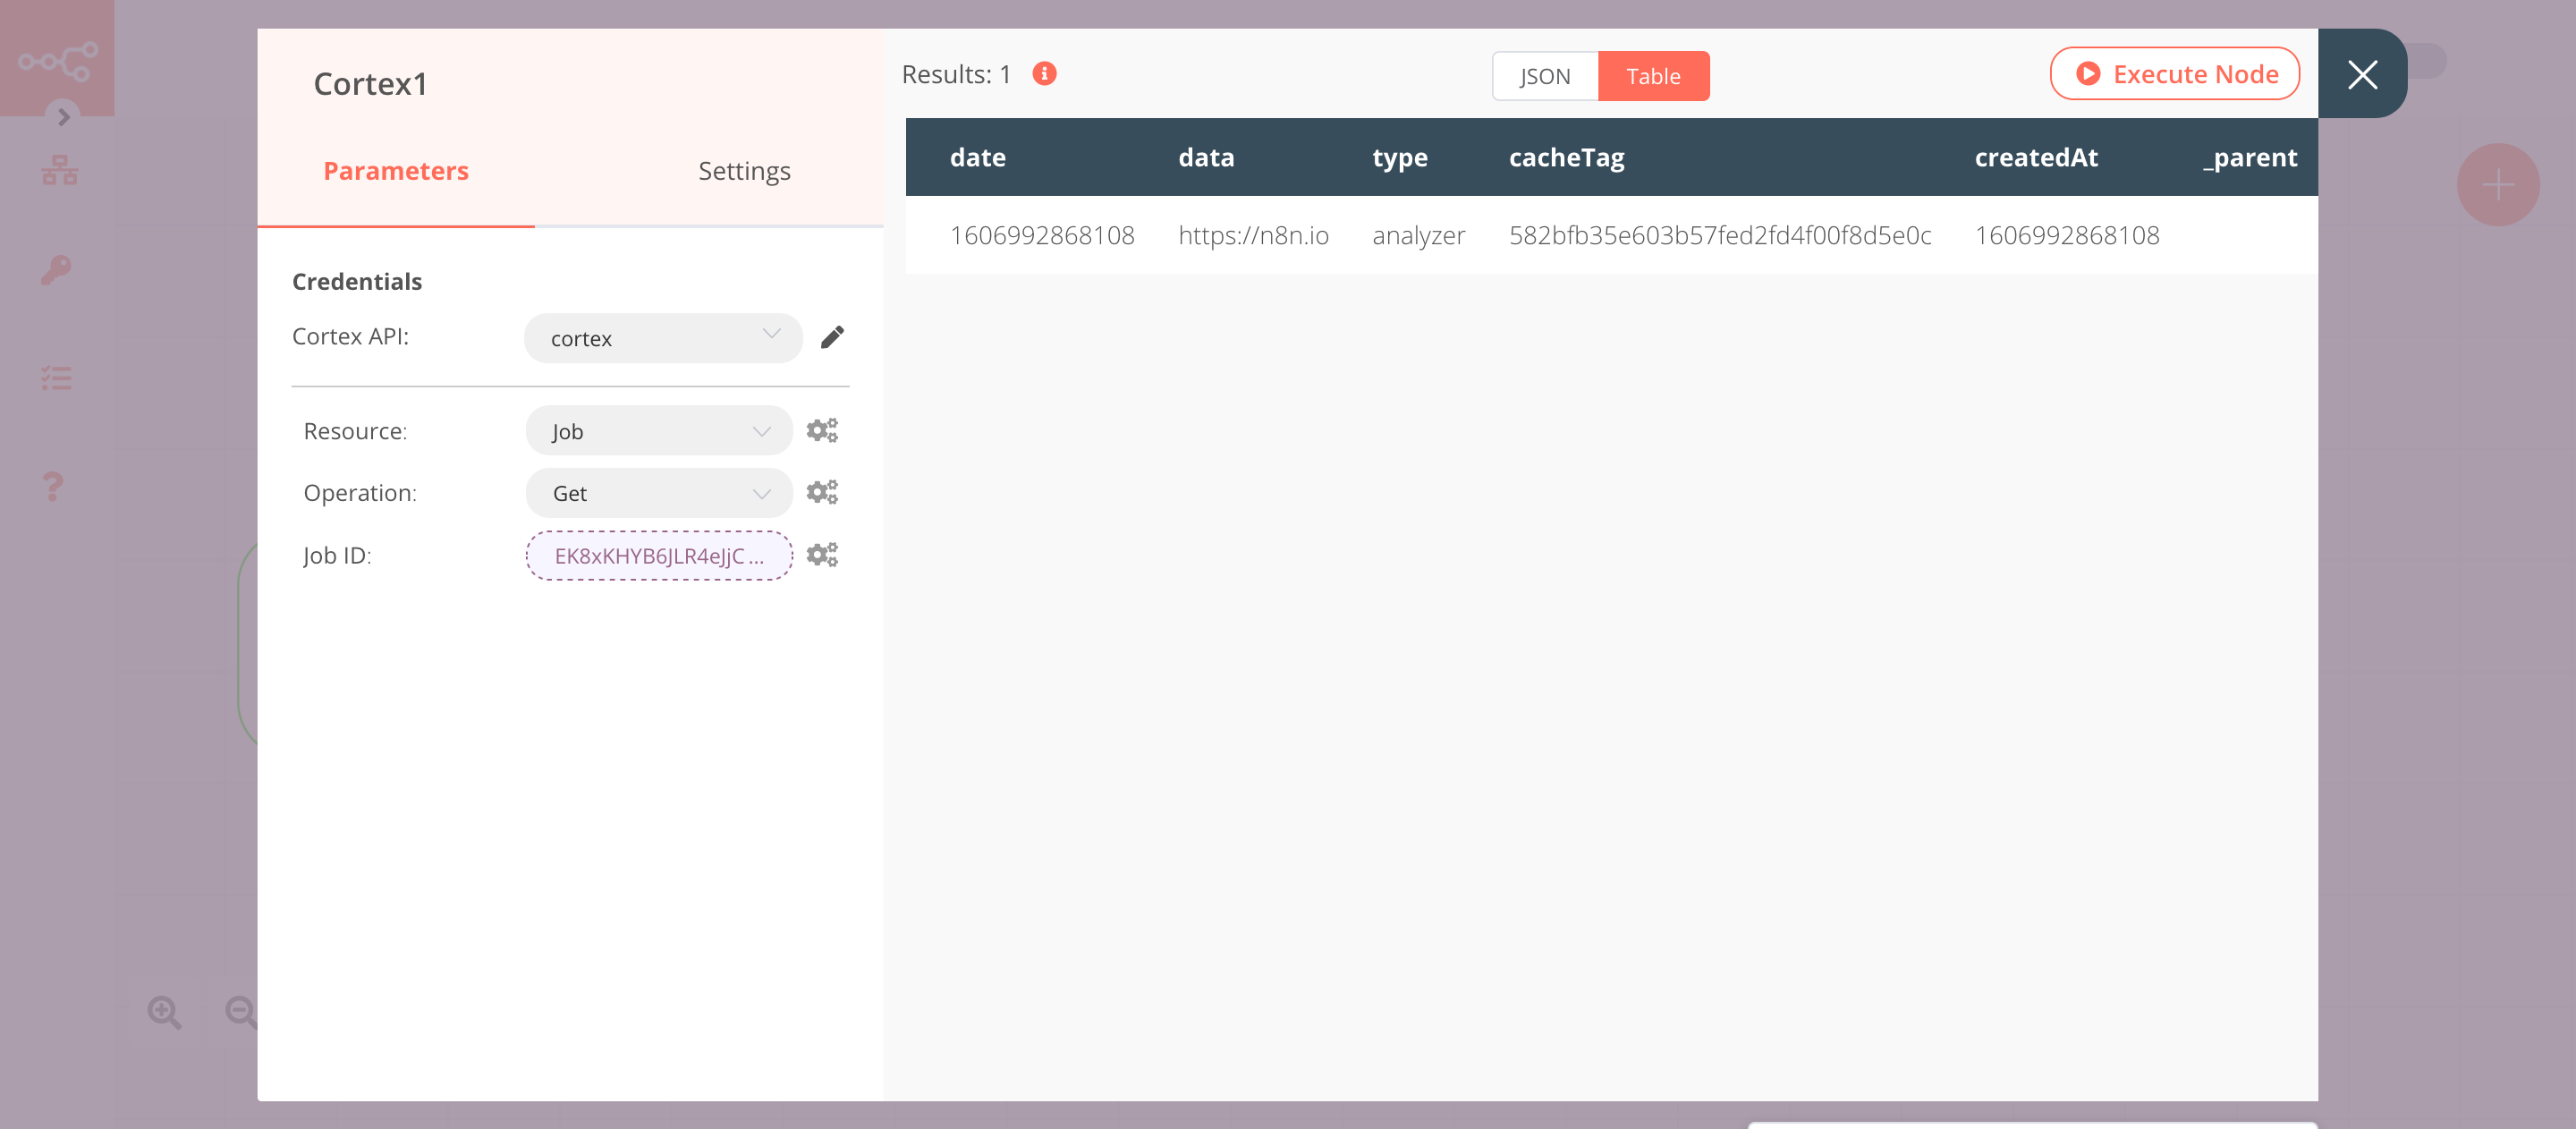
3. Cortex1 node (job: get)#
This node will return the job details for the analysis that we executed in the previous node.
- Select the credentials that you entered in the previous node.
- Select 'Job' from the Resource dropdown list.
- Click on the gears icon next to the Job ID field and click on Add Expression.
- Select the following in the Variable Selector section: Nodes > Cortex > Output Data > JSON > _id. You can also add the following expression:
{{$node["Cortex"].json["_id"]}}. - Click on Execute Node to run the node.
In the screenshot below, you will notice that the node starts the analysis of the URL.