Webflow#
Webflow is an application that allows you to build responsive websites with browser-based visual editing software.
Credentials
You can find authentication information for this node here.
Basic Operations#
- Item
- Create
- Delete
- Get
- Get All
- Update
Example Usage#
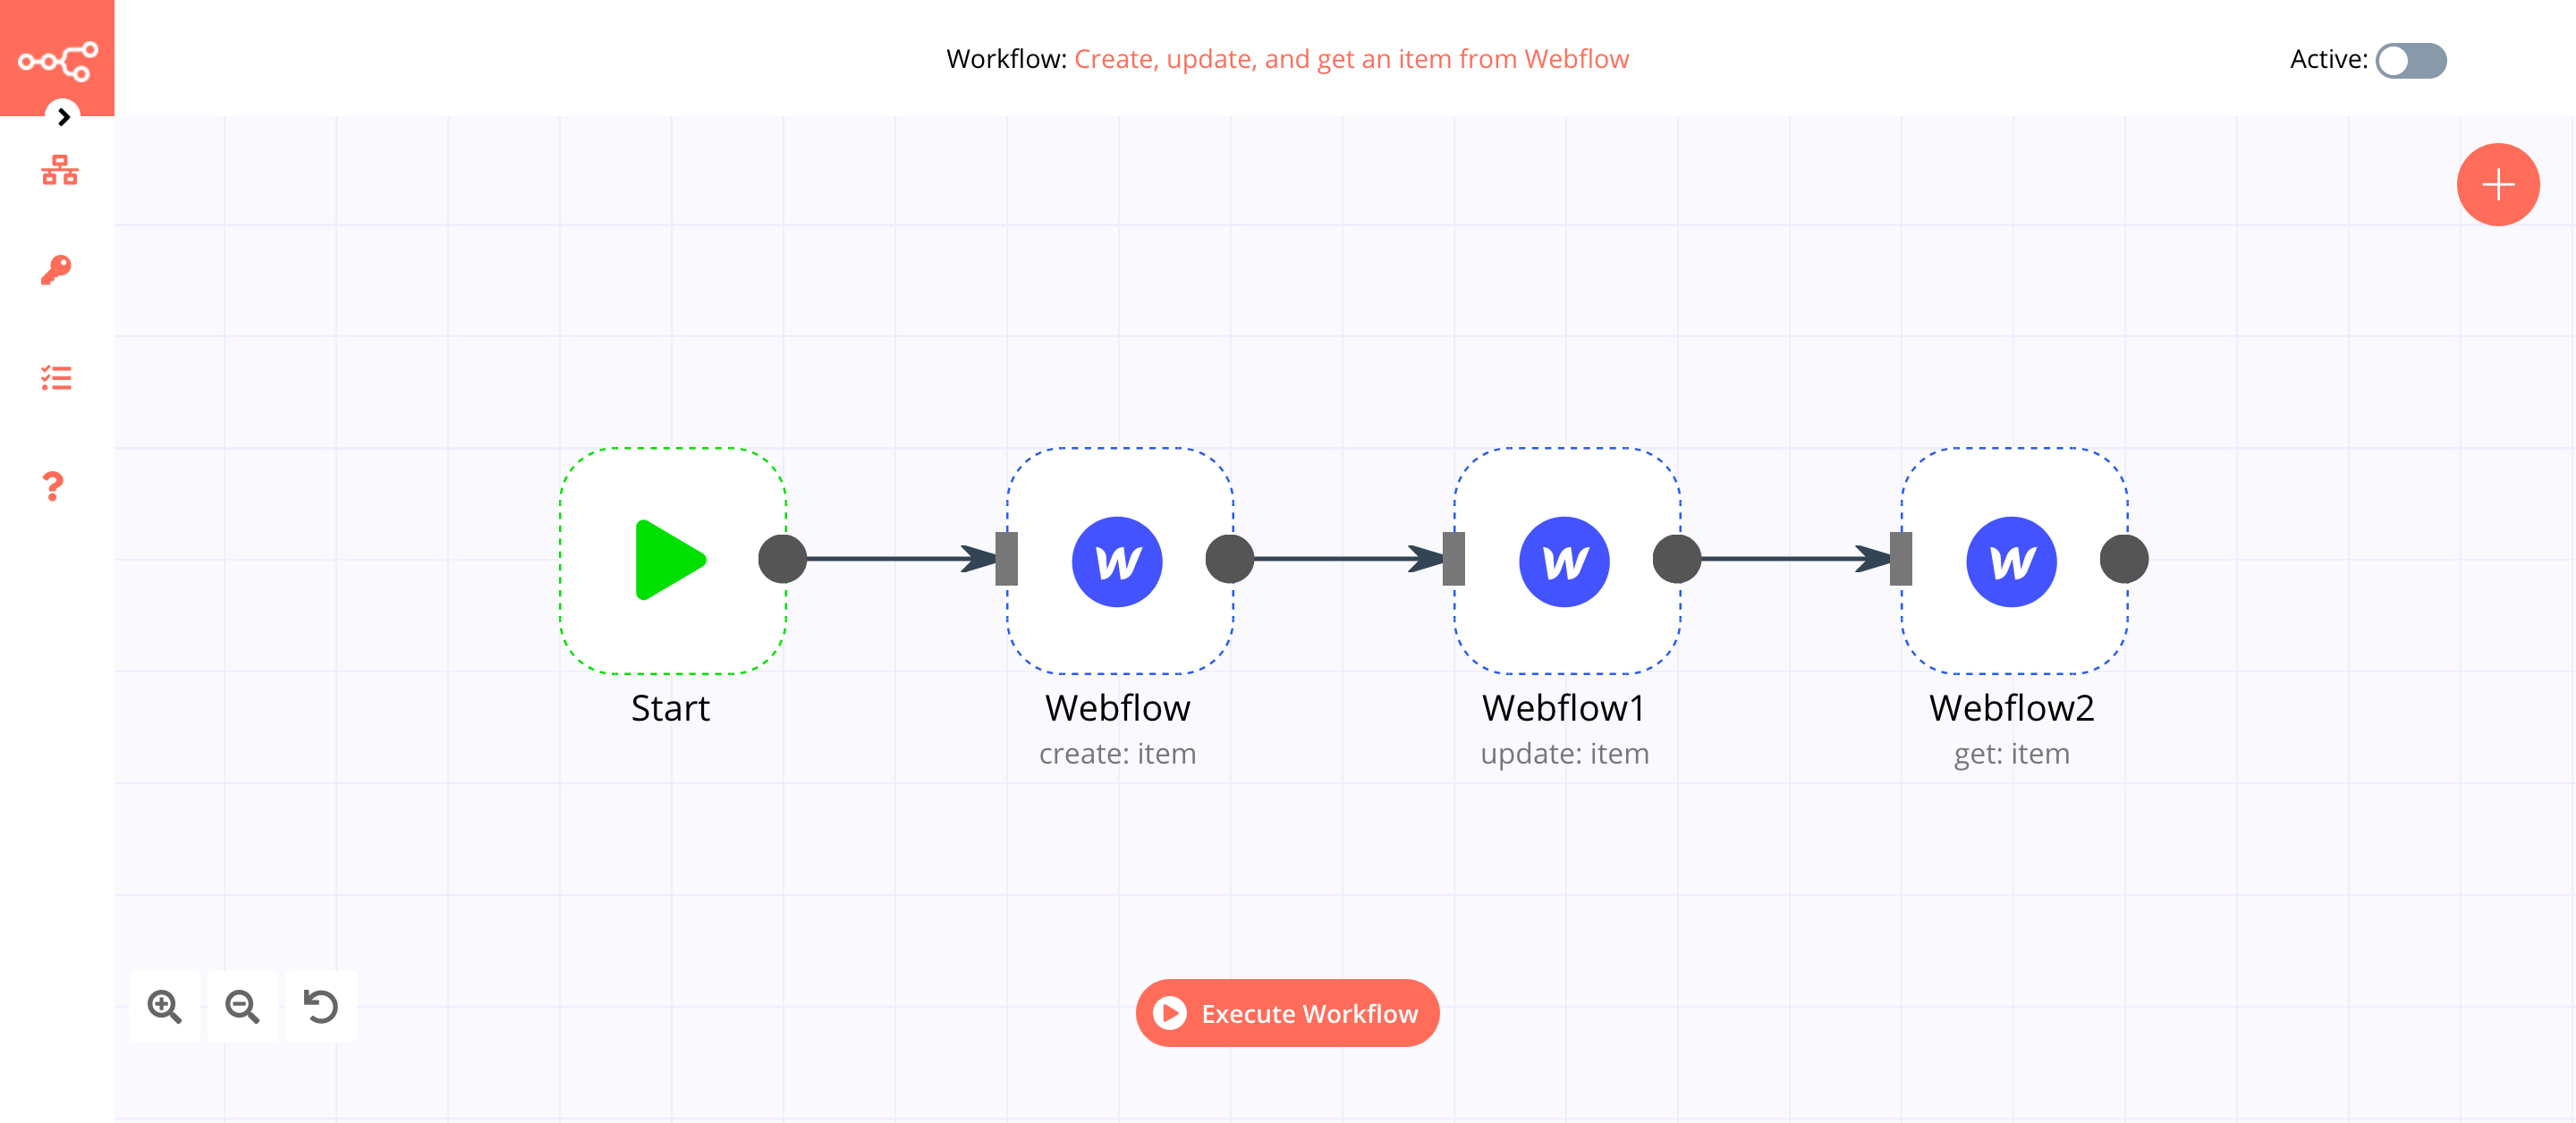
This workflow allows you to create, update, and get an item from Webflow. You can also find the workflow on n8n.io. This example usage workflow would use the following nodes. - Start - Webflow
The final workflow should look like the following image.
1. Start node#
The start node exists by default when you create a new workflow.
2. Webflow node (create: item)#
This node will create a new collection of the type Team Members in Webflow. If you want to create a collection with a different type, use that type instead.
- First of all, you'll have to enter credentials for the Webflow node. You can find out how to do that here.
- Select 'Create' from the Operation dropdown list.
- Select your site from the Site ID dropdown list.
- Select 'Team Members' from the Collection ID dropdown list.
- Click on the Add Field button.
- Select 'Name (PlainText) (required)' from the Field ID dropdown list. If you're using a different collection type, select the field present in that collection.
- Enter
n8nin the Field Value field. - Click on the Add Field button.
- Select 'Slug (PlainText) (required)' from the Field ID dropdown list. If you're using a different collection type, select the field present in that collection.
- Enter
n8nin the Field Value field. - Click on the Add Field button.
- Select 'Archived (Bool) (required)' from the Field ID dropdown list. If you're using a different collection type, select the field present in that collection.
- Enter
falsein the Field Value field. - Click on the Add Field button.
- Select 'Draft (Bool) (required)' from the Field ID dropdown list. If you're using a different collection type, select the field present in that collection.
- Enter
falsein the Field Value field. - Click on Execute Node to run the node.
In the screenshot below, you will notice that the node creates a new item for the collection type Team Members in Webflow.

3. Webflow1 node (update: item)#
This node will update the item that we created using the previous node.
- Select the credentials that you entered in the previous Webflow node.
- Select 'Update' from the Operation dropdown list.
- Select your site from the Site ID dropdown list.
- Select 'Team Members' from the Collection ID dropdown list.
- Click on the gears icon next to the Item ID field and click on Add Expression.
- Select the following in the Variable Selector section: Current Node > Input Data > JSON > _id. You can also add the following expression:
{{$json["_id"]}}. - Click on the Add Property button. Click on the Add Field button.
- Select 'Name (PlainText) (required)' from the Field ID dropdown list. If you're using a different collection type, select the field present in that collection.
- Click on the gears icon next to the Field Value field and click on Add Expression.
- Select the following in the Variable Selector section: Current Node > Input Data > JSON > name. You can also add the following expression:
{{$json["name"]}}. - Click on the Add Field button.
- Select 'Slug (PlainText) (required)' from the Field ID dropdown list. If you're using a different collection type, select the field present in that collection.
- Click on the gears icon next to the Field Value field and click on Add Expression.
- Select the following in the Variable Selector section: Current Node > Input Data > JSON > slug. You can also add the following expression:
{{$json["slug"]}}. - Click on the Add Field button.
- Select 'Archived (Bool) (required)' from the Field ID dropdown list. If you're using a different collection type, select the field present in that collection.
- Click on the gears icon next to the Field Value field and click on Add Expression.
- Select the following in the Variable Selector section: Current Node > Input Data > JSON > _archived. You can also add the following expression:
{{$json["_archived"]}}. - Click on the Add Field button.
- Select 'Draft (Bool) (required)' from the Field ID dropdown list. If you're using a different collection type, select the field present in that collection.
- Click on the gears icon next to the Field Value field and click on Add Expression.
- Select the following in the Variable Selector section: Current Node > Input Data > JSON > _draft. You can also add the following expression:
{{$json["_draft"]}}. - Click on the Add Field button.
- Select 'Avatar (ImageRef)' from the Field ID dropdown list. If you're using a different collection type, select the field present in that collection.
- Enter
https://n8n.io/n8n-logo.pngin the Value field. - Click on Execute Node to run the node.
In the screenshot below, you will notice that the node updates the item that got created previously.

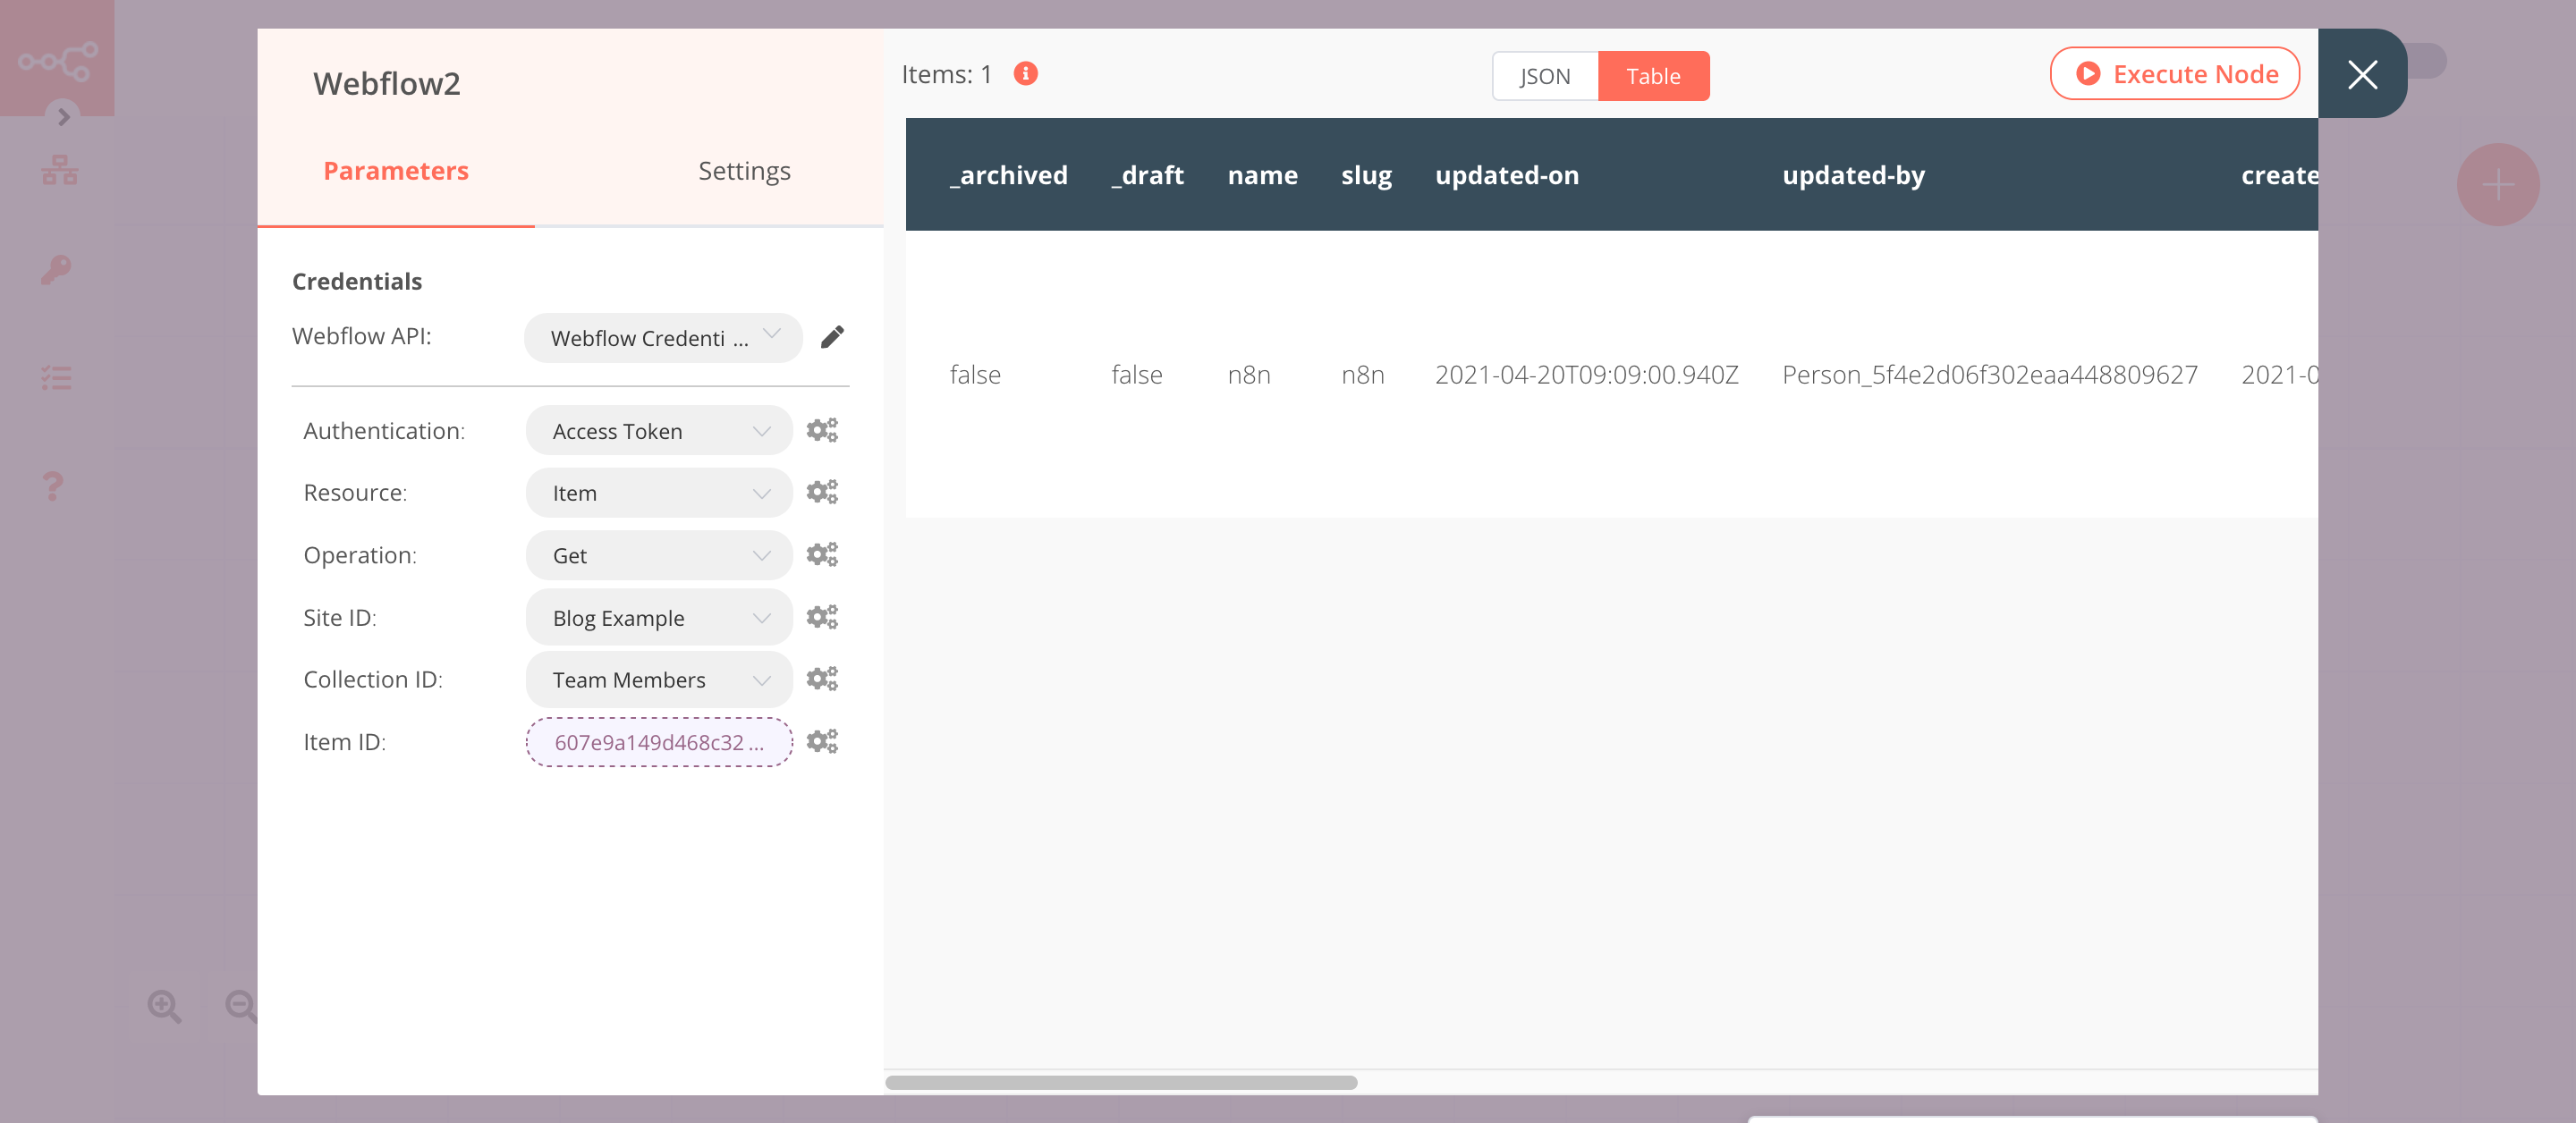
4. Webflow2 node (get: item)#
This node will retrieve the information about the item that we created earlier.
- Select the credentials that you entered in the previous Webflow node.
- Select your site from the Site ID dropdown list.
- Select 'Team Members' from the Collection ID dropdown list.
- Click on the gears icon next to the Item ID field and click on Add Expression.
- Select the following in the Variable Selector section: Current Node > Input Data > JSON > _id. You can also add the following expression:
{{$json["_id"]}}. - Click on Execute Node to run the node.
In the screenshot below, you will notice that the node retrieves the information of the item that we created earlier.