Respond to Webhook#
The Respond to Webhook node can be used in workflows with a Webhook node. It allows controlling the response to incoming webhooks. In the Webhook node, the Using 'Respond to Webhook' node option would need to be selected in the Response dropdown for the Respond to Webhook node to work.
Expressions
When using expressions, the Respond to Webhook node will only run for the first item in the input data
Node reference#
The node supports the following modes through the Respond With field:
- First Incoming Item: Respond with the first incoming item's JSON.
- Text: Respond with a text defined in the Response Body field.
- JSON: Respond with a JSON object defined in the Response Body field.
- Binary: Respond with a binary file defined in the Response Data Source field.
- No Data: No response payload is sent.
Available options:
- Response Code: Set the response code to be used.
- Response Headers: Define response headers to be sent.
Workflow behaviour#
When using the Respond to Webhook node, workflows will behave as follows:
- When the workflow finishes without executing the Respond to Webhook node, a standard message is returned with a 200 status.
- If a second Respond to Webhook node is executed after the first one, it is ignored.
- If the workflow errors before the first Respond to Webhook node is executed, an error message is returned with a 500 status.
- If a Respond to Webhook node is executed but there was no webhook, the Respond to Webhook node is ignored.
Example Usage#
This workflow allows serves an HTML page when receiving a GET requests. You can find the complete workflow here on n8n.io. The example workflow uses the following nodes:
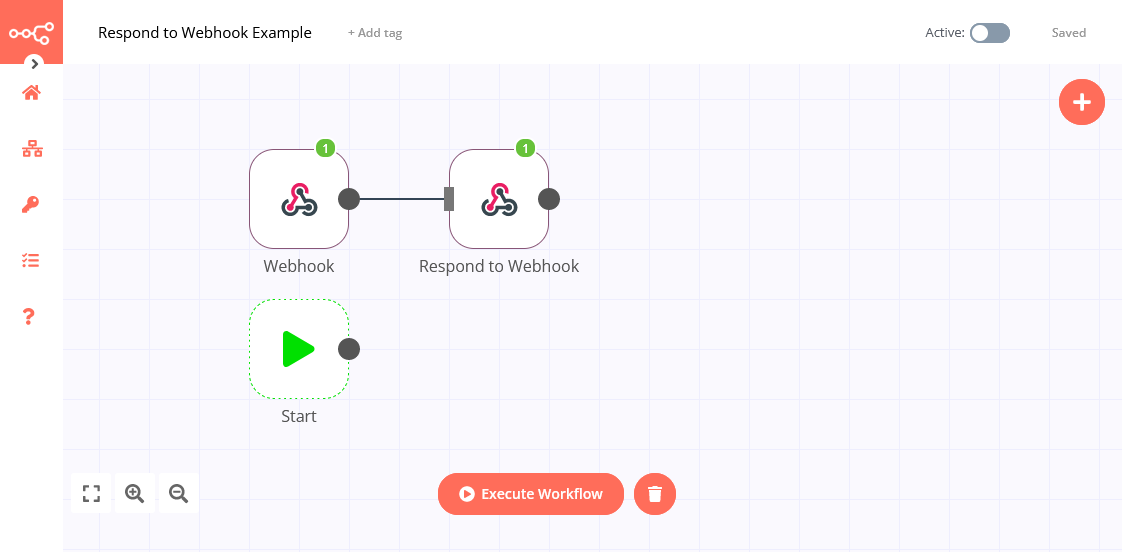
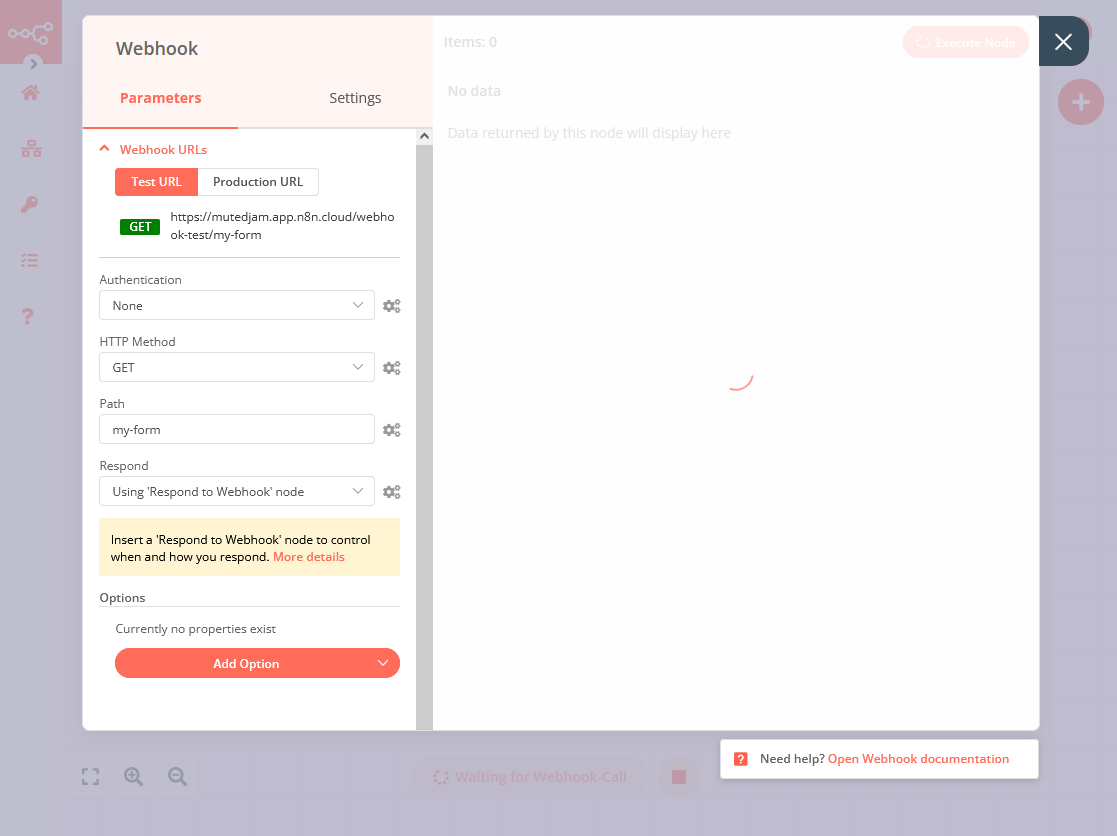
1. Webhook node#
This node will receive incoming requests (for example, when the webhook URL is opened with a browser).
- Enter a human-readable value in the path field, for example
my-form. - Choose the Using 'Respond to Webhook' node option Response dropdown.
- Click on Execute Node to run the node.
- Open the URL shown in the Test URL field under Webhook URLs in a new browser tab.
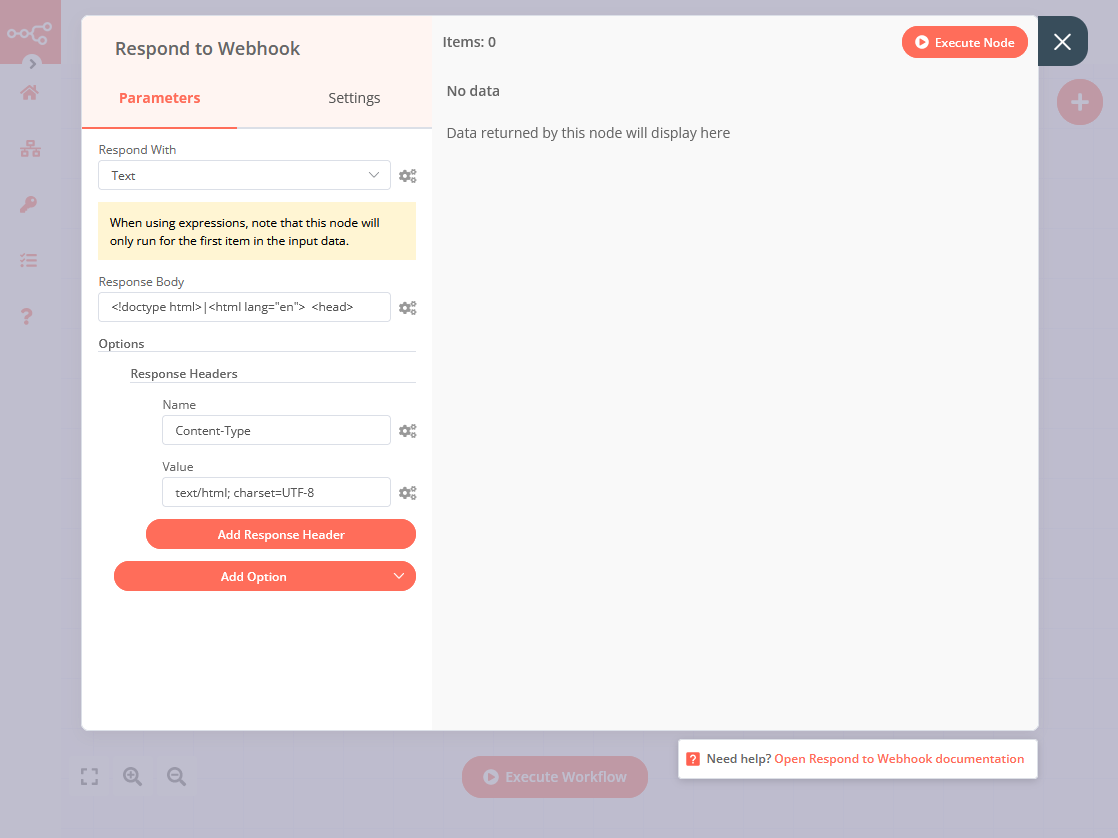
2. Respond to Webhook node#
This node will define the response to the request received in the previous step.
- Connect the Webhook node from the previous step to the new Respond to Webhook node.
- Choose the Text option in the Respond With dropdown.
- Enter some basic HTML into the Response Body field (for example the Bootstrap Starter template).
- Click Add Option > Response Headers > Add Response Header to add a header to the response.
- Enter
Content-Typein the Name field andtext/html; charset=UTF-8in the value field of the new header. - Close the Respond to Webhook modal and click the Execute Workflow button.
- Open the Test URL from the Webhook node in a new browser tab. The browser should now show the page added defined in the Response Body field of the Respond to Webhook node.