Google Cloud Firestore#
Google Cloud Firestore is a flexible, scalable database for mobile, web, and server development from Firebase and Google Cloud. It keeps your data in-sync across client apps through real-time listeners and offers offline support for mobile and web.
Credentials
You can find authentication information for this node here.
Basic Operations#
- Document
- Create a document
- Create/Update a document
- Delete a document
- Get a document
- Get all documents from a collection
- Runs a query against your documents
- Collection
- Get all root collections
Example Usage#
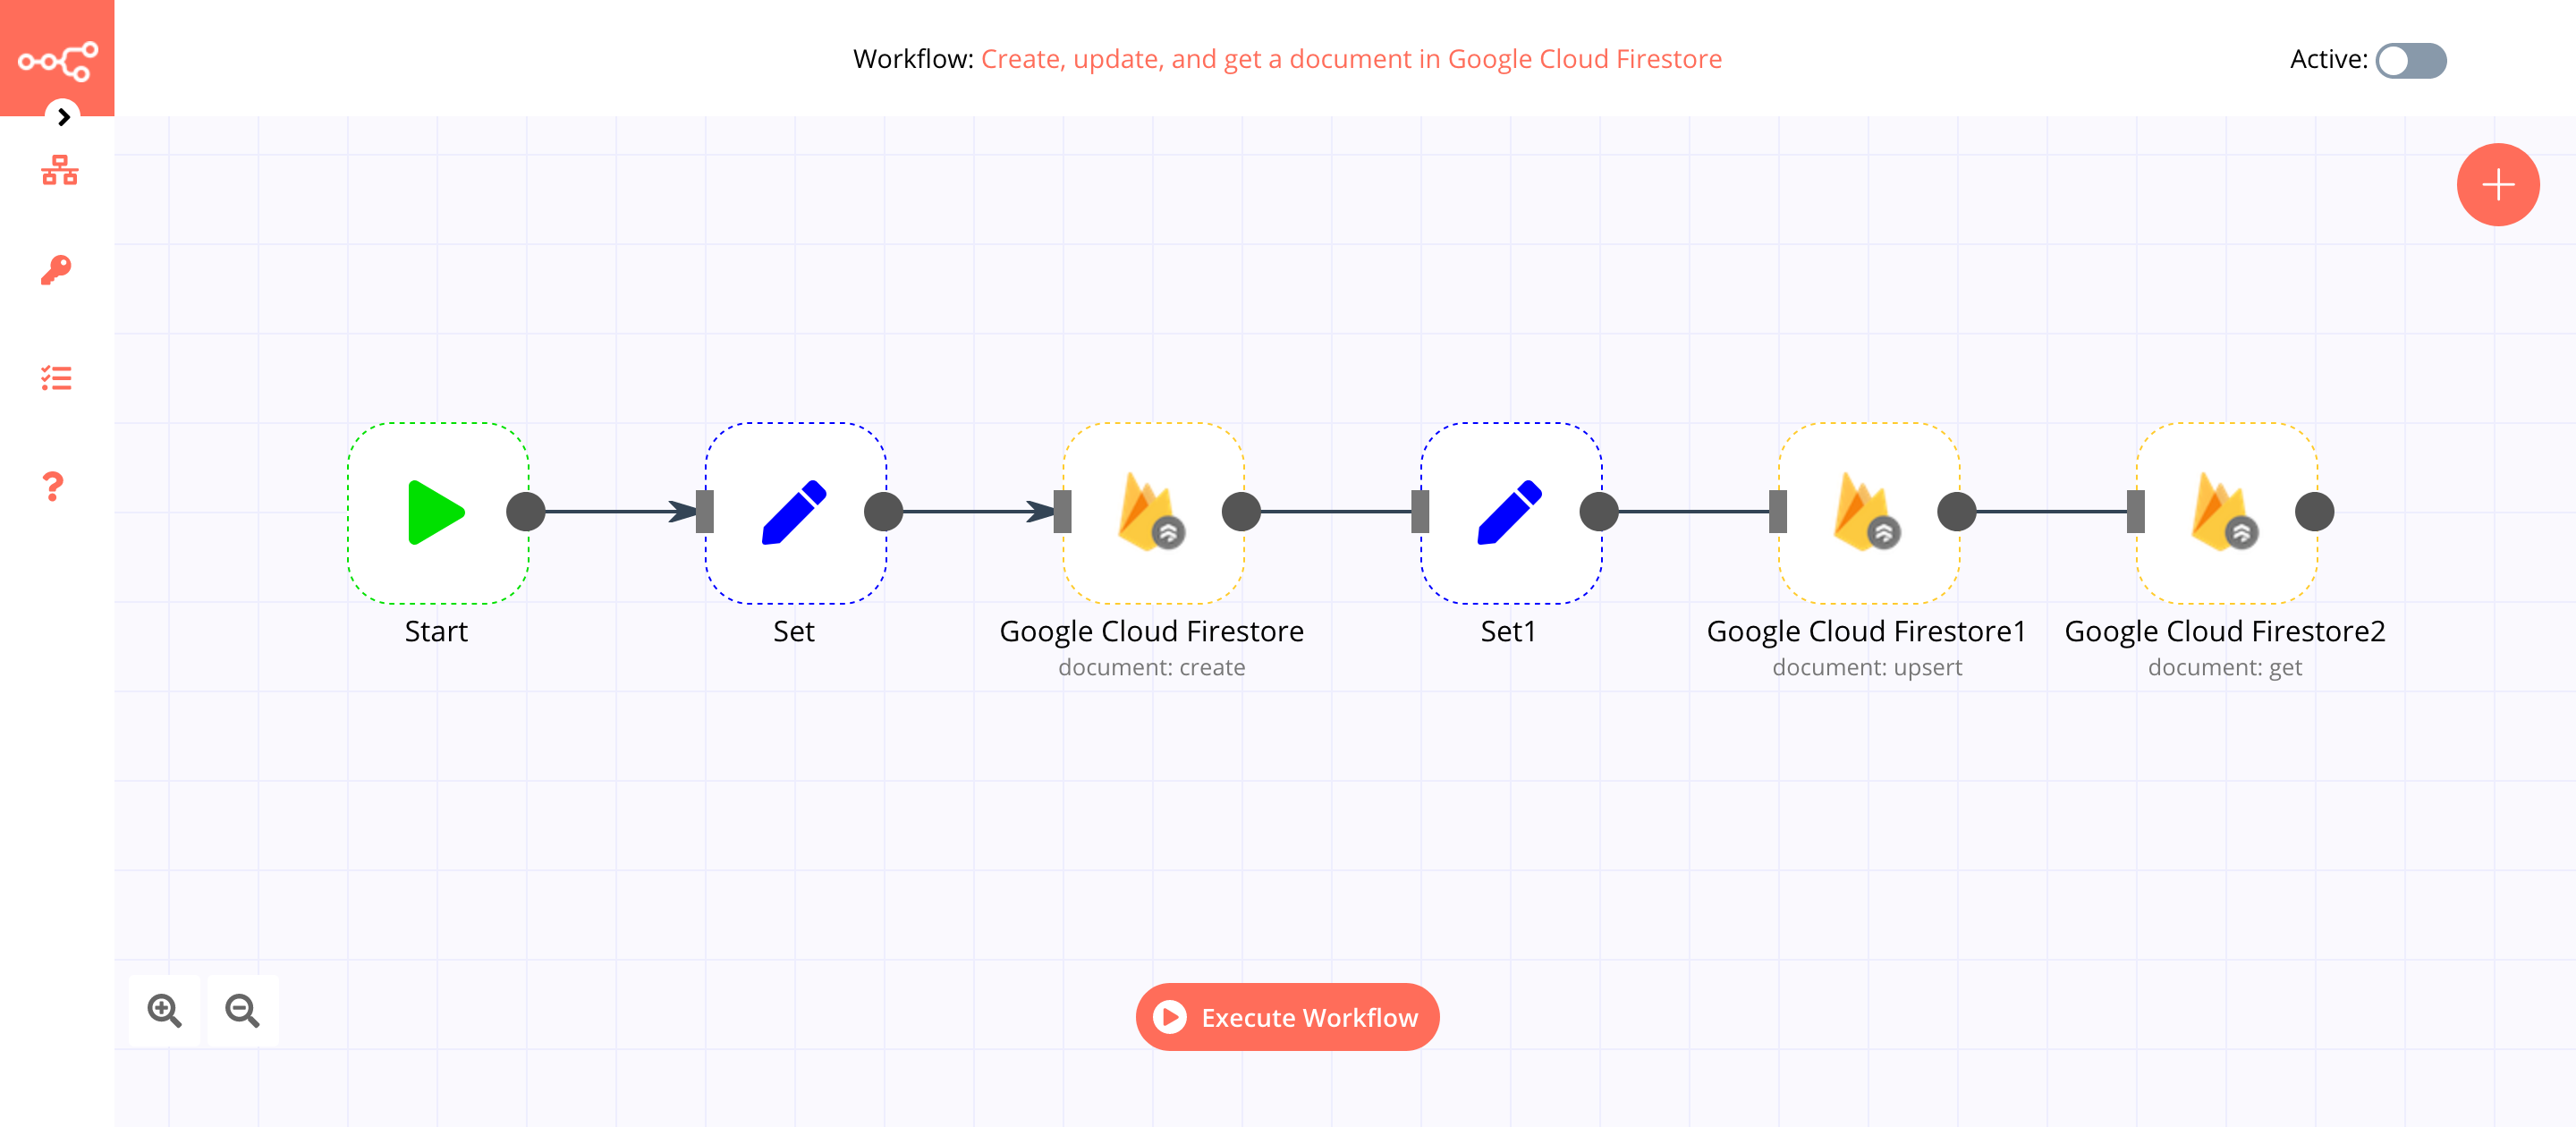
This workflow allows you to create, update, and get a document in the Google Cloud Firestore. You can also find the workflow on n8n.io. This example usage workflow uses the following nodes. - Start - Set - Google Cloud Firestore
The final workflow should look like the following image.
1. Start node#
The Start node exists by default when you create a new workflow.
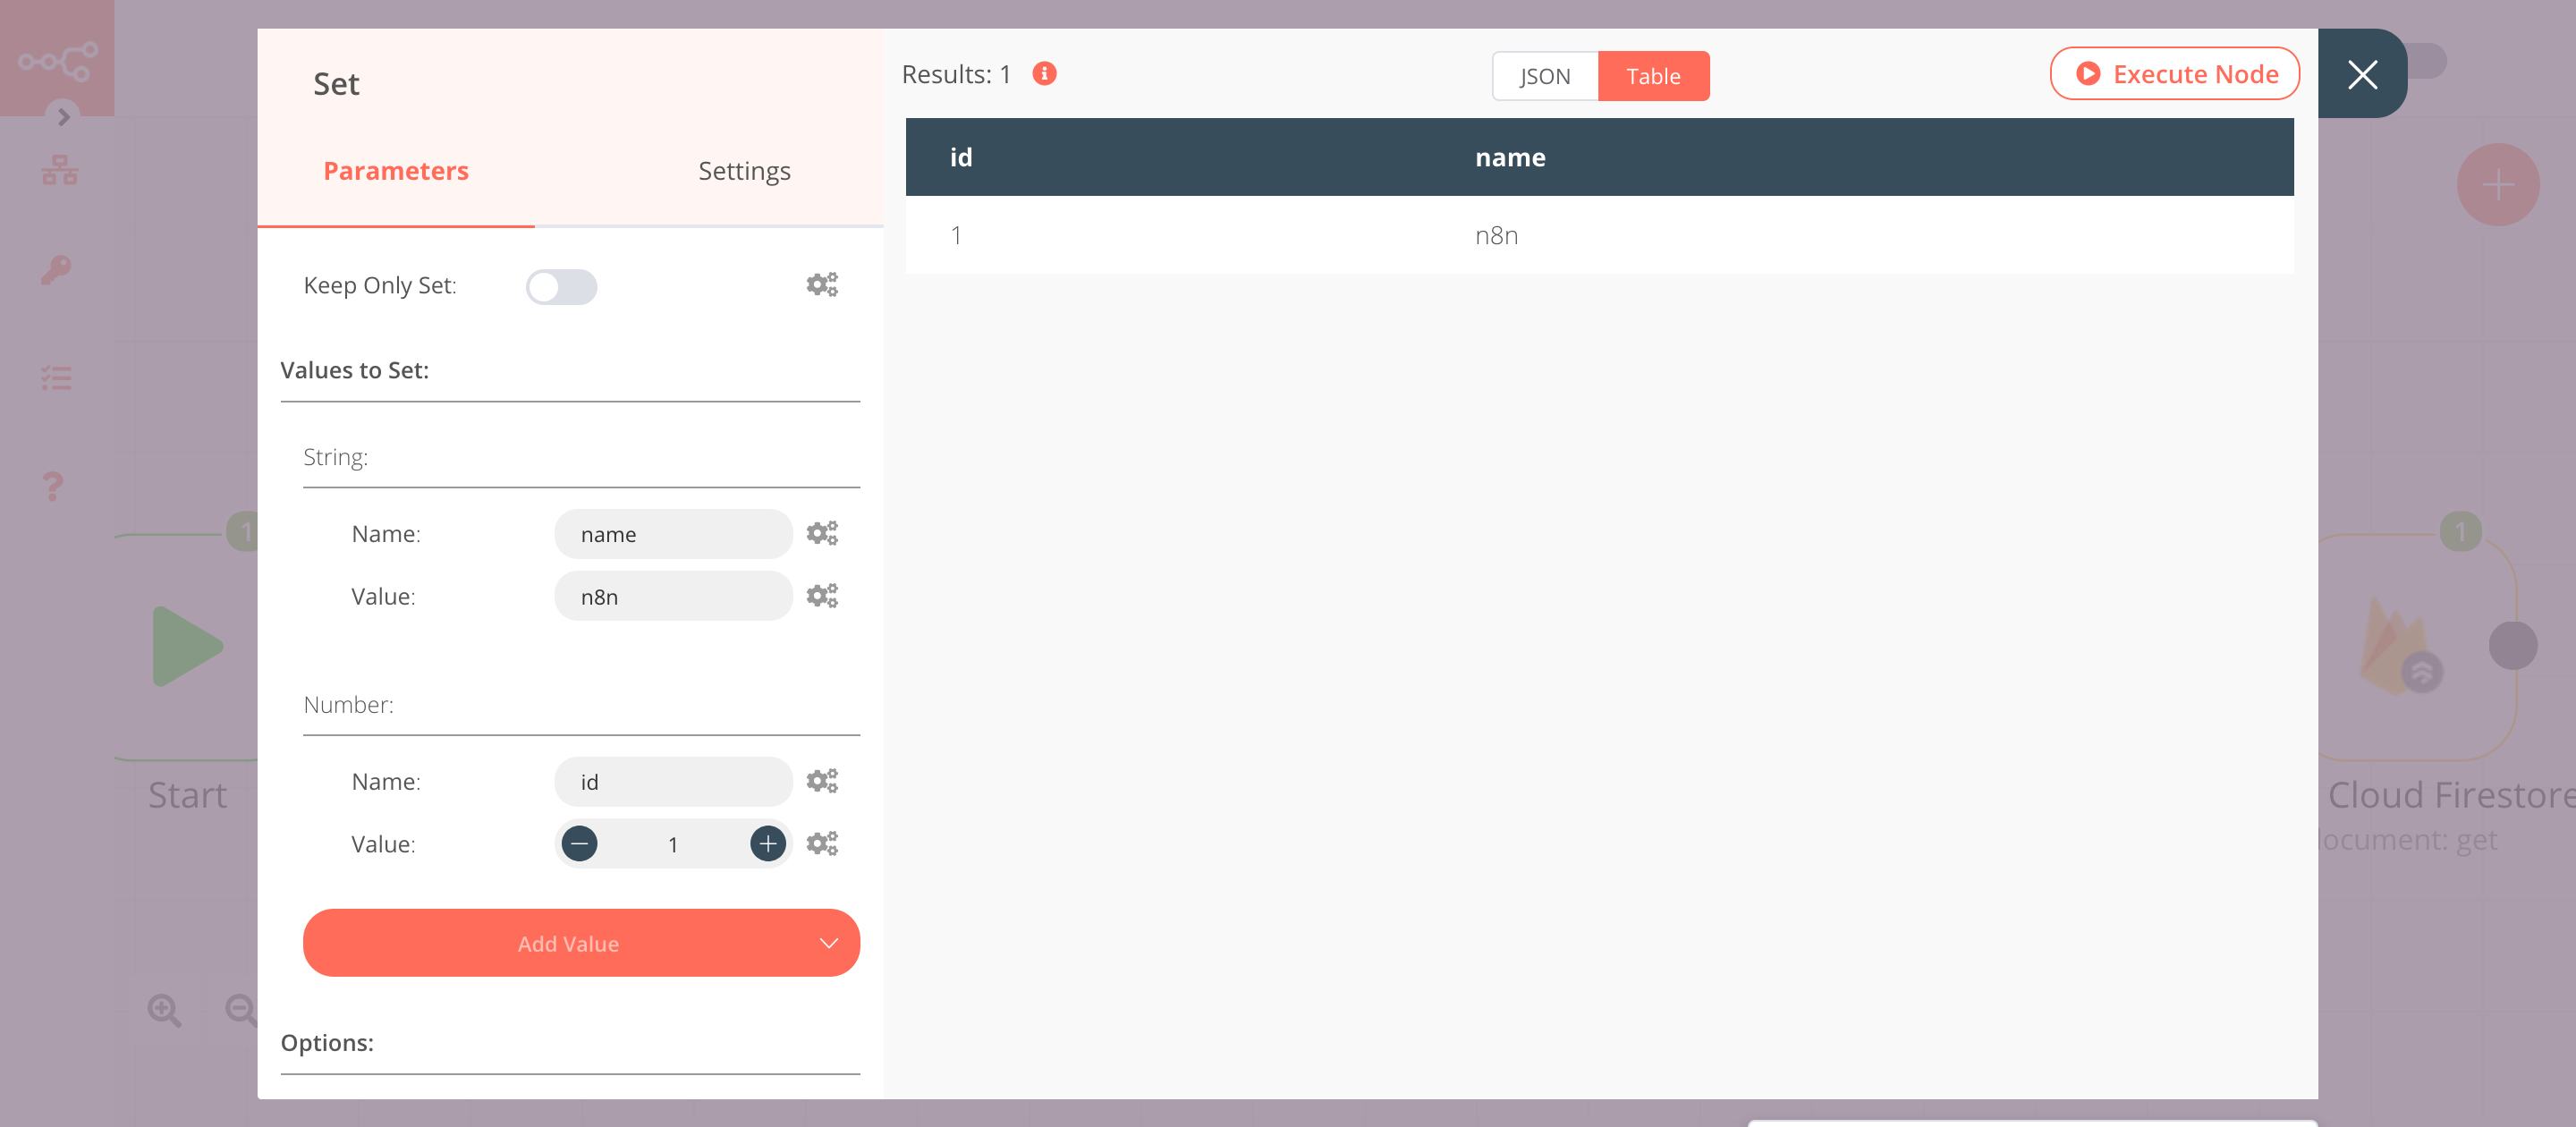
2. Set node#
We will use the Set node to set the name and id.
- Click on Add Value and select 'String' from the dropdown list.
- Enter
namein the Name field. - Enter
n8nin the Value field. - Click on Add Value and select 'Number' from the dropdown list.
- Enter
idin the Name field. - Enter
1in the Value field. - Click on Execute Node to run the node.
In the screenshot below, you will notice that node sets the value for name and id.
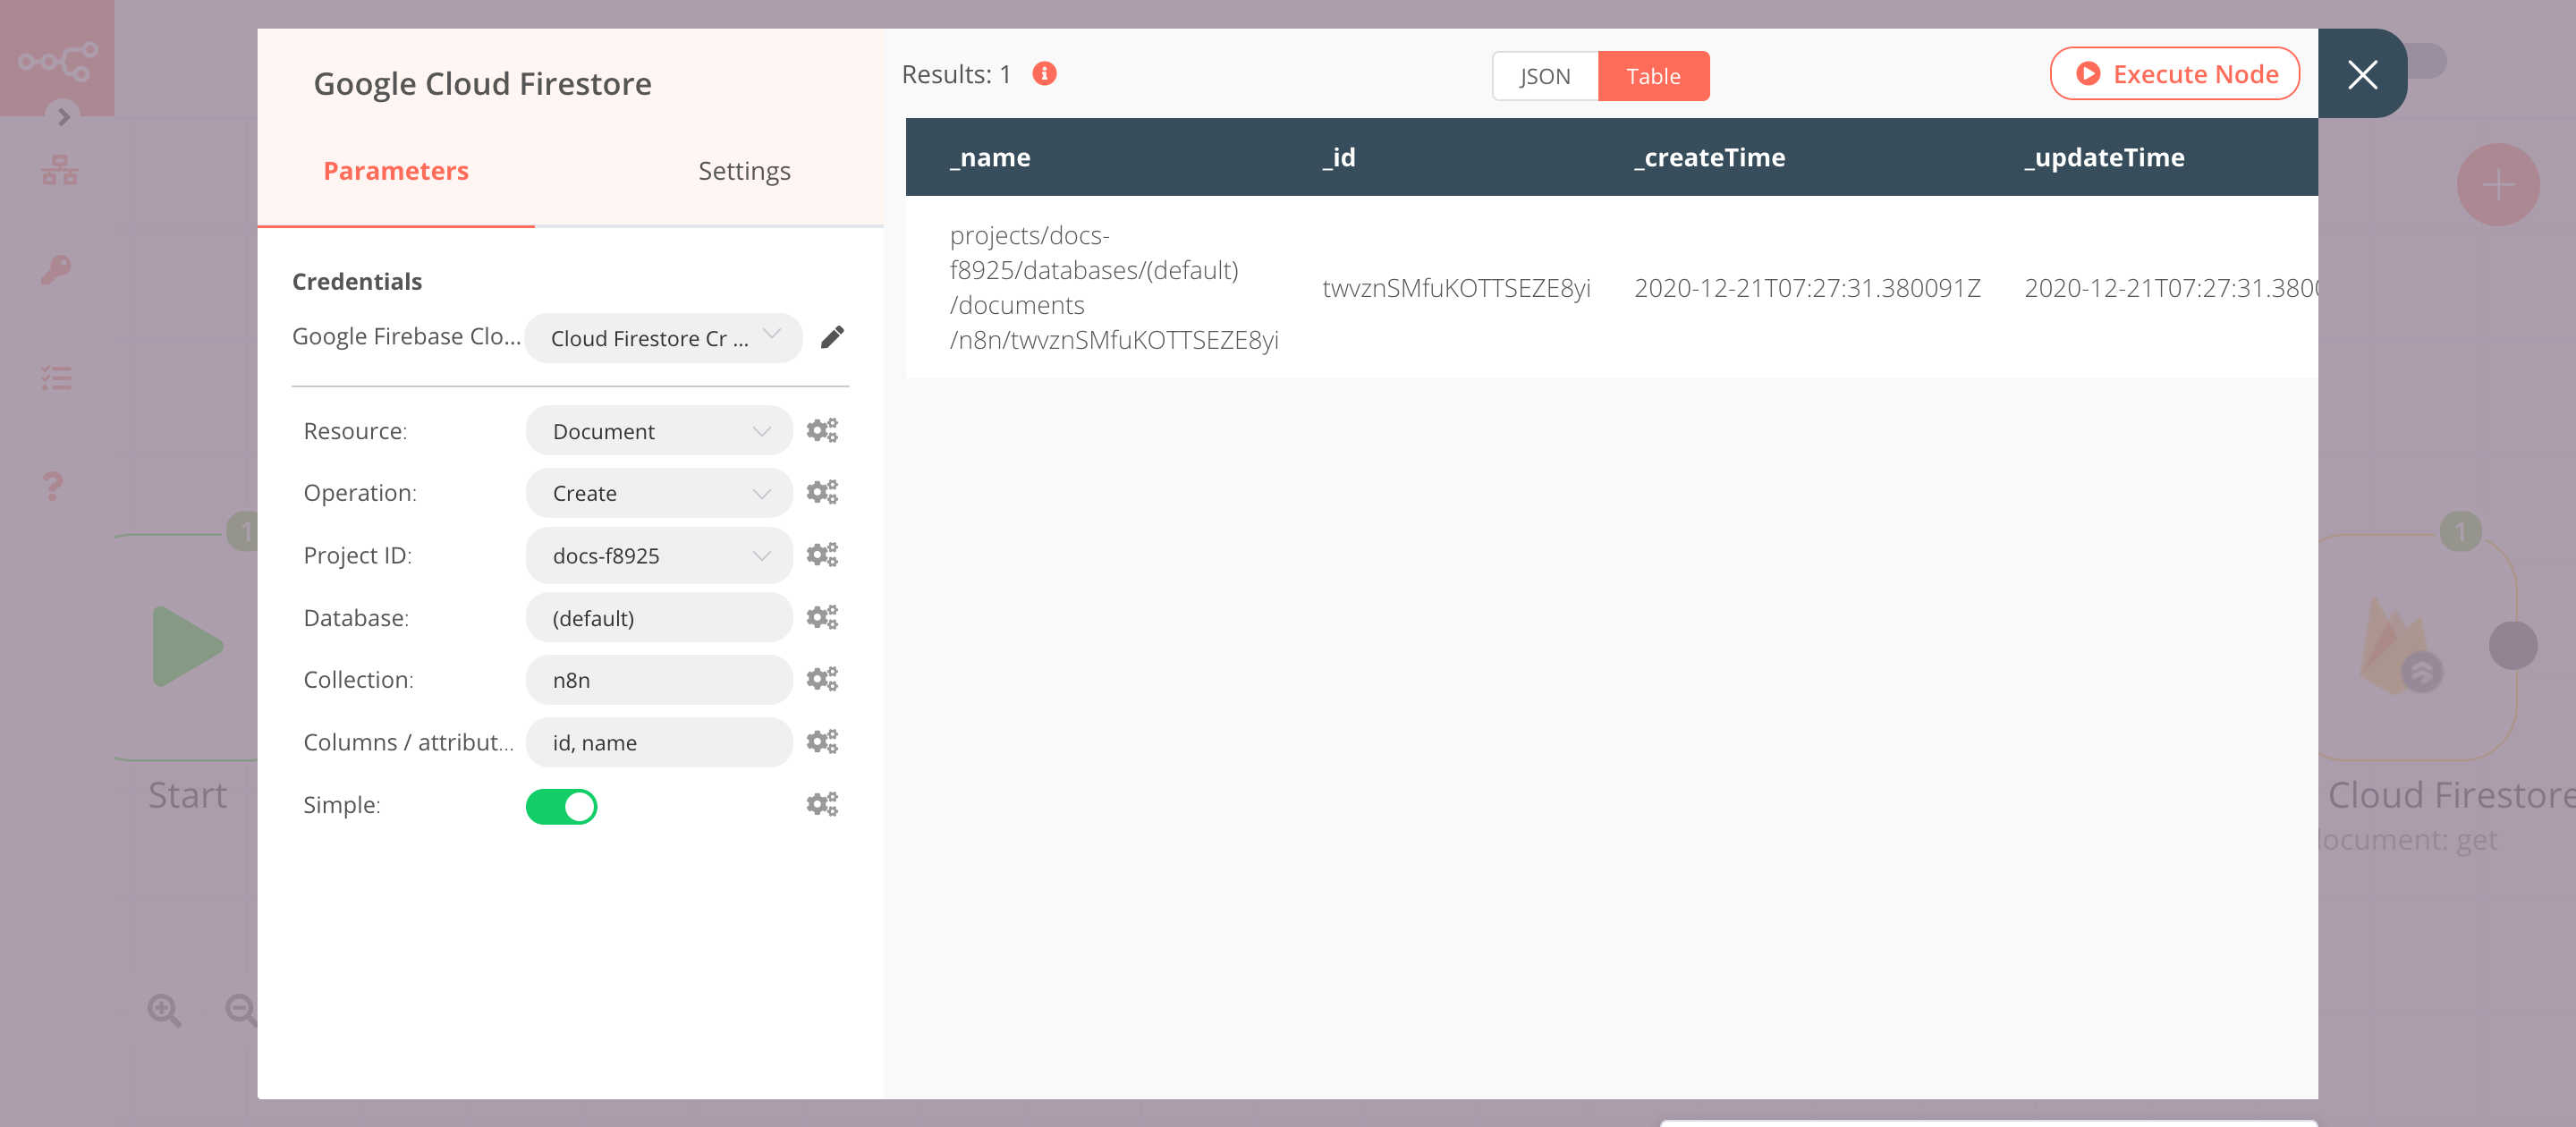
3. Google Cloud Firestore node (document: create)#
This node will create a new document in a collection in Google Cloud Firestore with the data from the previous node.
- First of all, you'll have to enter credentials for the Google Cloud Firestore node. You can find out how to do that here.
- Select 'Create' from the Operation dropdown list.
- Select a project from the Project ID dropdown list.
- Enter the name of your collection in the Collection field.
- Enter
id, namein the Columns / attributes field. - Click on Execute Node to run the node.
In the screenshot below, you will notice that the node creates a new document using the data from the previous node.
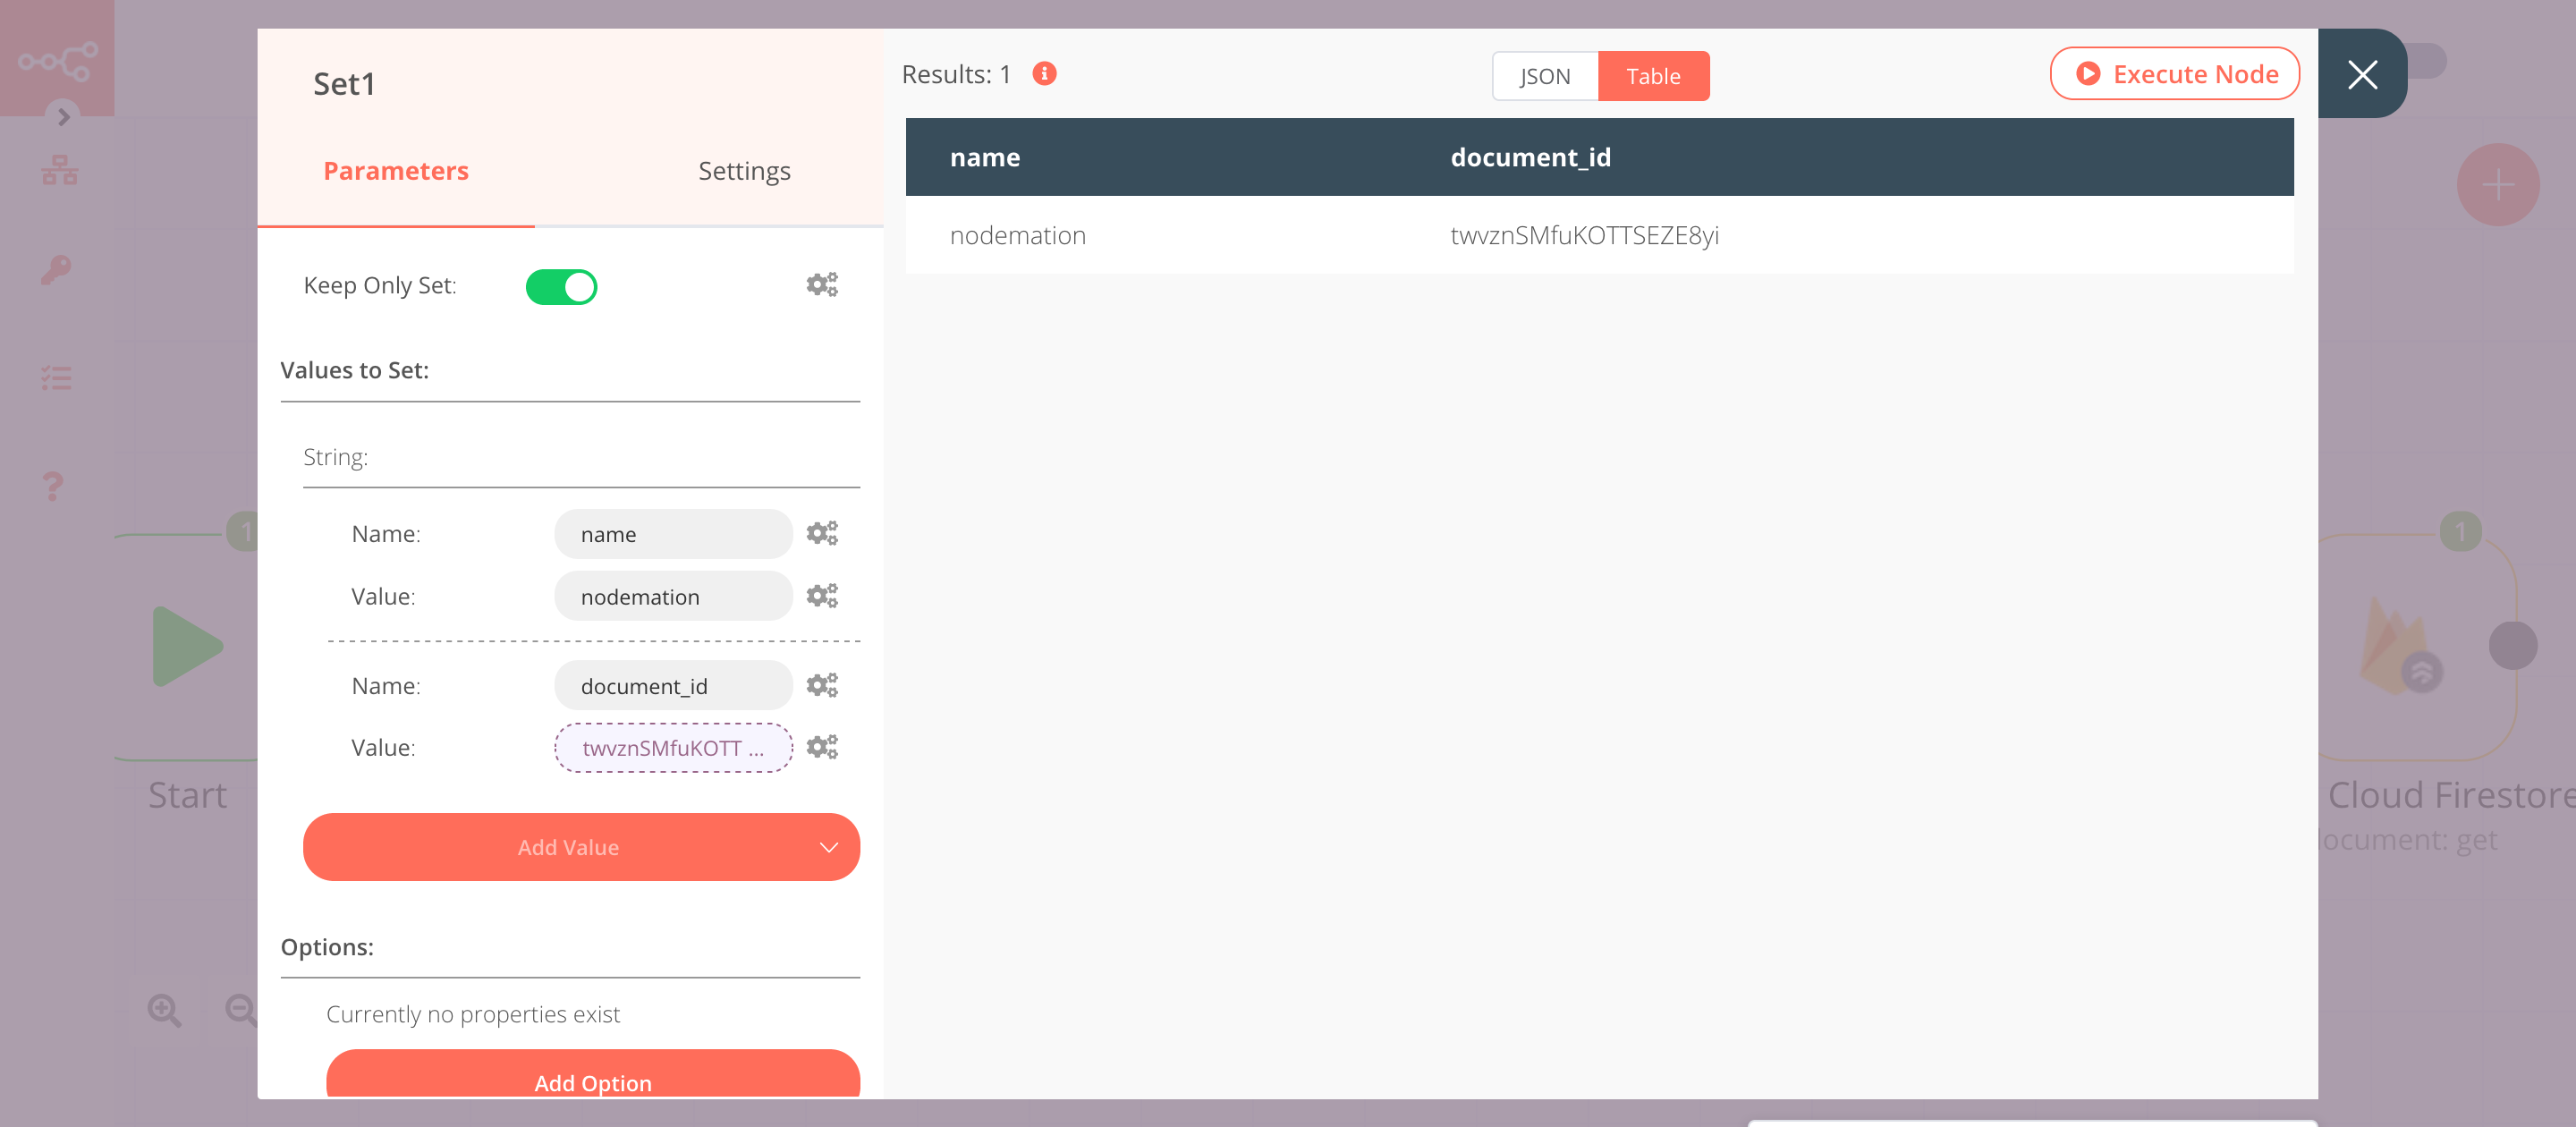
4. Set node#
We will use the Set node to ensure that only the data that we set in this node gets passed on to the next nodes in the workflow. We will set a new value for name.
- Click on Add Value and select 'String' from the dropdown list.
- Enter
namein the Name field. - Enter
nodemationin the Value field. - Click on Add Value and select 'String' from the dropdown list.
- Enter
document_idin the Name field. - Click on the gears icon next to the Value field and click on Add Expression.
- Select the following in the Variable Selector section: Nodes > Google Cloud Firestore > Output Data > JSON > _id. You can also add the following expression:
{{$node["Google Cloud Firestore"].json["_id"]}}. - Toggle Keep Only Set to
true. We set this option to true to ensure that only the data that we have set in this node get passed on to the next nodes in the workflow. - Click on Execute Node to run the node.
In the screenshot below, you will notice that the node sets the values of name and document_id. These values are passed to the next node in the workflow.
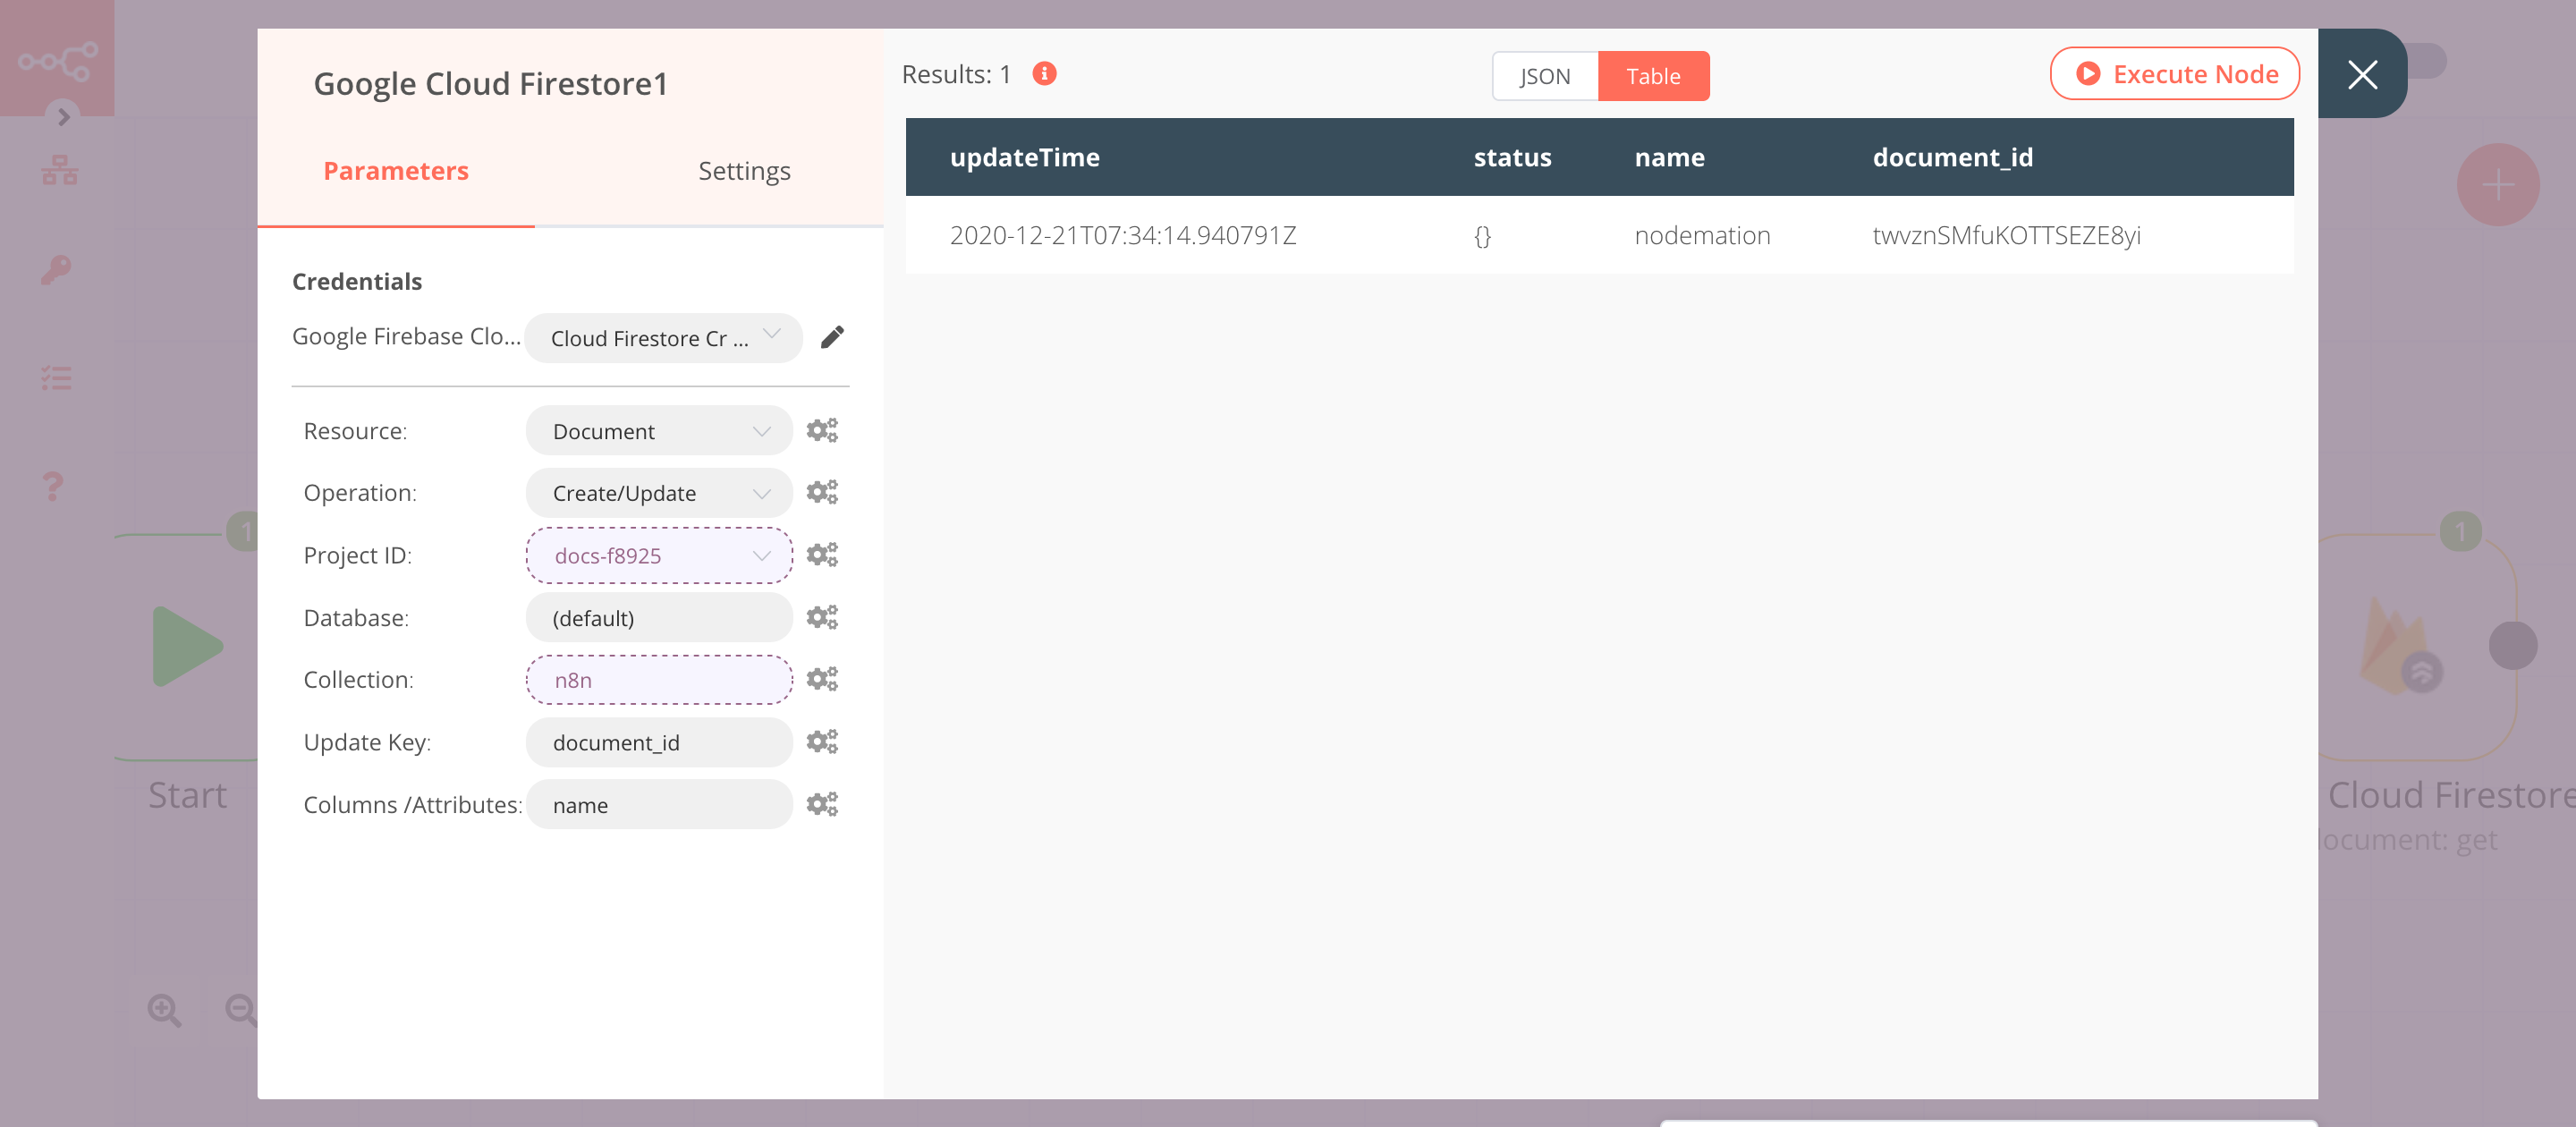
5. Google Cloud Firestore1 node (document: upsert)#
This node will update the value of the name field in the document that we created using the Google Cloud Firestore node.
- Select the credentials that you entered in the previous Google Cloud Firestore node.
- Select 'Create/Update' from the Operation dropdown list.
- Click on the gears icon next to the Project ID field and click on Add Expression.
- Select the following in the Variable Selector section: Nodes > Google Cloud Firestore > Parameters > projectId. You can also add the following expression:
{{$node["Google Cloud Firestore"].parameter["projectId"]}}. - Click on the gears icon next to the Collection field and click on Add Expression.
- Select the following in the Variable Selector section: Nodes > Google Cloud Firestore > Parameters > collection. You can also add the following expression:
{{$node["Google Cloud Firestore"].parameter["collection"]}}. - Enter
document_idin the Update Key field. - Enter
namein the Column /Attributes field. - Click on Execute Node to run the node.
In the screenshot below, you will notice that the node updates the value of the name field in the document that we created using the Google Cloud Firestore node.
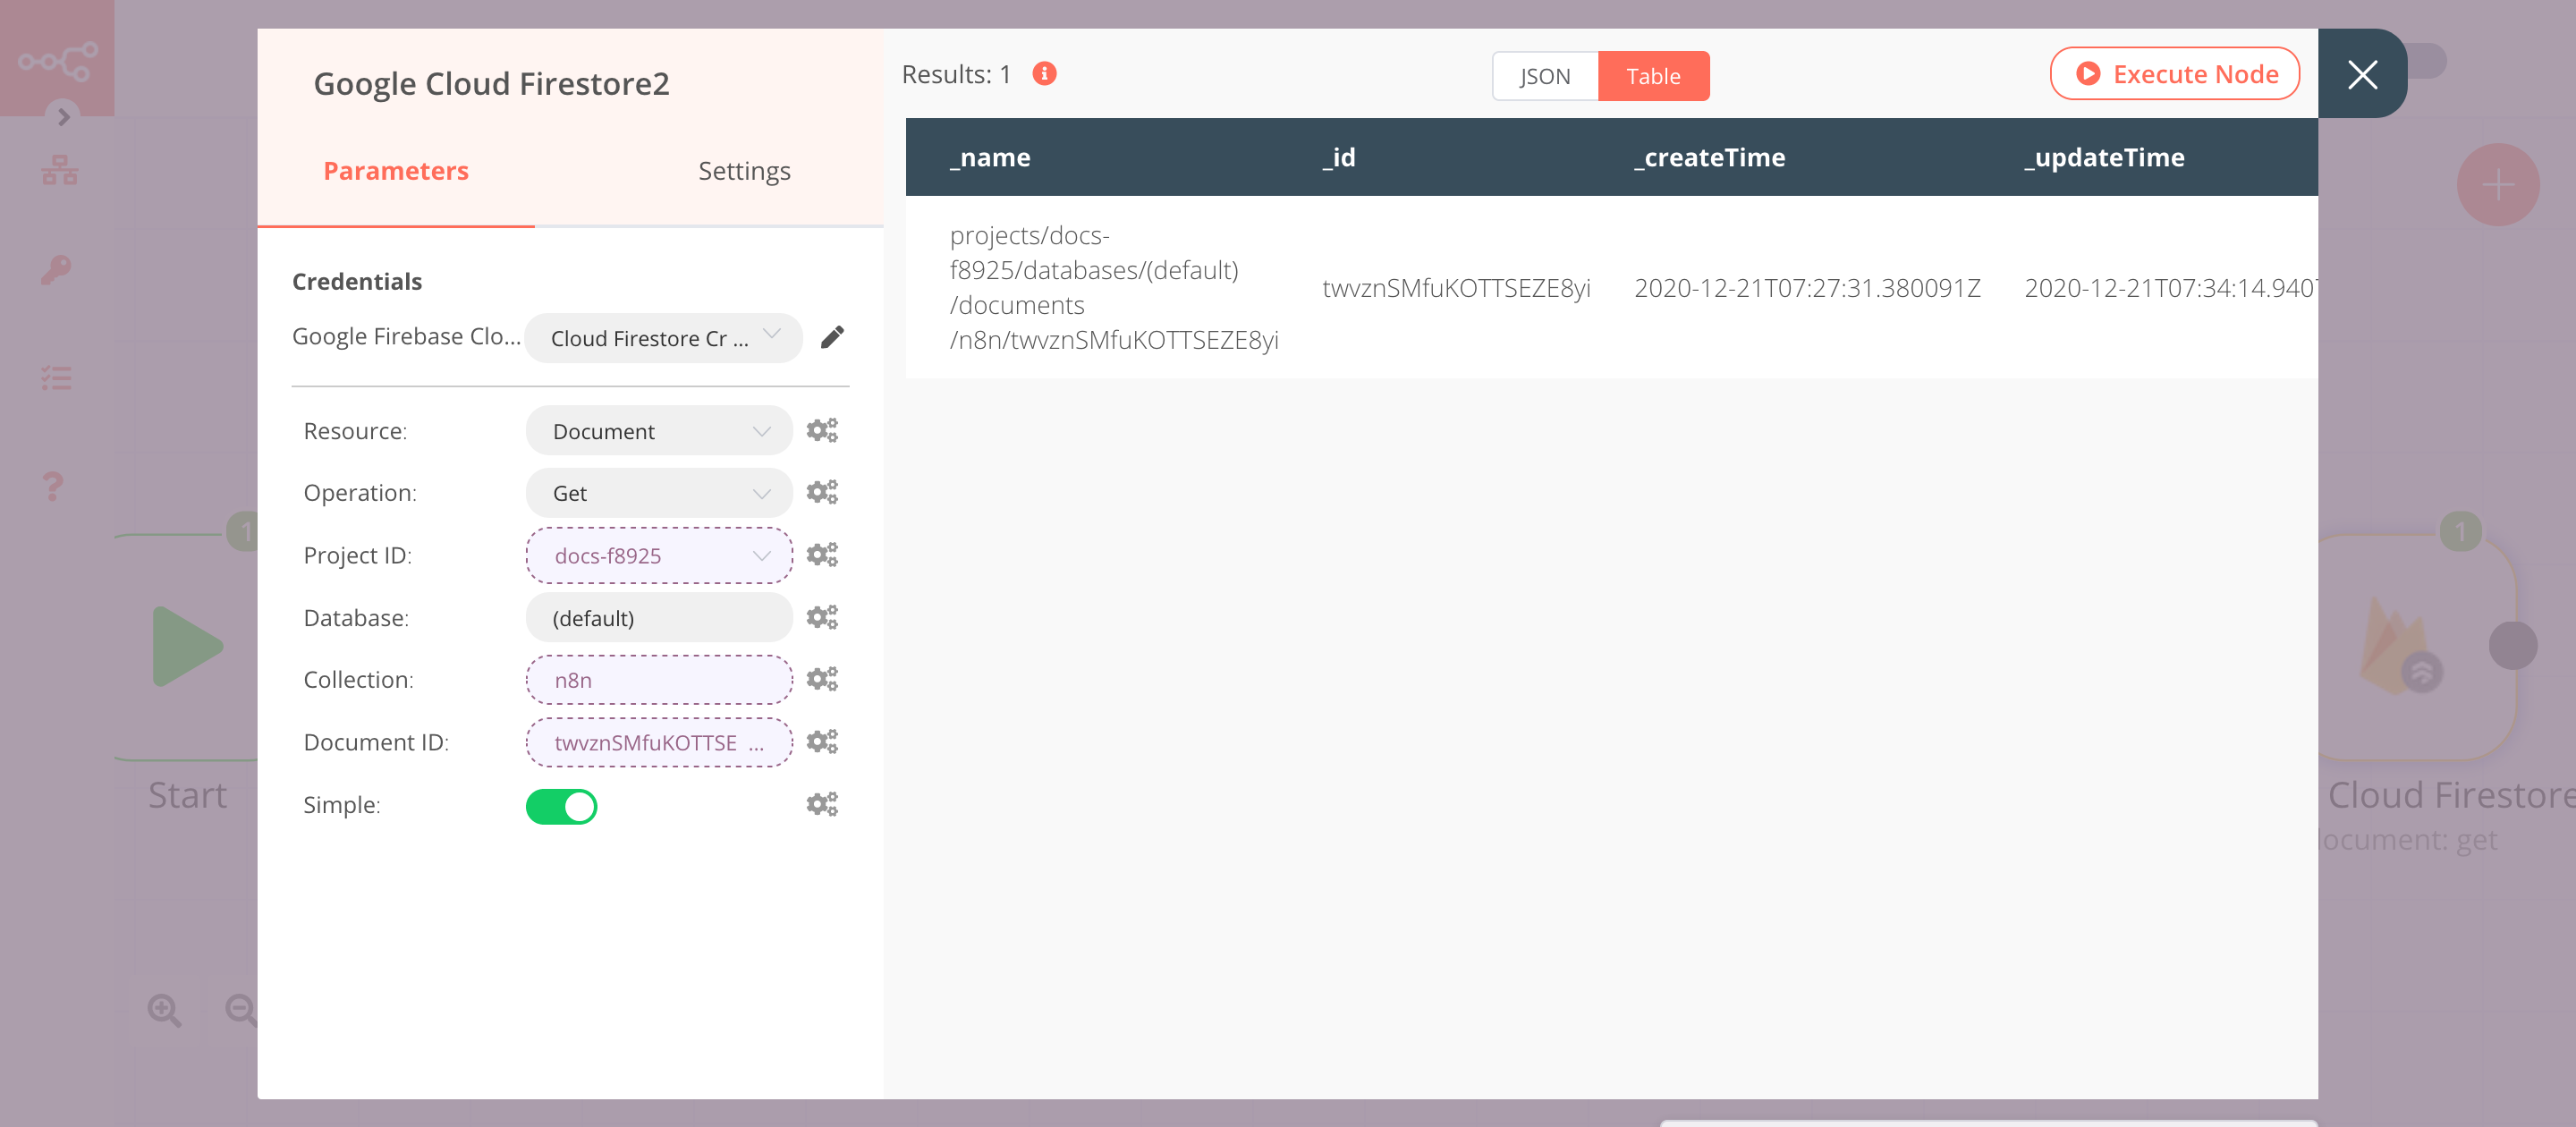
6. Google Cloud Firestore node (document: get)#
This node will get the document that we created using the Google Cloud Firestore node.
- Select the credentials that you entered in the previous node.
- Click on the gears icon next to the Project ID field and click on Add Expression.
- Select the following in the Variable Selector section: Nodes > Google Cloud Firestore > Parameters > projectId. You can also add the following expression:
{{$node["Google Cloud Firestore"].parameter["projectId"]}}. - Click on the gears icon next to the Collection field and click on Add Expression.
- Select the following in the Variable Selector section: Nodes > Google Cloud Firestore > Parameters > collection. You can also add the following expression:
{{$node["Google Cloud Firestore"].parameter["collection"]}}. - Click on the gears icon next to the Document ID field and click on Add Expression.
- Select the following in the Variable Selector section: Nodes > Set1 > Output Data > JSON > document_id. You can also add the following expression:
{{$node["Set1"].json["document_id"]}}. - Click on Execute Node to run the node.
In the screenshot below, you will notice that the node returns the document that we created using the Google Cloud Firestore node.