RabbitMQ Trigger#
RabbitMQ is an open-source message broker that accepts and forwards messages.
Credentials
You can find authentication information for this node here.
Example Usage#
This workflow allows you to receive messages from a queue and send an SMS if the value of the temperature is greater than 50. You can also find the workflow on n8n.io. This example usage workflow would use the following nodes.
The final workflow should look like the following image.
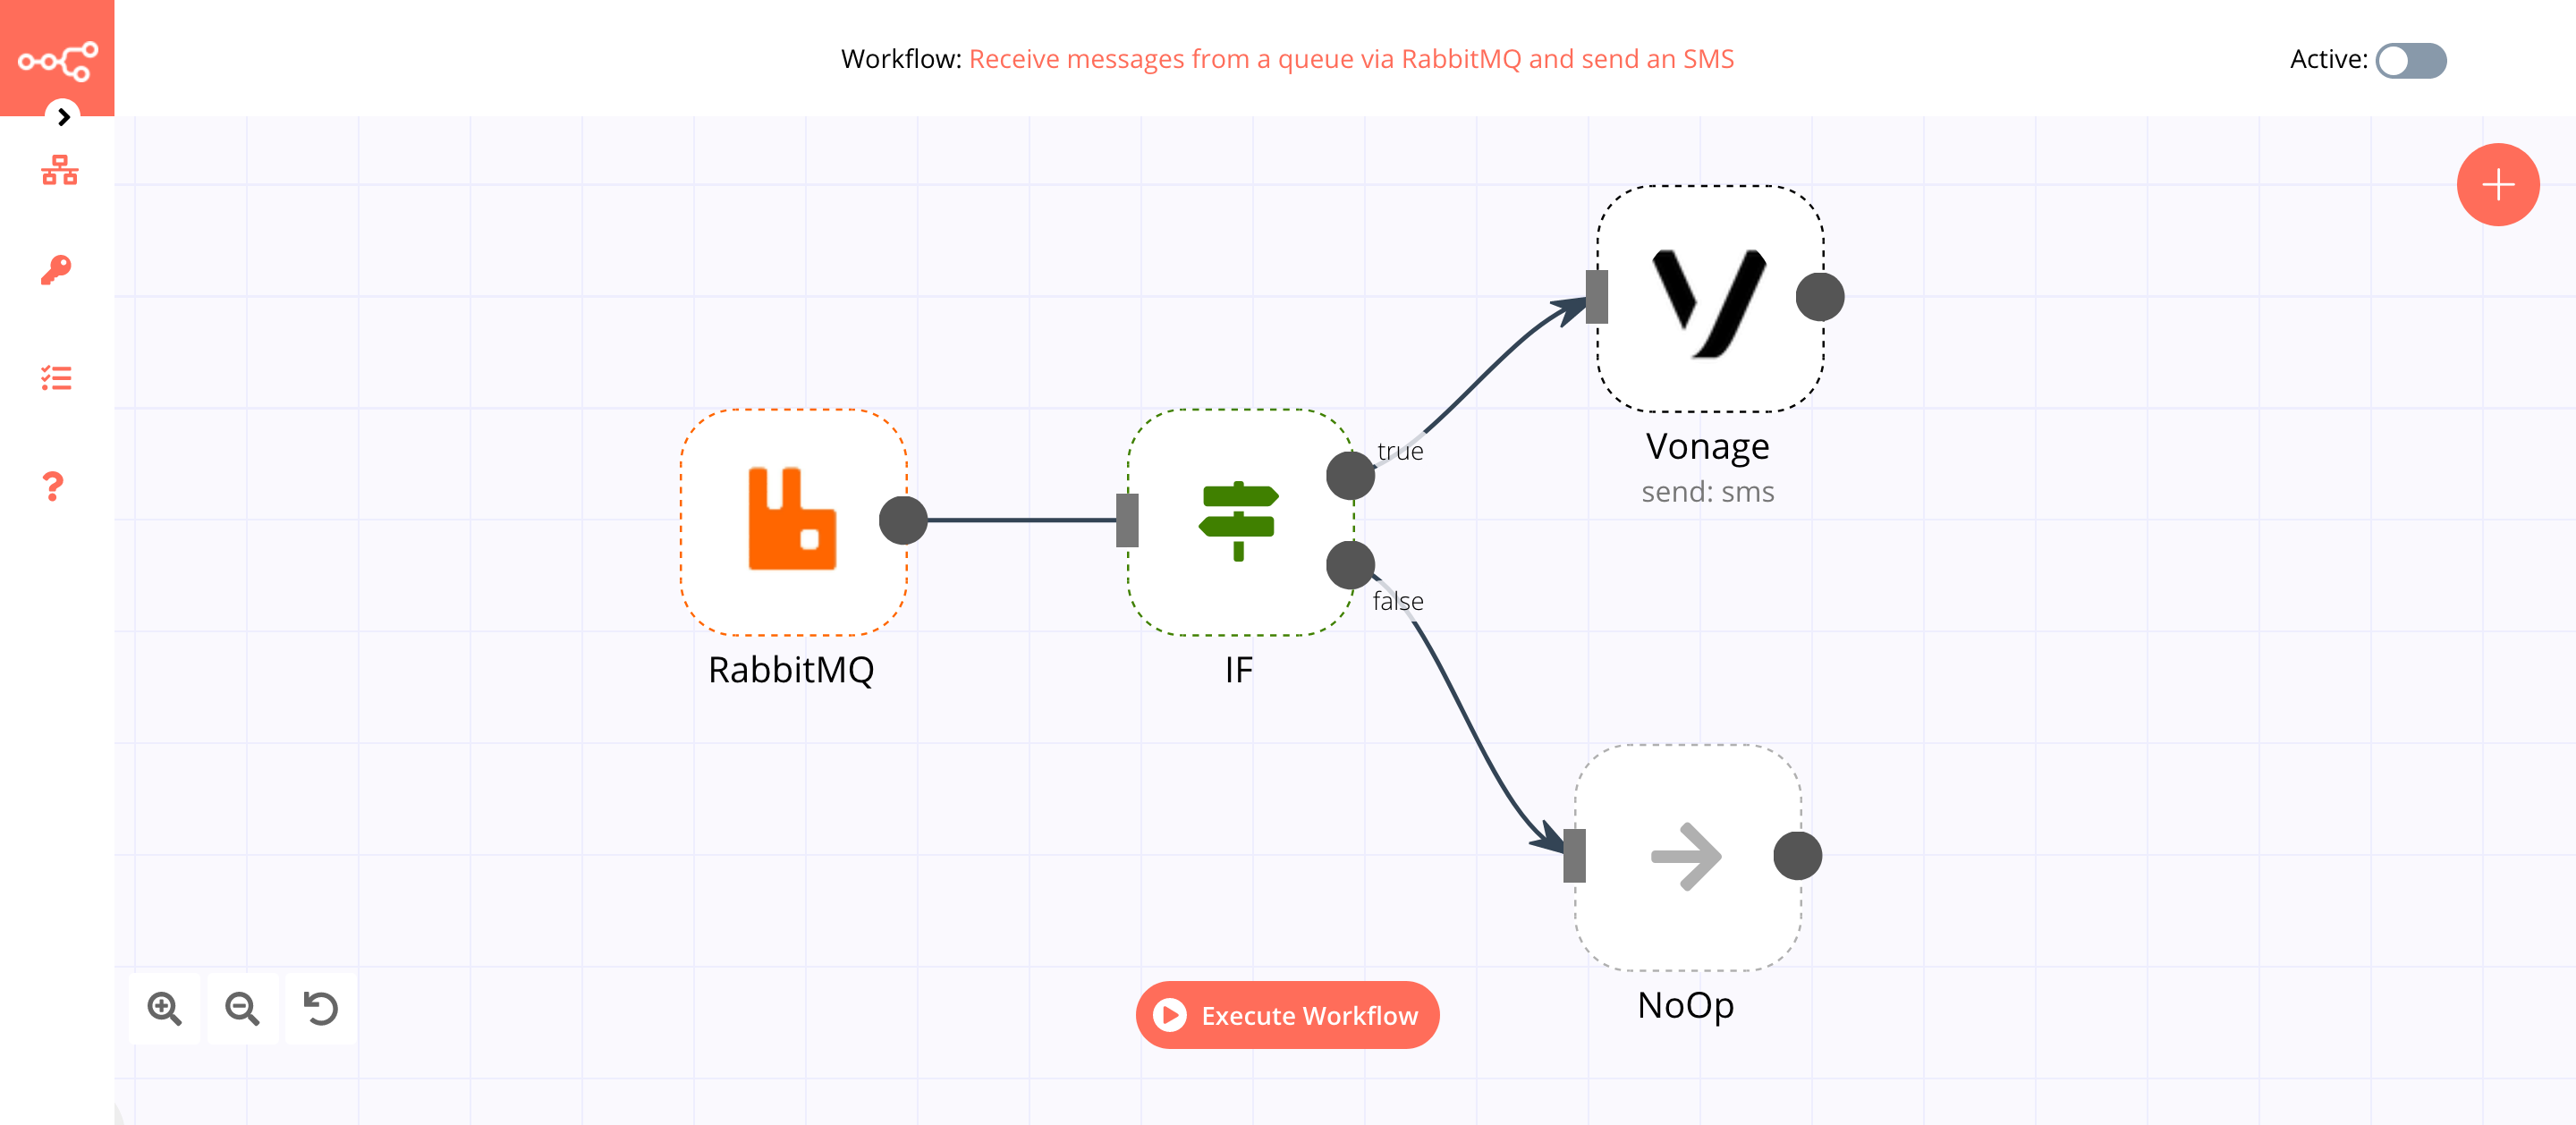
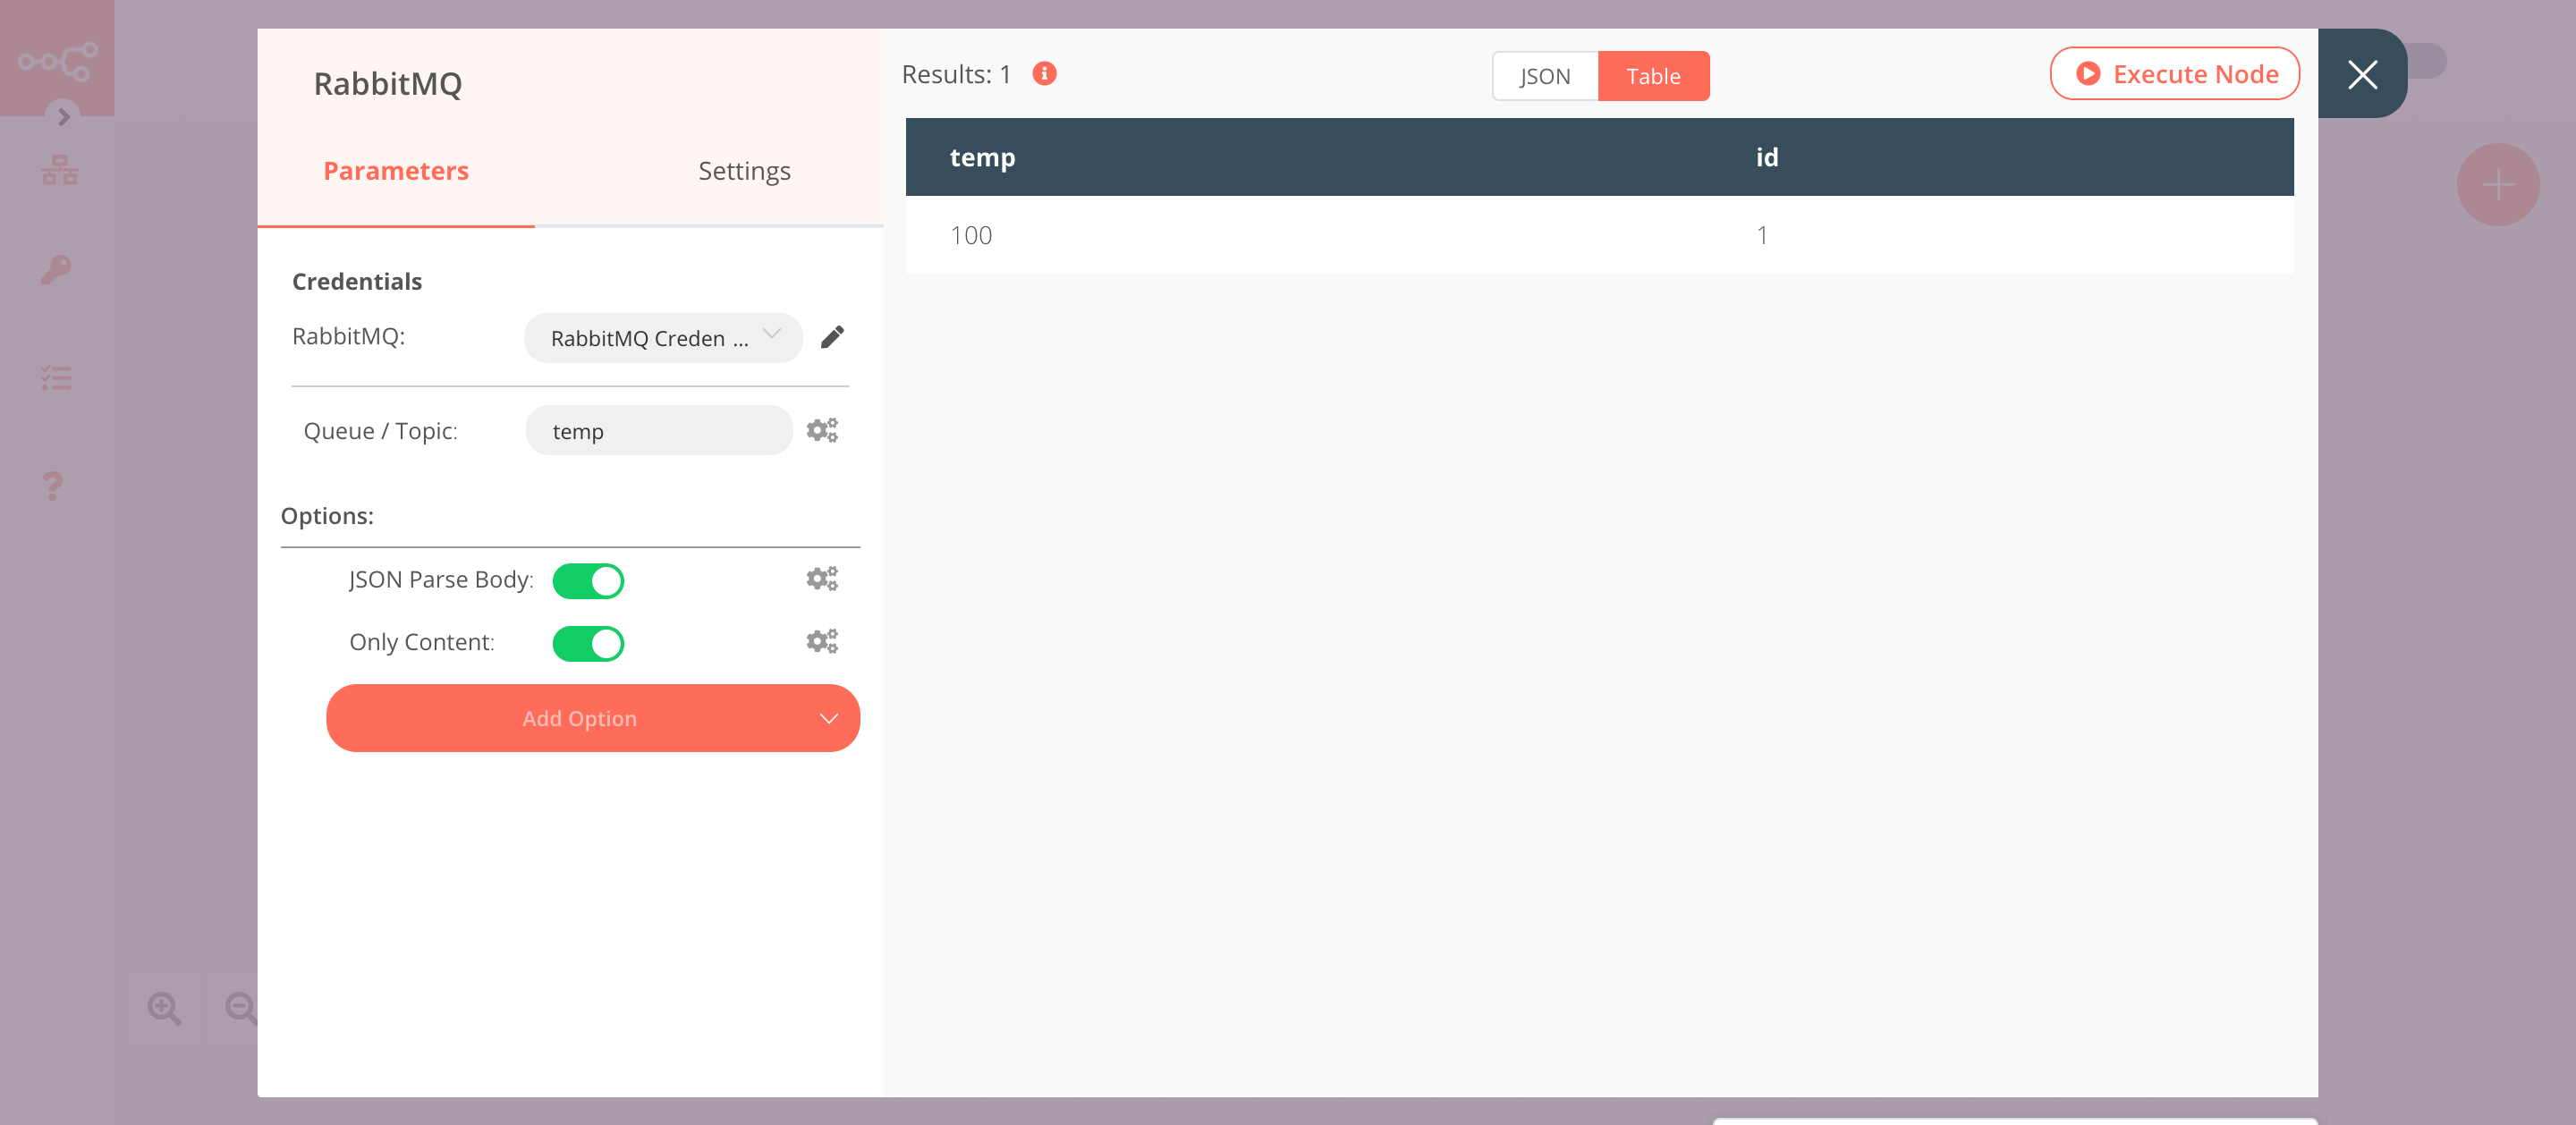
1. RabbitMQ Trigger node#
This node will trigger the workflow when a new message is sent to the queue temp. If you're using a different queue, use that instead. We are sending the message { "id": 1, "temp": 100 } to temp.
- First of all, you'll have to enter credentials for the RabbitMQ Trigger node. You can find out how to do that here.
- Enter the name of the queue or topic in the Queue / Topic field.
- Click on Add Option and select 'JSON Parse Body'.
- Toggle JSON Parse Body to
true. By setting this value to true, the node returns the body as JSON instead of a string. - Click on Add Option and select 'Only Content'.
- Toggle Only Content to
true. By setting this to true, the node only returns the message. - Click on Execute Node to run the node.
In the screenshot below, you will notice that the node gets triggered when a new message is sent to the temp queue in RabbitMQ.
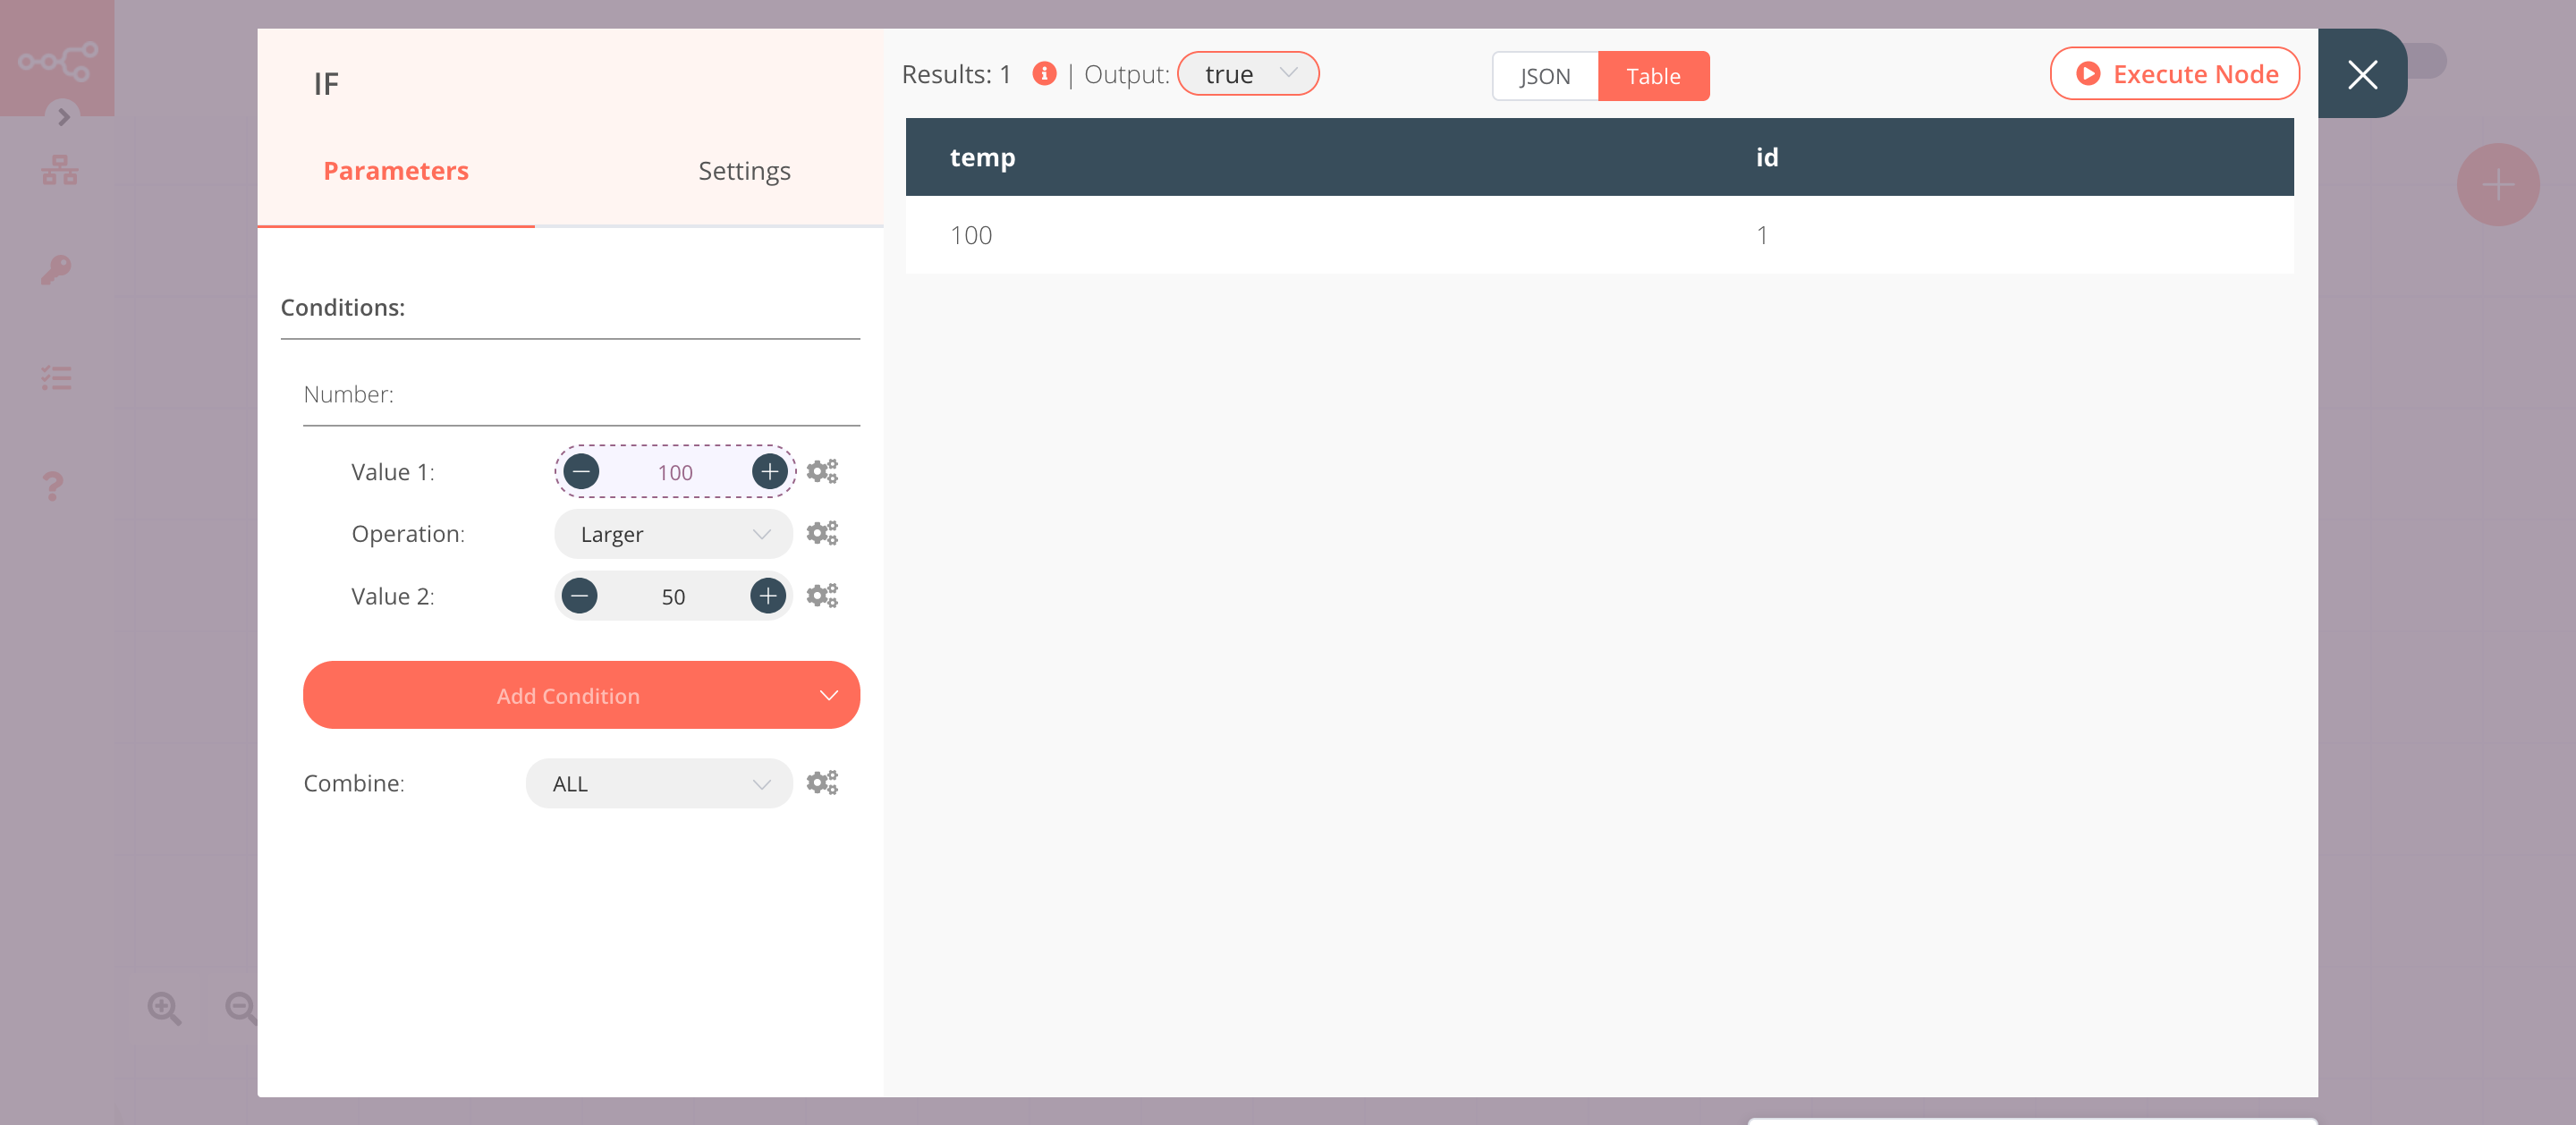
2. IF node#
This node will compare the value of temp that we received in the message from the previous node. If the value is greater than 50, it will return true otherwise false.
- Click on Add Condition and select 'Number' from the dropdown list.
- Click on the gears icon next to the Value 1 field and click on Add Expression.
- Select the following in the Variable Selector section: Nodes > RabbitMQ > Output Data > JSON > temp. You can also add the following expression:
{{$node["RabbitMQ"].json["temp"]}}. - Select 'Larger' from the Operation dropdown list.
- Set Value 2 to 50.
- Click on Execute Node to run the node.
In the screenshot below, you will notice that the node returns output for true when the temperature is greater than 50.
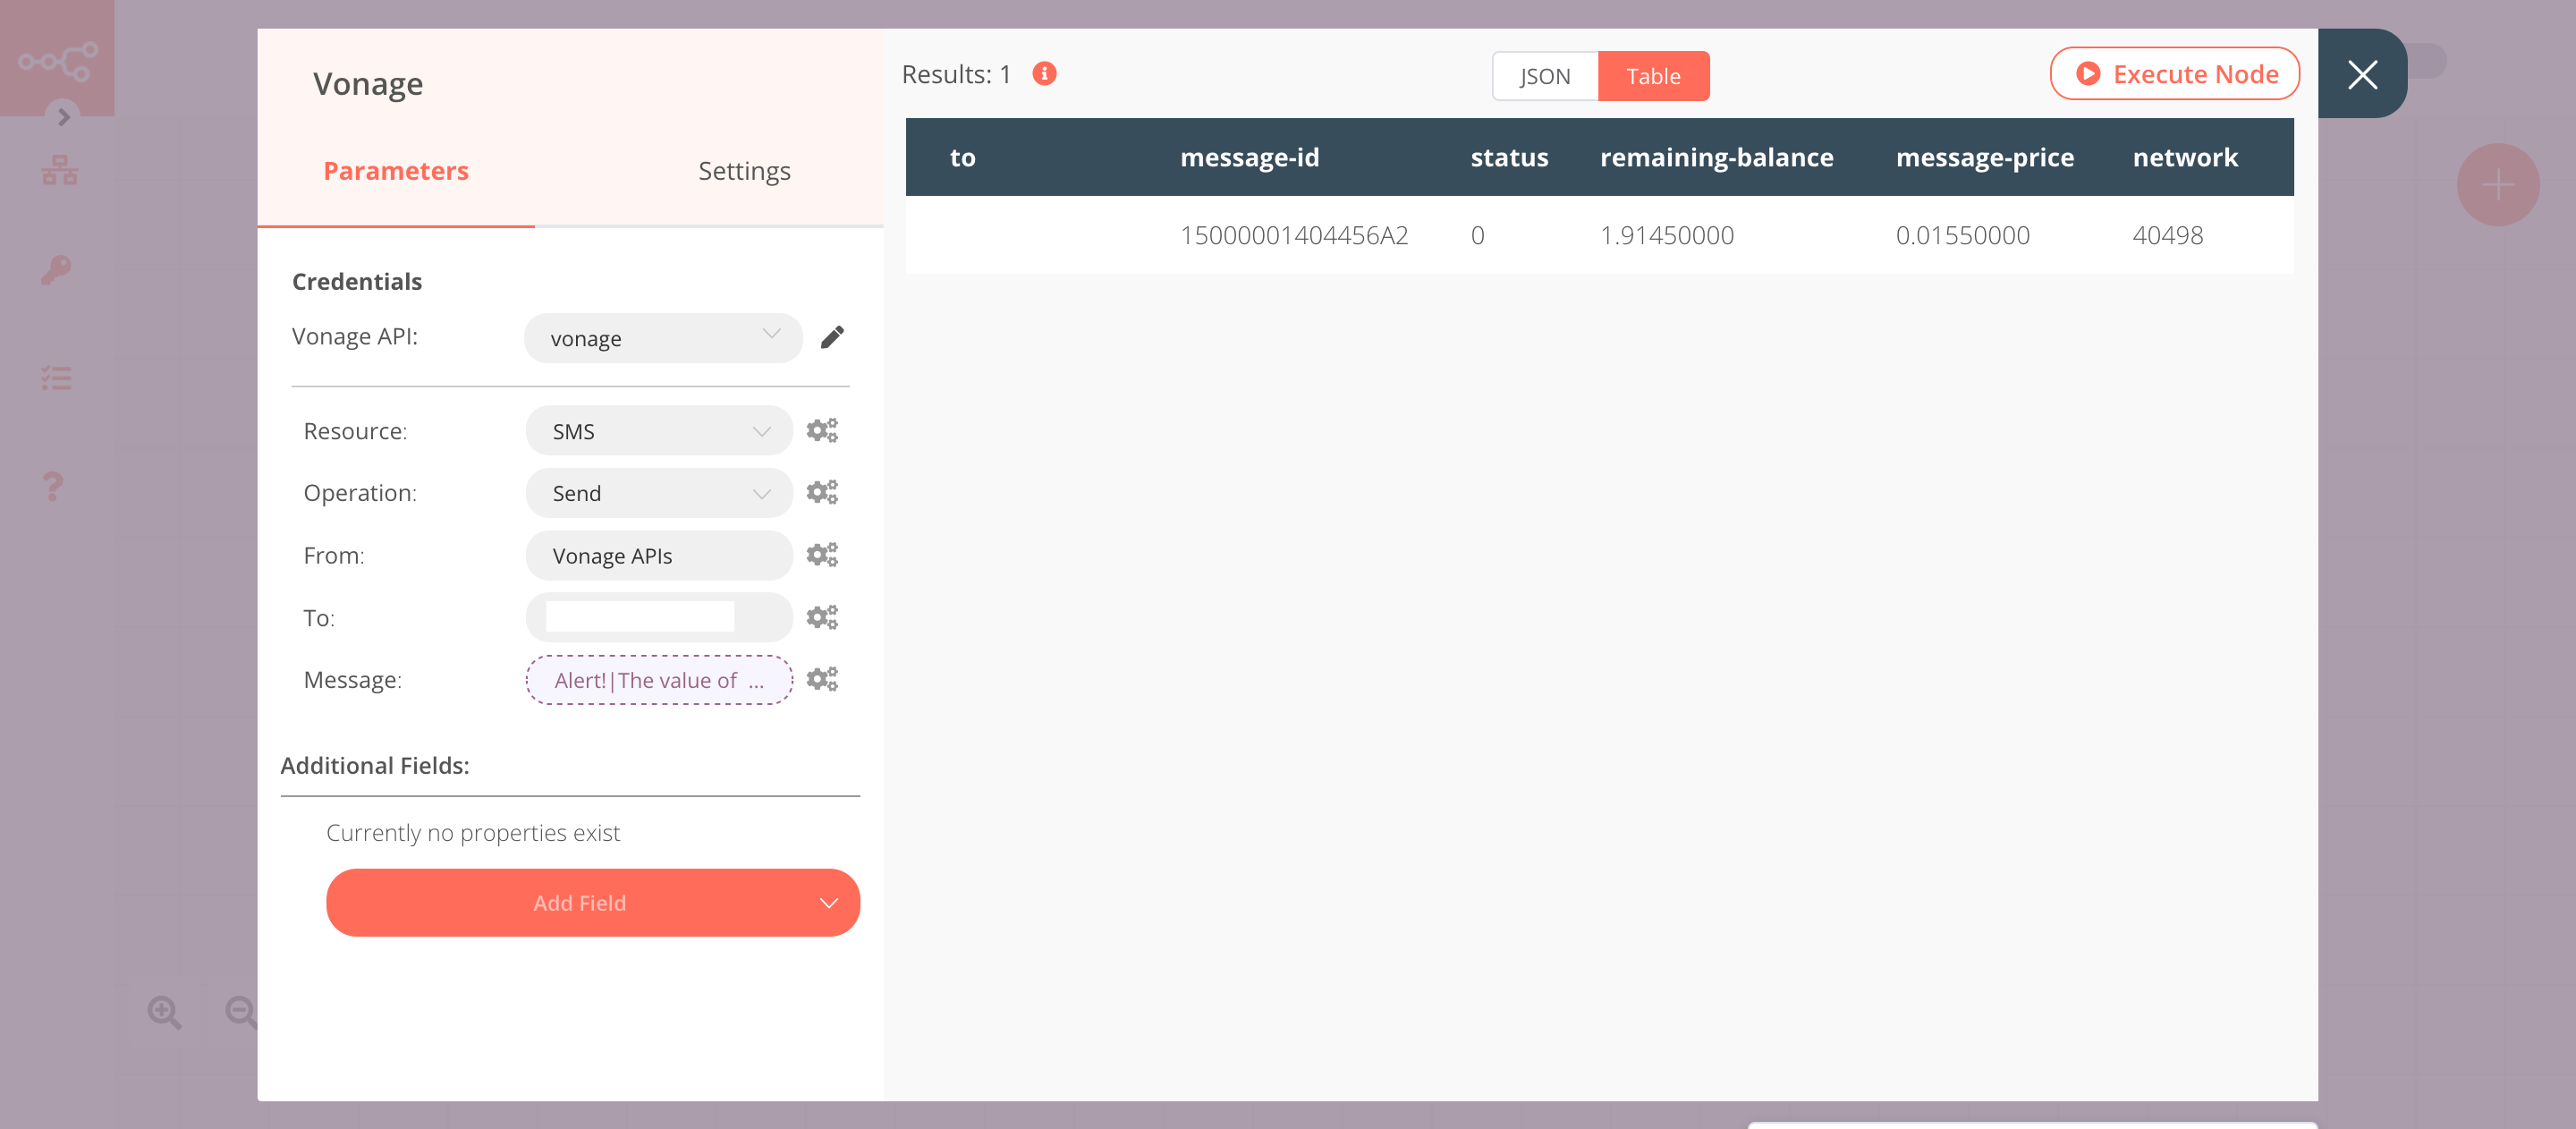
3. Vonage node (send: sms)#
This node sends an SMS to the specified phone number when the value of temp is greater than 50.
- Create a Vonage node connected to the 'true' output of the IF node.
- You'll have to enter credentials for the Vonage node. You can find out how to do that here.
- Enter the name of the sender in the From field. If you're using a number, enter the number instead.
- Enter the receiver's phone number in the To field.
-
Click on the gears icon next to the Message field and click on Add Expression.
-
Enter the following in the Expression field.
1
2
Alert! The value of temp is {{$node["RabbitMQ"].json["temp"]}}. - Click on Execute Node to run the node.
In the screenshot below, you will notice that the node sends an SMS with the value of temp that we received from the RabbitMQ Trigger node.
4. NoOp node#
Adding this node here is optional, as the absence of this node won't make a difference to the functioning of the workflow.
- Create a NoOp node connected to the 'false' output of the IF node.
- Click on Execute Node to run the node.
Activate workflow for production
You'll need to save the workflow and then click on the Activate toggle on the top right of the screen to activate the workflow. Your workflow will then be triggered as specified by the settings in the RabbitMQ Trigger node.