MQTT#
MQTT is an open OASIS and ISO standard lightweight, publish-subscribe network protocol that transports messages between devices.
Credentials
You can find authentication information for this node here.
Example Usage#
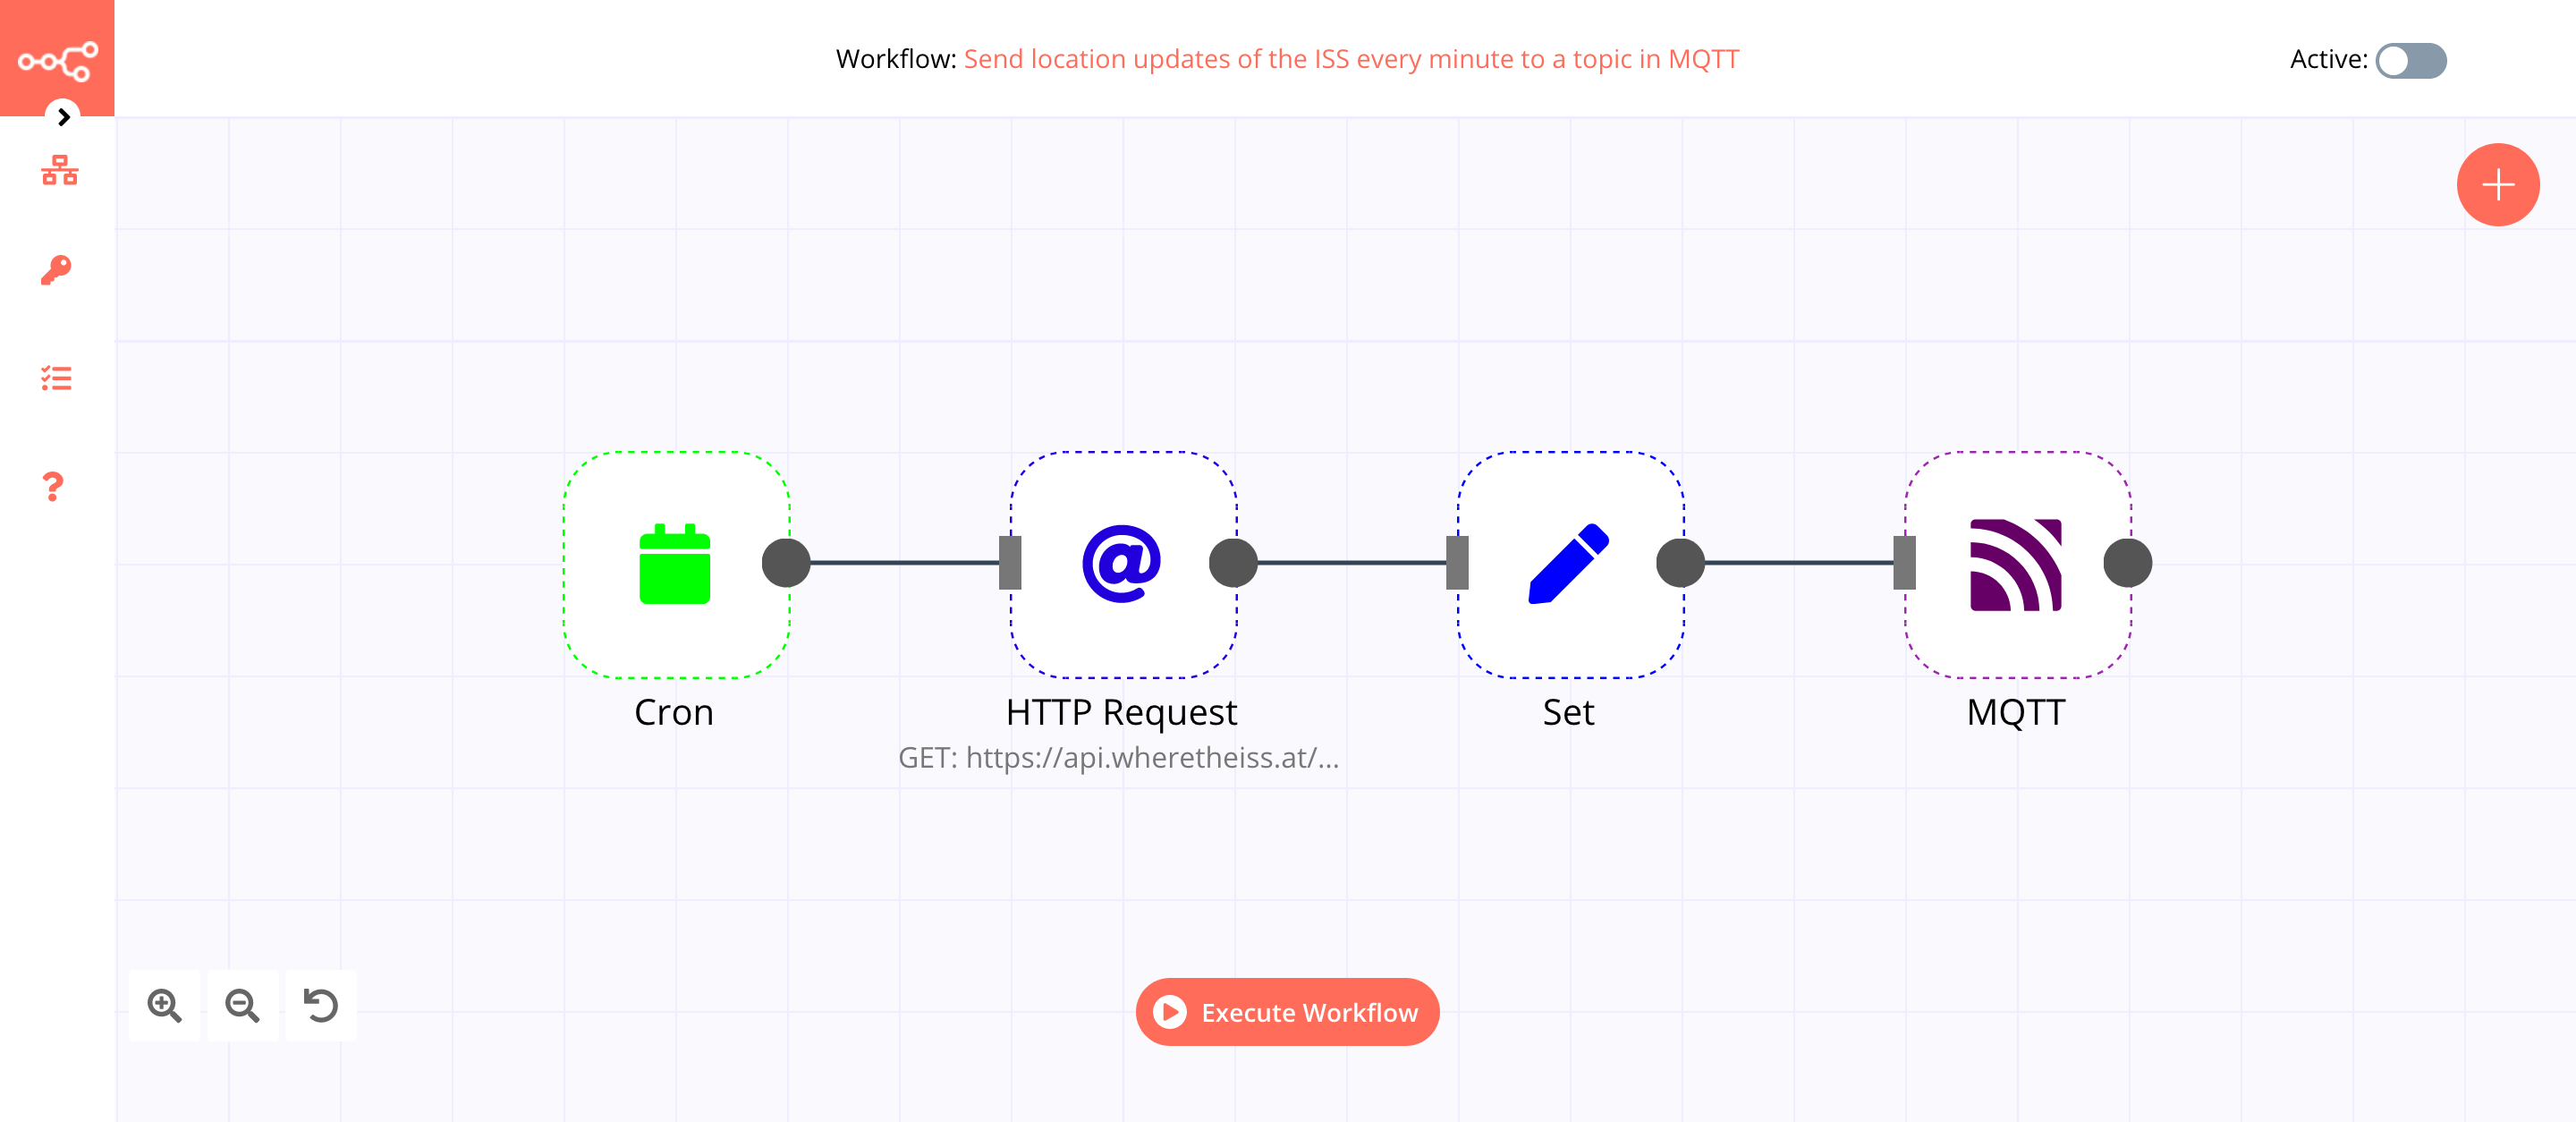
This workflow allows you to send position updates of the ISS every minute to a topic in MQTT using the MQTT node. You can also find the workflow on n8n.io. This example usage workflow uses the following nodes. - Cron - HTTP Request - Set - MQTT
The final workflow should look like the following image.
1. Cron node#
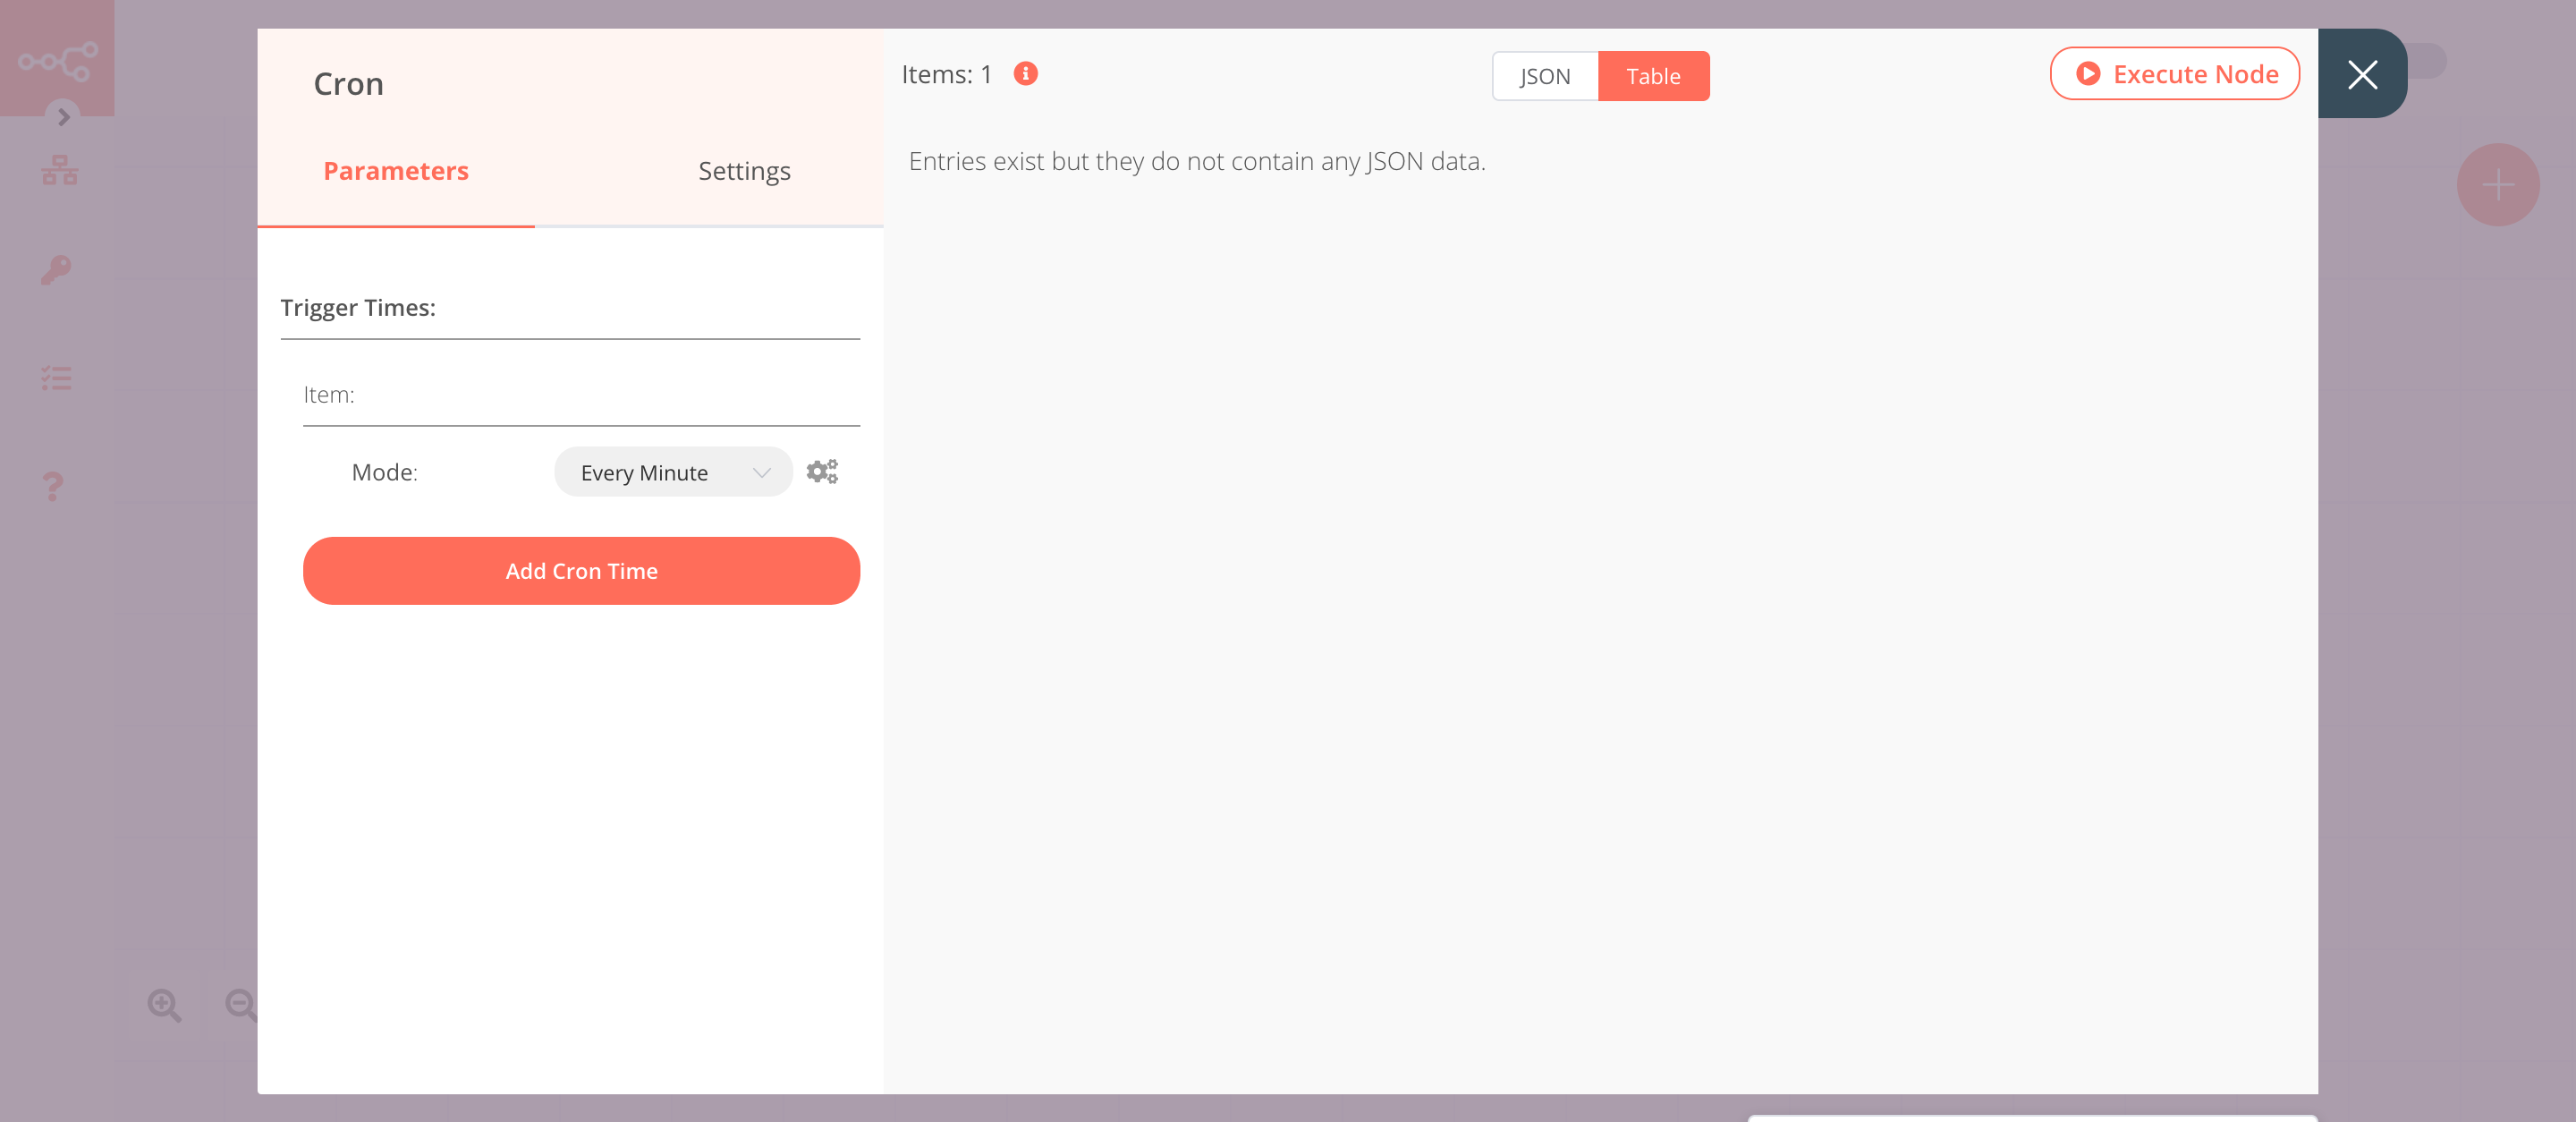
The Cron node will trigger the workflow every minute.
- Click on Add Cron Time.
- Select 'Every Minute' from the Mode dropdown list.
- Click on Execute Node to run the node.
In the screenshot below, you will notice that the Cron node is configured to trigger the workflow every minute.
2. HTTP Request node (GET)#
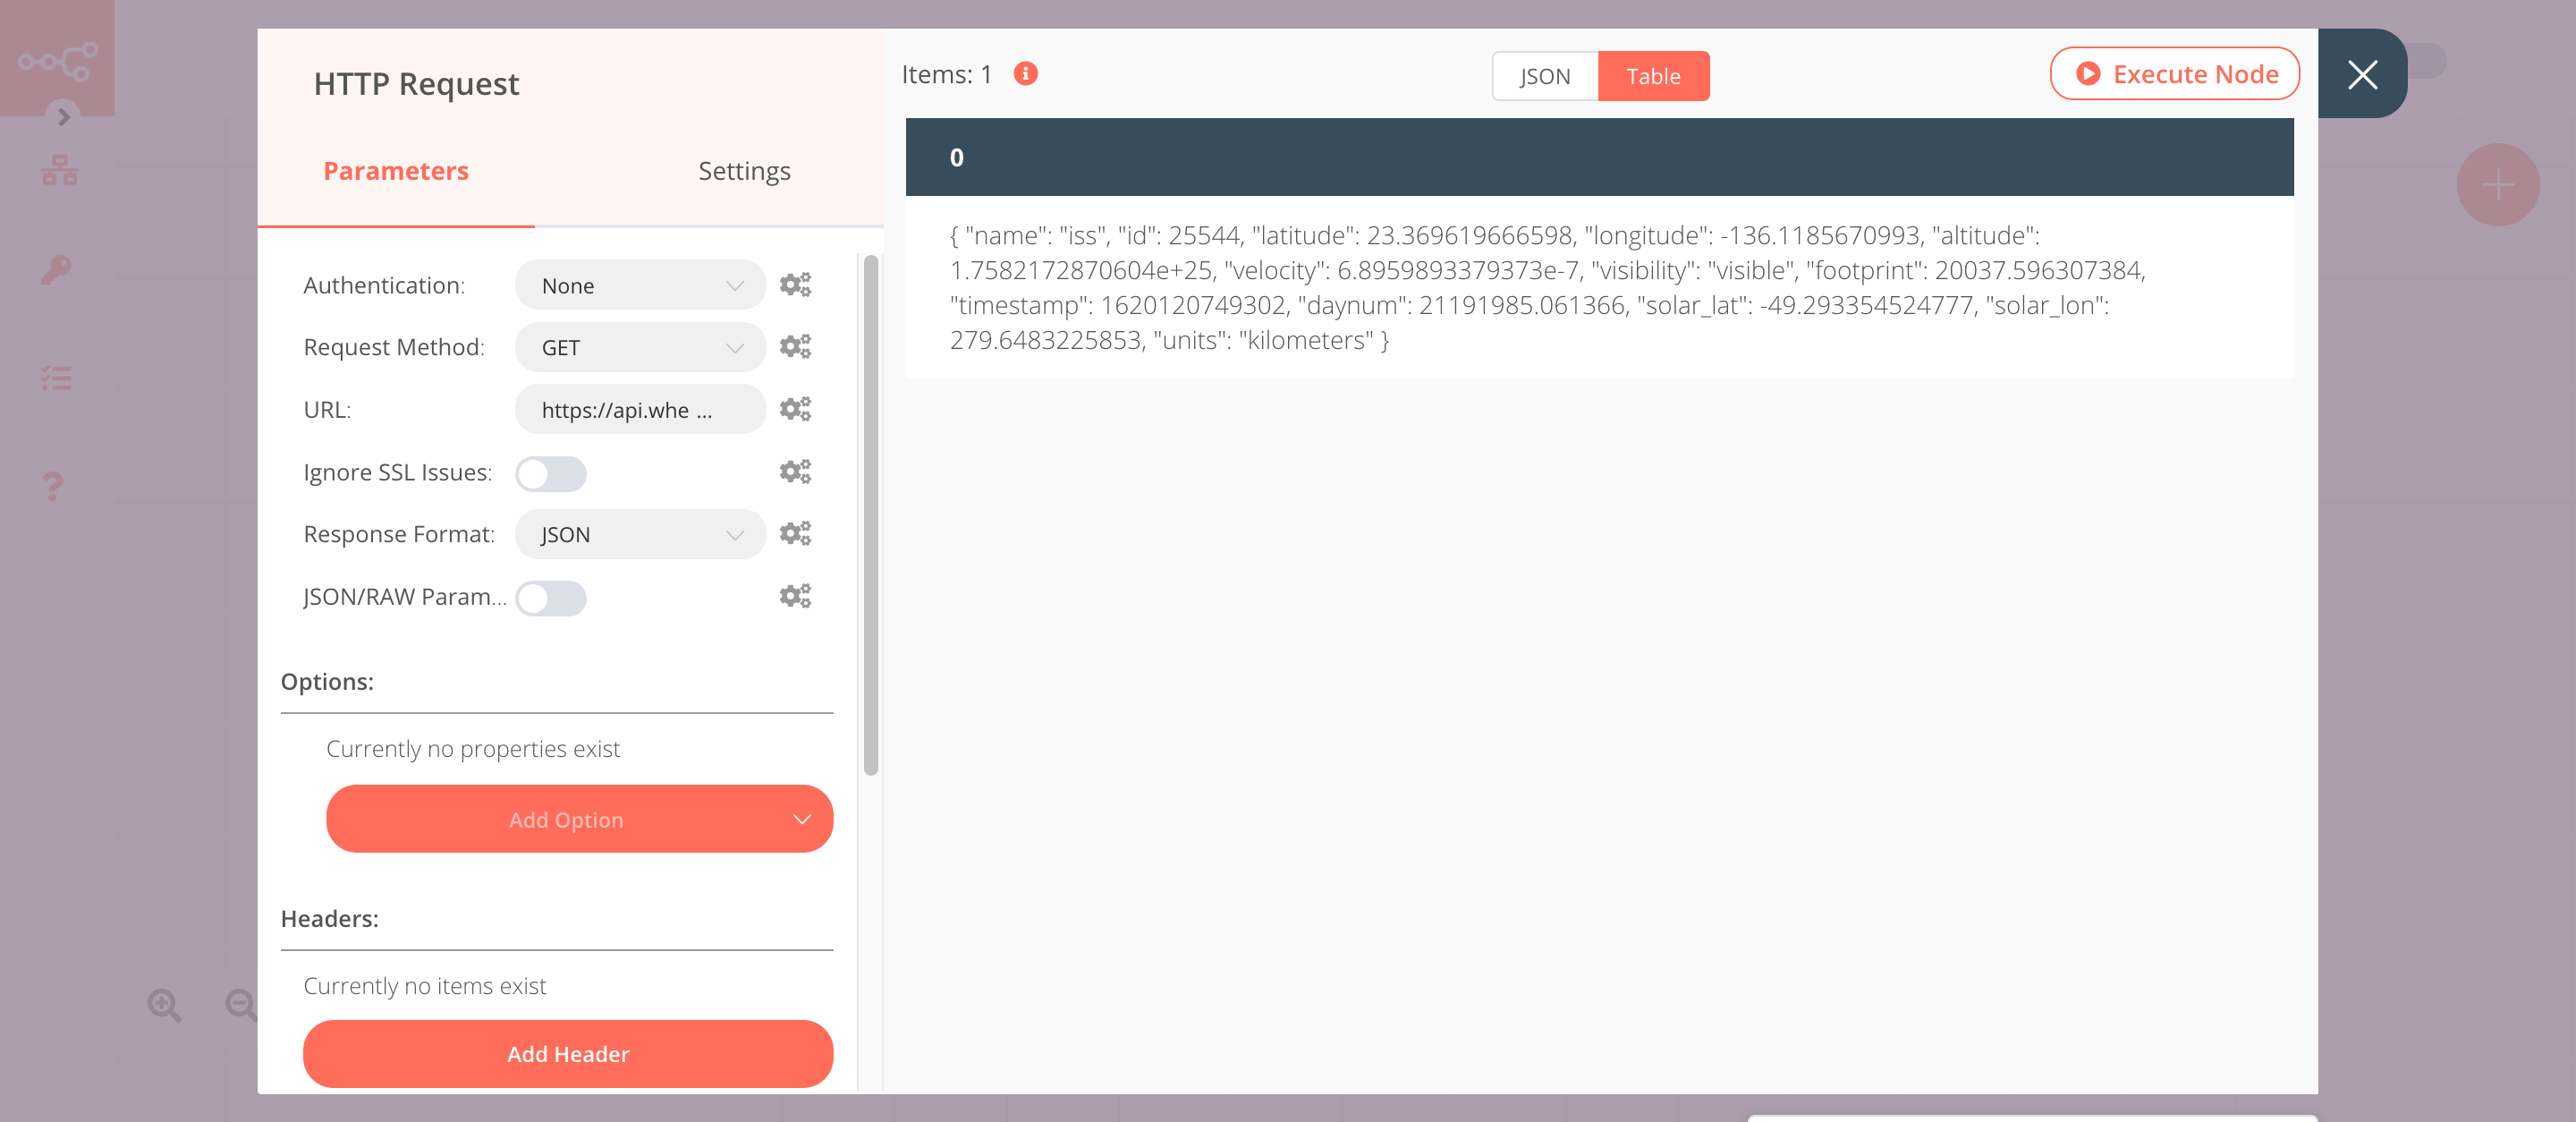
This node will make a GET request to the API https://api.wheretheiss.at/v1/satellites/25544/positions to fetch the position of the ISS. This information gets passed on to the next node in the workflow.
- Enter
https://api.wheretheiss.at/v1/satellites/25544/positionsin the URL field. - Click on the Add Parameter button in the Query Parameters section.
- Enter
timestampsin the Name field. - Click on the gears icon next to the Value field and click on Add Expression.
- Enter the following expression:
{{Date.now()}}. This expression will return the current timestamp. - Click on Execute Node to run the node.
In the screenshot below, you will notice that the node makes a GET request to the API and returns the information about the location of the ISS.
3. Set node#
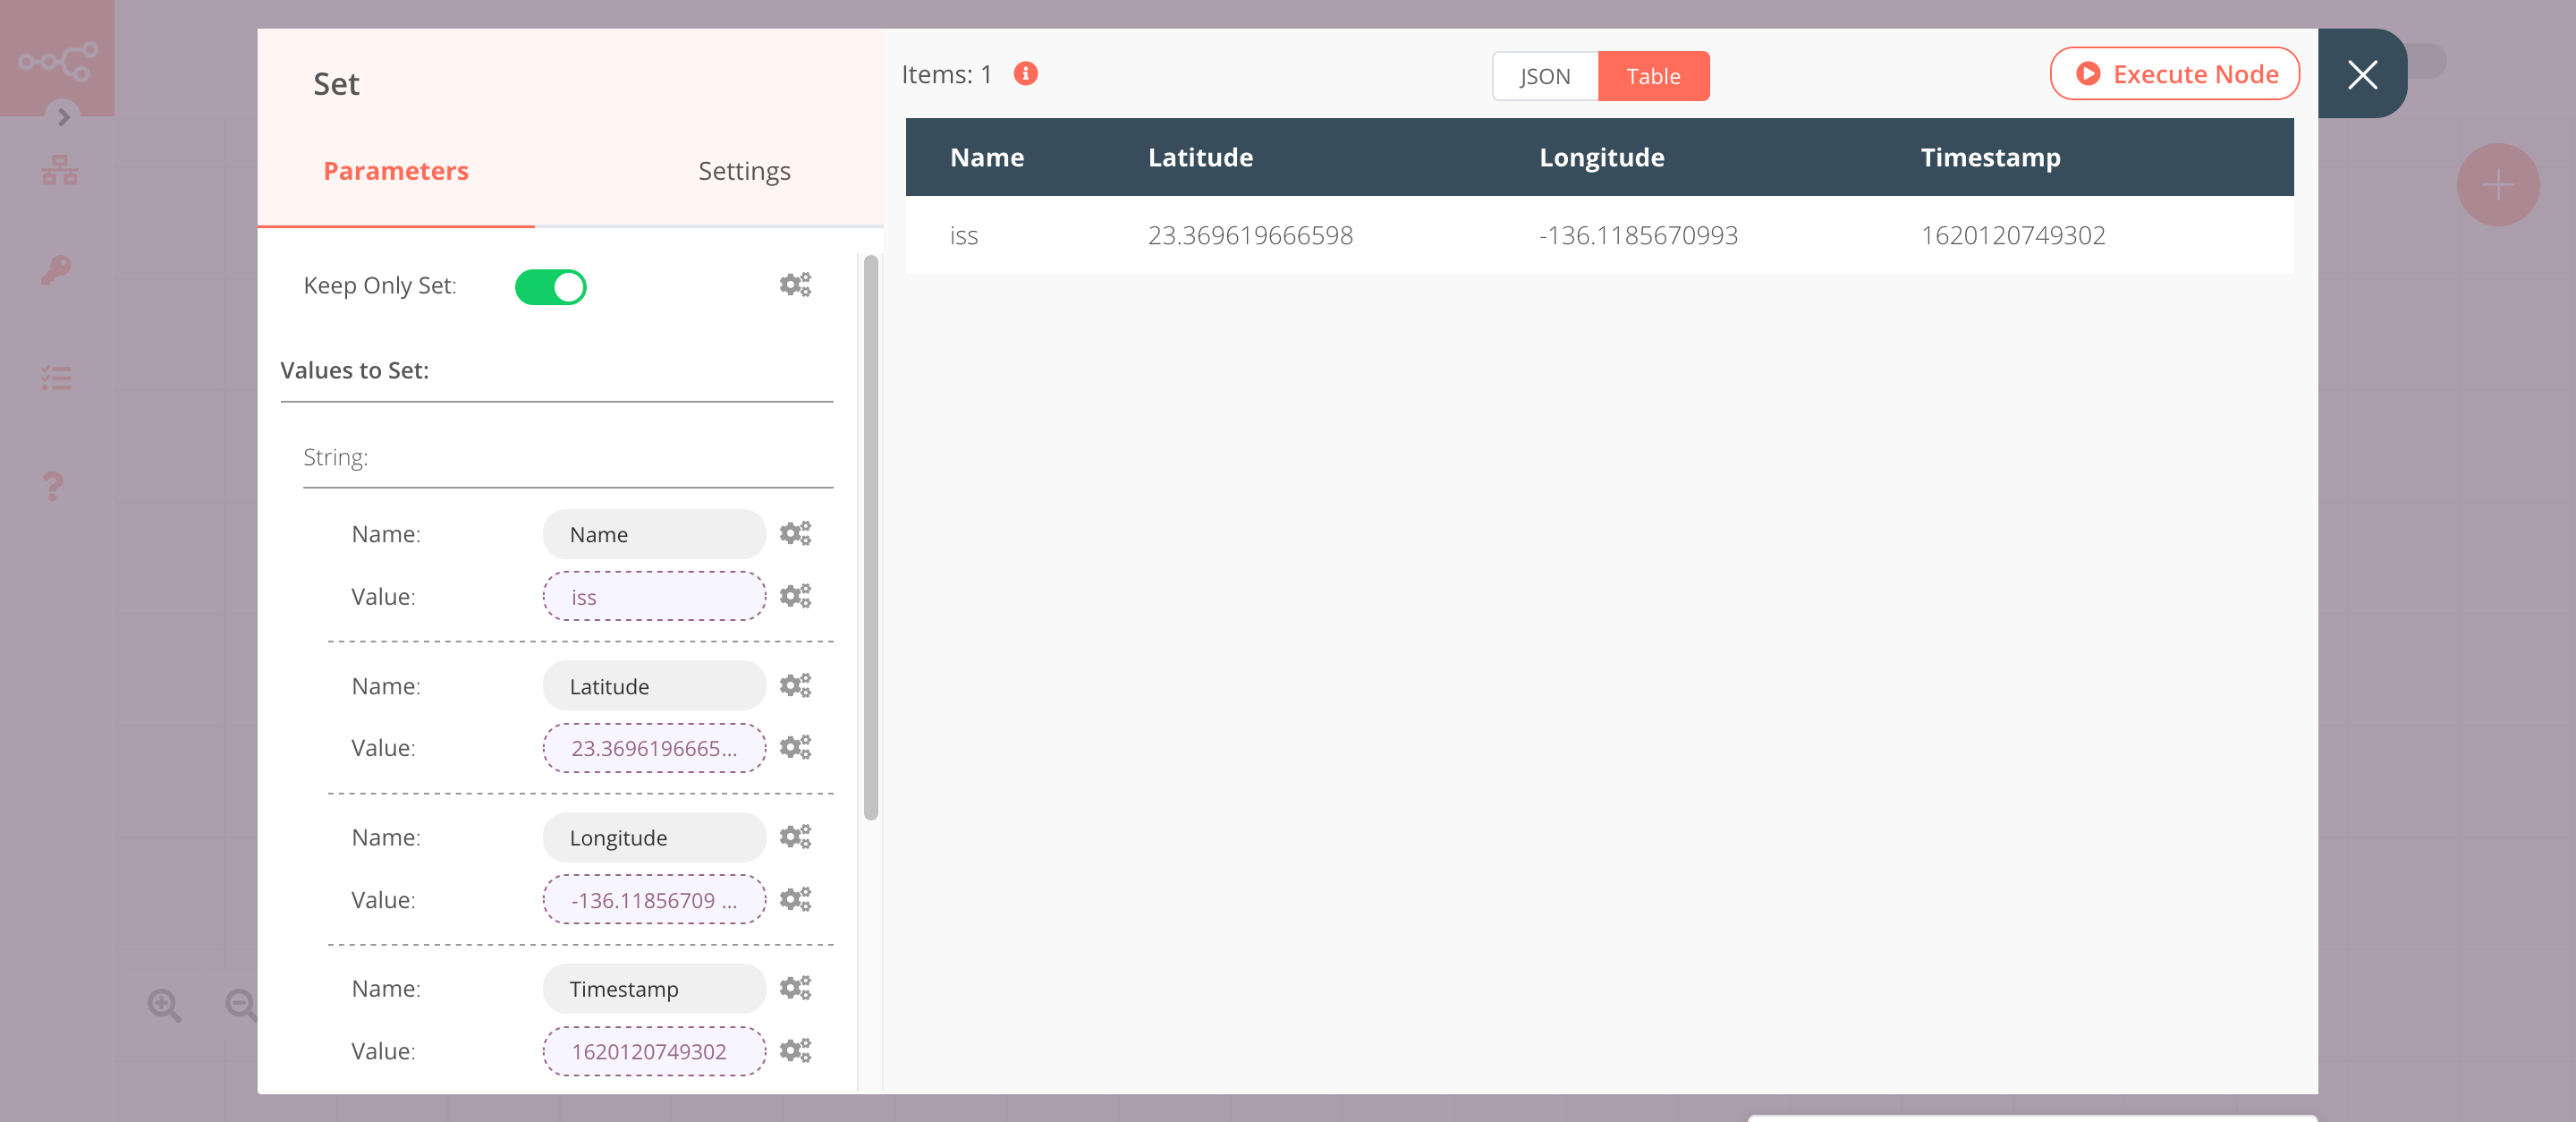
We will use the Set node to ensure that only the data that we set in this node gets passed on to the next nodes in the workflow.
- Click on Add Value and select 'String' from the dropdown list.
- Enter
Namein the Name field. - Click on the gears icon next to the Value field and click on Add Expression.
- Select the following in the Variable Selector section: Current Node > Input Data > JSON > 0 > name. You can also add the following expression:
{{$json["0"]["name"]}}. - Click on Add Value and select 'String' from the dropdown list.
- Enter
Latitudein the Name field. - Click on the gears icon next to the Value field and click on Add Expression.
- Select the following in the Variable Selector section: Current Node > Input Data > JSON > 0 > latitude. You can also add the following expression:
{{$json["0"]["latitude"]}}. - Click on Add Value and select 'String' from the dropdown list.
- Enter
Longitudein the Name field. - Click on the gears icon next to the Value field and click on Add Expression.
- Select the following in the Variable Selector section: Current Node > Input Data > JSON > 0 > longitude. You can also add the following expression:
{{$json["0"]["longitude"]}}. - Click on Add Value and select 'String' from the dropdown list.
- Enter
Timestampin the Name field. - Click on the gears icon next to the Value field and click on Add Expression.
- Select the following in the Variable Selector section: Current Node > Input Data > JSON > 0 > timpestamp. You can also add the following expression:
{{$json["0"]["timestamp"]}}. - Toggle Keep Only Set to
true. We set this option to true to ensure that only the data that we have set in this node get passed on to the next nodes in the workflow. - Click on Execute Node to run the node.
In the screenshot below, you will notice that the node uses the data from the previous node and returns the data that we set for the workflow.
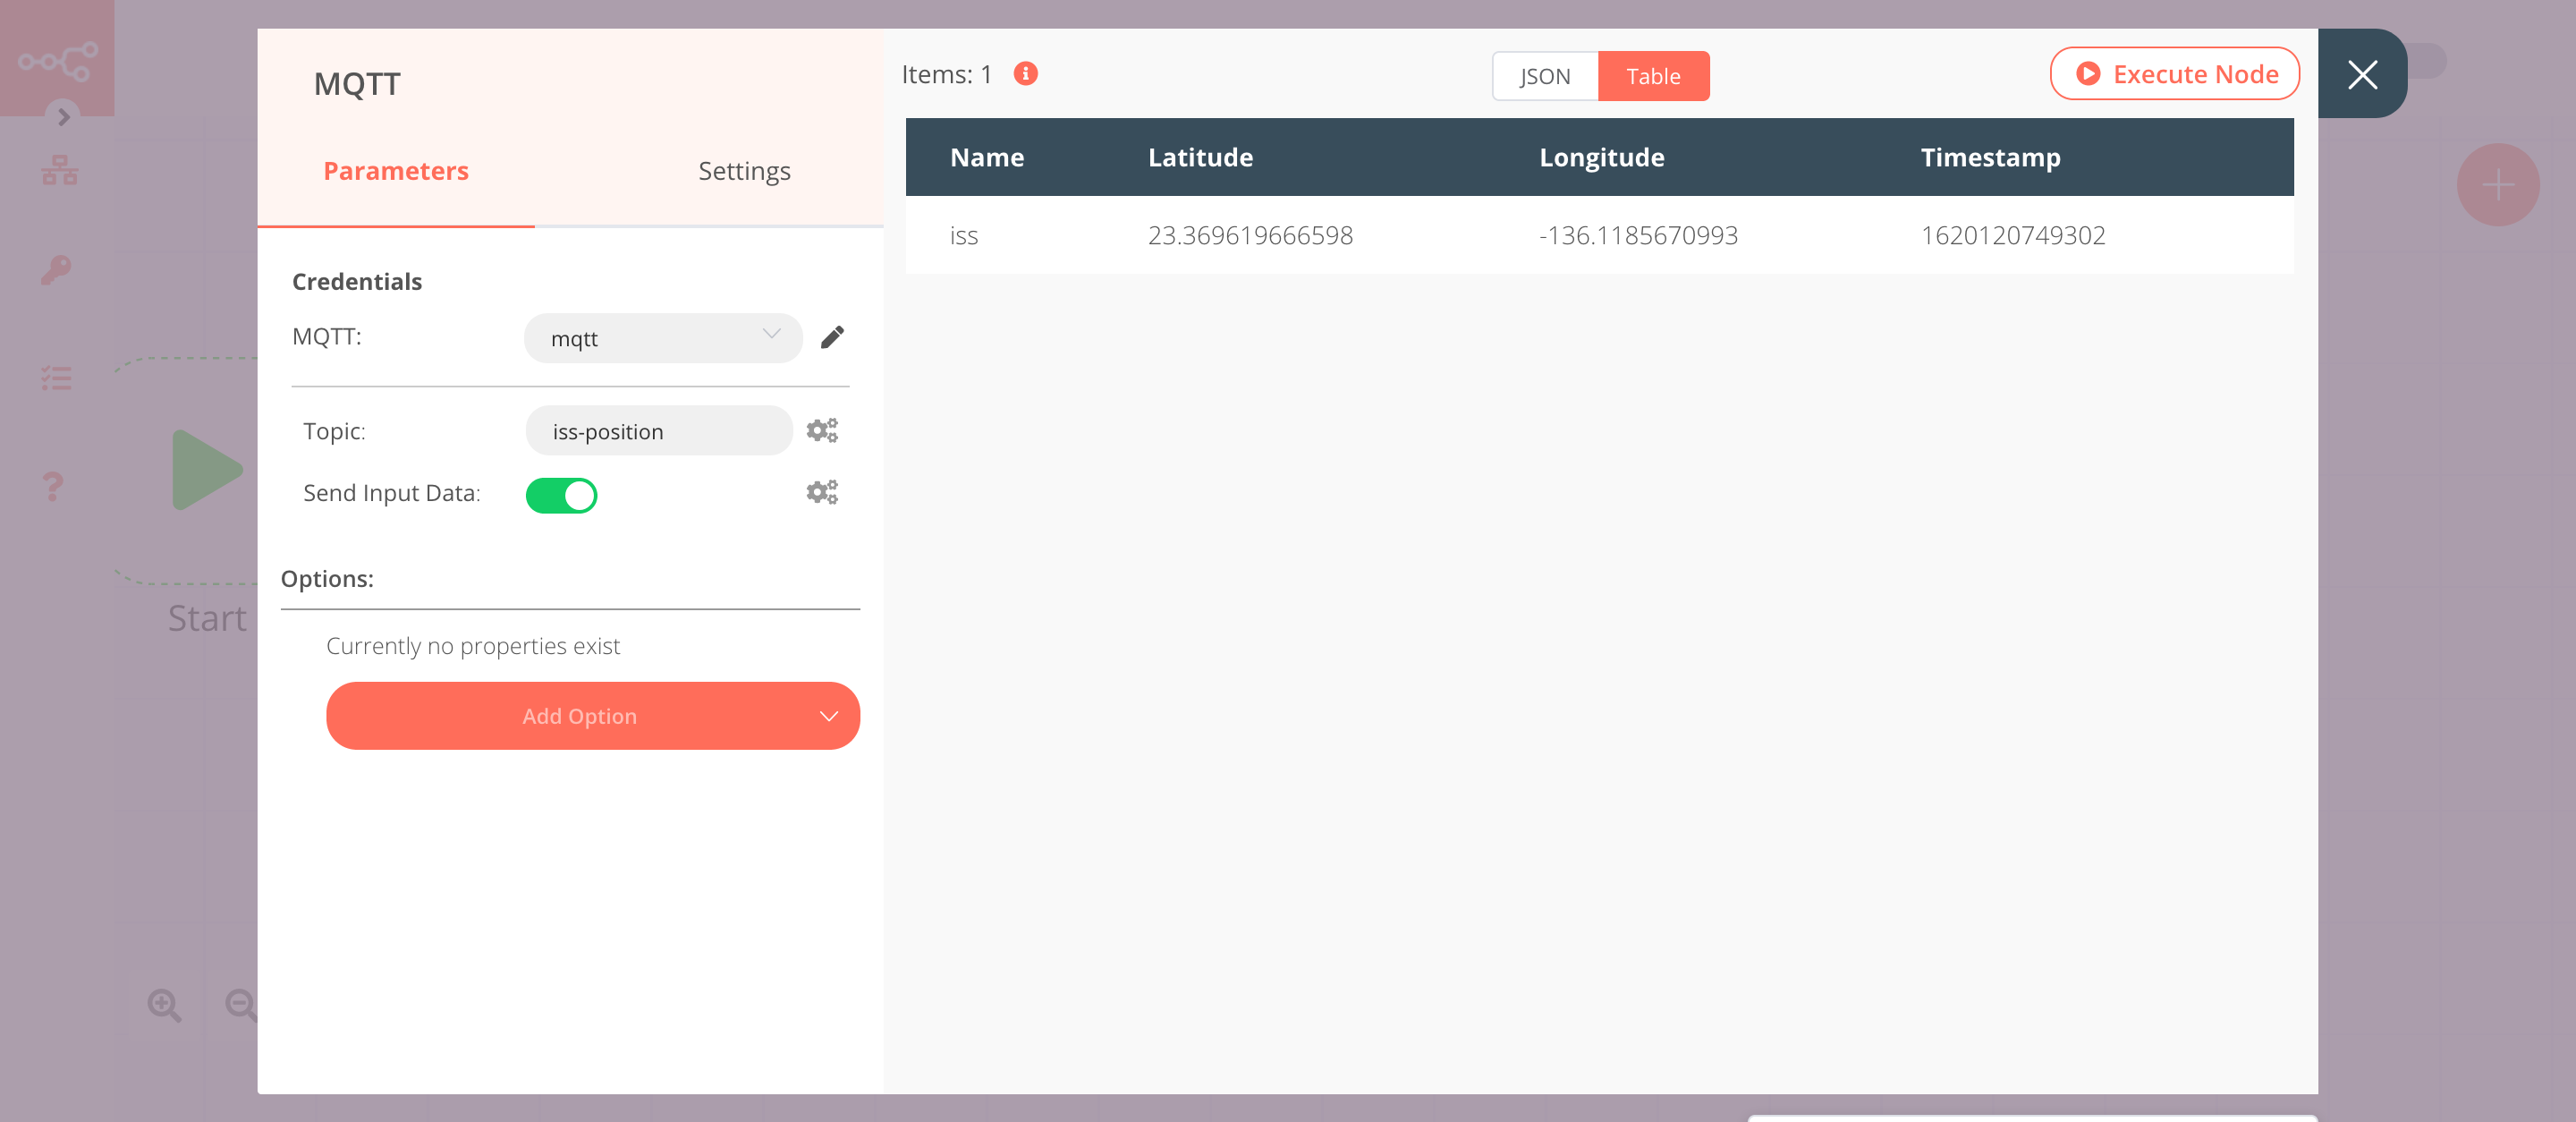
4. MQTT node#
This node will send the data from the previous node to the iss-position topic in MQTT. If you have created a topic with a different name in MQTT, you can use that topic name instead.
- First of all, you'll have to enter credentials for the MQTT node. You can find out how to do that here.
- Enter the name of the topic in the Topic field.
- Click on Execute Node to run the node.
In the screenshot below, you will notice that the node sends the data from the previous node to the iss-position topic in MQTT.
Activate workflow for production
This example workflow uses the Cron node, which is a Trigger node. You'll need to save the workflow and then click on the Activate toggle on the top right of the screen to activate the workflow. Your workflow will then be triggered as specified by the settings in the Cron node.