Autopilot Trigger#
Autopilot is a visual marketing software that allows you to automate and personalize your marketing across the entire customer journey.
Credentials
You can find authentication information for this node here.
Events#
- Contact added
- Contact added to a list
- Contact entered to a segment
- Contact left a segment
- Contact removed from a list
- Contact unsubscribed
- Contact updated
Example Usage#
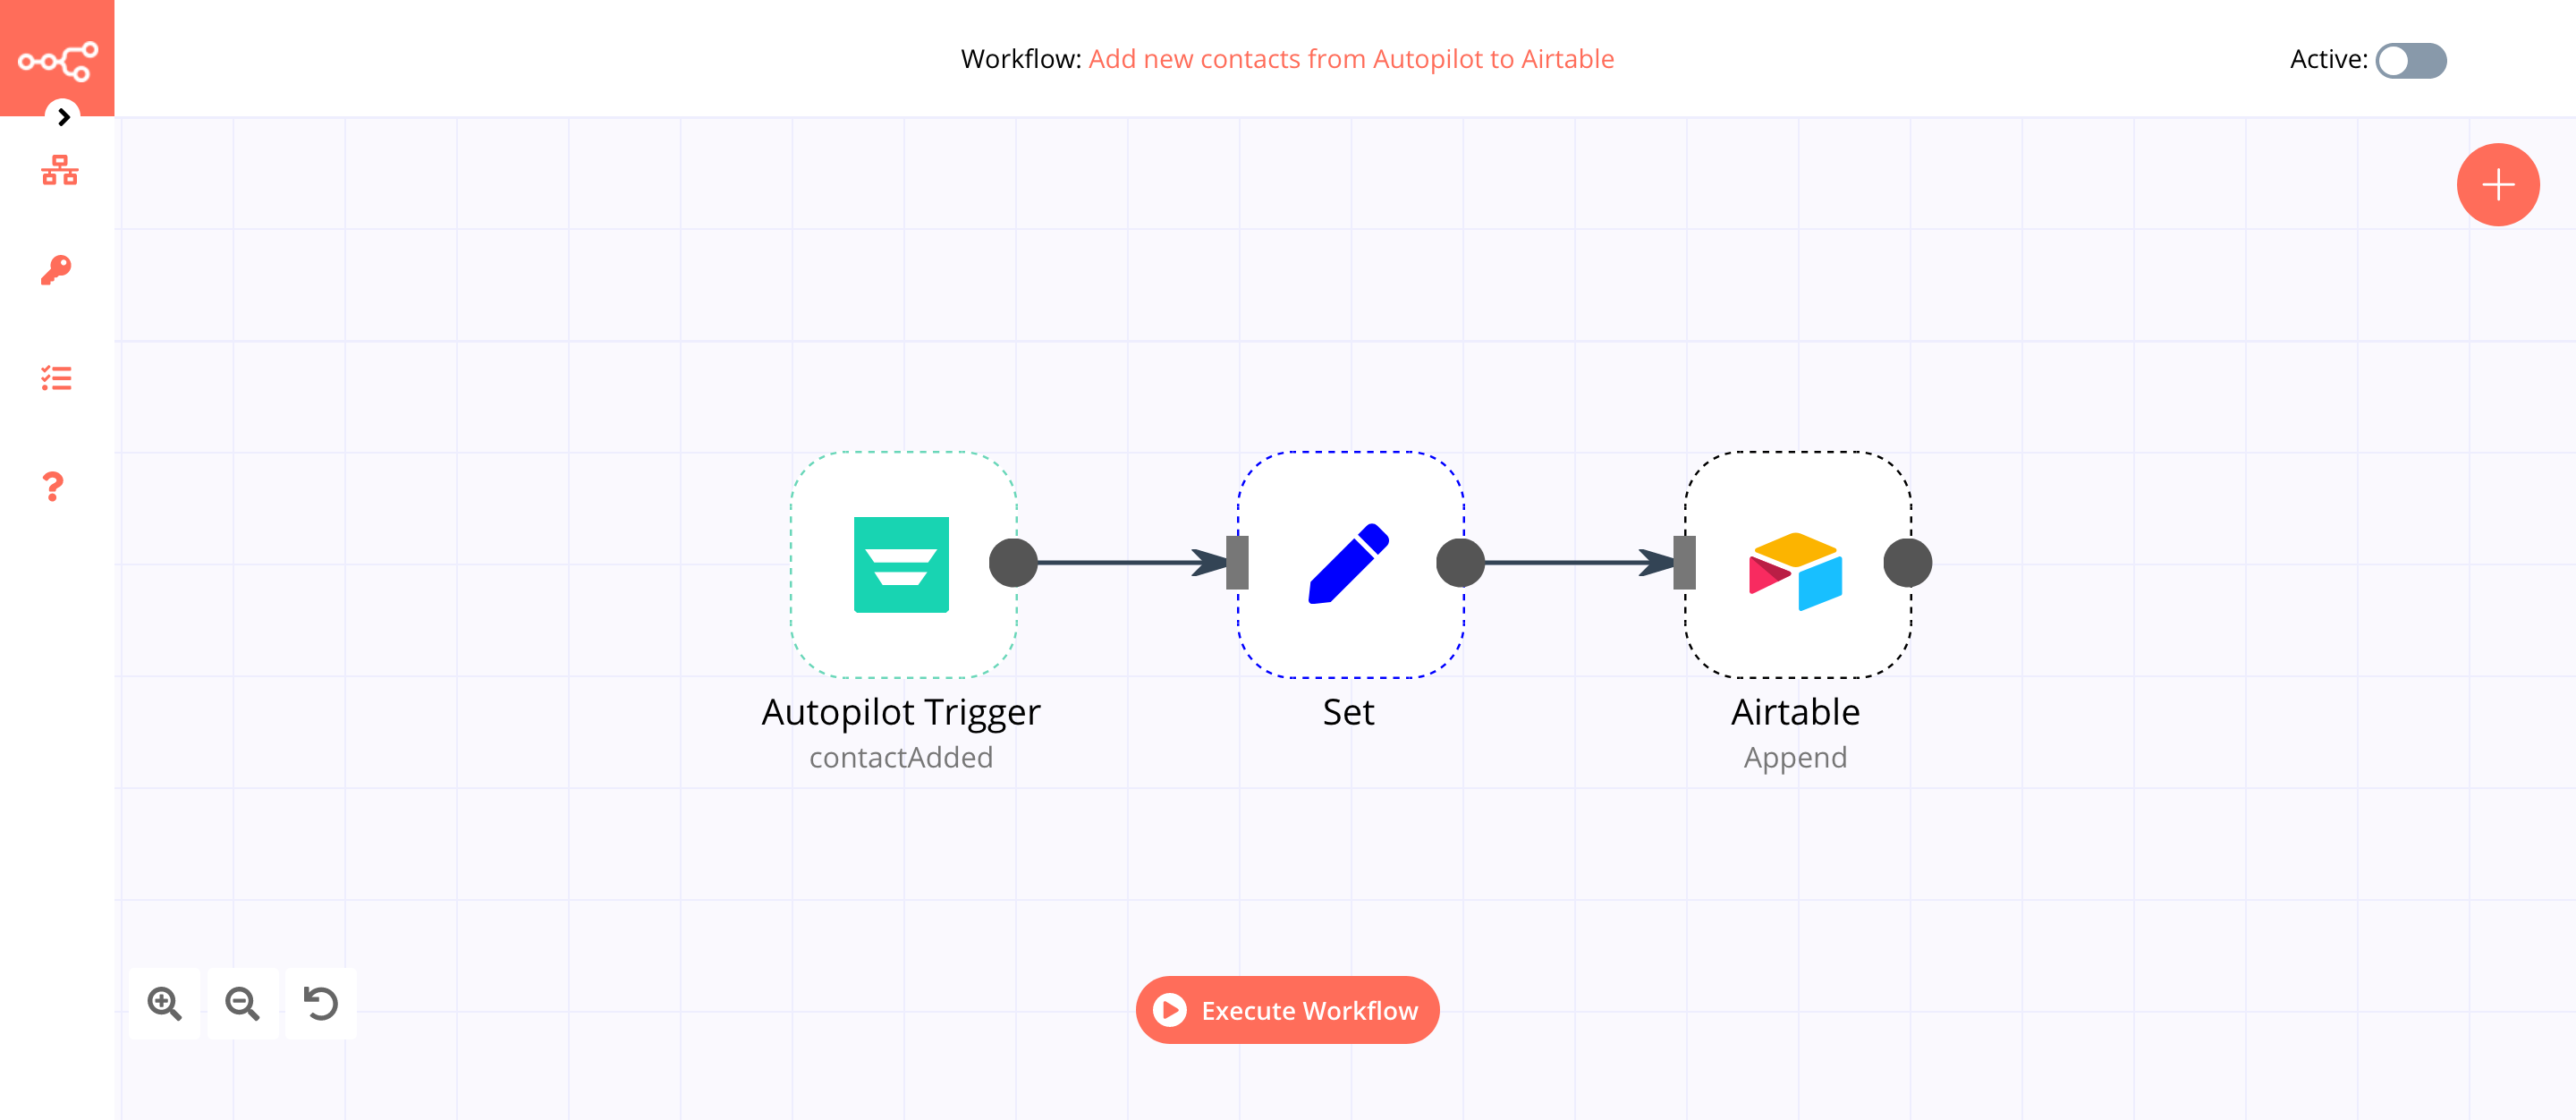
This workflow allows you to receive updates when a new contact gets added in Autopilot and add them to a base in Airtable. You can also find the workflow on n8n.io. This example usage workflow would use the following node.
The final workflow should look like the following image.
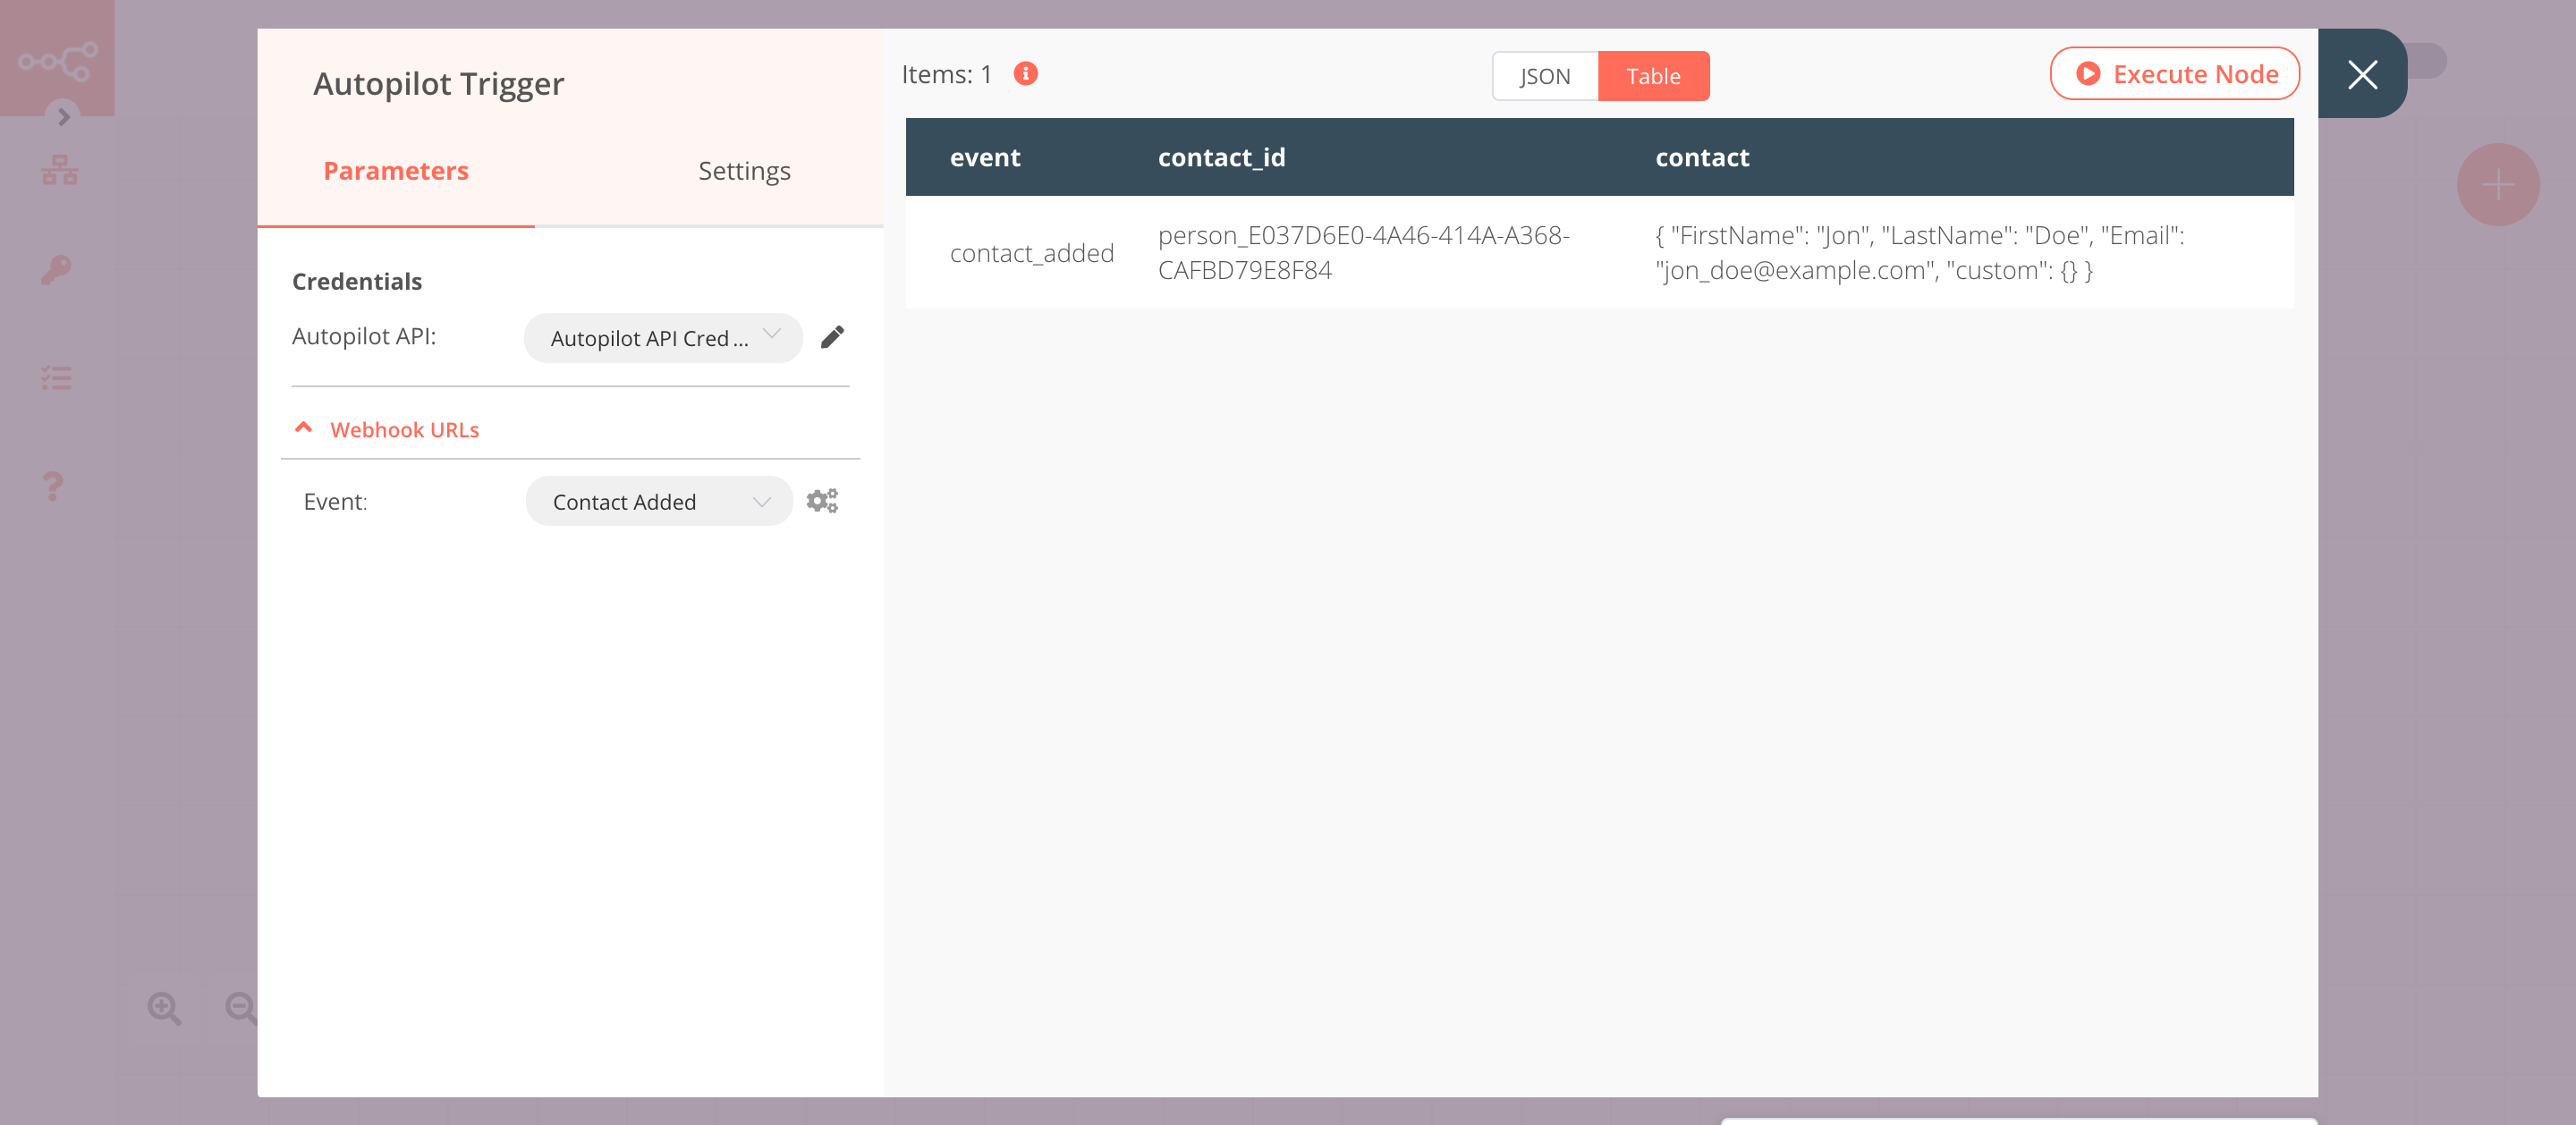
1. Autopilot Trigger#
The Autopilot Trigger node will trigger the workflow when a new contact gets added in Autopilot.
- First of all, you'll have to enter credentials for the Autopilot Trigger node. You can find out how to do that here.
- Select 'Contact Added' from the Events dropdown list.
- Click on Execute Node to run the node.
In the screenshot below, you will notice that the node returns the information of the new contact that was added to Autopilot. This output gets passed on to the next node in the workflow.
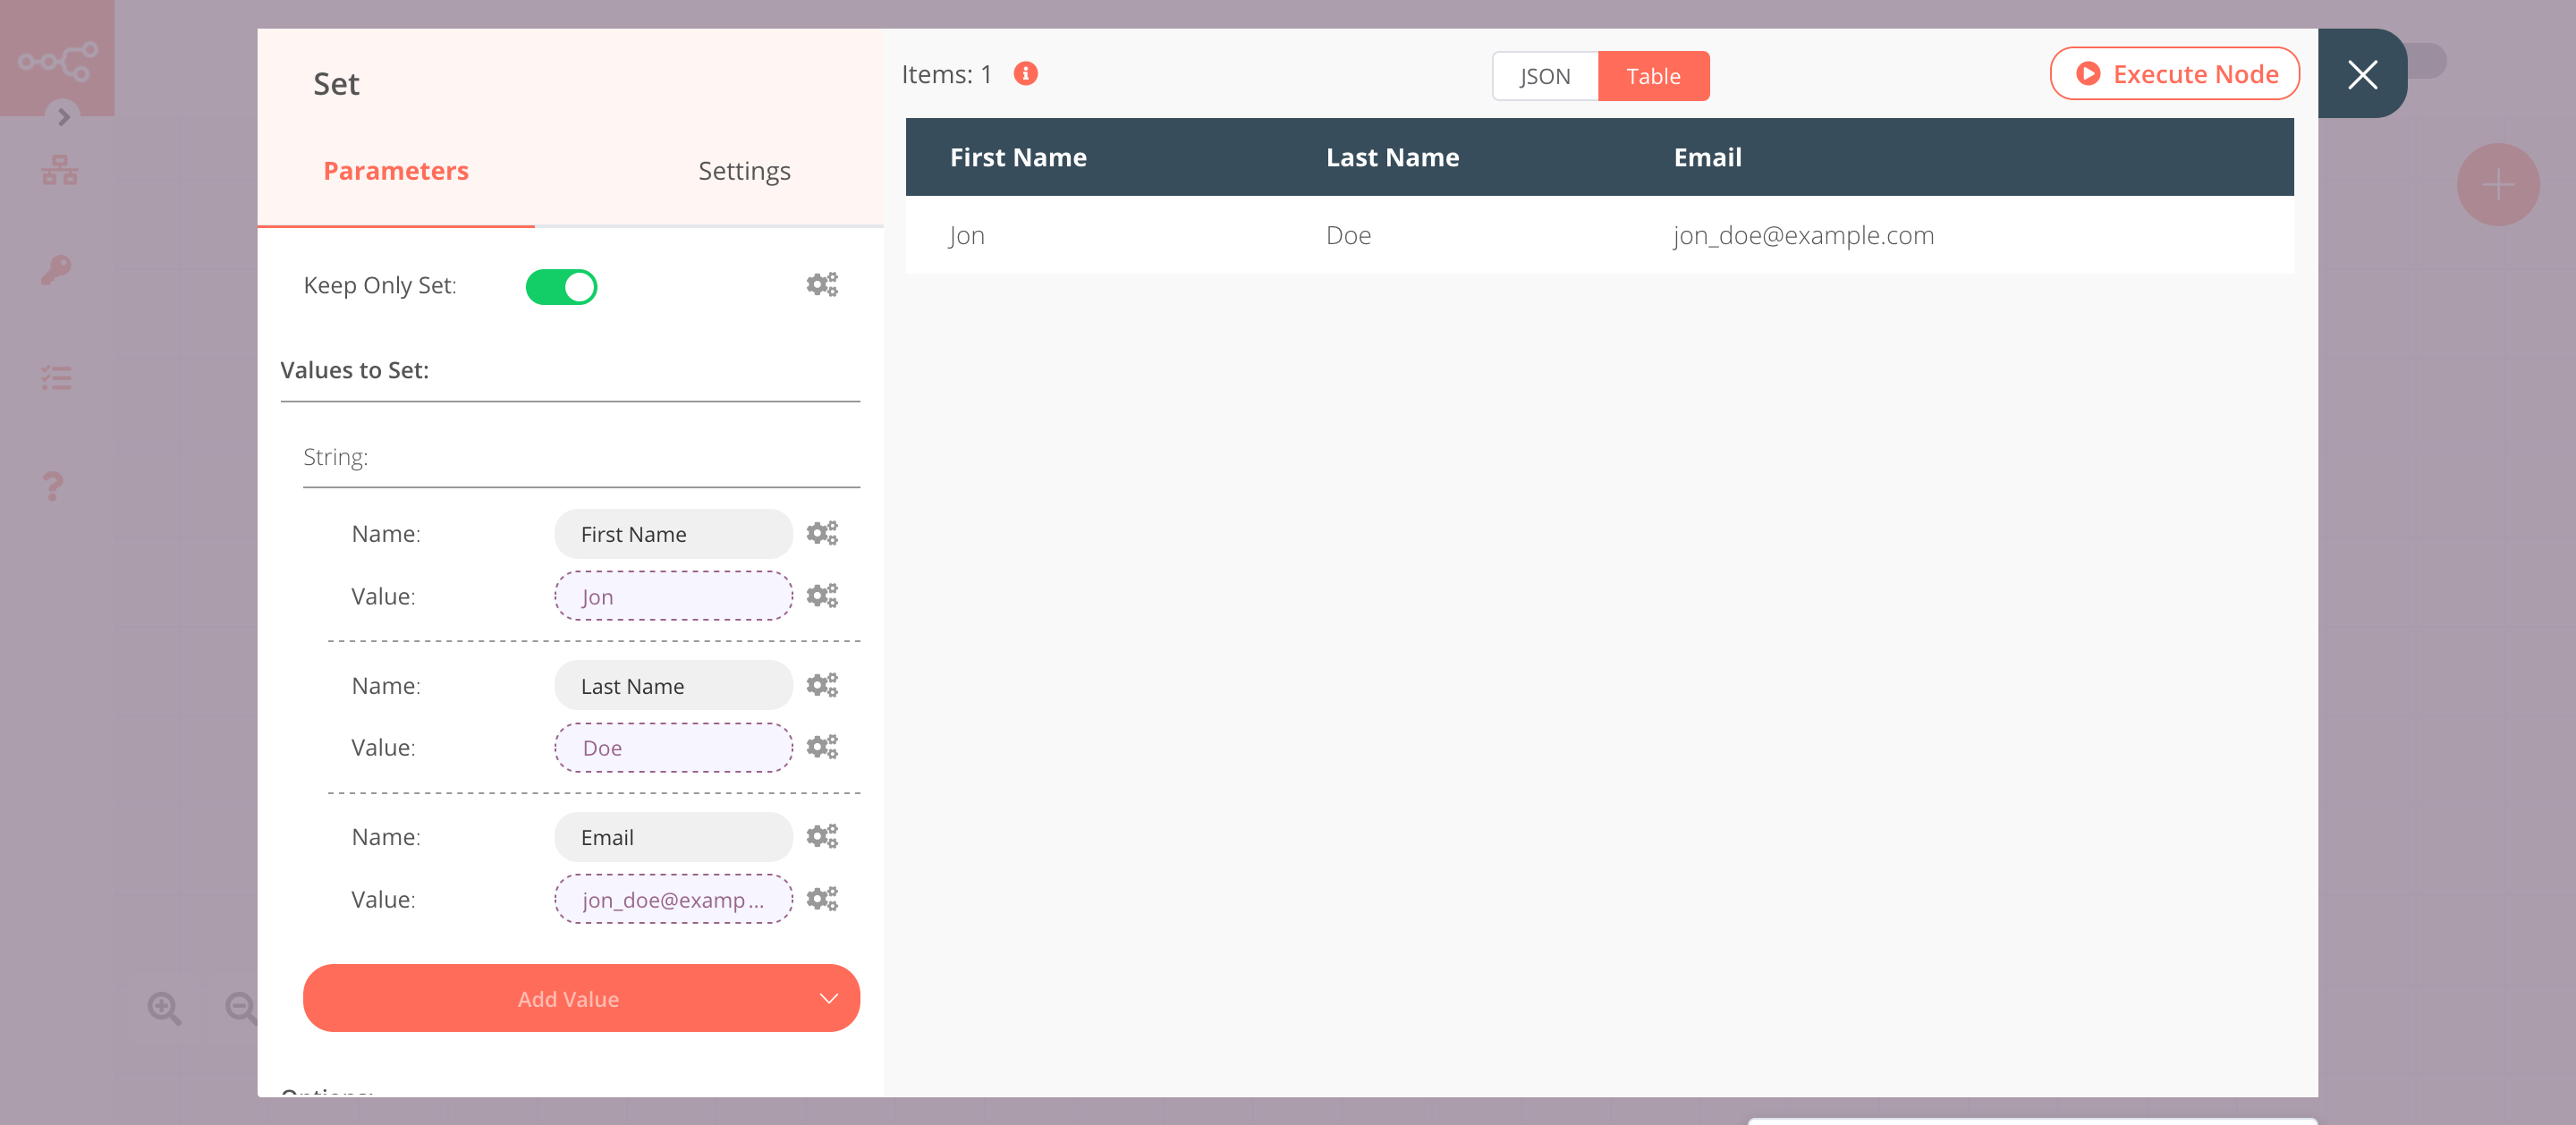
2. Set node#
We will use the Set node to ensure that only the data that we set in this node gets passed on to the next nodes in the workflow.
- Click on Add Value and select 'String' from the dropdown list.
- Enter
First Namein the Name field. - Click on the gears icon next to the Value field and click on Add Expression.
- Select the following in the Variable Selector section: Current Node > Input Data > JSON > contact > FirstName. You can also add the following expression:
{{$json["contact"]["FirstName"]}}. - Enter
First Namein the Name field. - Click on the gears icon next to the Value field and click on Add Expression.
- Select the following in the Variable Selector section: Current Node > Input Data > JSON > contact > LastName. You can also add the following expression:
{{$json["contact"]["LastName"]}}. - Click on Add Value and select 'String' from the dropdown list.
- Enter
Emailin the Name field. - Click on the gears icon next to the Value field and click on Add Expression.
- Select the following in the Variable Selector section: Current Node > Input Data > JSON > contact > Email. You can also add the following expression:
{{$json["contact"]["Email"]}}. - Toggle Keep Only Set to
true. We set this option to true to ensure that only the data that we have set in this node get passed on to the next nodes in the workflow. - Click on Execute Node to run the node.
In the screenshot below, you will notice that the node uses the data from the previous node and returns the data that we set for the workflow.
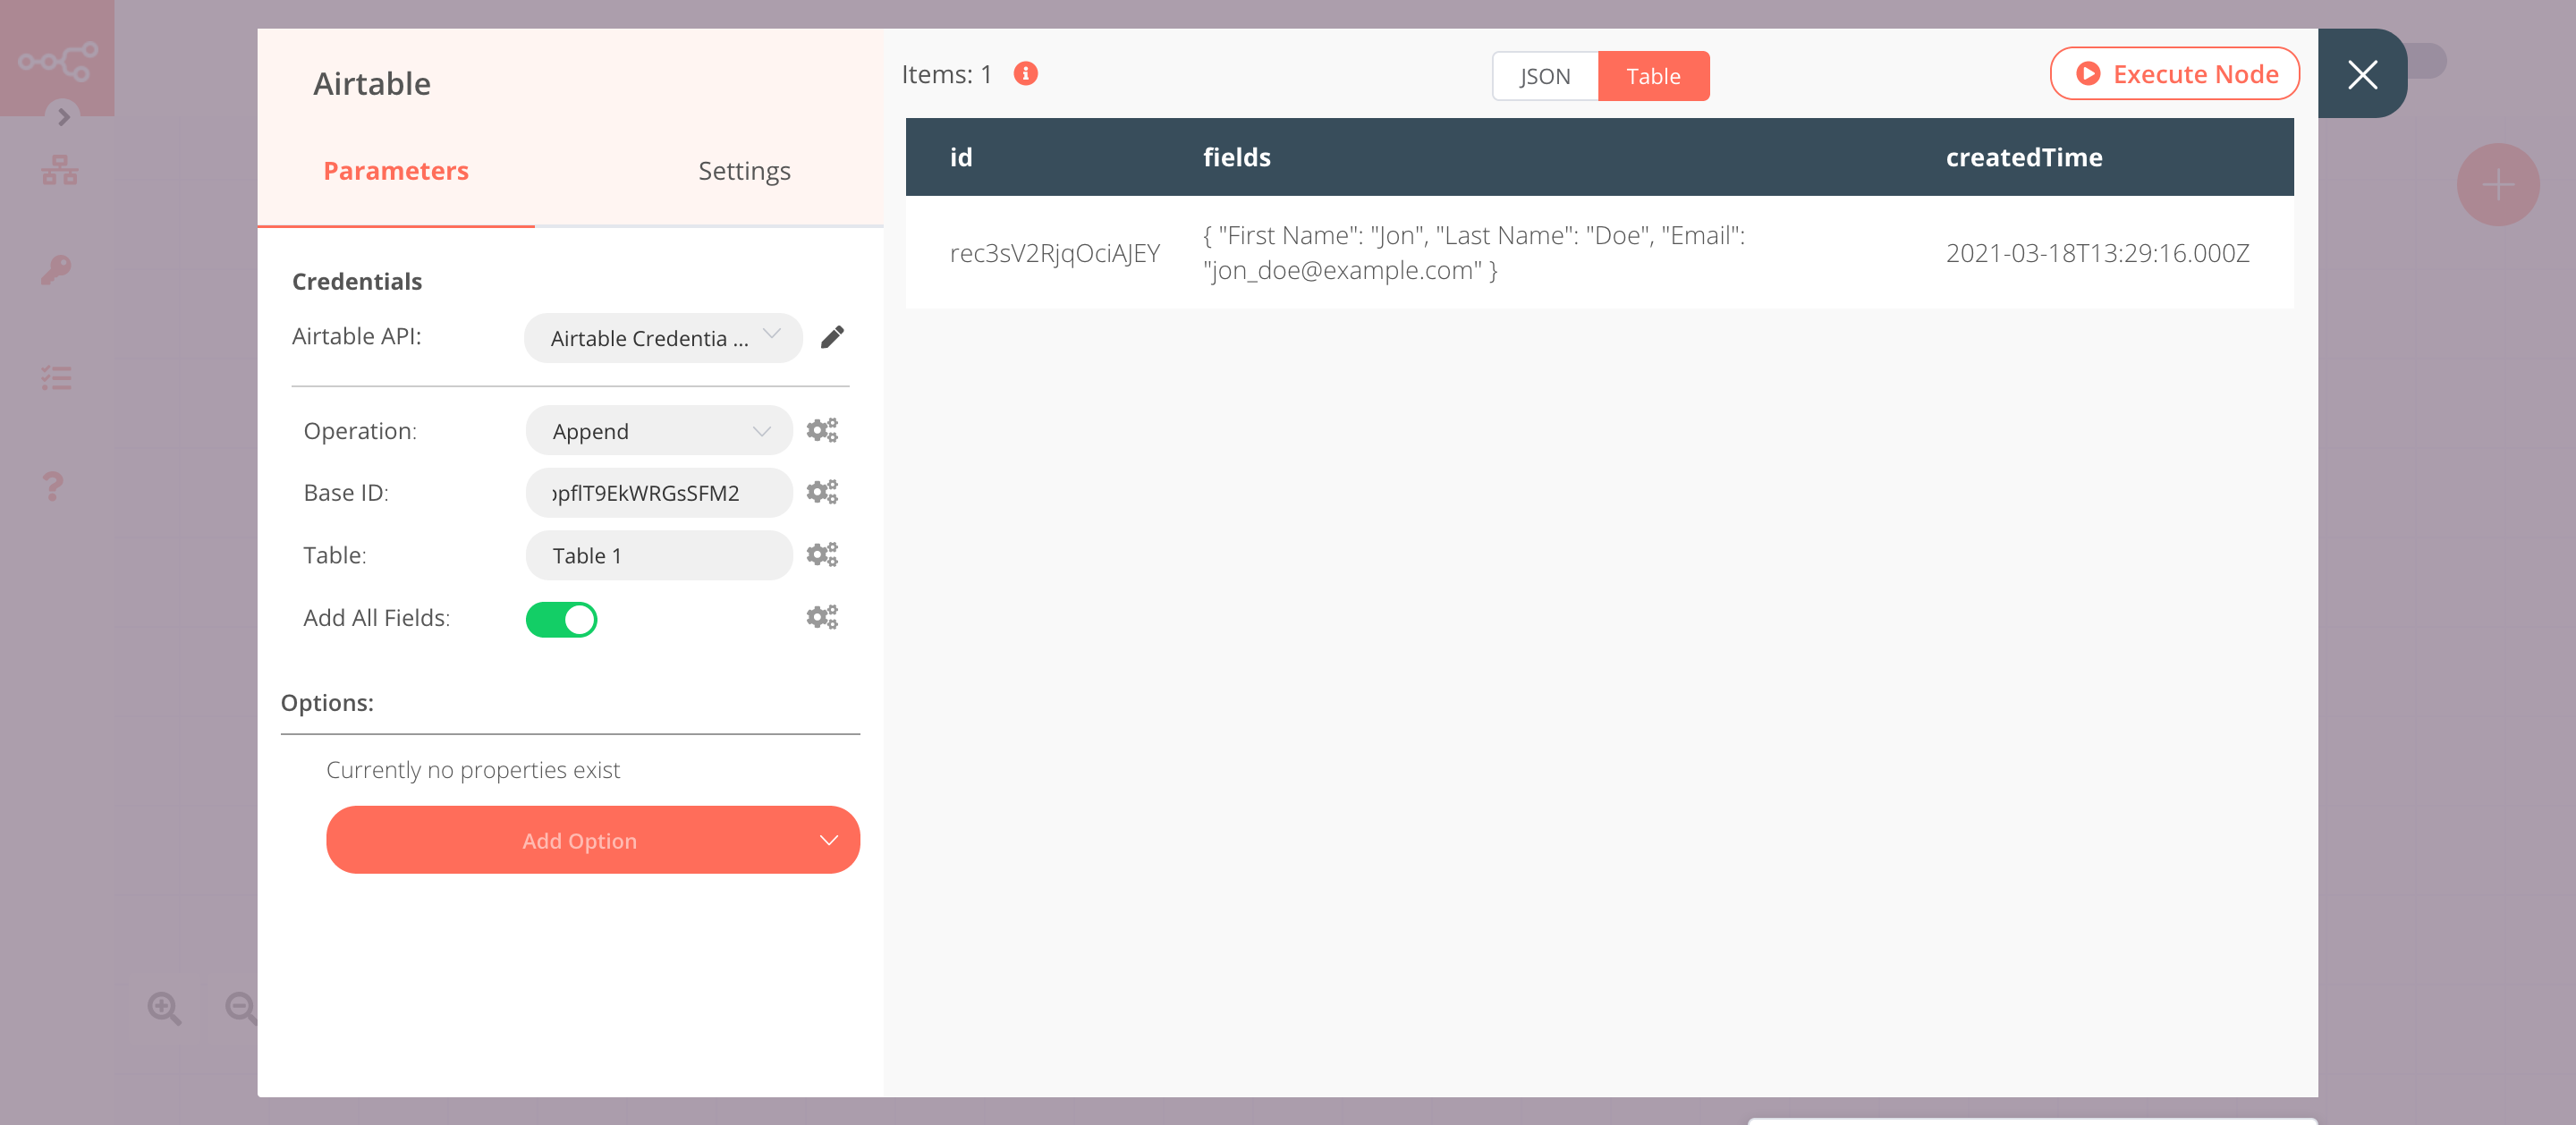
3. Airtable node#
This node will store the data coming from the previous node in a table in Airtable.
- First of all, you'll have to enter credentials for the Airtable node. You can find out how to do that here.
- Select 'Append' from the Operation dropdown list.
- Enter the base ID in the Base ID field. For obtaining the Base ID, head over to their API page and select the correct base. You'll find the Base ID under the Introduction section.
- In n8n, paste the ID of the base in the Base ID field.
- Enter the table name in the Table name field.
- Click on Execute Node to run the node.
In the screenshot below, you will notice that the node adds the information of a new contact from the previous node in a table in Airtable.
Activate workflow for production
You'll need to save the workflow and then click on the Activate toggle on the top right of the screen to activate the workflow. Your workflow will then be triggered as specified by the settings in the Autopilot Trigger node.