Google Analytics#
Google Analytics is a web analytics service offered by Google that lets you measure your advertising ROI as well as track your Flash, video, and social networking sites and applications.
Credentials
You can find authentication information for this node here.
Basic Operations#
- Report
- Return the analytics data
- User Activity
- Return user activity data.
Example Usage#
This workflow allows you to get analytical metrics of your website using the Goole Analytics node and store it in Airtable. You can also find the workflow on n8n.io. This example usage workflow uses the following nodes. - Start - Google Analytics - Set - [Airtable]/integrations/builtin/app-nodes/n8n-nodes-base.airtable/)
The final workflow should look like the following image.

1. Start node#
The Start node exists by default when you create a new workflow.
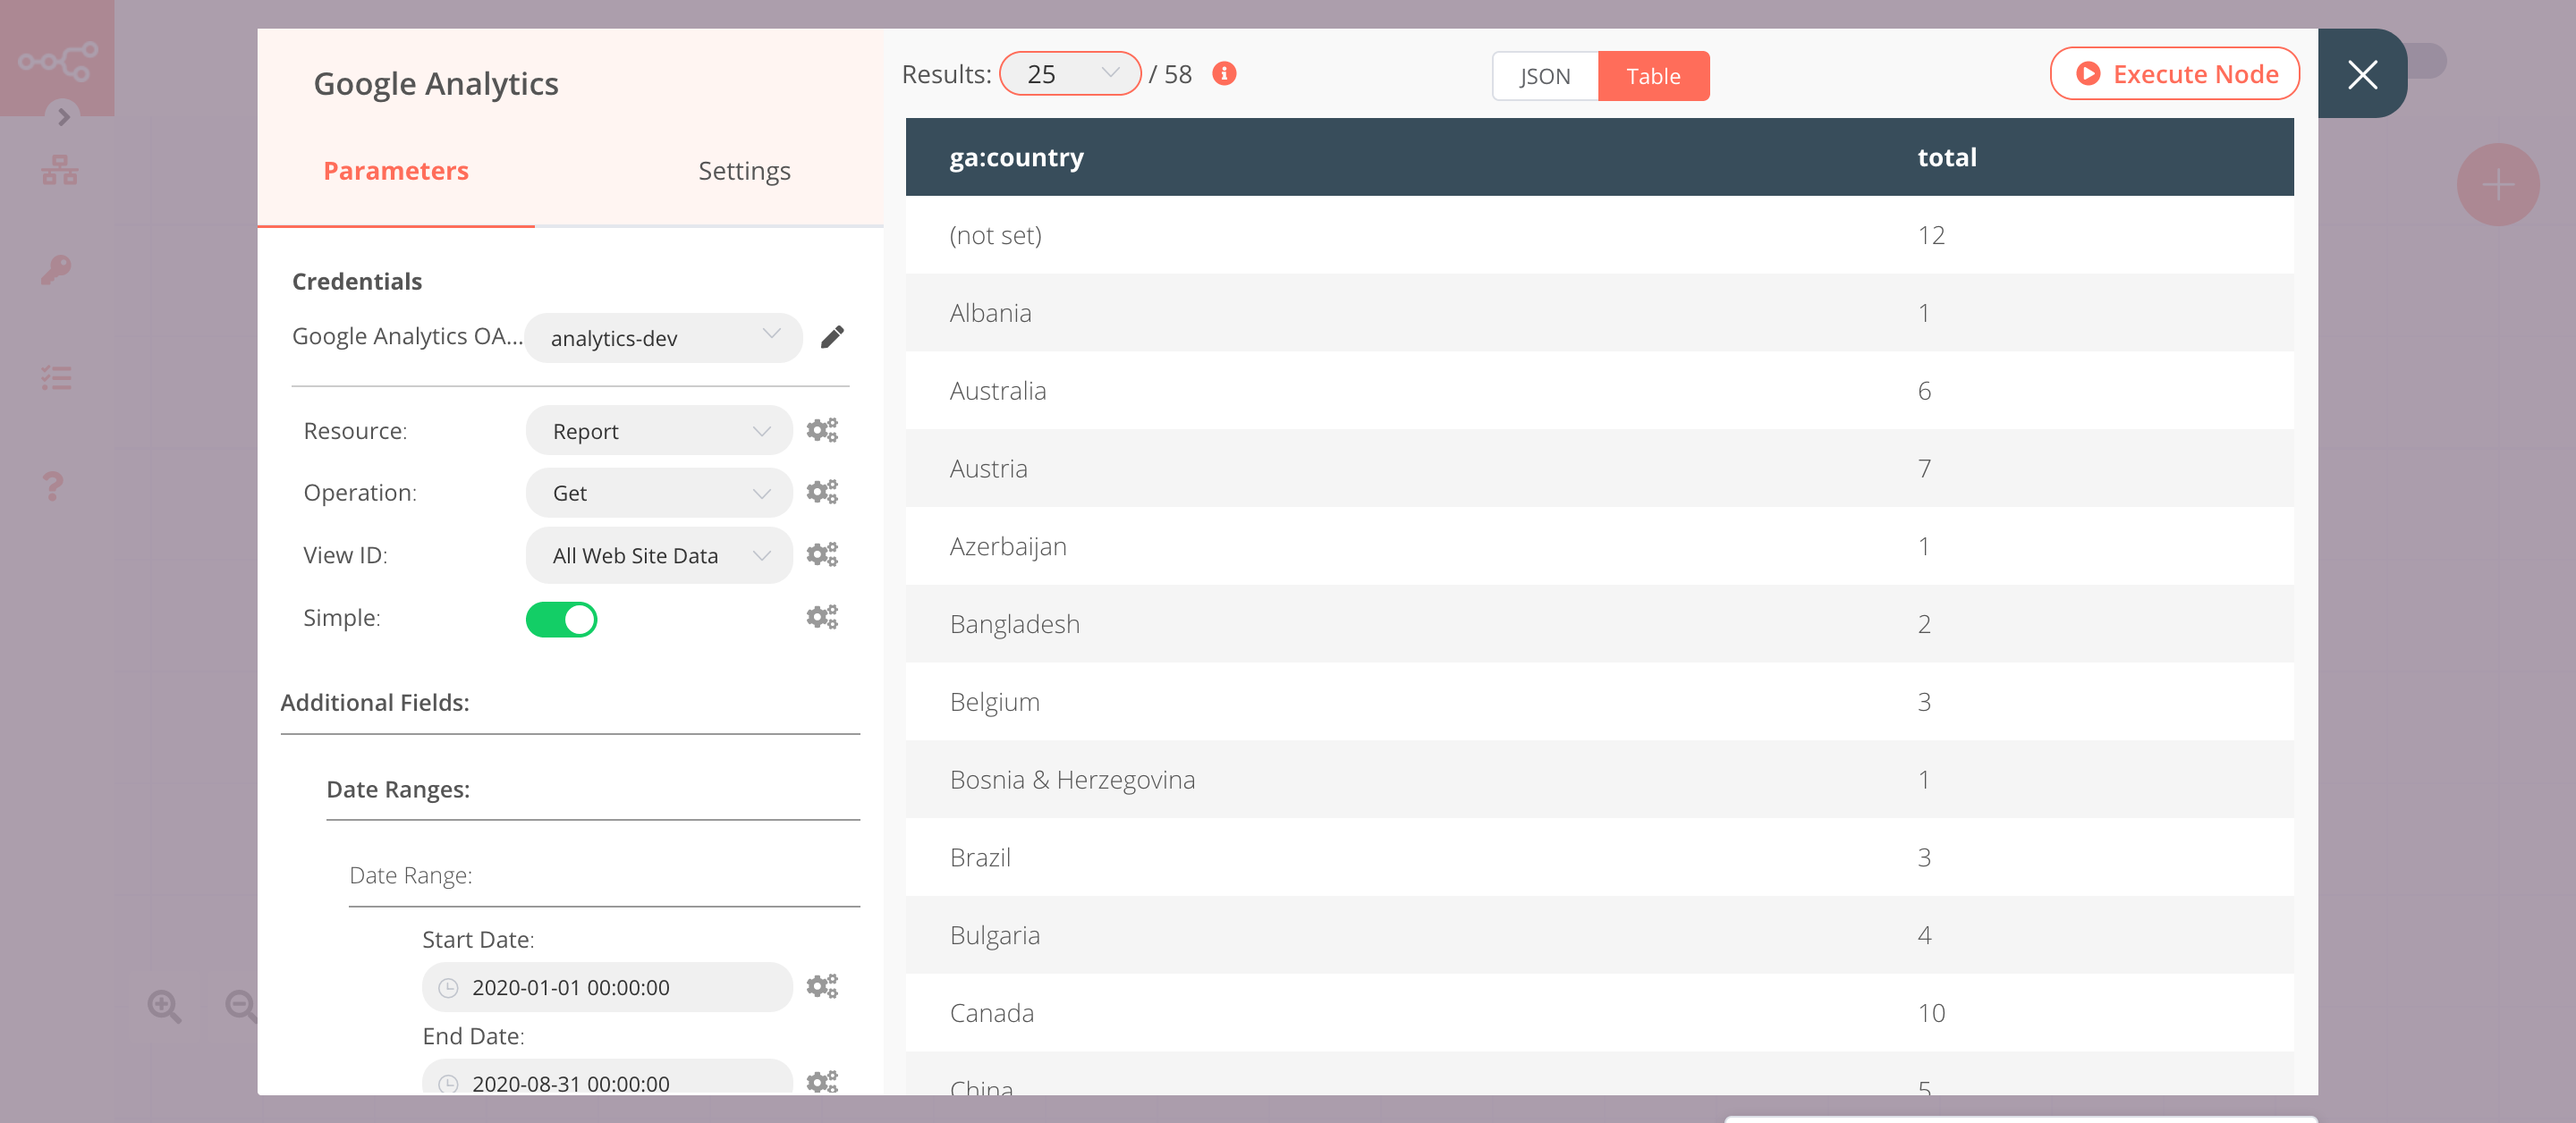
2. Google Analytics node (get: report)#
This node will retrieve the session metrics grouped by country for a given date range. You can select a different dimension, metric, and date range.
- First of all, you'll have to enter credentials for the Google Analytics node. You can find out how to do that here.
- Select a view from the View ID dropdown list.
- Click on Add Field and select 'Dimensions'.
- Click on the Add Dimension button.
- Select 'Country' from the Name field.
- Click on Add Field and select 'Date Ranges'.
- Click on the Add Date Range button.
- Select a start date in the Start Date field.
- Select an end date in the End Date field.
- Click on Add Field and select 'Metrics'.
- Click on the Add Metrics button.
- Enter
Sessionin the Alias field. - Enter
ga:sessionsin the Expression field. - Click on Execute Node to run the node.
In the screenshot below, you will notice that the node returns the information about the sessions grouped by country.
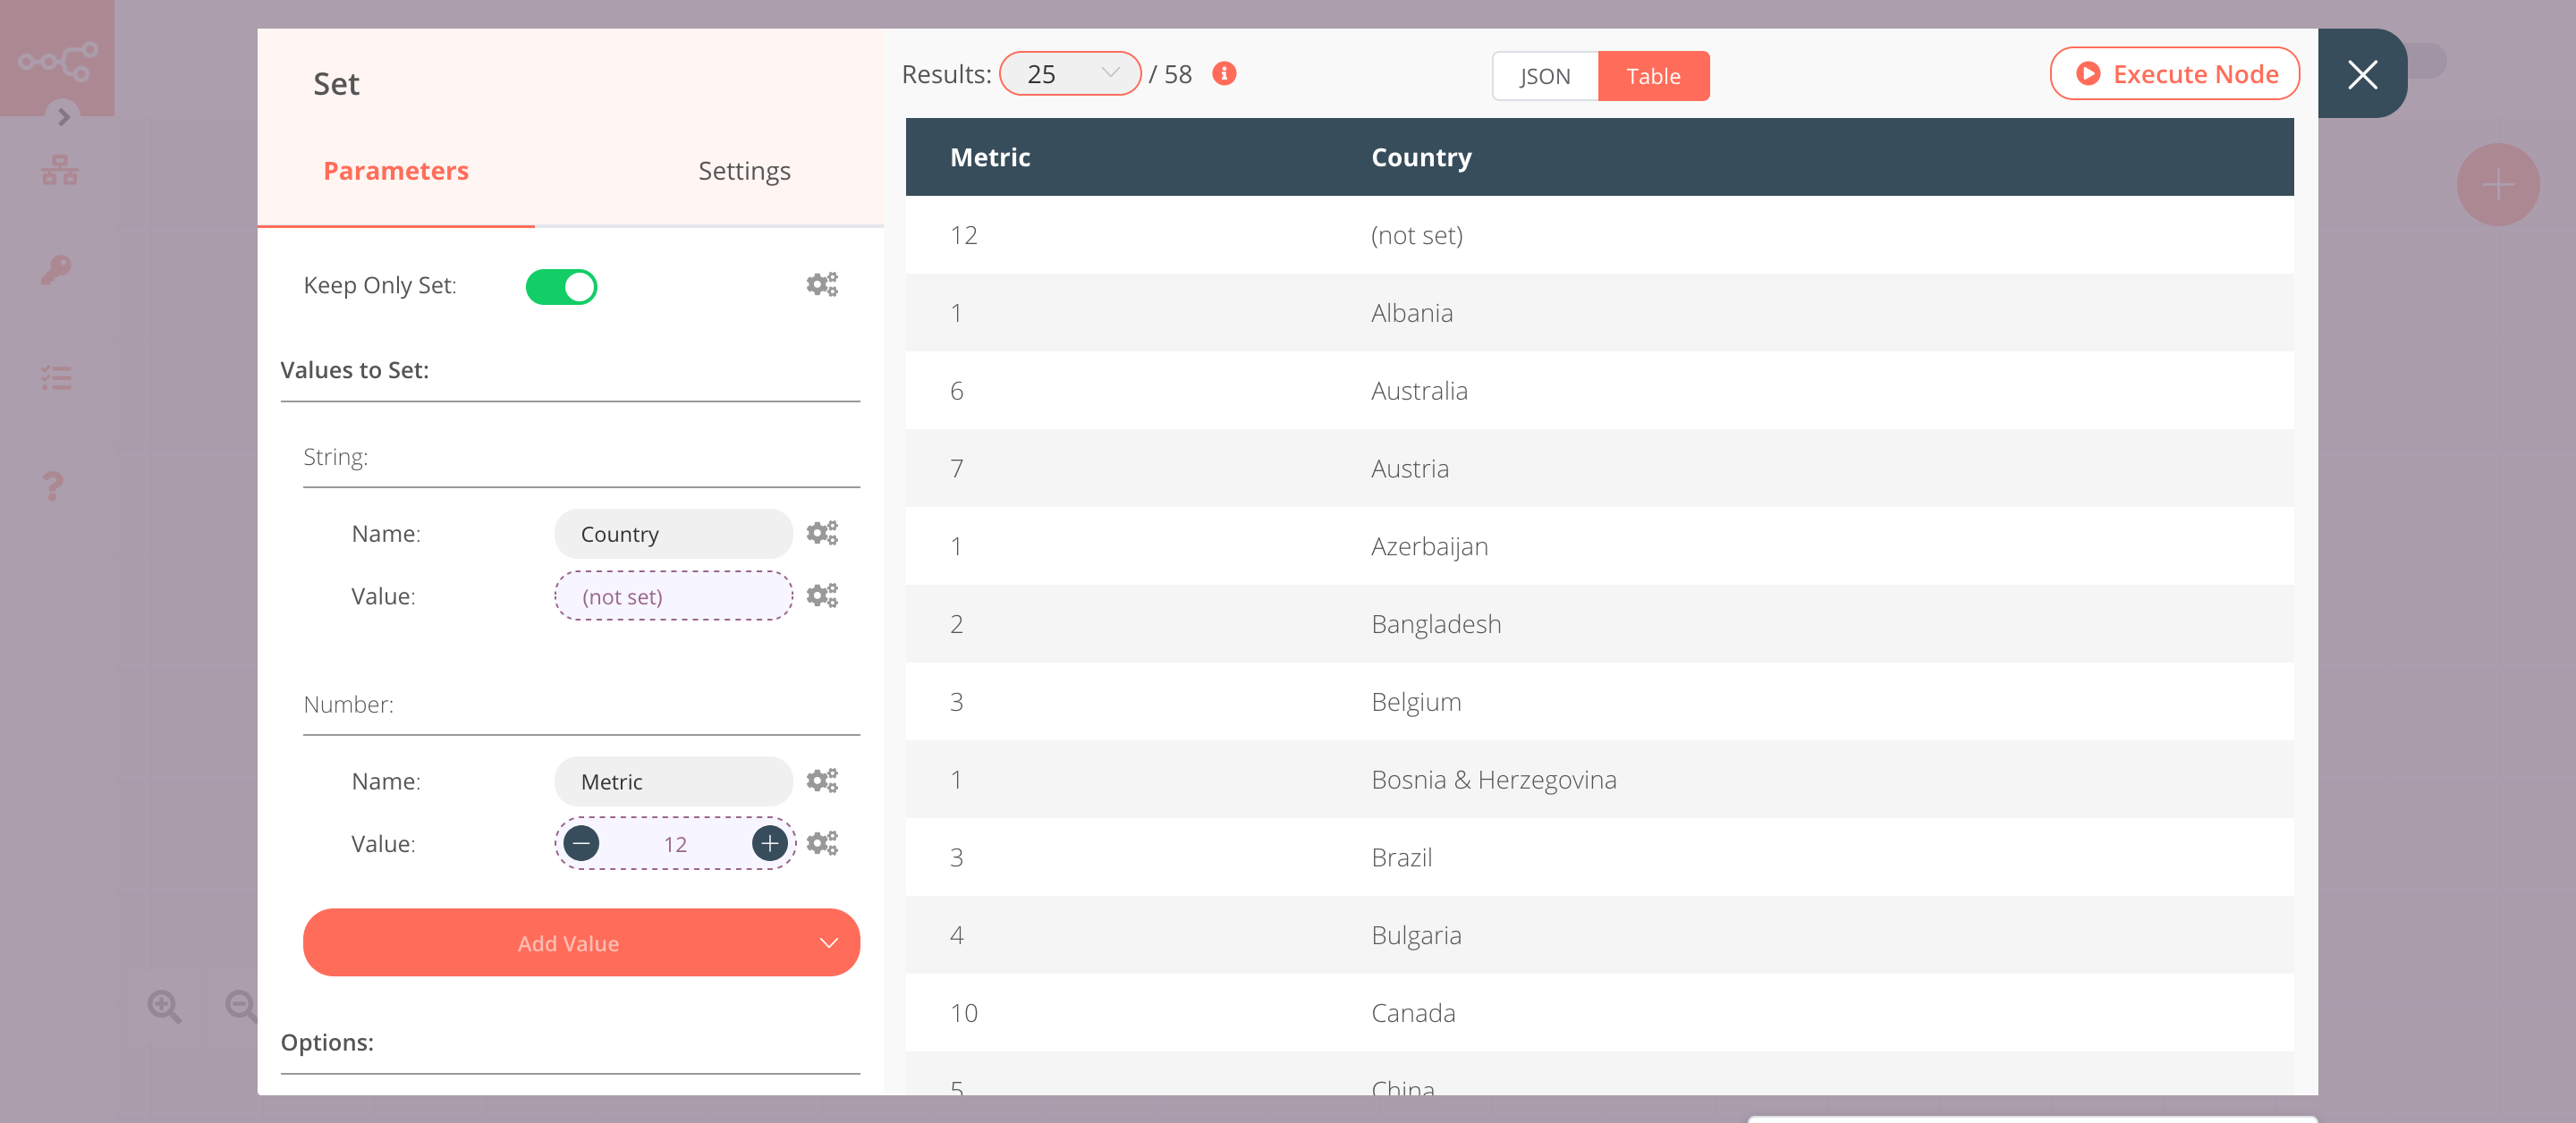
3. Set node#
We will use the Set node to set the values for the country and metrics. This data gets passed on to the next nodes in the workflow.
- Click on the Add Value button and select 'string' from the dropdown list.
- Enter
Countryin the Name field. - Click on the gears icon next to the Value field and click on Add Expression.
- Select the following in the Variable Selector section: Current Nodes > Input Data > JSON > country. You can also add the following expression:
{{$json["ga:country"]}}. - Click on Add Value and select 'Number' from the dropdown list.
- Enter
Metricin the Name field. - Click on the gears icon next to the Value field and click on Add Expression.
- Select the following in the Variable Selector section: Current Nodes > Input Data > JSON > total. You can also add the following expression:
{{$json["total"]}}. - Toggle Keep Only Set to
true. We set this option to true to ensure that only the data that we have set in this node get passed on to the next nodes in the workflow. - Click on Execute Node to run the node.
In the screenshot below, you will notice that the node sets the value for Country and Metric.
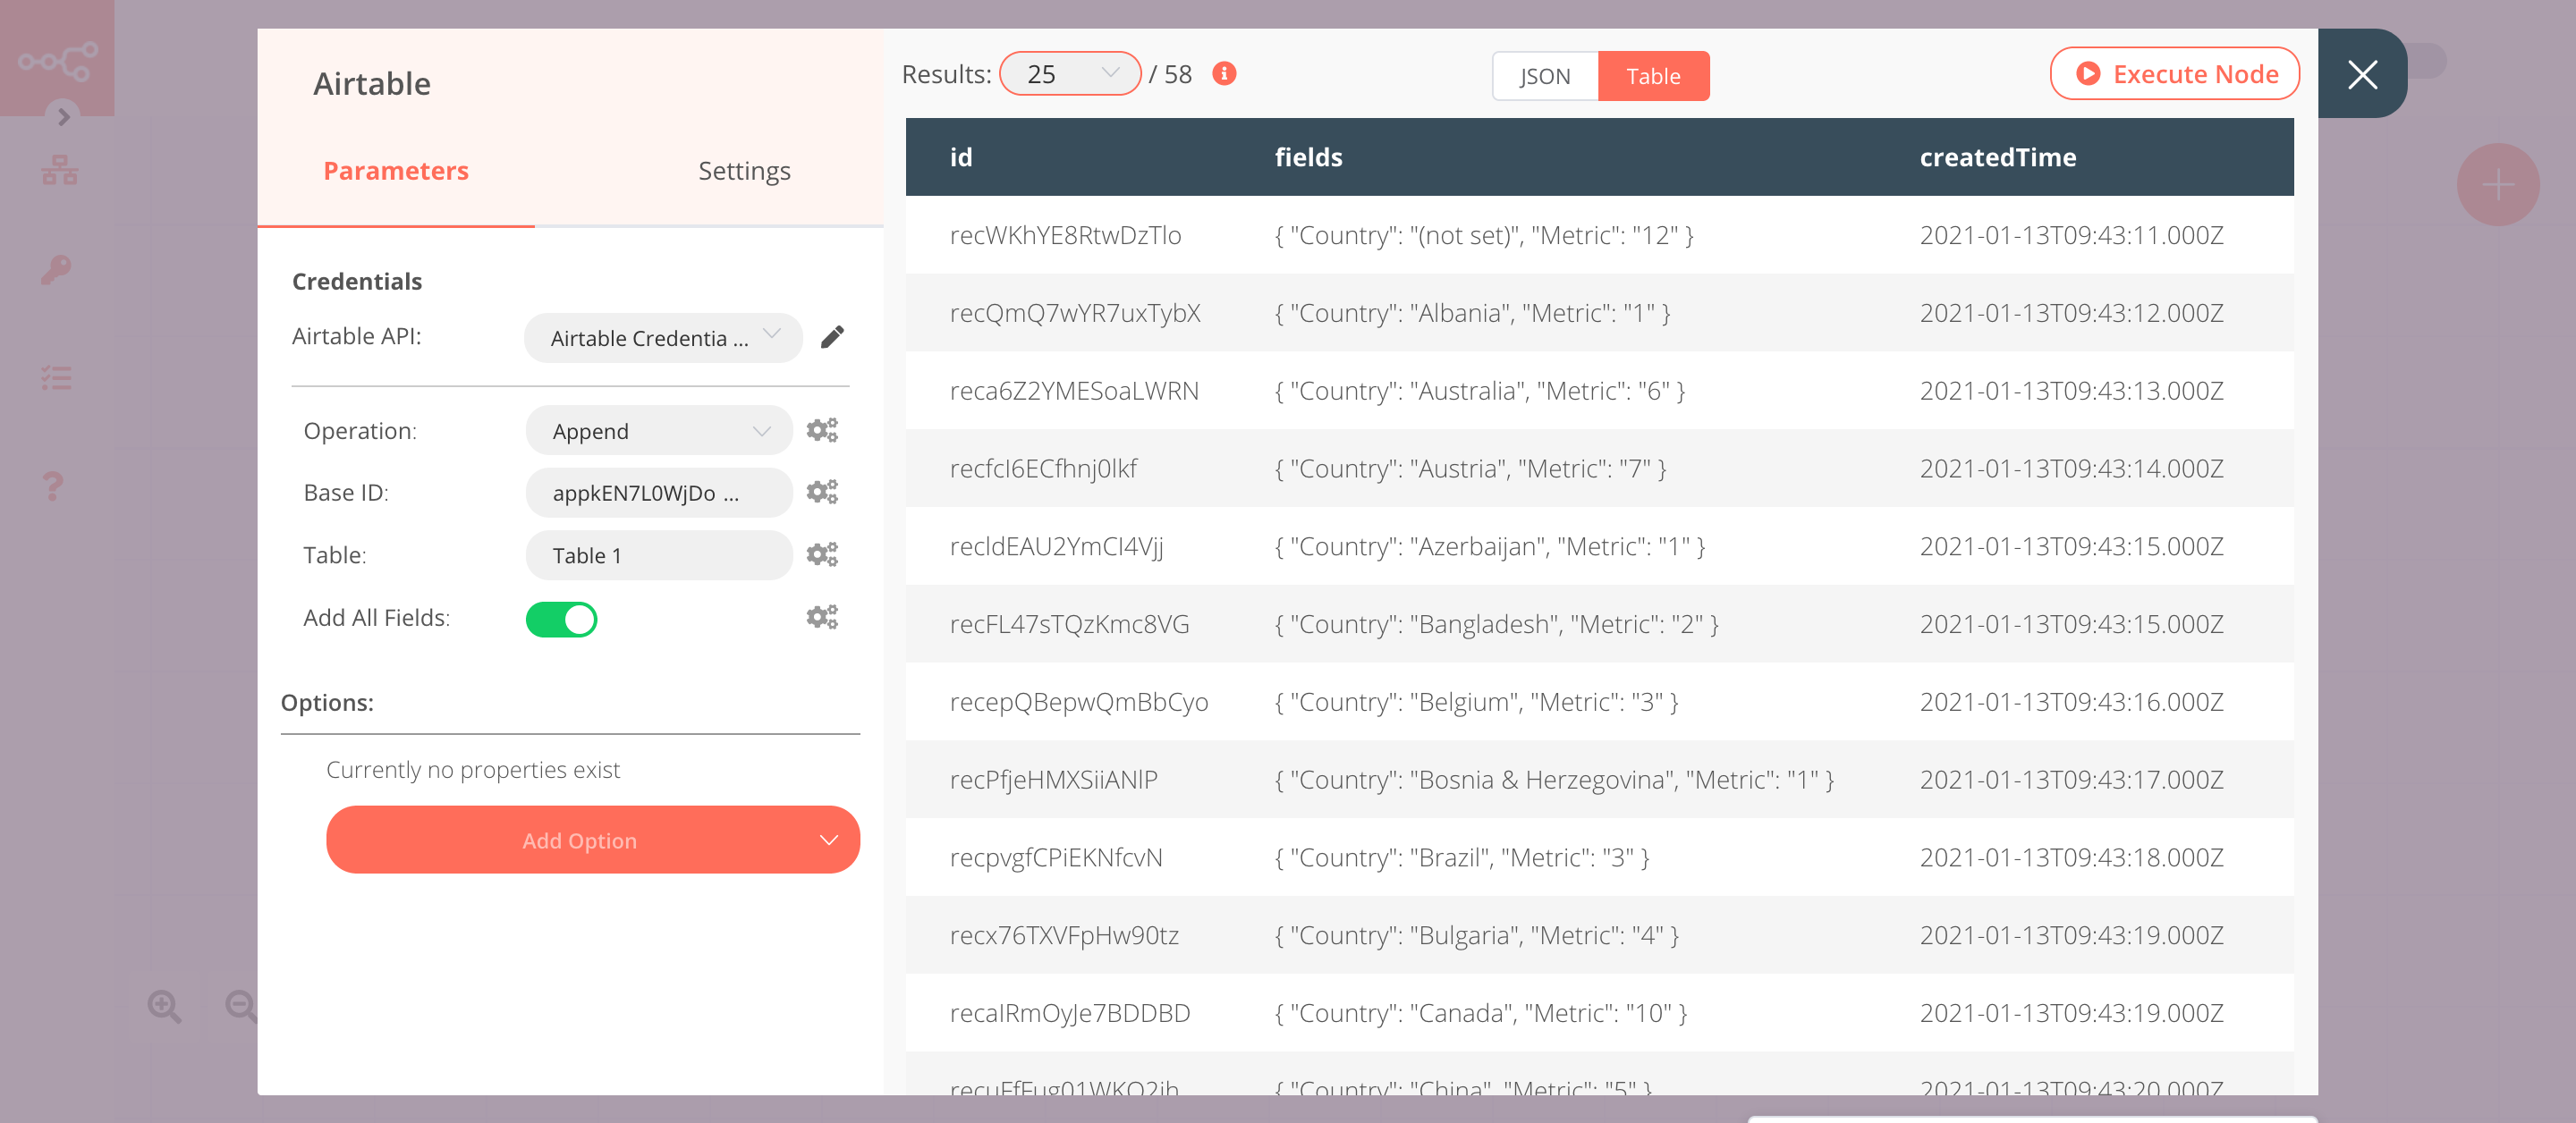
4. Airtable node (Append)#
This node will append the data that we set in the previous node to a table. Create a table like this in your Airtable base.
- First of all, you'll have to enter credentials for the Airtable node. You can find out how to do that here.
- Select 'Append' from the Operation dropdown list.
- Enter the Base ID in the Base ID field. For obtaining the Base ID, head over to their API page and select the correct base. You'll find the Base ID there.
- Enter the name of your table in the Table field.
- Click on Execute Node to run the node.
In the screenshot below, you will notice that the node appends the data that we had set in the previous node.