Bubble#
Bubble lets you create interactive, multi-user apps for desktop and mobile web browsers.
Credentials
You can find authentication information for this node here.
Basic Operations#
- Object
- Create
- Delete
- Get
- Get All
- Update
Example Usage#
This workflow allows you to create, update, and get an object from Bubble. You can also find the workflow on n8n.io. This example usage workflow would use the following nodes. - Start - Bubble
The final workflow should look like the following image.
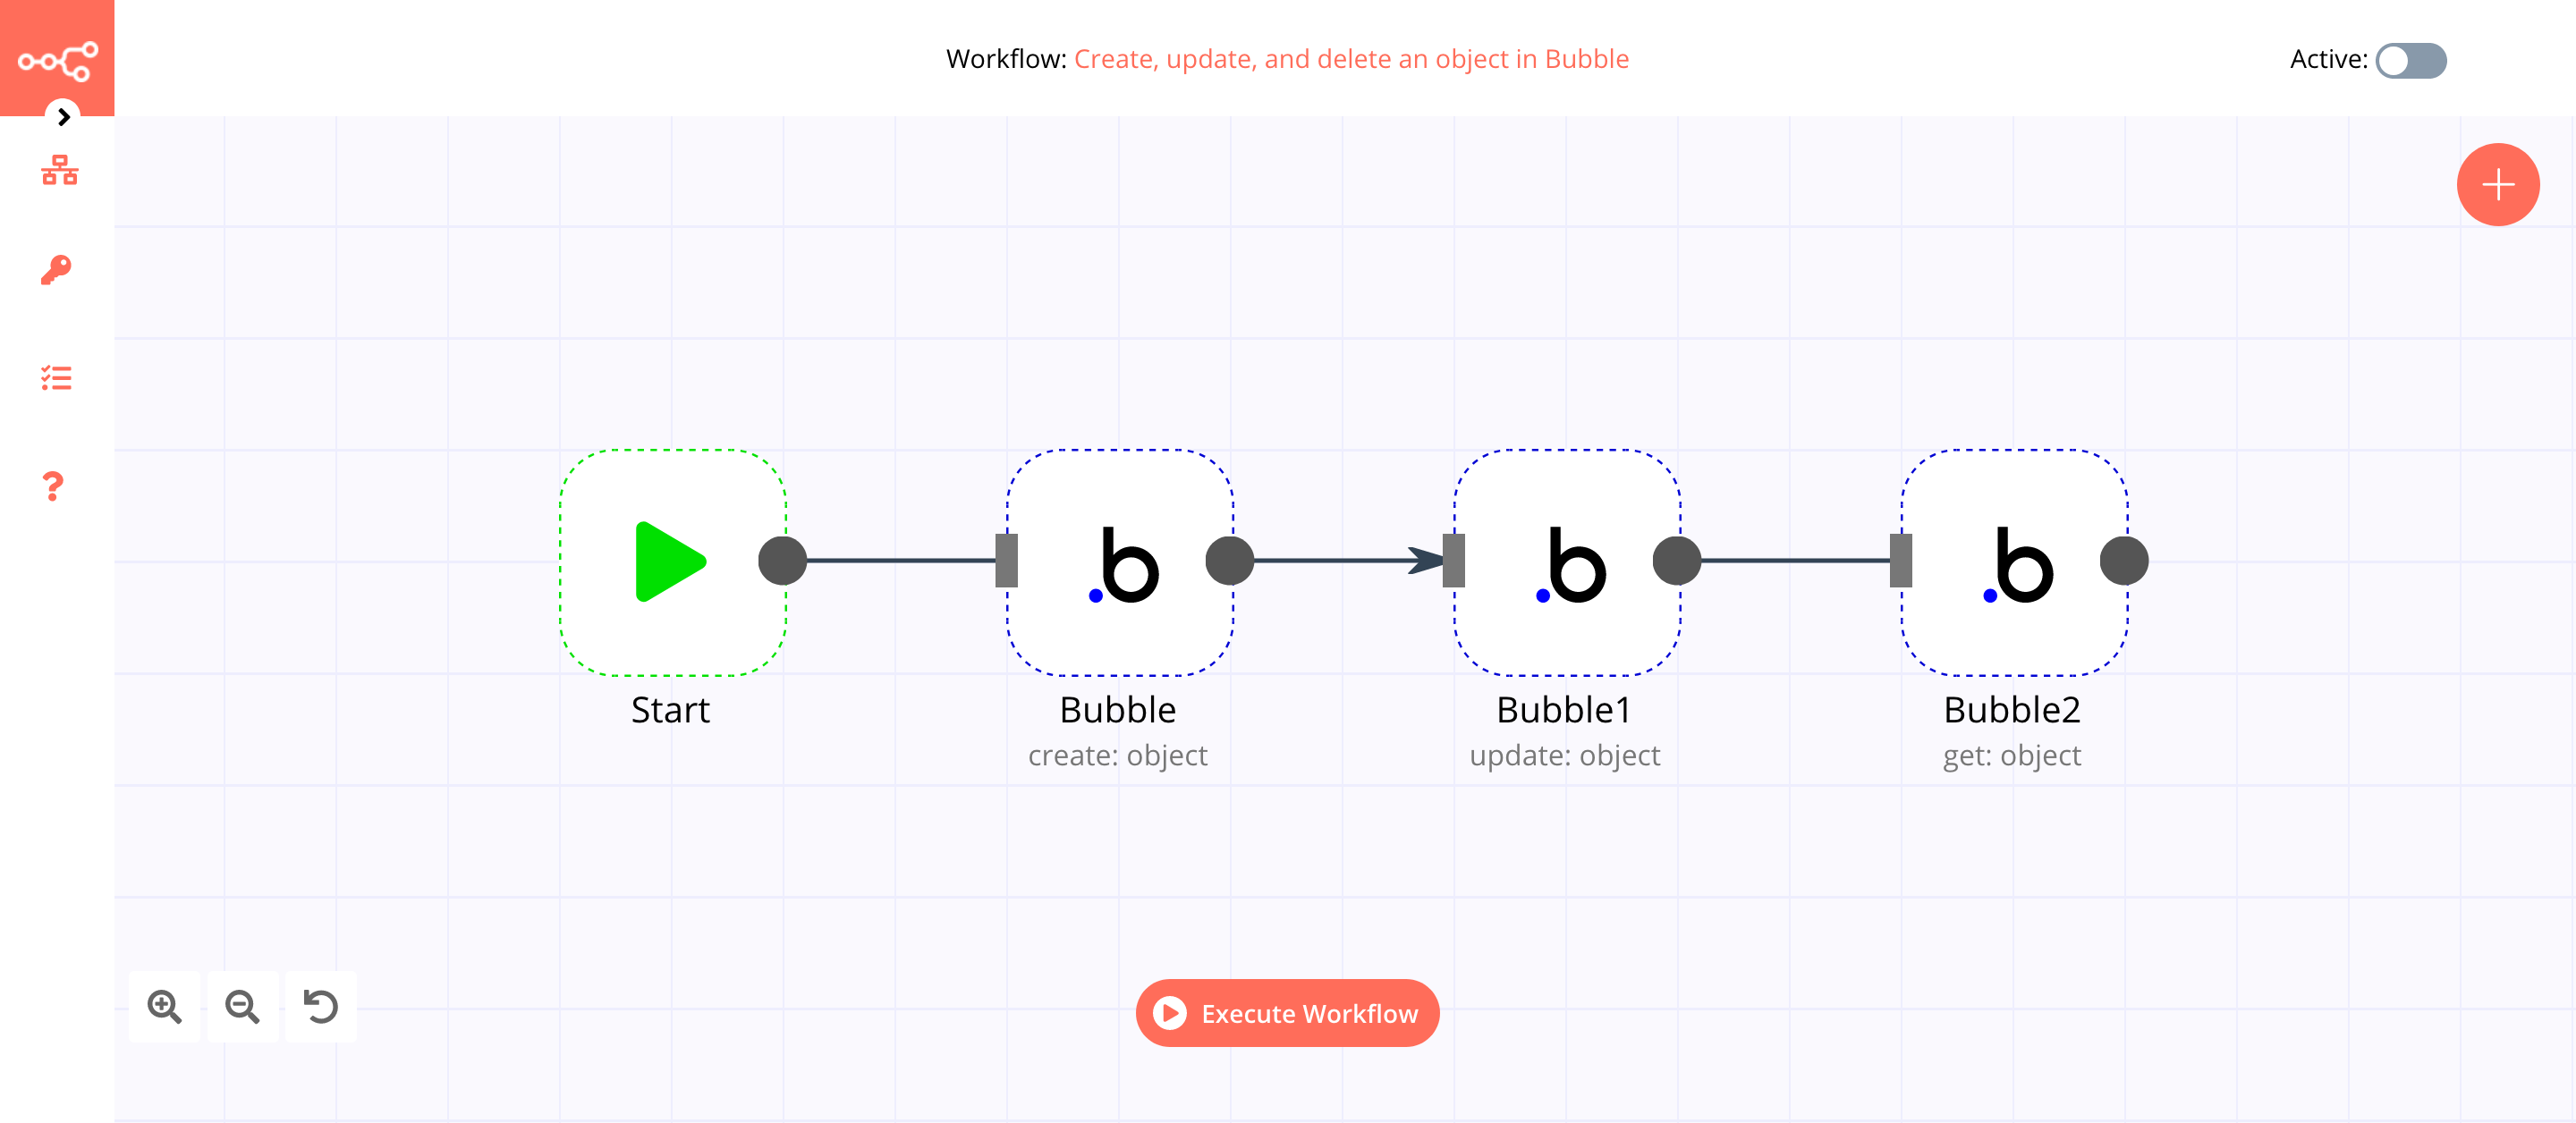
1. Start node#
The start node exists by default when you create a new workflow.
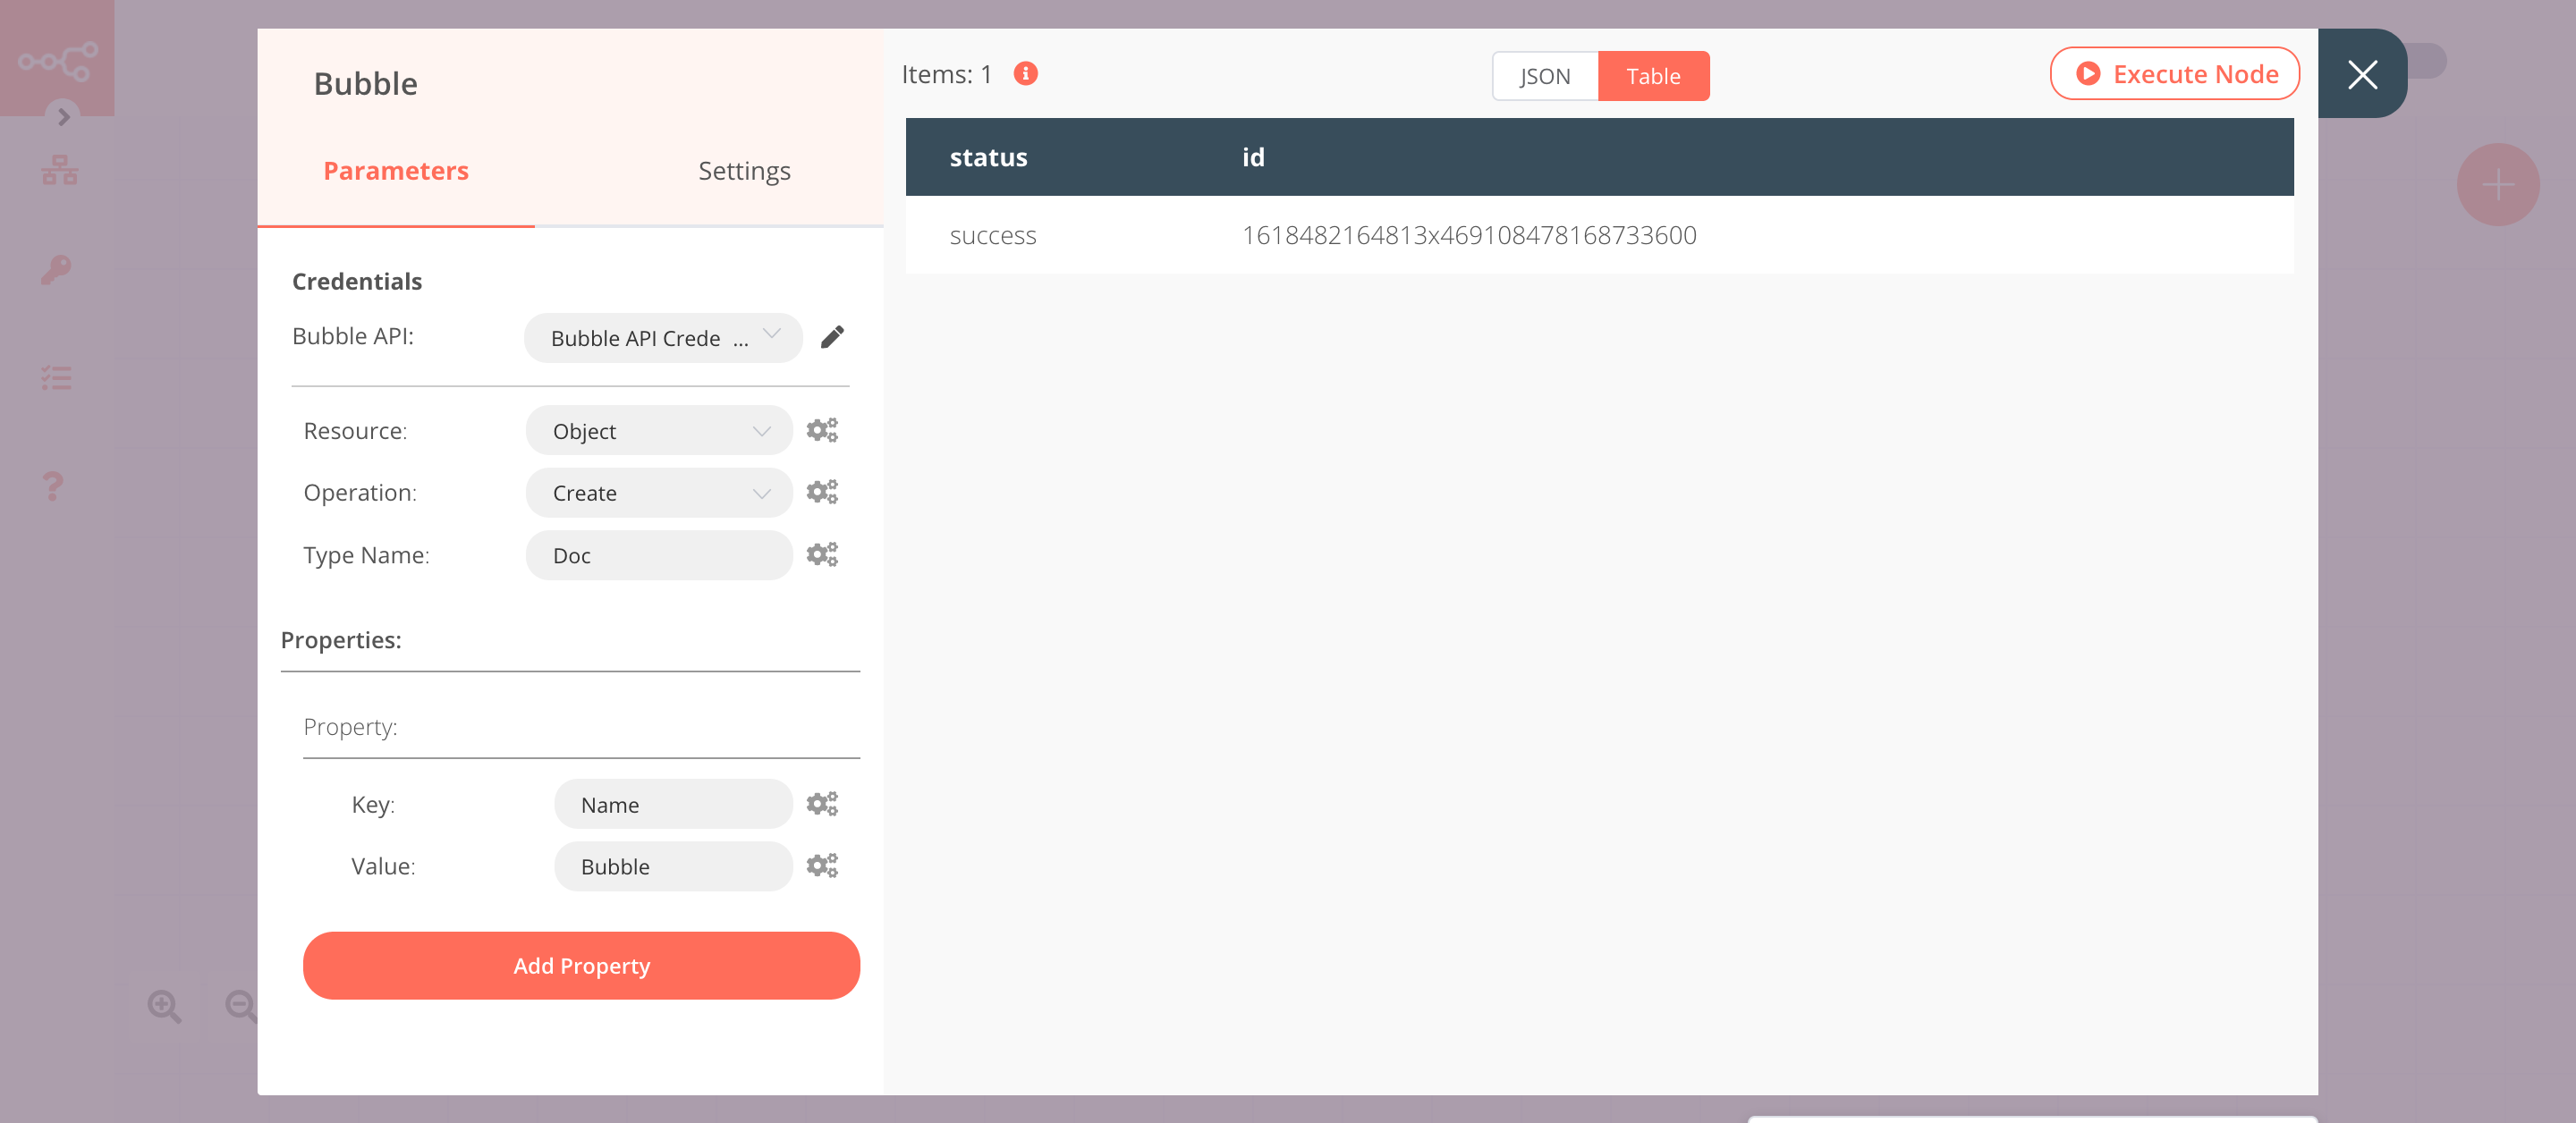
2. Bubble node (create: object)#
This node will create a new object of the type Doc in Bubble. If you want to create an object with a different type, use that type instead.
- First of all, you'll have to enter credentials for the Bubble node. You can find out how to do that here.
- Select 'Create' from the Operation dropdown list.
- Enter
Docin the Type Name field. - Click on the Add Property button.
- Enter
Namein the Key field. If you're using a different type, enter the field name present in the type. - Enter
Bubblein the Value field. - Click on Execute Node to run the node.
In the screenshot below, you will notice that the node creates a new object of the type Doc in Bubble.
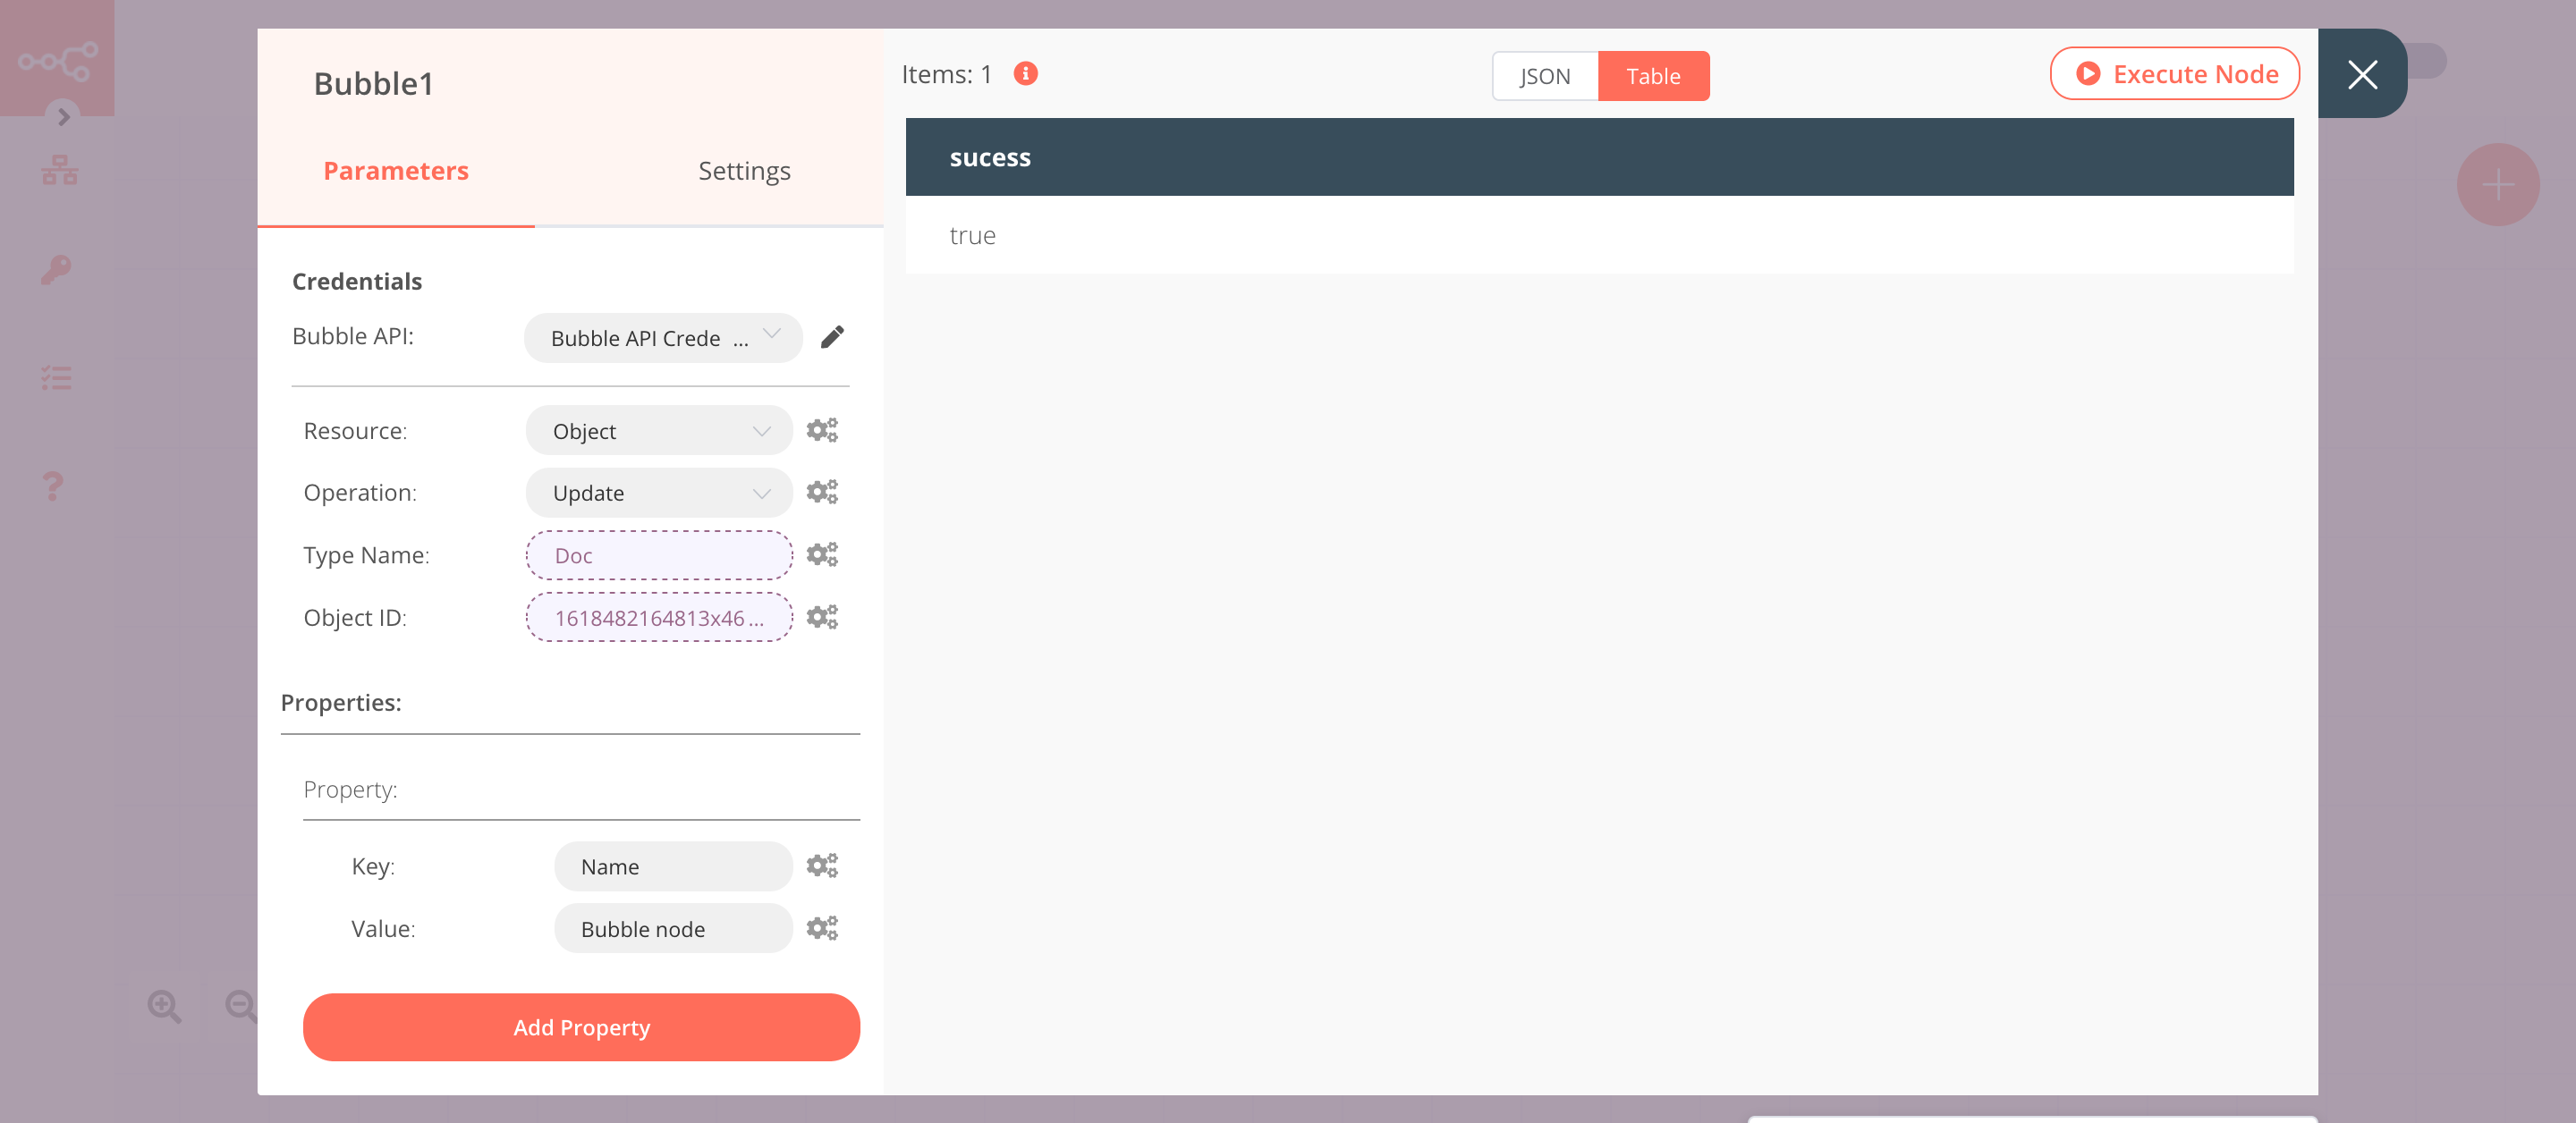
3. Bubble1 node (update: object)#
This node will update the object that we created using the previous node.
- Select the credentials that you entered in the previous Bubble node.
- Select 'Update' from the Operation dropdown list.
- Click on the gears icon next to the Type Name field and click on Add Expression.
- Select the following in the Variable Selector section: Nodes > Bubble > Parameters > typeName. You can also add the following expression:
{{$node["Bubble"].parameter["typeName"]}}. - Click on the gears icon next to the Object ID field and click on Add Expression.
- Select the following in the Variable Selector section: Current Node > Input Data > JSON > id. You can also add the following expression:
{{$json["id"]}}. - Click on the Add Property button.
- Enter
Namein the Key field. If you're using a different type, enter the field name present in the type. - Enter
Bubble nodein the Value field. - Click on Execute Node to run the node.
In the screenshot below, you will notice that the node updates the information of the object that got created previously.
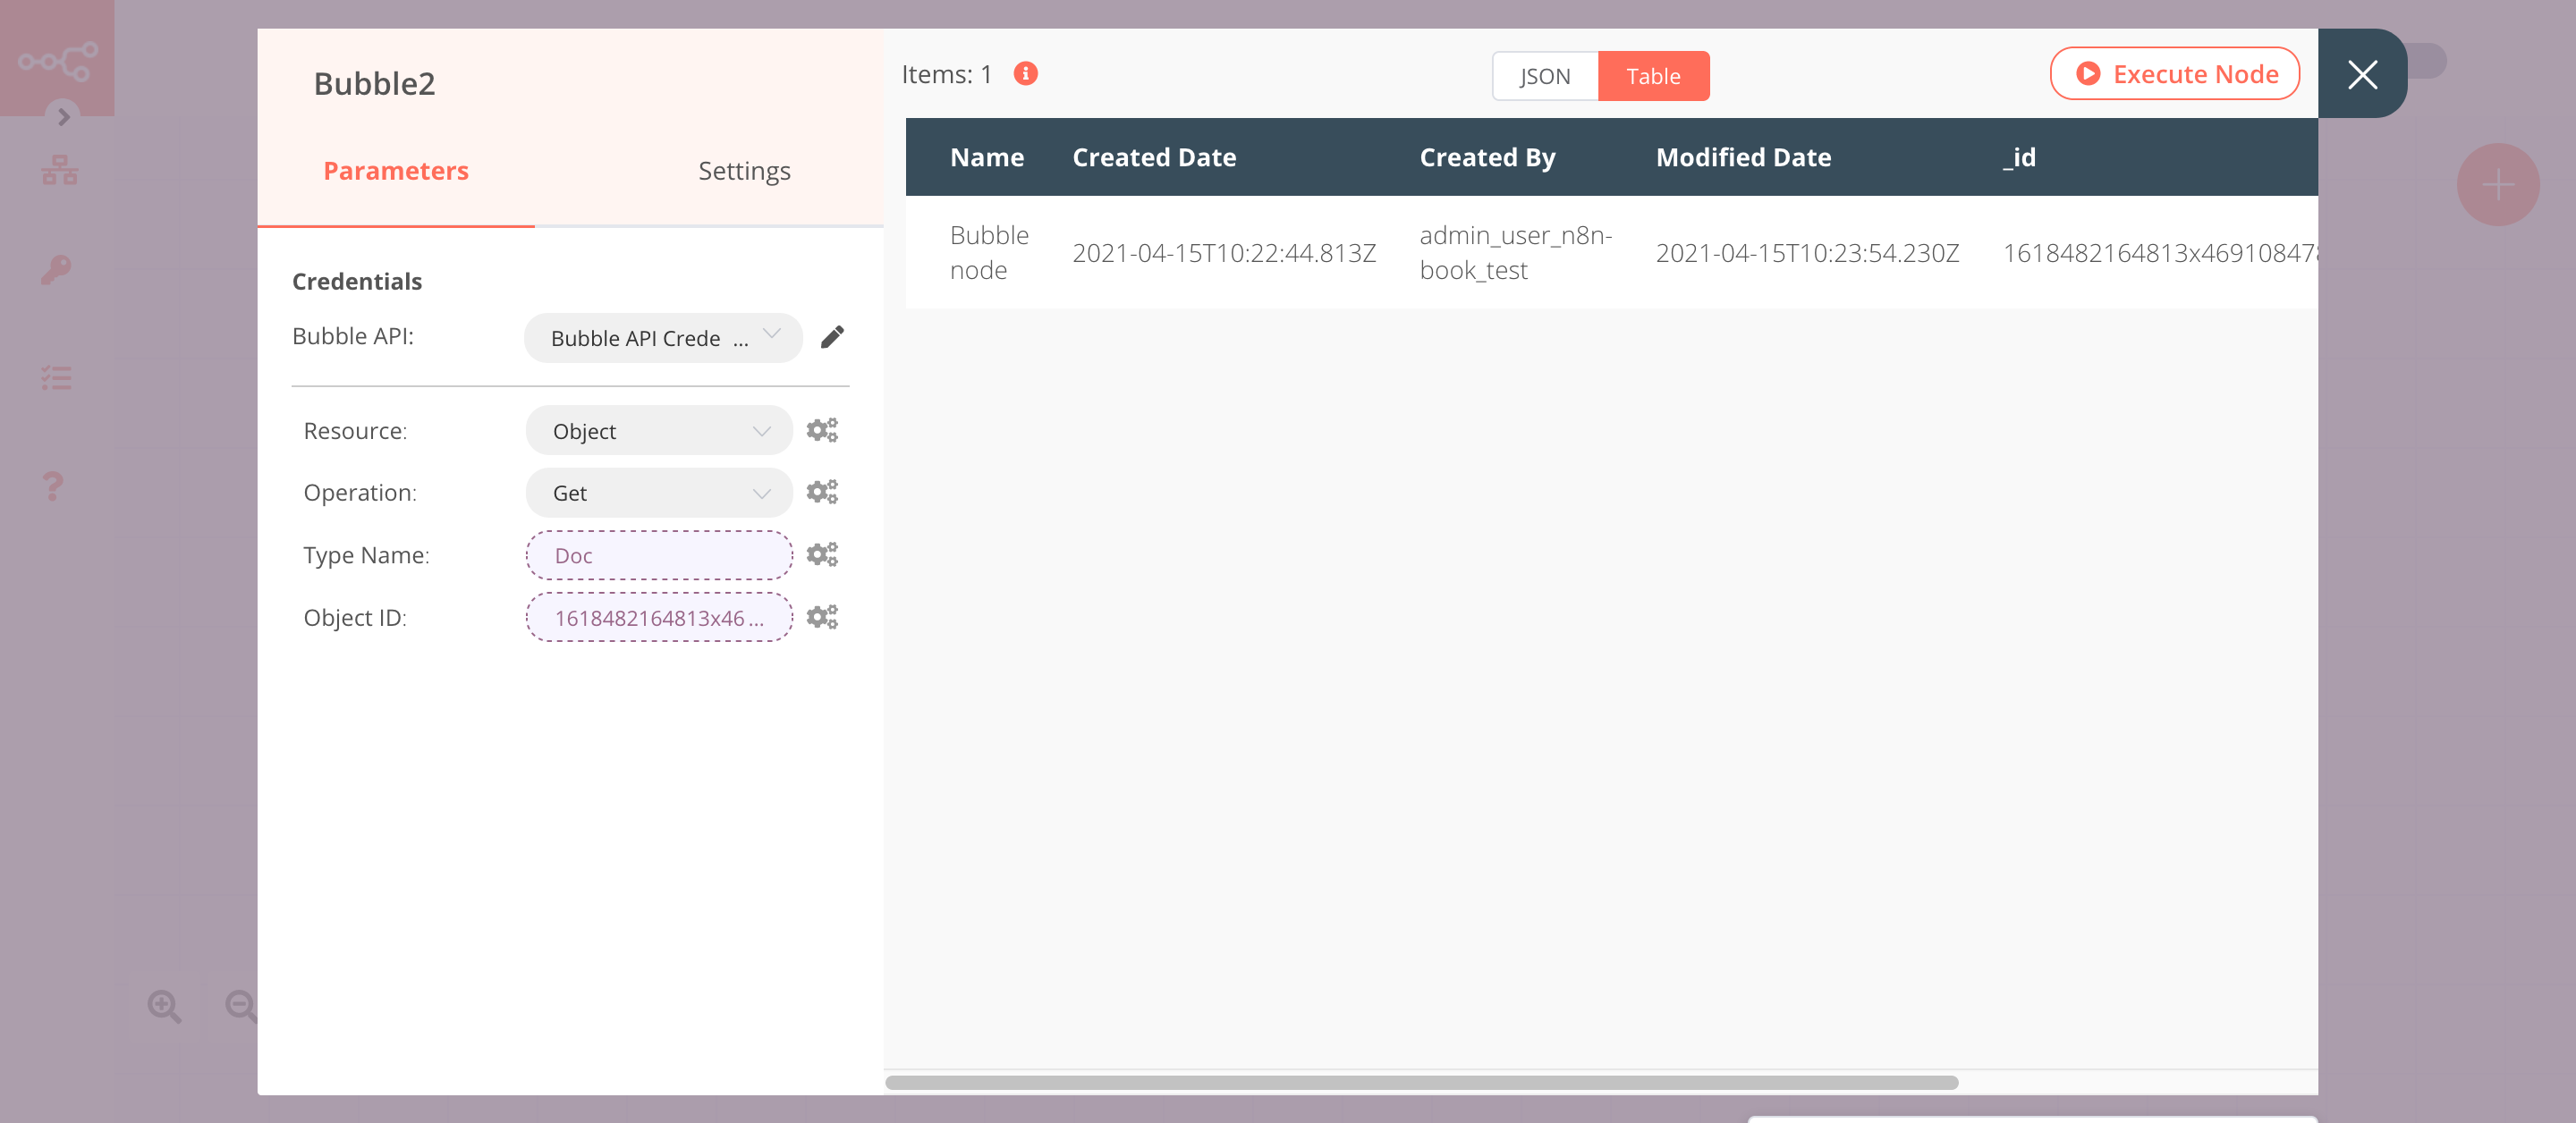
4. Bubble2 node (get: object)#
This node will retrieve the information of the object that we created earlier.
- Select the credentials that you entered in the previous Bubble node.
- Click on the gears icon next to the Type Name field and click on Add Expression.
- Select the following in the Variable Selector section: Nodes > Bubble > Parameters > typeName. You can also add the following expression:
{{$node["Bubble"].parameter["typeName"]}}. - Click on the gears icon next to the Object ID field and click on Add Expression.
- Select the following in the Variable Selector section: Nodes > Bubble > Output Data > JSON > id. You can also add the following expression:
{{$node["Bubble"].json["id"]}}. - Click on Execute Node to run the node.
In the screenshot below, you will notice that the node retrieves the information of the object that we created earlier.