Dropcontact#
Dropcontact is an email finder platform that allows you to automatically find, verify and validate nominative emails and enrich your contacts with all efficient information to contact him.
Credentials
You can find authentication information for this node here.
Basic Operations#
Contact - Enrich - Fetch Request
Example Usage#
This workflow allows you to find email and enrich your contact from a Google Sheet and add them to Lemlist. You can also find the workflow on n8n.io.
This example usage workflow would use the following nodes. - Start - Google Sheets node - Dropcontact node - Lemlist node
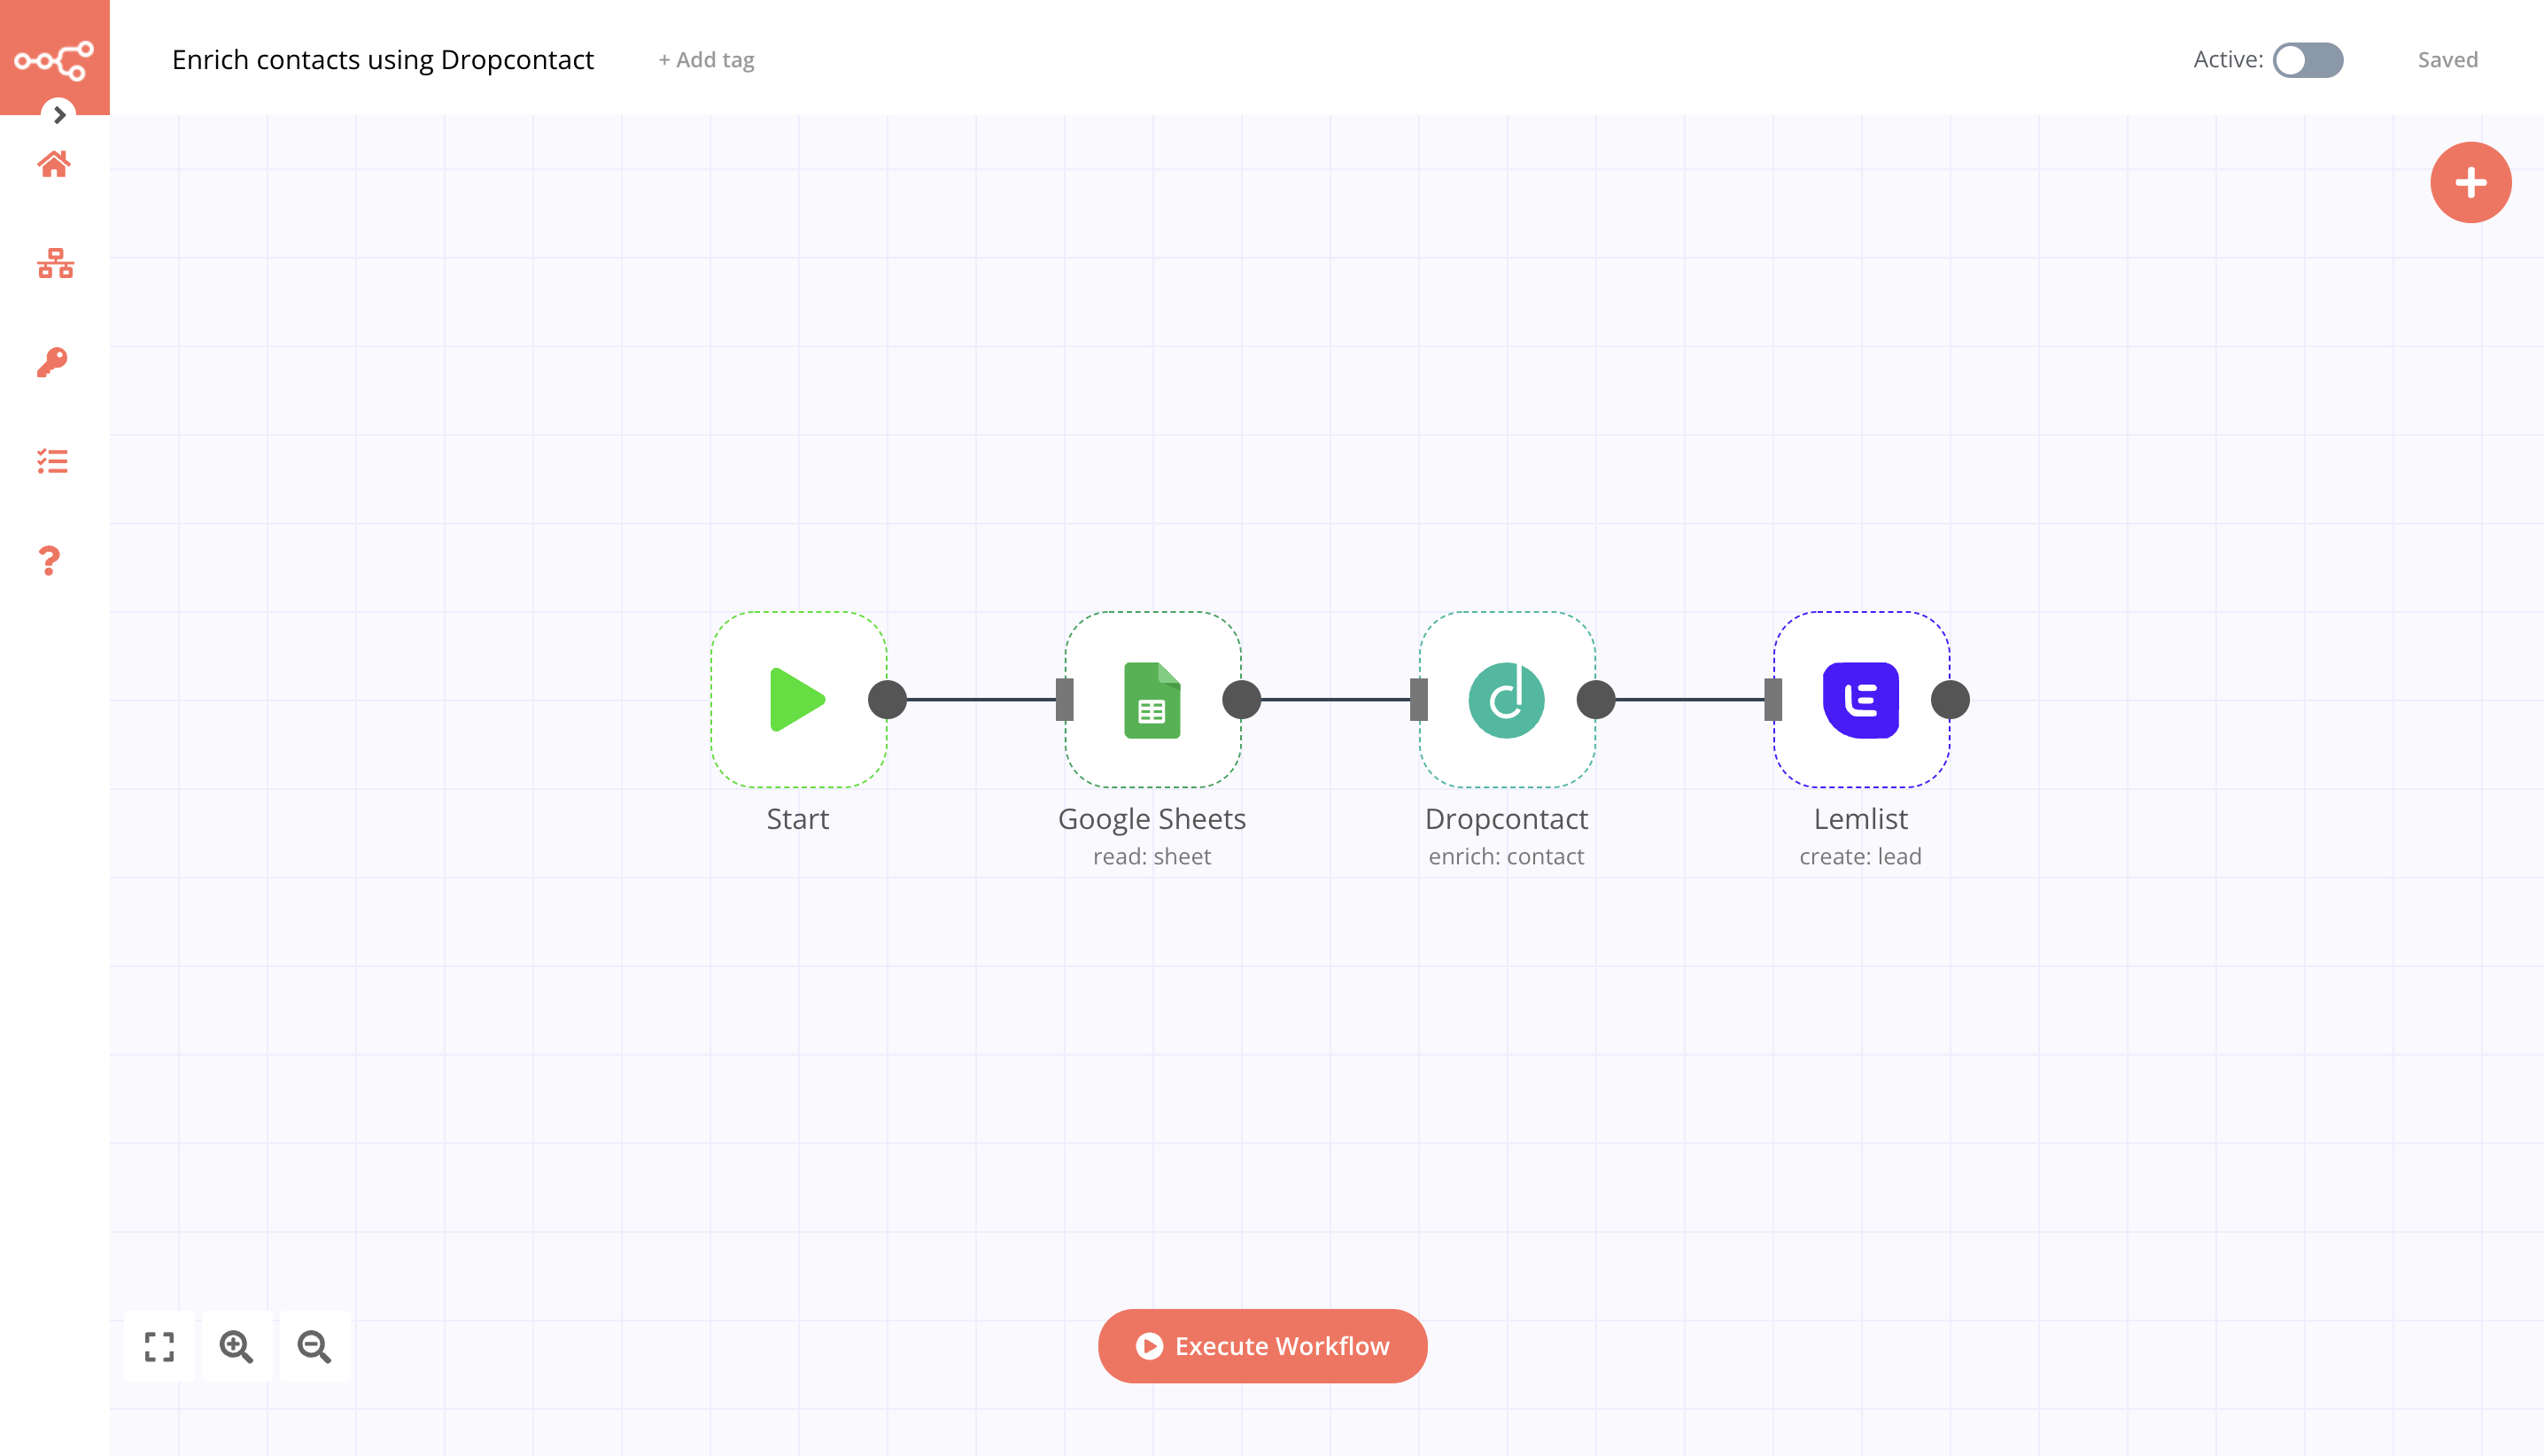
1. Start Node#
The start node exists by default when you create a new workflow.
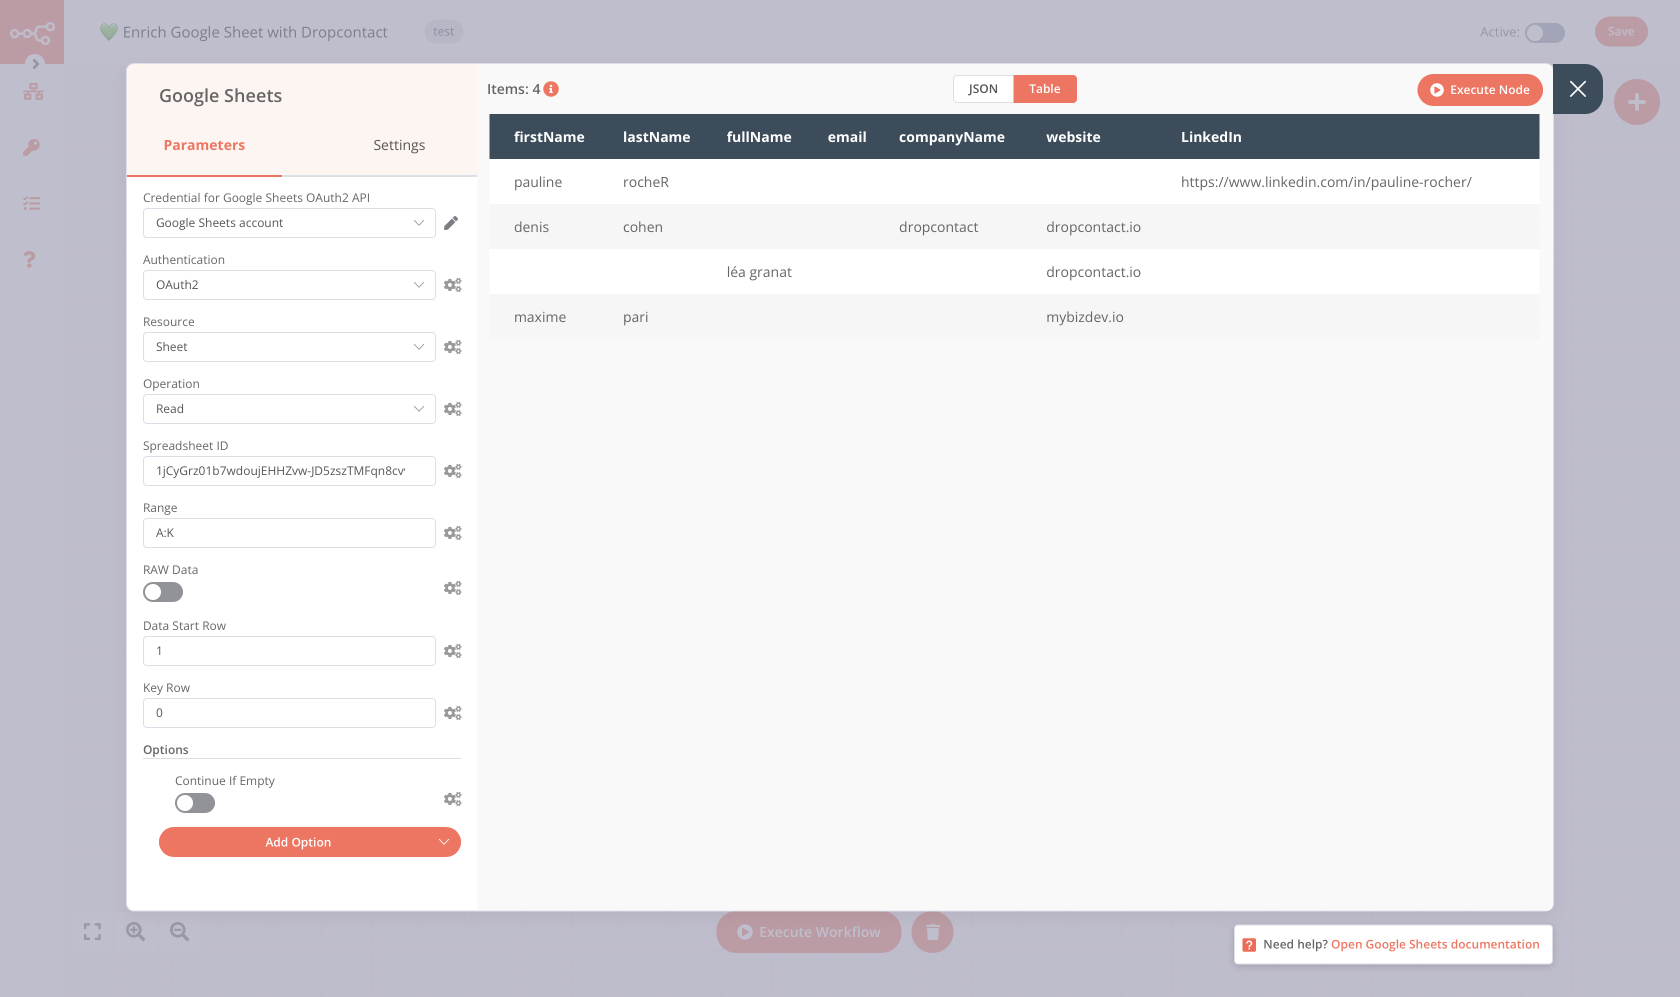
2. Google Sheet node#
This node will list all the records from Google Sheet. Create a sheet like this in your Google Drive.
-
First of all, you'll have to enter credentials for the Google Sheet node. You can find out how to do that here.
-
Select the 'Sheet' option from the Ressource dropdown list.
- Select the 'Read' option from the Operation dropdown list.
- Enter the Sheet ID in the Sheet ID field. Your Google Sheet ID is available in the URL
https://docs.google.com/spreadsheets/d/{spreadsheetId}/edit - In the Range field, enter
A:K. - Click on Execute Node to run the node.
In the screenshot below, you will notice that the node returns the information of the leads.
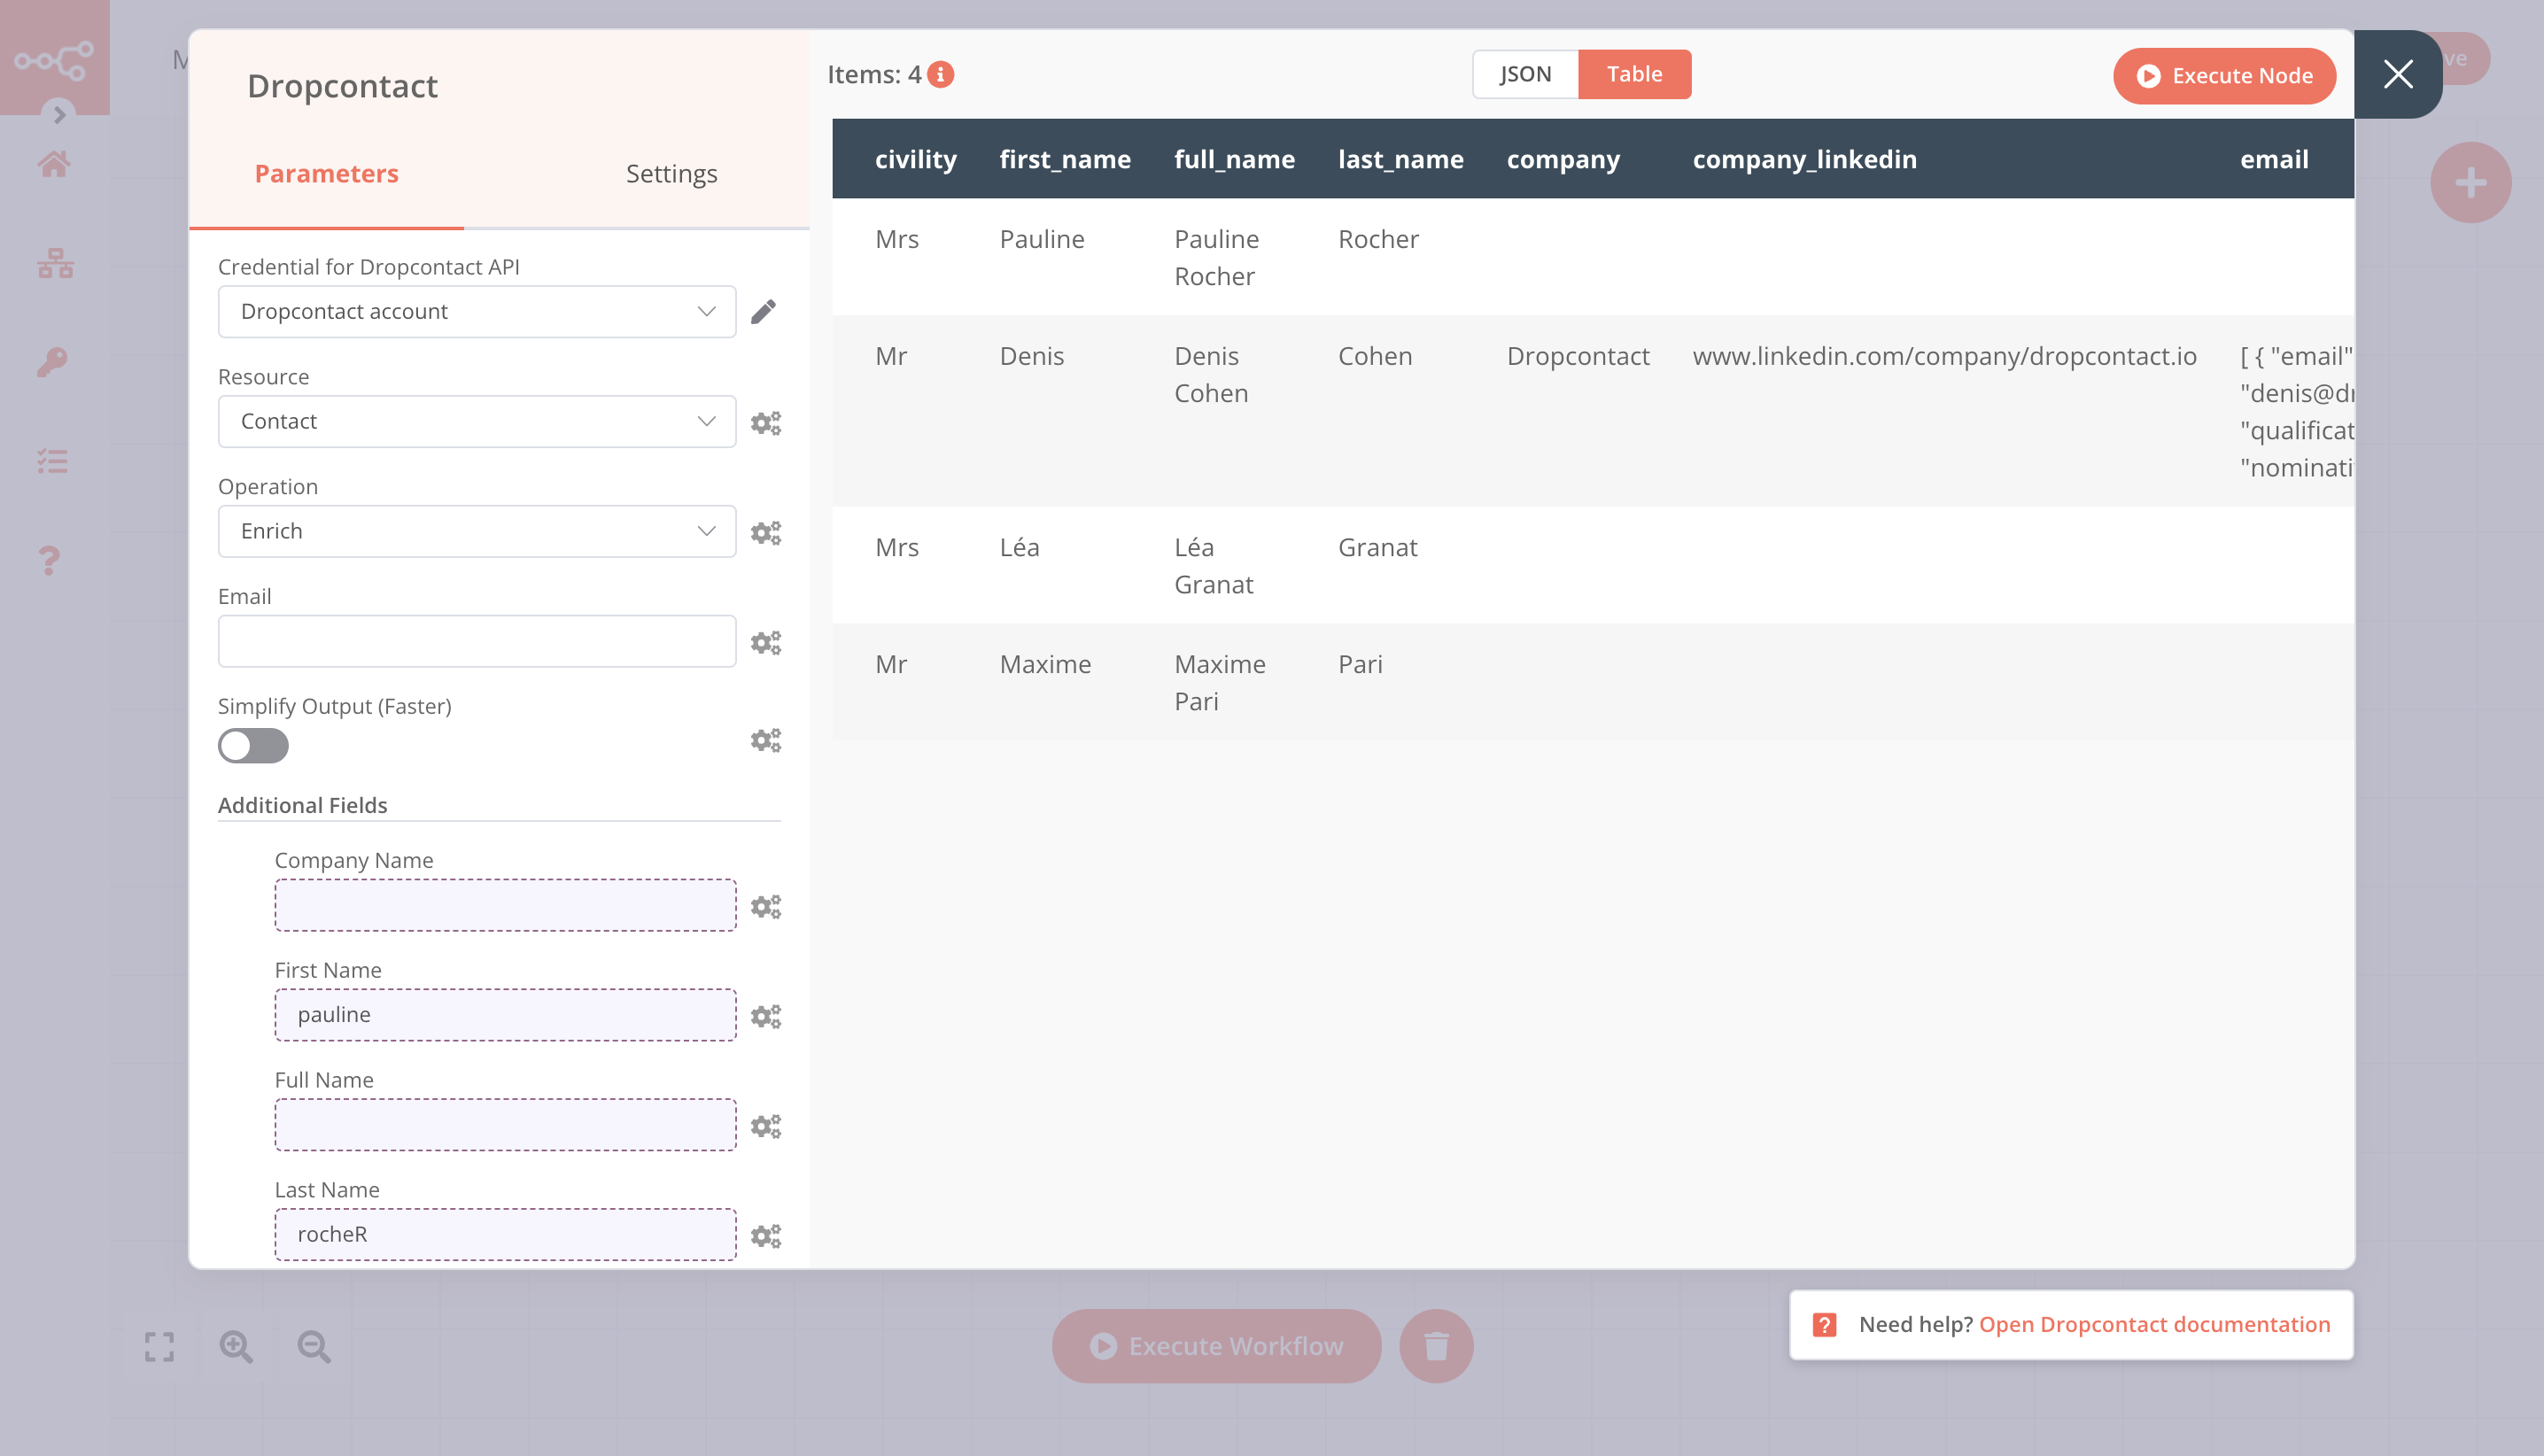
3. Dropontact node#
This node will find the verified email address and enrich the contact.
-
First of all, you'll have to enter credentials for the Dropcontact node. You can find out how to do that here.
-
Select 'Contact' from the Resource dropdown list.
- Select 'Enrich' from the Operation dropdown list.
- Click on Add Field and select 'Company Name'.
- Click on the gears icon next to the Company Name field and click on Add Expression.
- Select the following in the Variable Selector section: Node > Input Data > JSON > fields > companyName . You can also add the following expression:
{{$json["fields"]["companyName"]}}. - Click on Add Field and select 'First Name'.
- Click on the gears icon next to the First Name field and click on Add Expression.
- Select the following in the Variable Selector section: Node > Input Data > JSON > fields > firstName . You can also add the following expression:
{{$json["fields"]["firstName"]}}. - Click on Add Field and select 'Full Name'.
- Click on the gears icon next to the Full Name field and click on Add Expression.
- Select the following in the Variable Selector section: Node > Input Data > JSON > fields > fullName . You can also add the following expression:
{{$json["fields"]["fullName"]}}. - Click on Add Field and select 'Last Name'.
- Click on the gears icon next to the Last Name field and click on Add Expression.
- Select the following in the Variable Selector section: Node > Input Data > JSON > fields > lastName . You can also add the following expression:
{{$json["fields"]["lastName"]}}. - Click on Execute Node to run the node.
In the screenshot below, you will notice that the Dropcontact node has enriched your data.
4. Lemlist node#
This node will create new leads for a campaign in Lemlist.
- First of all, you'll have to enter credentials for the Lemlist node. You can find out how to do that here.
- Select 'Lead' from the Resource dropdown list.
- Select a campaign from the Campaign ID dropdown list.
-
Click on the gears icon next to the Email field and click on 'Add Expression'.
-
Select the following in the Variable Selector section: Dropcontact > Input Data > JSON > fields > email > [Item: 0] > email. You can also add the following expression:
{{$json["email"][0]["email"]}} - Click on the Add Field button and select 'First Name'.
- Click on the gears icon next to the First Name field and click on Add Expression.
- Select the following in the Variable Selector section: Node > Input Data > JSON > fields > first_name . You can also add the following expression:
{{$json["fields"]["first_name"]}}. - Click on the Add Field button and select 'Last Name'.
- Click on the gears icon next to the Last Name field and click on Add Expression.
- Select the following in the Variable Selector section: Node > Input Data > JSON > fields > last_name . You can also add the following expression:
{{$json["fields"]["last_name"]}}. - Click on the Add Field button and select 'Company Name'.
- Click on the gears icon next to the Company Name field and click on Add Expression.
- Select the following in the Variable Selector section: Node > Input Data > JSON > fields > company_name . You can also add the following expression:
{{$json["fields"]["company_name"]}}. - Click on the Add Field button and select 'Deduplicate'.
- Toggle Deduplicate to
true. - Click on Execute Node to run the node.
In the screenshot below, you will notice that the node creates new enriched leads in Lemlist.
