Slack#
Slack is a business communication platform offering many IRC-style features, including persistent chat rooms (channels), private groups, and direct messaging.
Credentials
You can find authentication information for this node here.
Basic Operations#
- Channel
- Archives a conversation.
- Closes a direct message or multi-person direct message.
- Initiates a public or private channel-based conversation
- Get information about a channel.
- Get all channels in a Slack team.
- Get a conversation's history of messages and events.
- Invite a user to a channel
- Joins an existing conversation.
- Removes a user from a channel.
- Leaves a conversation.
- List members of a conversation.
- Opens or resumes a direct message or multi-person direct message.
- Renames a conversation.
- Get a thread of messages posted to a channel
- Sets the purpose for a conversation.
- Sets the topic for a conversation.
- Unarchives a conversation.
- File
- Get a file info
- Get & filters team files.
- Create or upload an existing file.
- Message
- Deletes a message
- Get Permanent Link of a message
- Post a message into a channel
- Post an ephemeral message to a user in channel
- Updates a message
- Reaction
- Adds a reaction to a message
- Get the reactions of a message
- Remove a reaction of a message
- Star
- Add a star to an item.
- Delete a star from an item.
- Get all stars of autenticated user.
- User
- Get information about a user
- Get a list of users
- Get online status of a user
- User Group
- Create a user group
- Disable a user group
- Enable a user group
- Get all user groups
- Update a user group
- User Profile
- Get your user's profile
- Update user's profile
Example Usage#
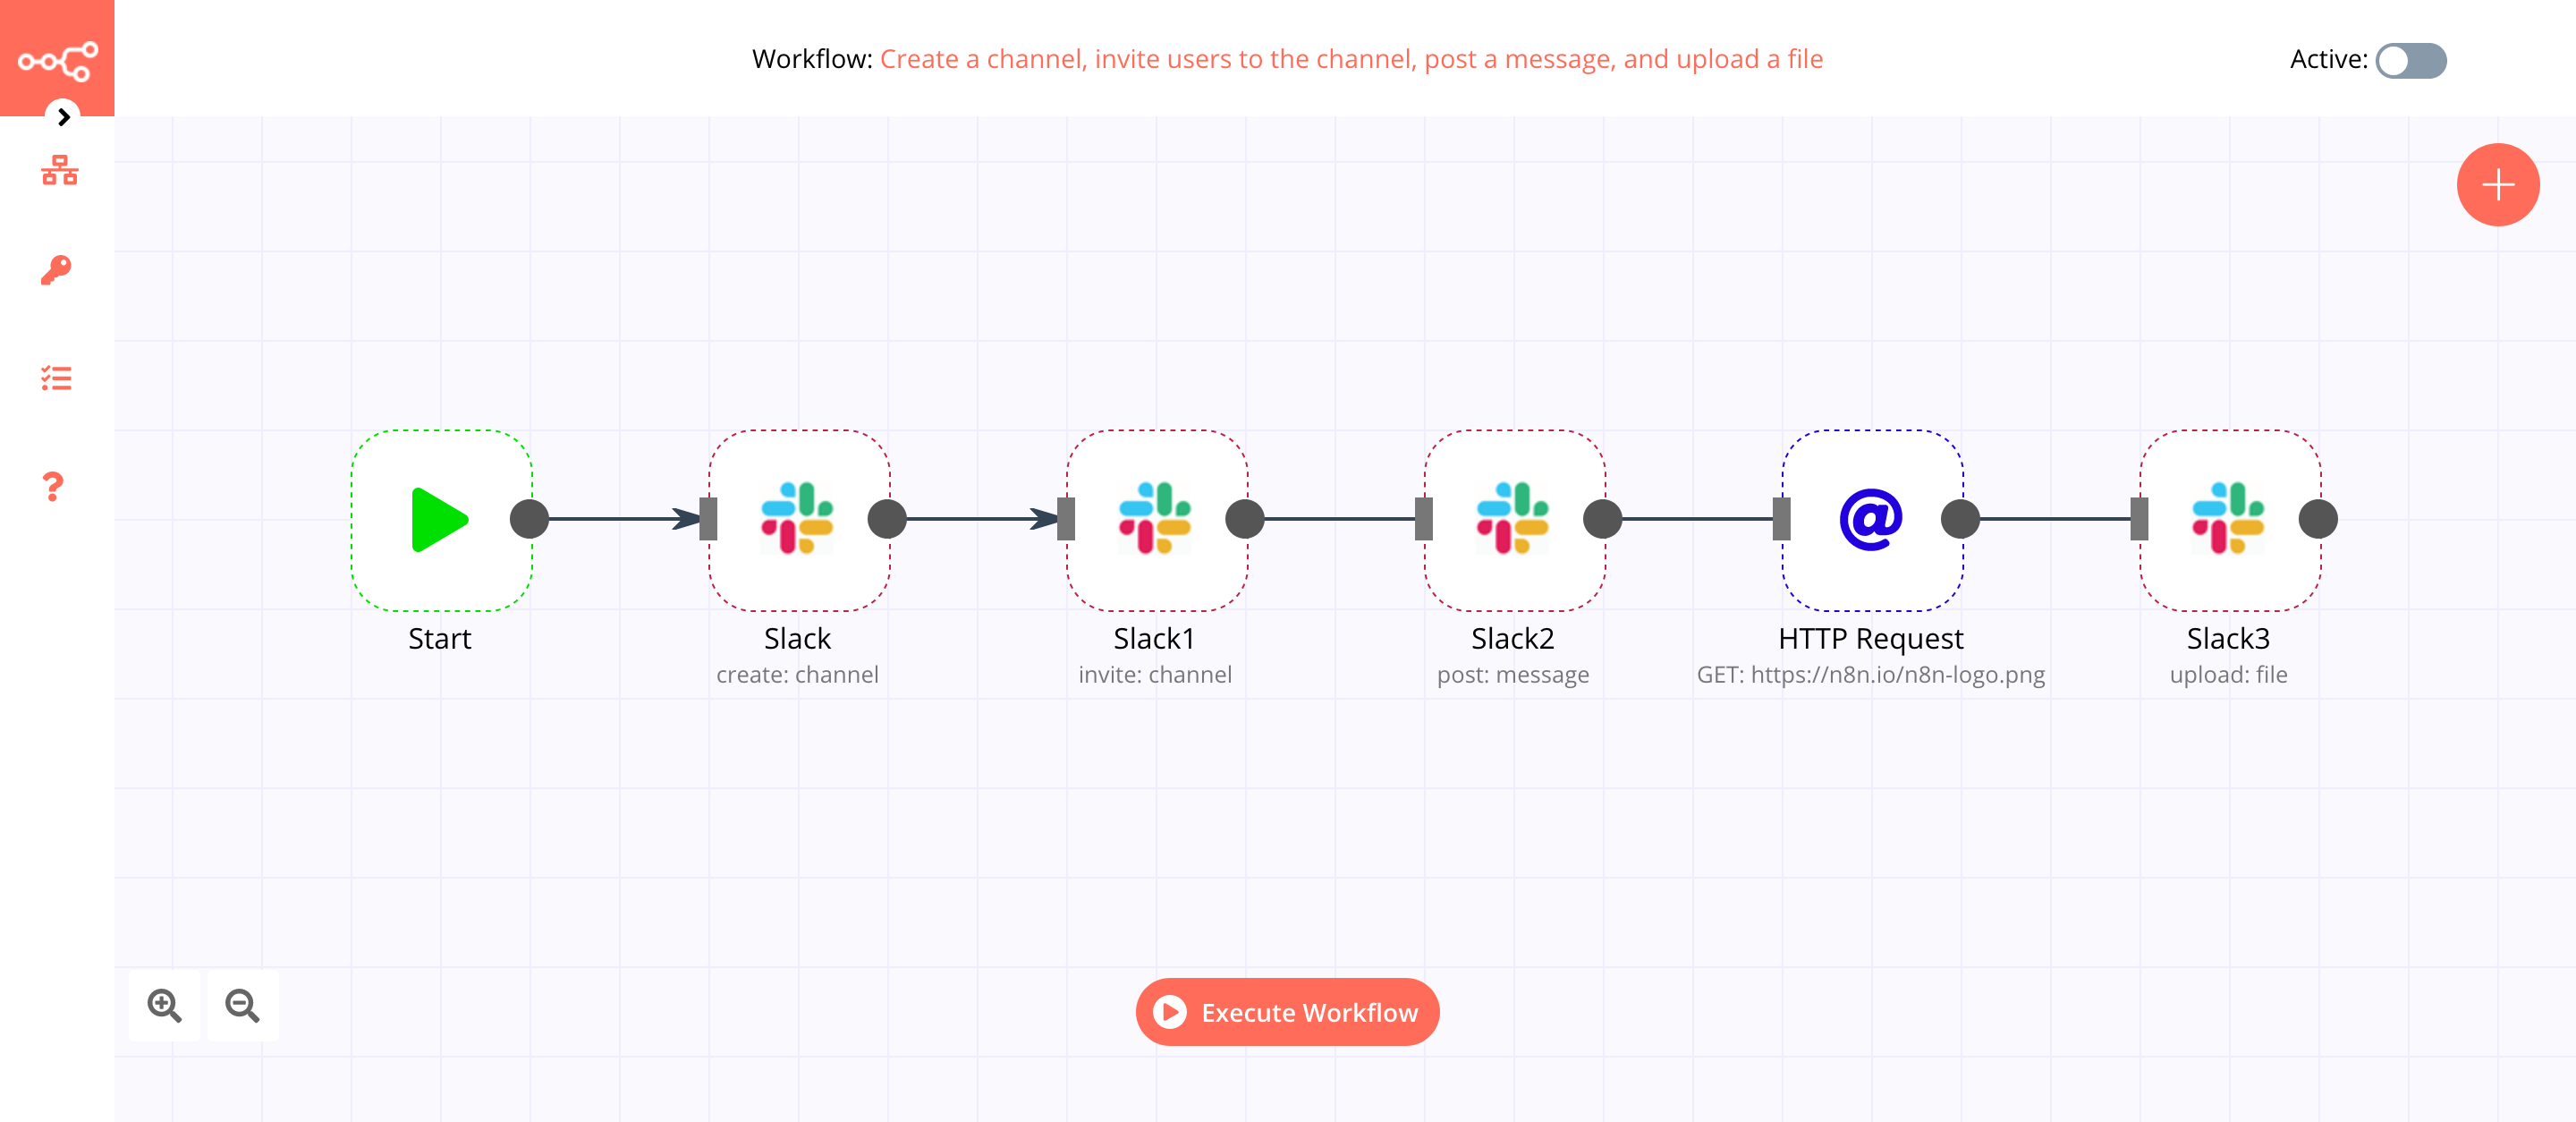
This workflow allows you to create a channel, invite users to the channel, post a message, and upload a file to the channel. You can also find the workflow on n8n.io This example usage workflow uses the following nodes. - Start - Slack - HTTP Request
The final workflow should look like the following image.
1. Start node#
The Start node exists by default when you create a new workflow.
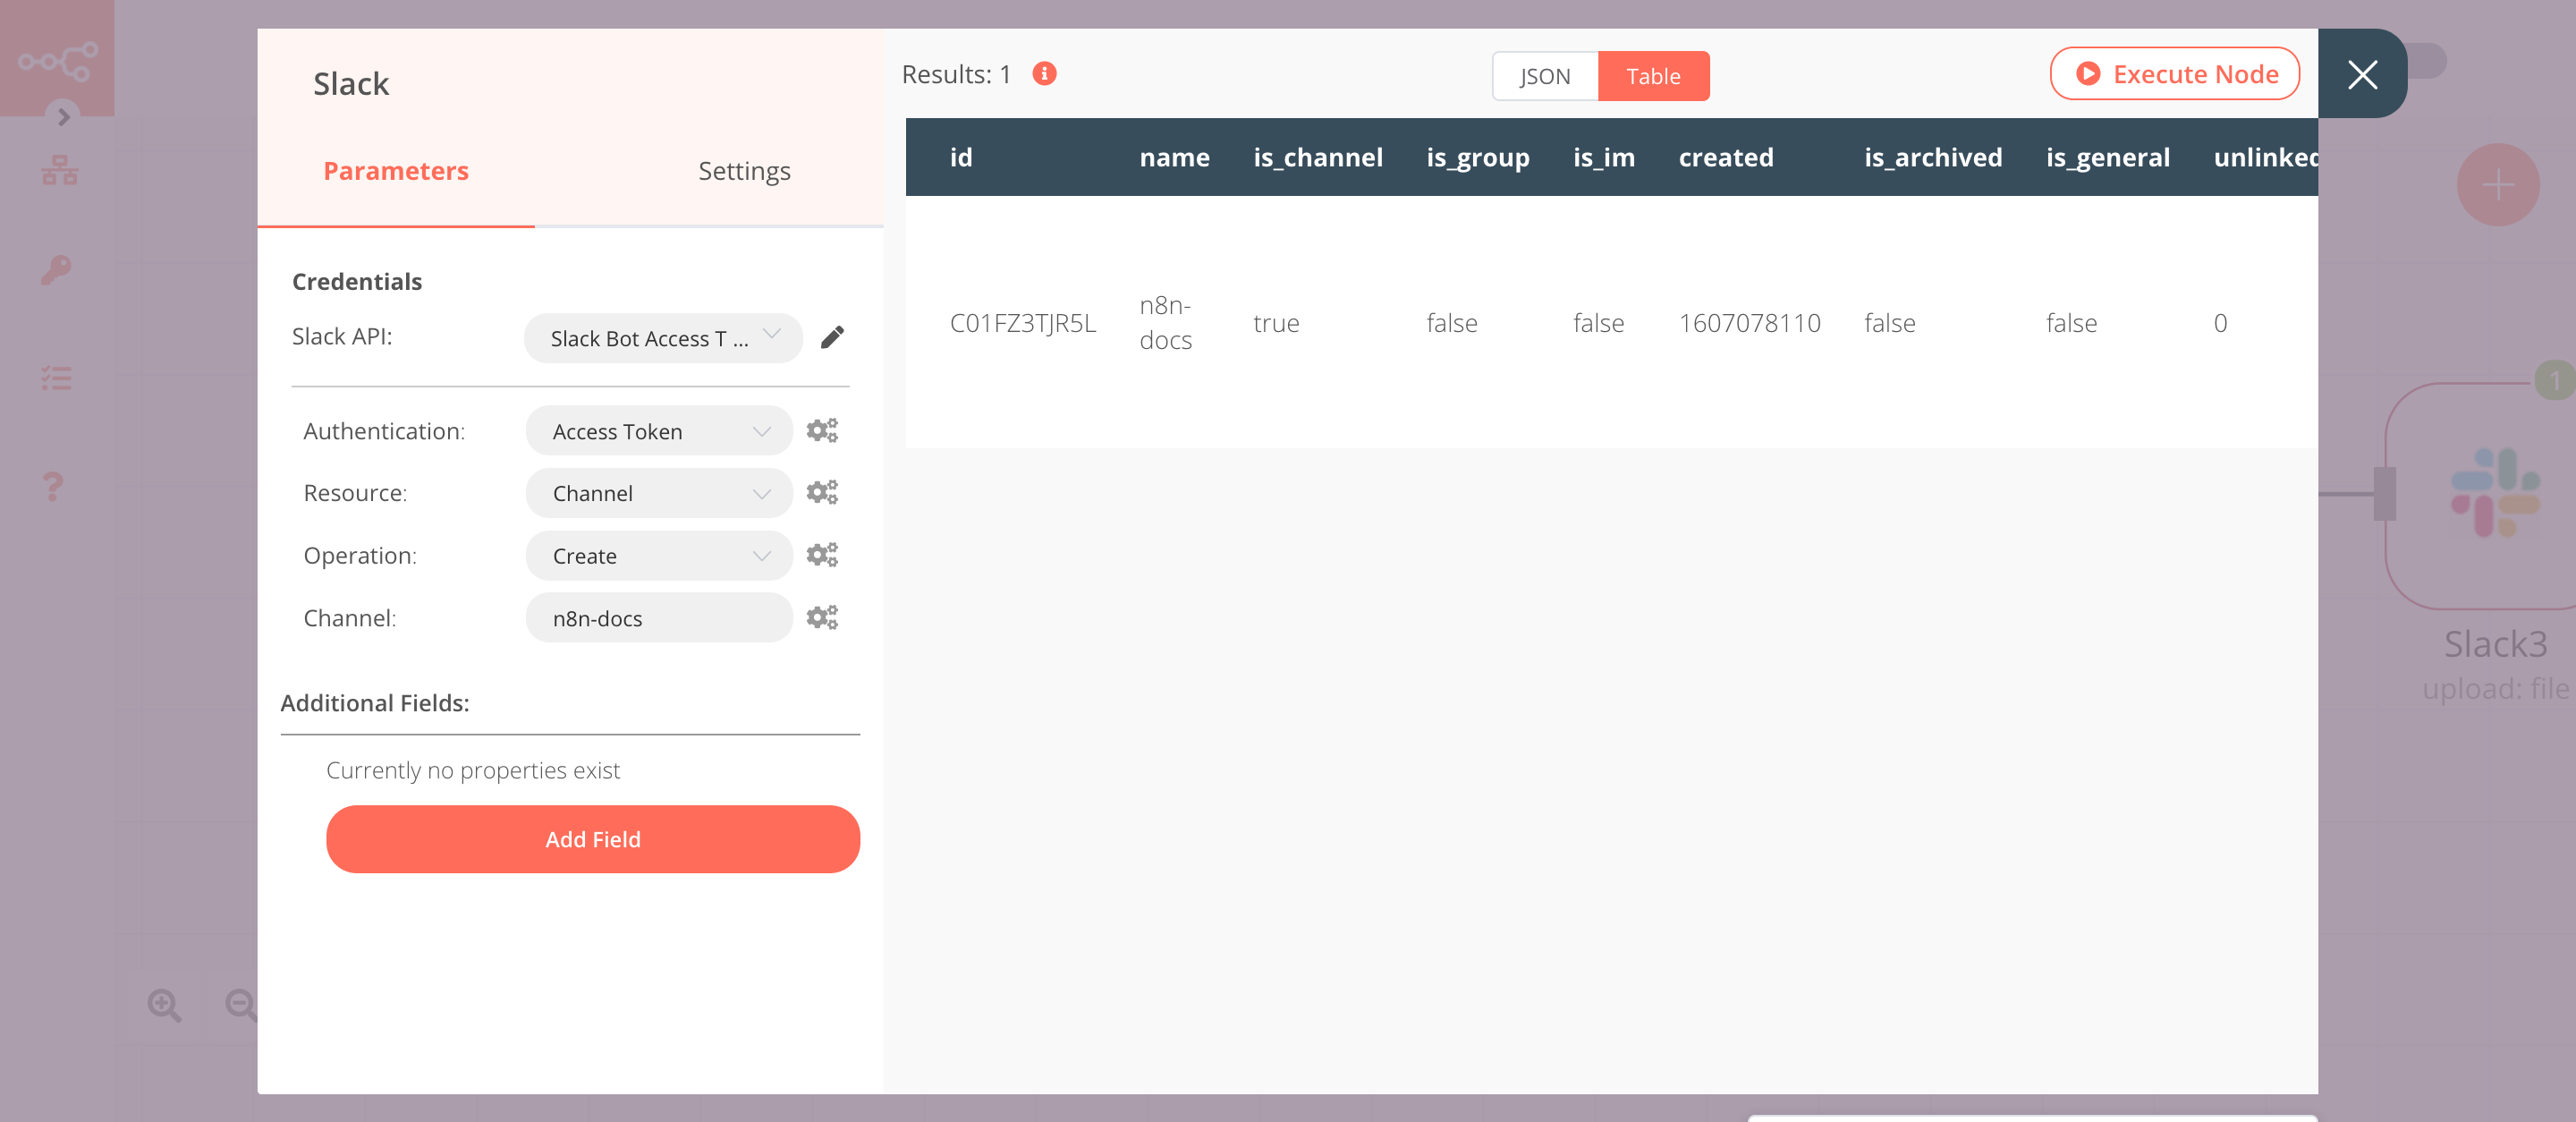
2. Slack node (create: channel)#
This node will create a new channel in your Slack workspace. This operation requires the channel:manage scope. Add this scope under the Bot Token Scopes section on Slack. You can refer to the FAQs to learn how to add scopes.
- Select 'Access Token' from the Authentication dropdown list.
- You'll have to enter credentials for the Slack node. You can find out how to enter credentials for this node here.
- Select 'Channel' from the Resource dropdown list.
- Enter a channel name in the Channel field.
- Click on Execute Node to run the node.
In the screenshot below, you will notice that node creates a new channel in Slack.
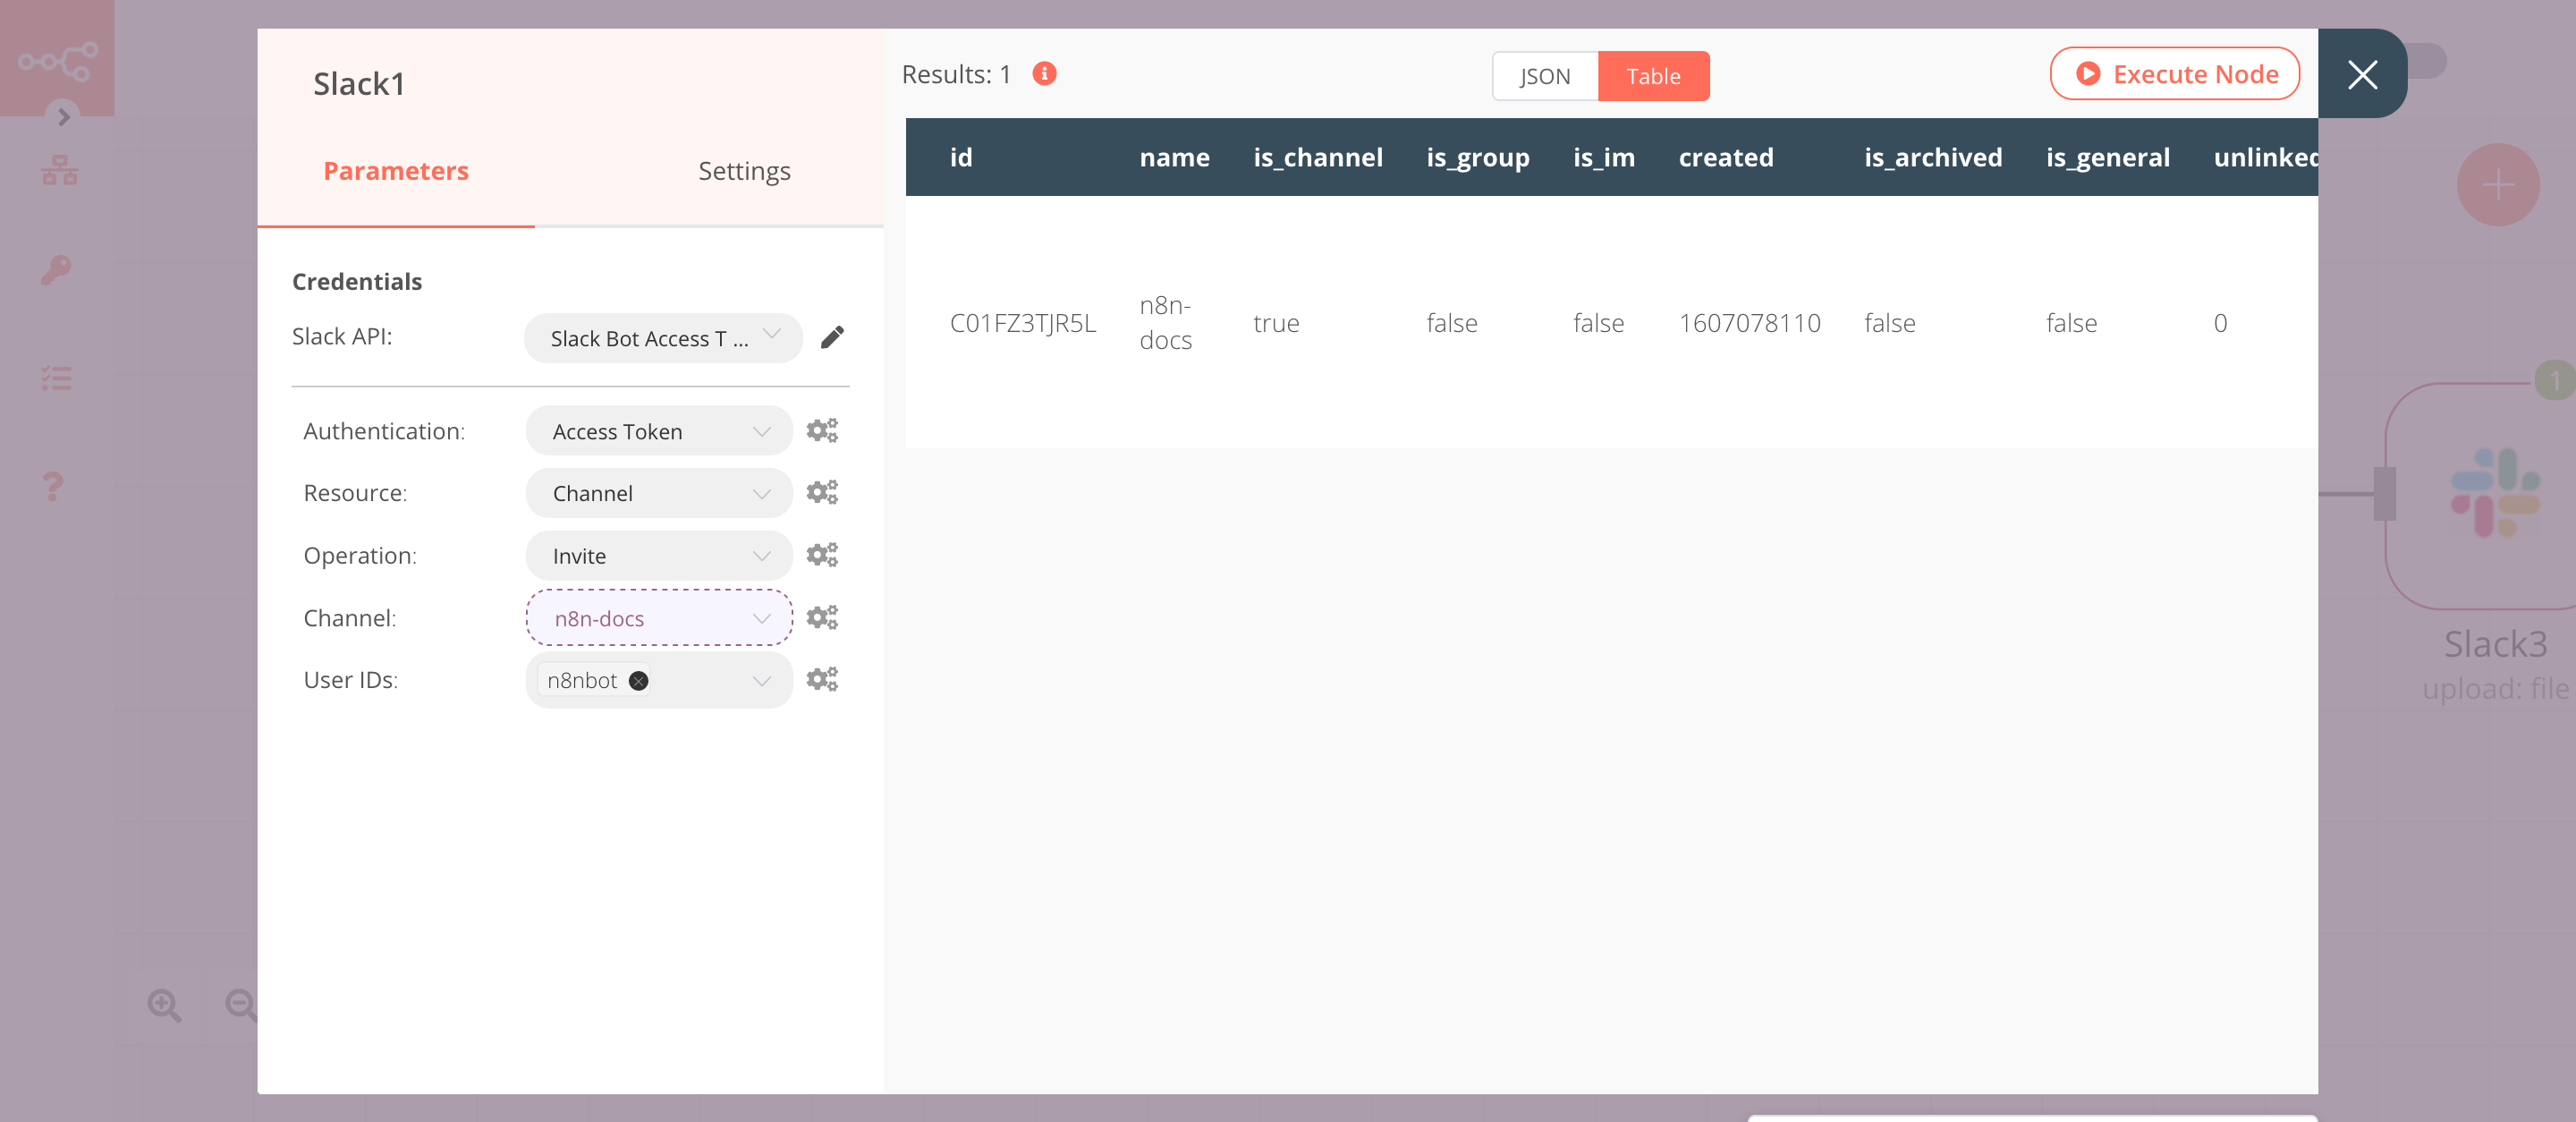
3. Slack1 node (invite: channel)#
This node will invite a member to the channel that we created in the previous node. This operation requires the channel:read scope. Add this scope under the Bot Token Scopes section on Slack.
- Select 'Access Token' from the Authentication dropdown list.
- Select the credentials that you entered in the previous node.
- Select 'Channel' from the Resource dropdown list.
- Select 'Invite' from the Operation dropdown list.
- Click on the gears icon next to the Channel field click on Add Expression.
- Select the following in the Variable Selector section: Nodes > Slack > Output Data > JSON > id. You can also add the following expression:
{{$node["Slack"].json["id"]}}. - Select the users from the User IDs dropdown list. The users you select in this field will be added to the channel.
- Click on Execute Node to run the node.
In the screenshot below, you will notice that node invites the user to the channel we created using the previous node.
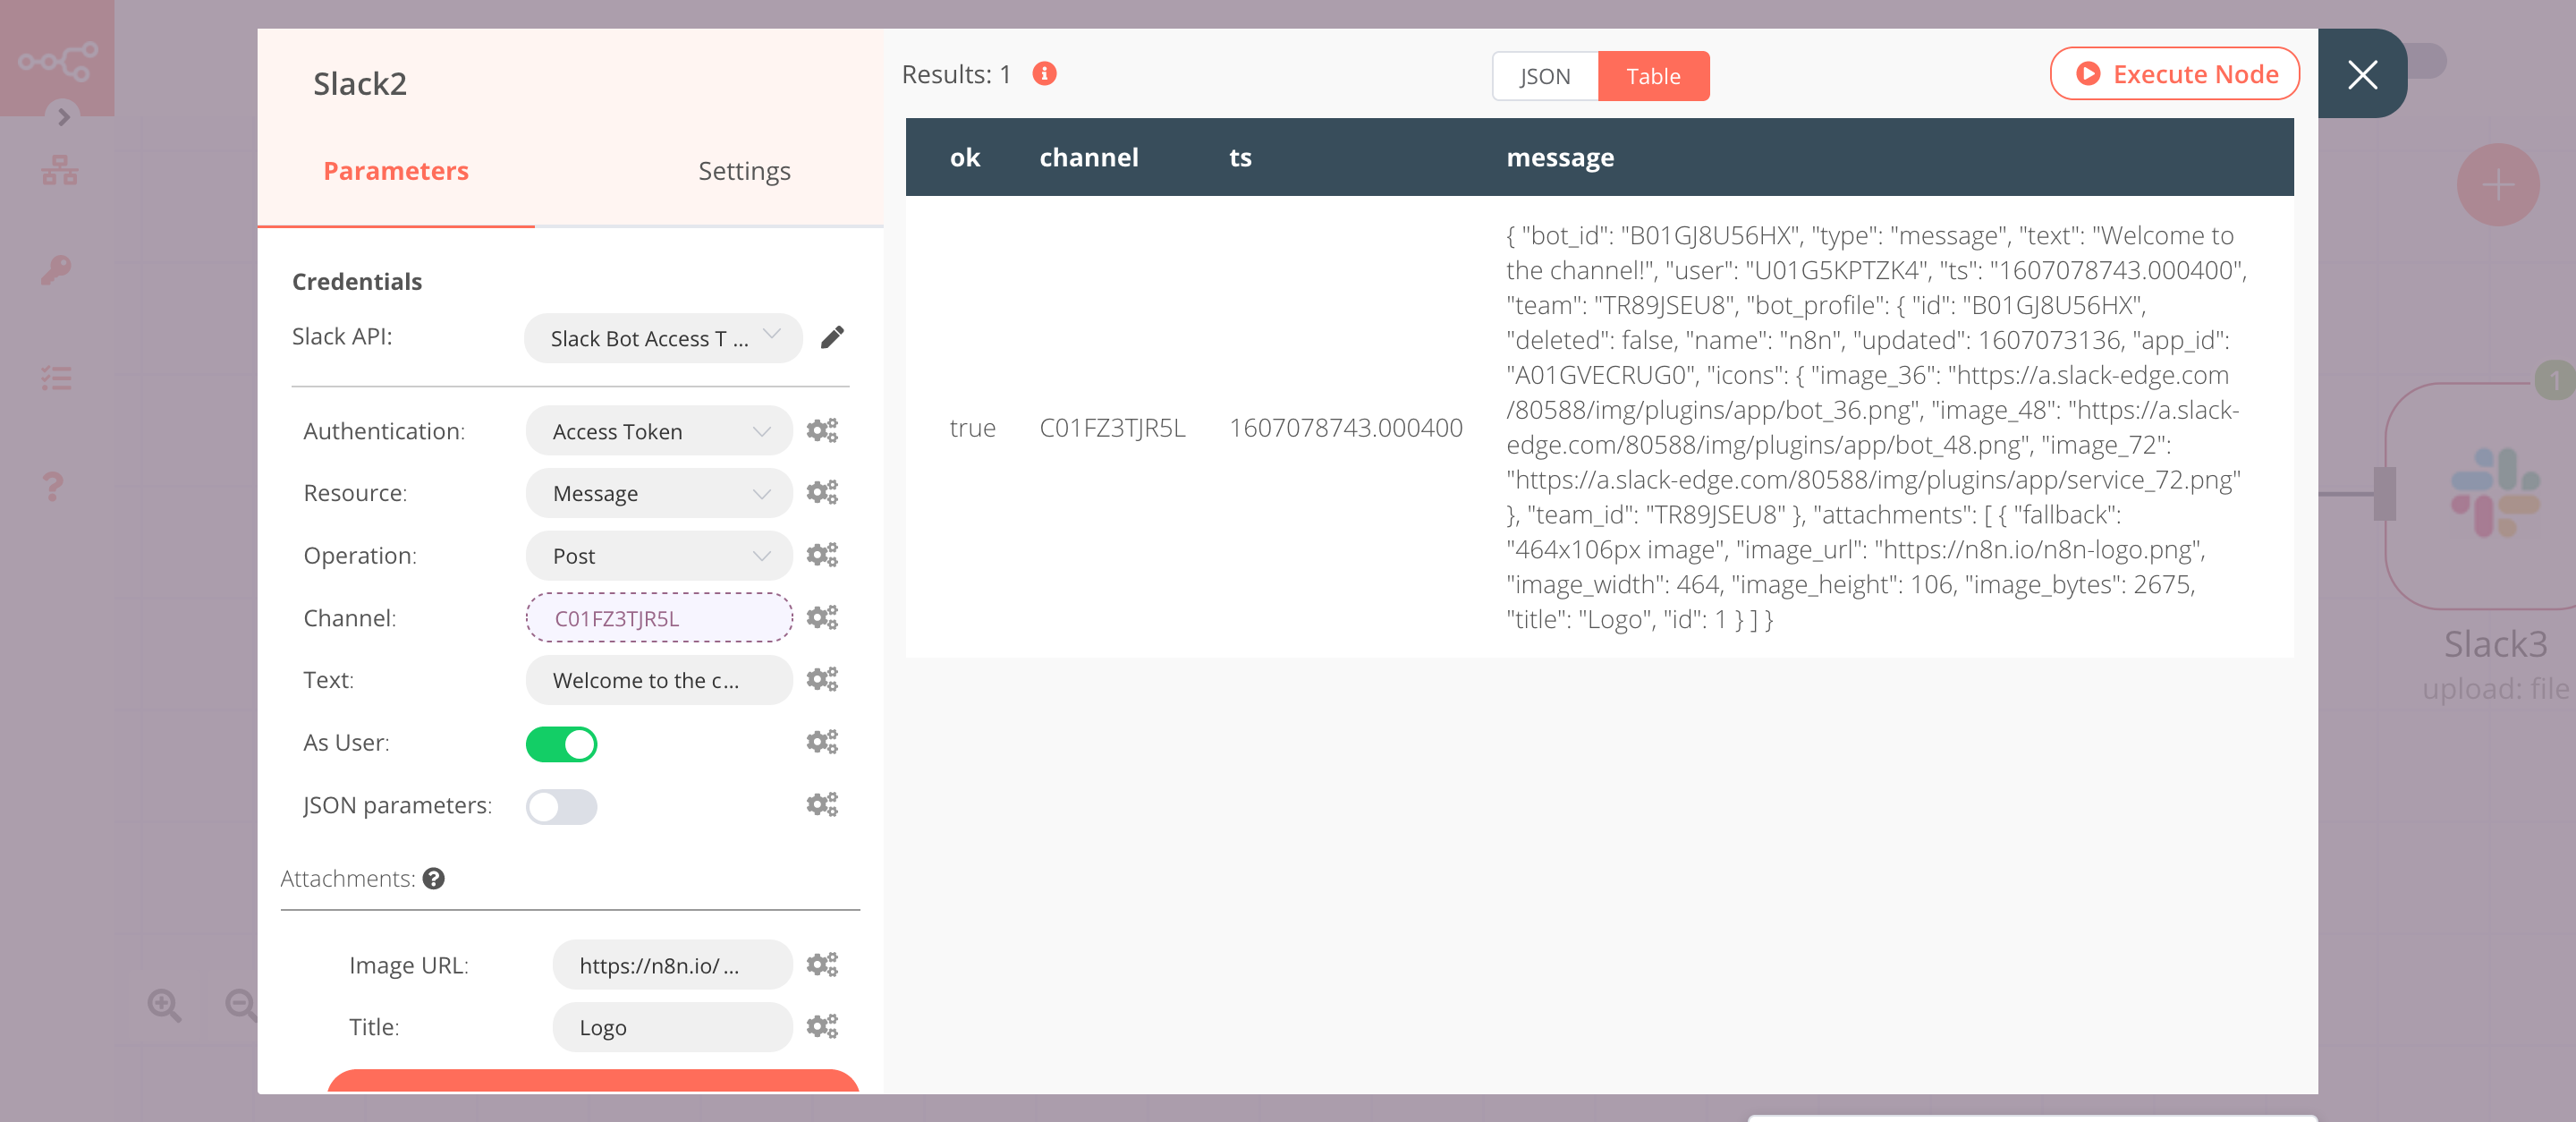
4. Slack2 node (post: message)#
This node will post a message in the channel with an attachment.
- Select 'Access Token' from the Authentication dropdown list.
- Select the credentials that you entered in the previous node.
- Click on the gears icon next to the Channel field click on Add Expression.
- Select the following in the Variable Selector section: Nodes > Slack > Output Data > JSON > id. You can also add the following expression:
{{$node["Slack"].json["id"]}}. - Enter a message in the Text field.
- Toggle As User to
true. This option allows you to post a message as a bot. - Click on the Add attachment button.
- Select 'Image URL' from the Add attachment item dropdown list.
- Enter the URL of an image in the Image URL field.
- Select 'Title' from the Add attachment item dropdown list.
- Enter a title in the Title field.
- Click on Execute Node to run the node.
In the screenshot below, you will notice that node sends a message with an attachment to the channel that we created in the previous node.
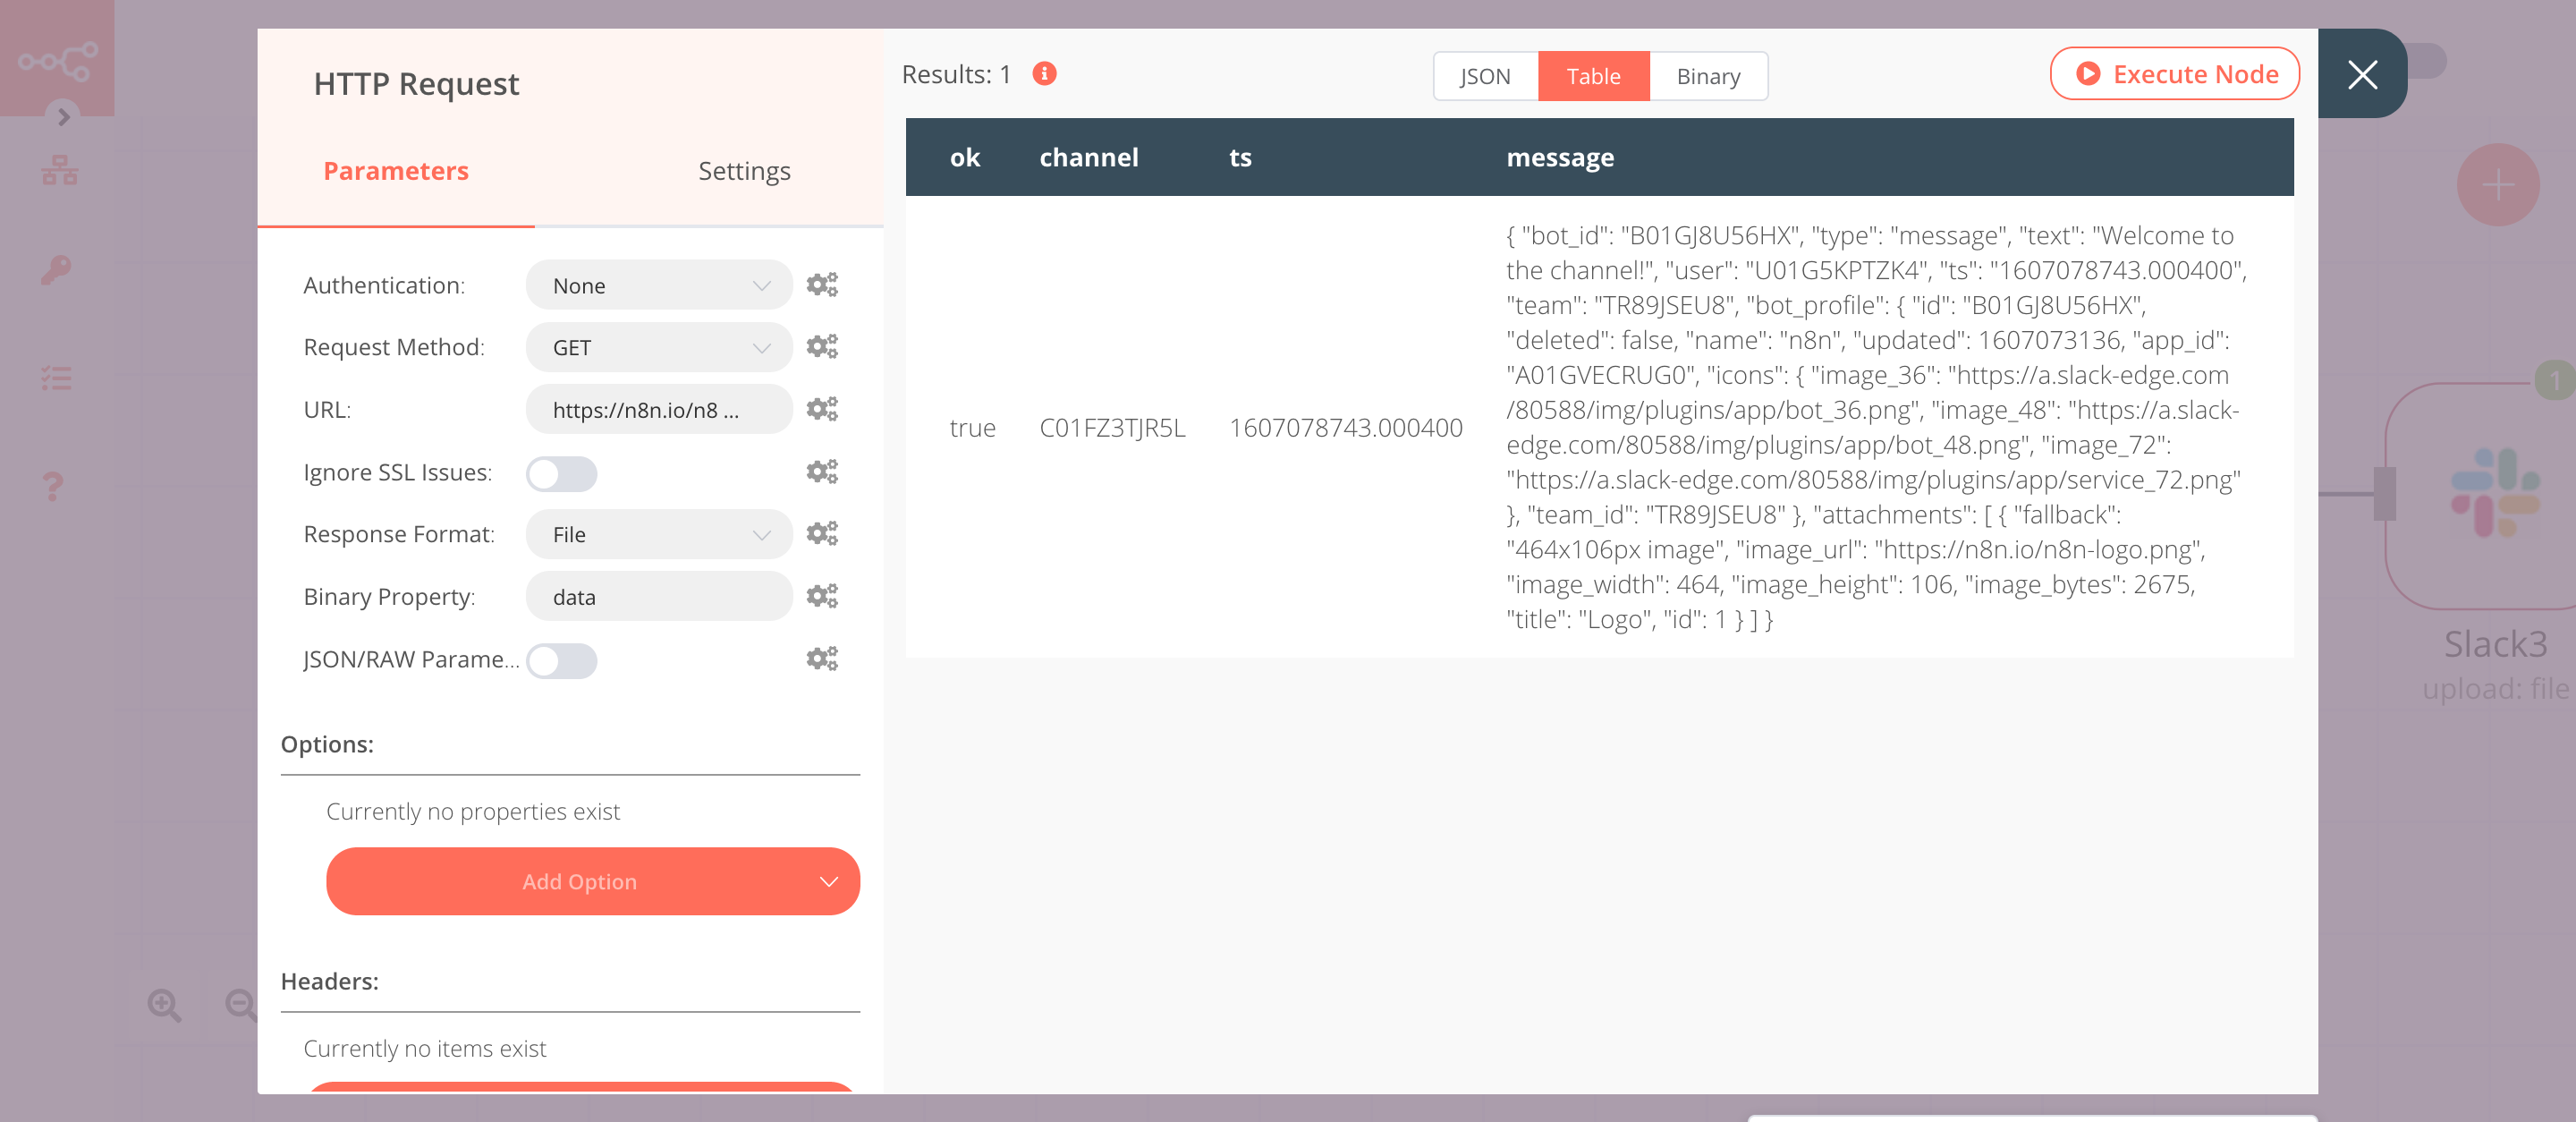
5. HTTP Request node (GET)#
This node will fetch a file from a URL. You can also use the Read Binary File node to read a file from the path you specify.
- Enter the URL of a file in the URL field.
- Select 'File' from the Response Format dropdown list.
- Click on Execute Node to run the node.
In the screenshot below, you will notice that the HTTP Request node fetches the file from the URL. This file gets passed on as binary data to the next node in the workflow.
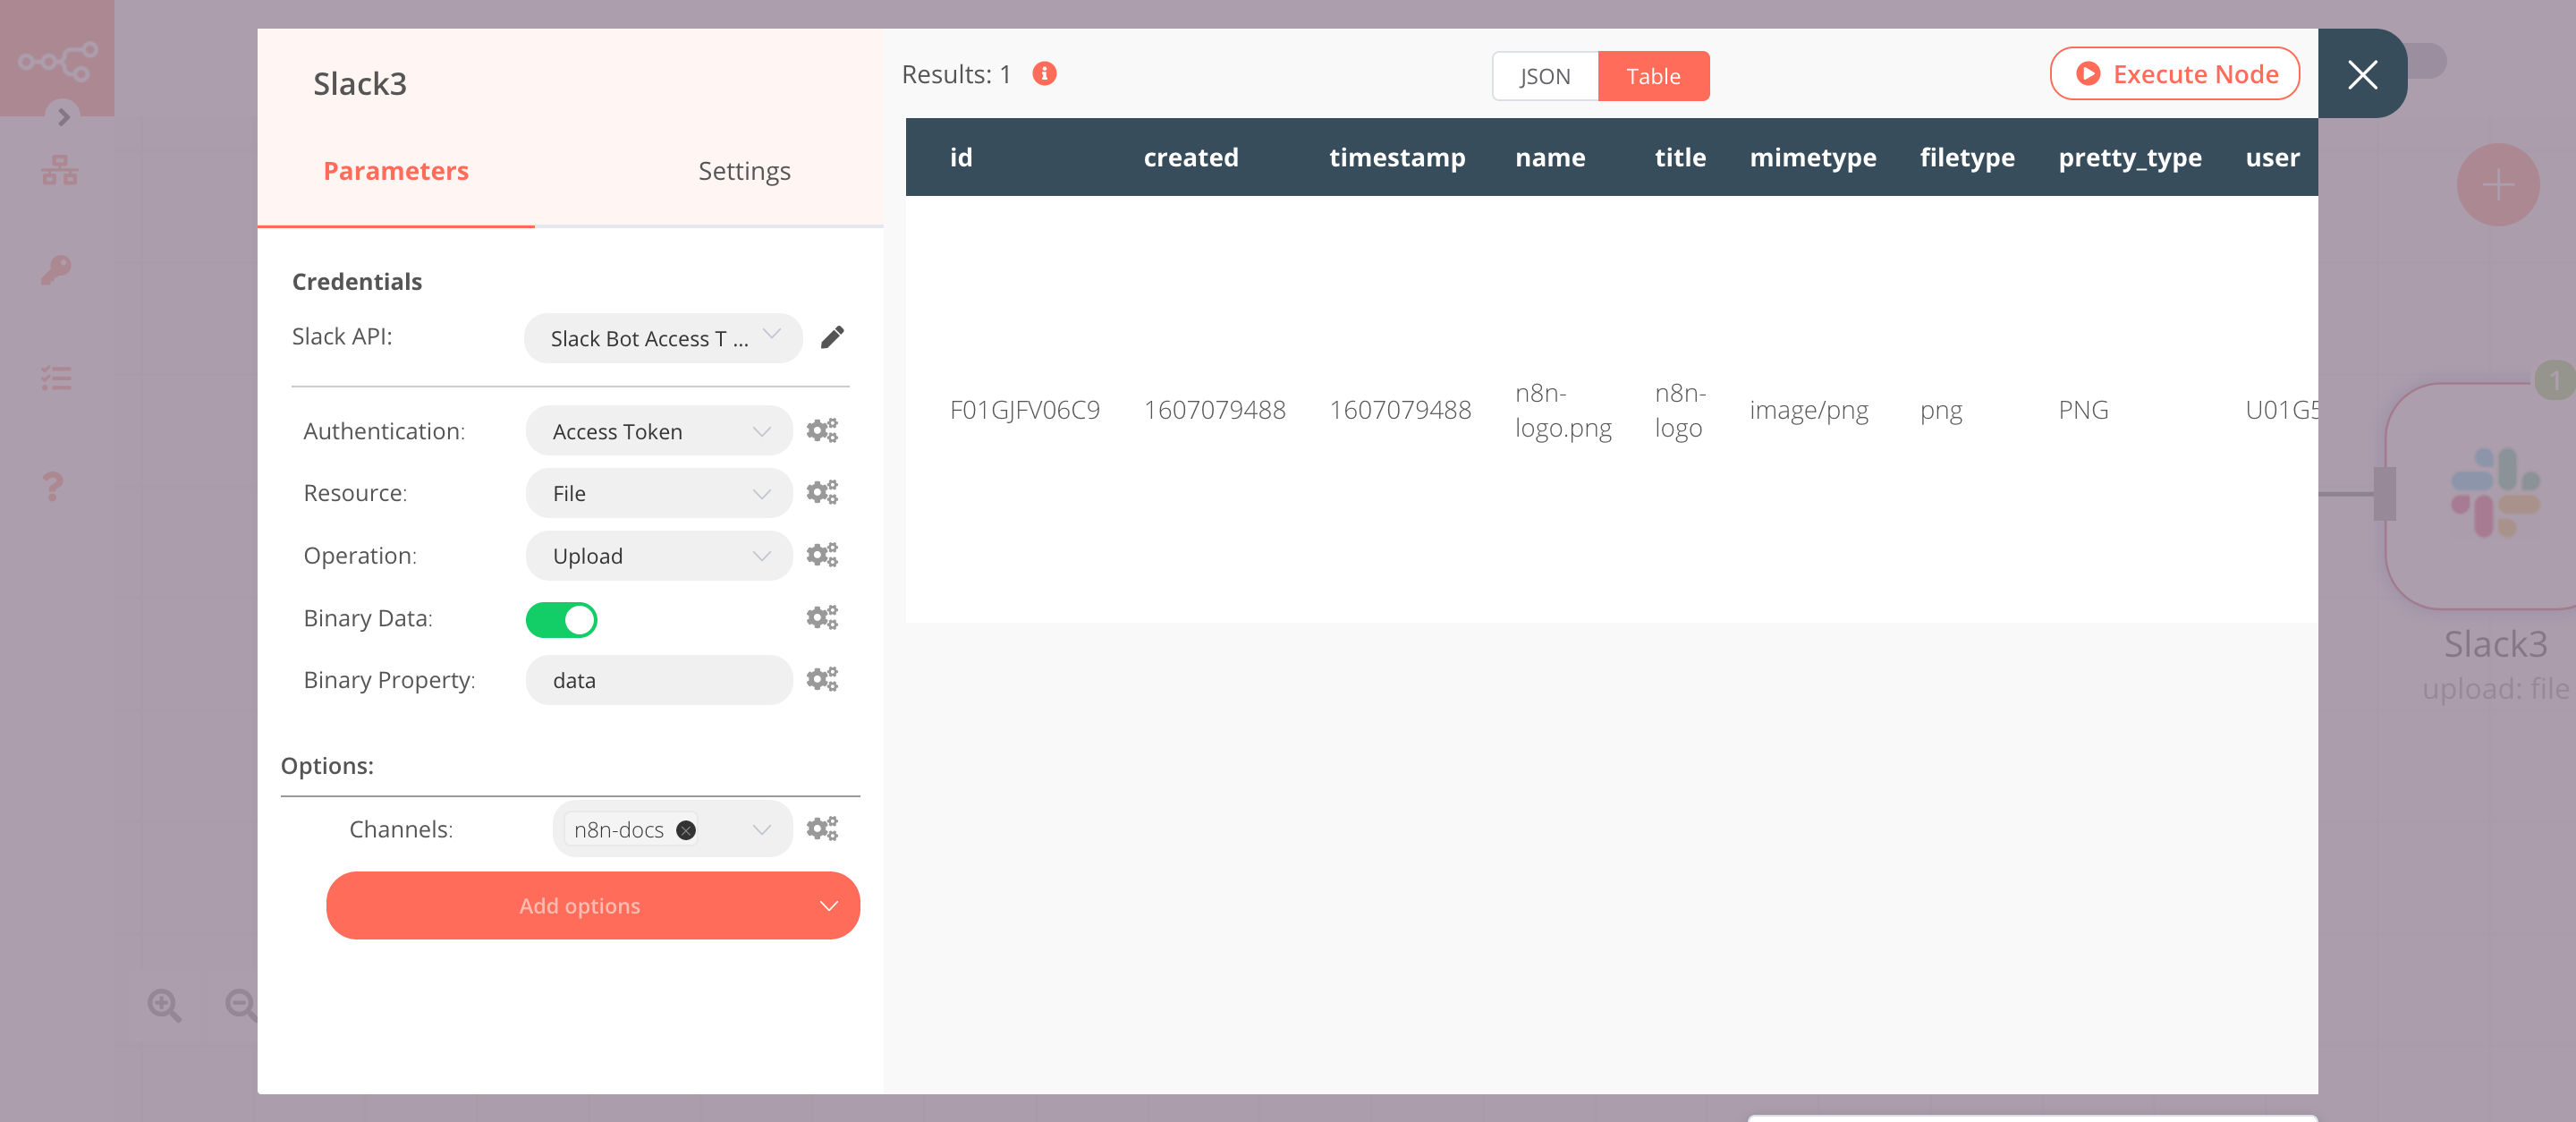
6. Slack3 node (upload: file)#
This node will upload the file that we got from the previous node to a channel we specify.
- Select 'Access Token' from the Authentication dropdown list.
- Select the credentials that you entered in the previous Slack node.
- Select 'File' from Resource dropdown list.
- Select 'Upload' from the Operation dropdown list.
- Toggle Binary Data to true.
- Click on Add options and select 'Channels'.
- Select the channel from the Channels dropdown list.
- Click on Execute Node to run the node.
In the screenshot below, you will notice that the node uploads the file to the channel that we created earlier.
FAQs#
How to create a private channel?#
To create a private channel, follow the steps mentioned below.
1. Select 'Channel' from the Resource dropdown list.
2. Select 'Create' from the Operation dropdown list.
3. Click on the Add Field button.
4. Toggle Is Private to true.
How to add OAuth Scopes to a Slack app?#
Your app needs appropriate scopes and permissions to perform actions. For example, if you want to create a new channel, your app requires the channel:manage scope. To add scopes and permissions, follow the steps mentioned below.
1. Navigate to the Slack App dashboard page and select your app.
2. Click on 'OAuth & Permissions' under the Feature section on the left sidebar.
3. Scroll down to the Scopes section.
4. If you're building a bot, click on Add an OAuth Scope under the Bot Token Scopes.
5. Select the permissions you want to give to your bot from the dropdown list.
6. If you want the app to access user data and act on behalf of users that authorize them, add scopes under the User Token Scopes.
7. When you add new scopes, Slack will ask you to reinstall the app. Click on 'reinstall your app' on the top of the page and reinstall the app.
You can refer to the official documentation on Scopes and permissions to learn more.