Matrix#
Matrix is an open standard for interoperable, decentralized, real-time communication over IP.
Credentials
You can find authentication information for this node here.
Basic Operations#
- Account
- Get current user's account information
- Event
- Get single event by ID
- Media
- Send media to a chat room
- Message
- Send a message to a room
- Gets all messages from a room
- Room
- New chat room with defined settings
- Invite a user to a room
- Join a new room
- Kick a user from a room
- Leave a room
- Room Member
- Get all members
Example Usage#
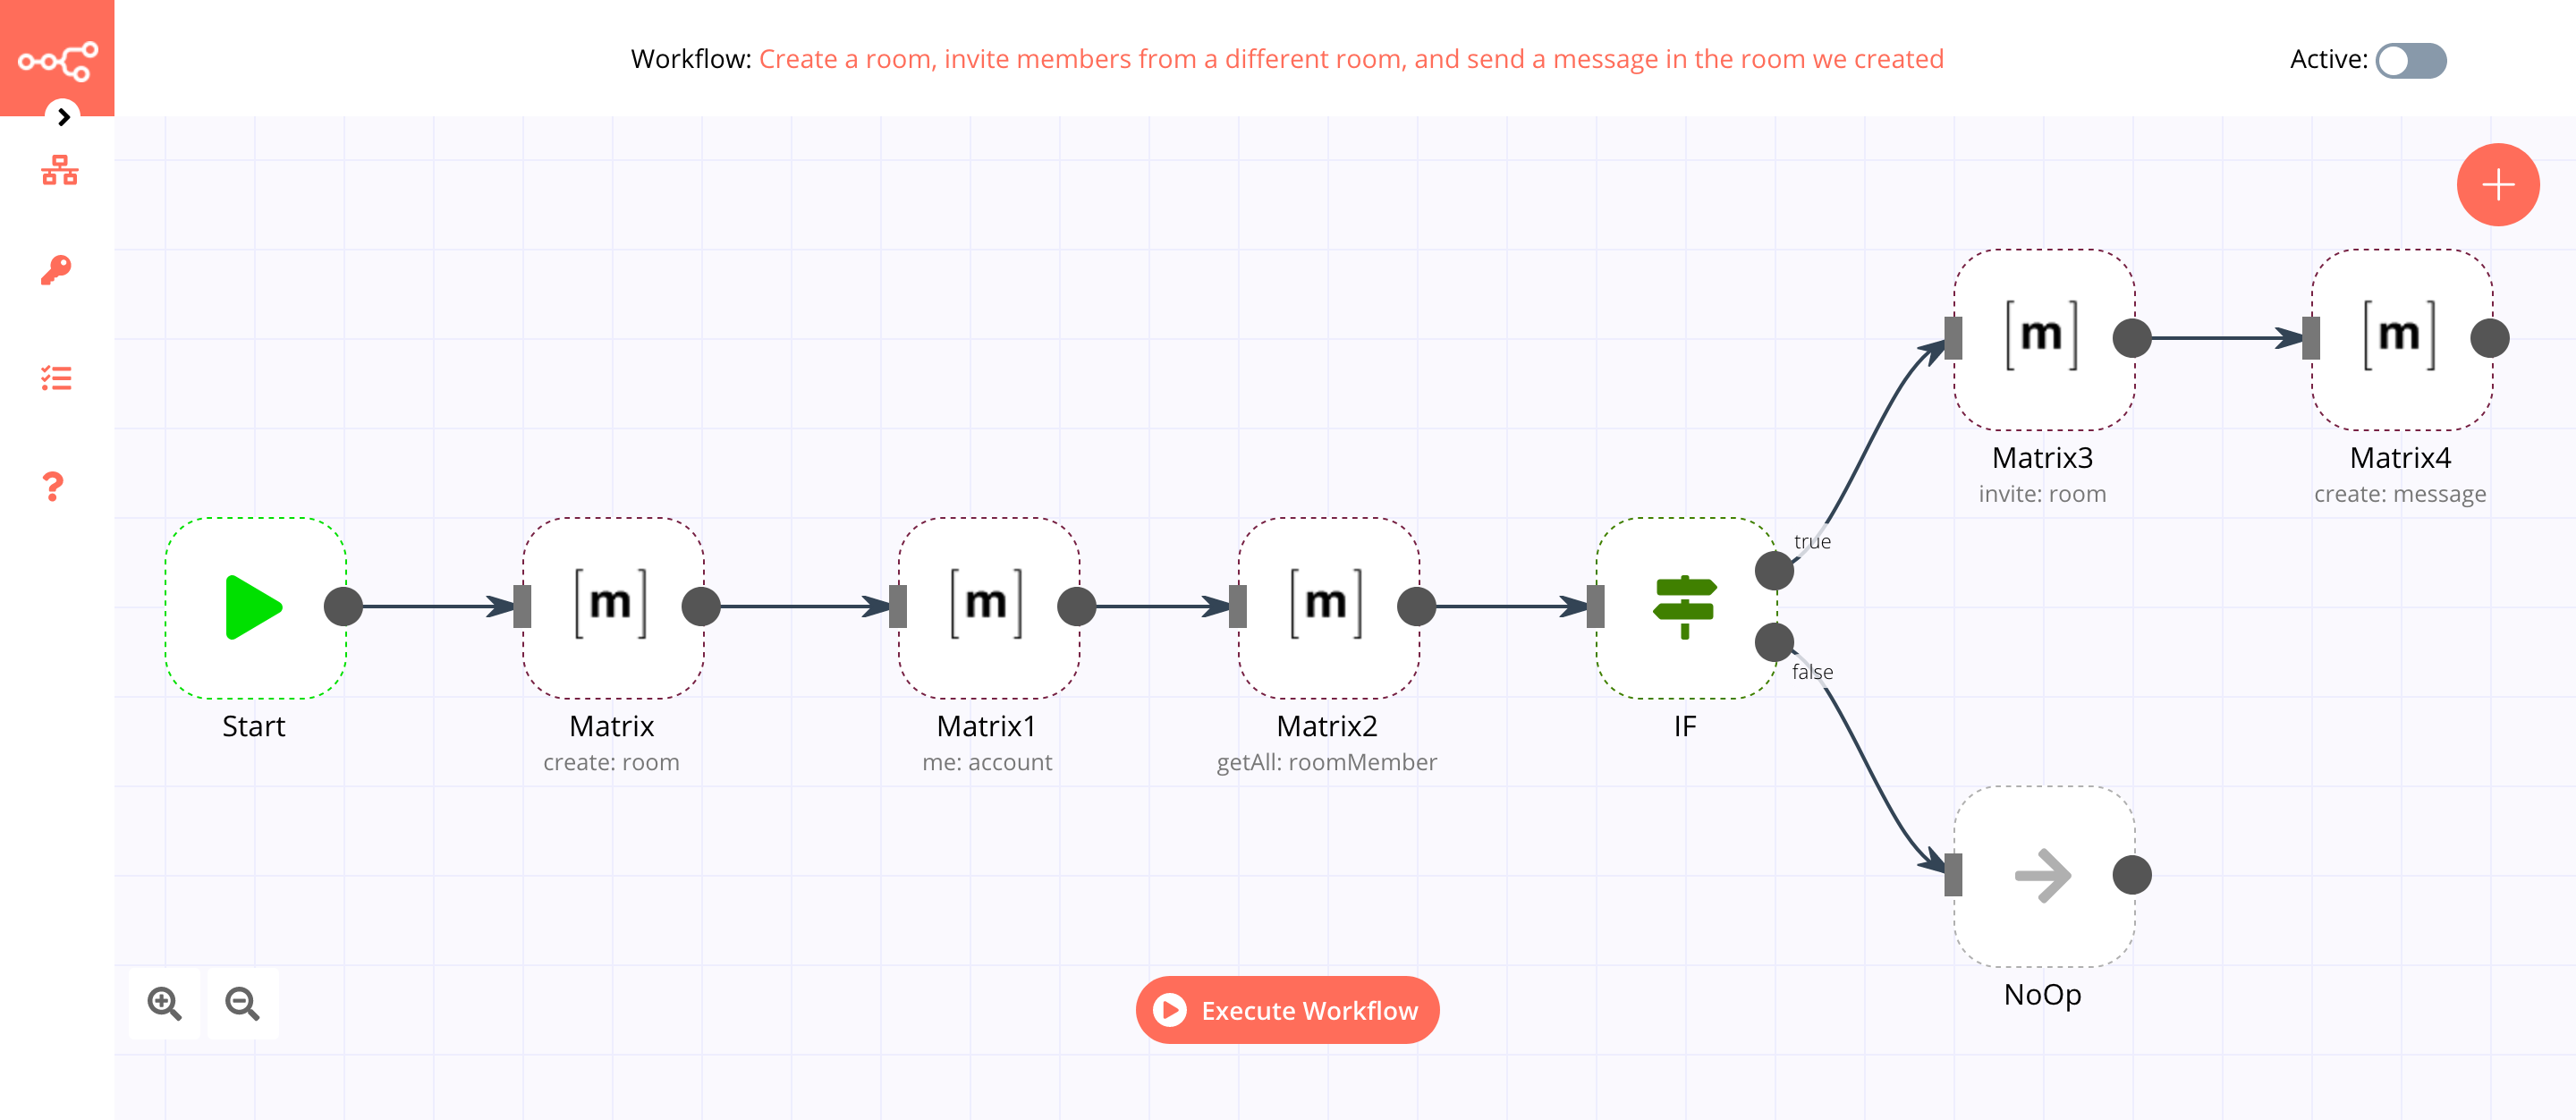
This workflow allows you to create a room, invite members from a different room, and send a message to the room that we created using the Matrix node. You can also find the workflow on n8n.io. This example usage workflow uses the following nodes. - Start - Matrix - IF - No Operation, do nothing
The final workflow should look like the following image.
1. Start node#
The Start node exists by default when you create a new workflow.
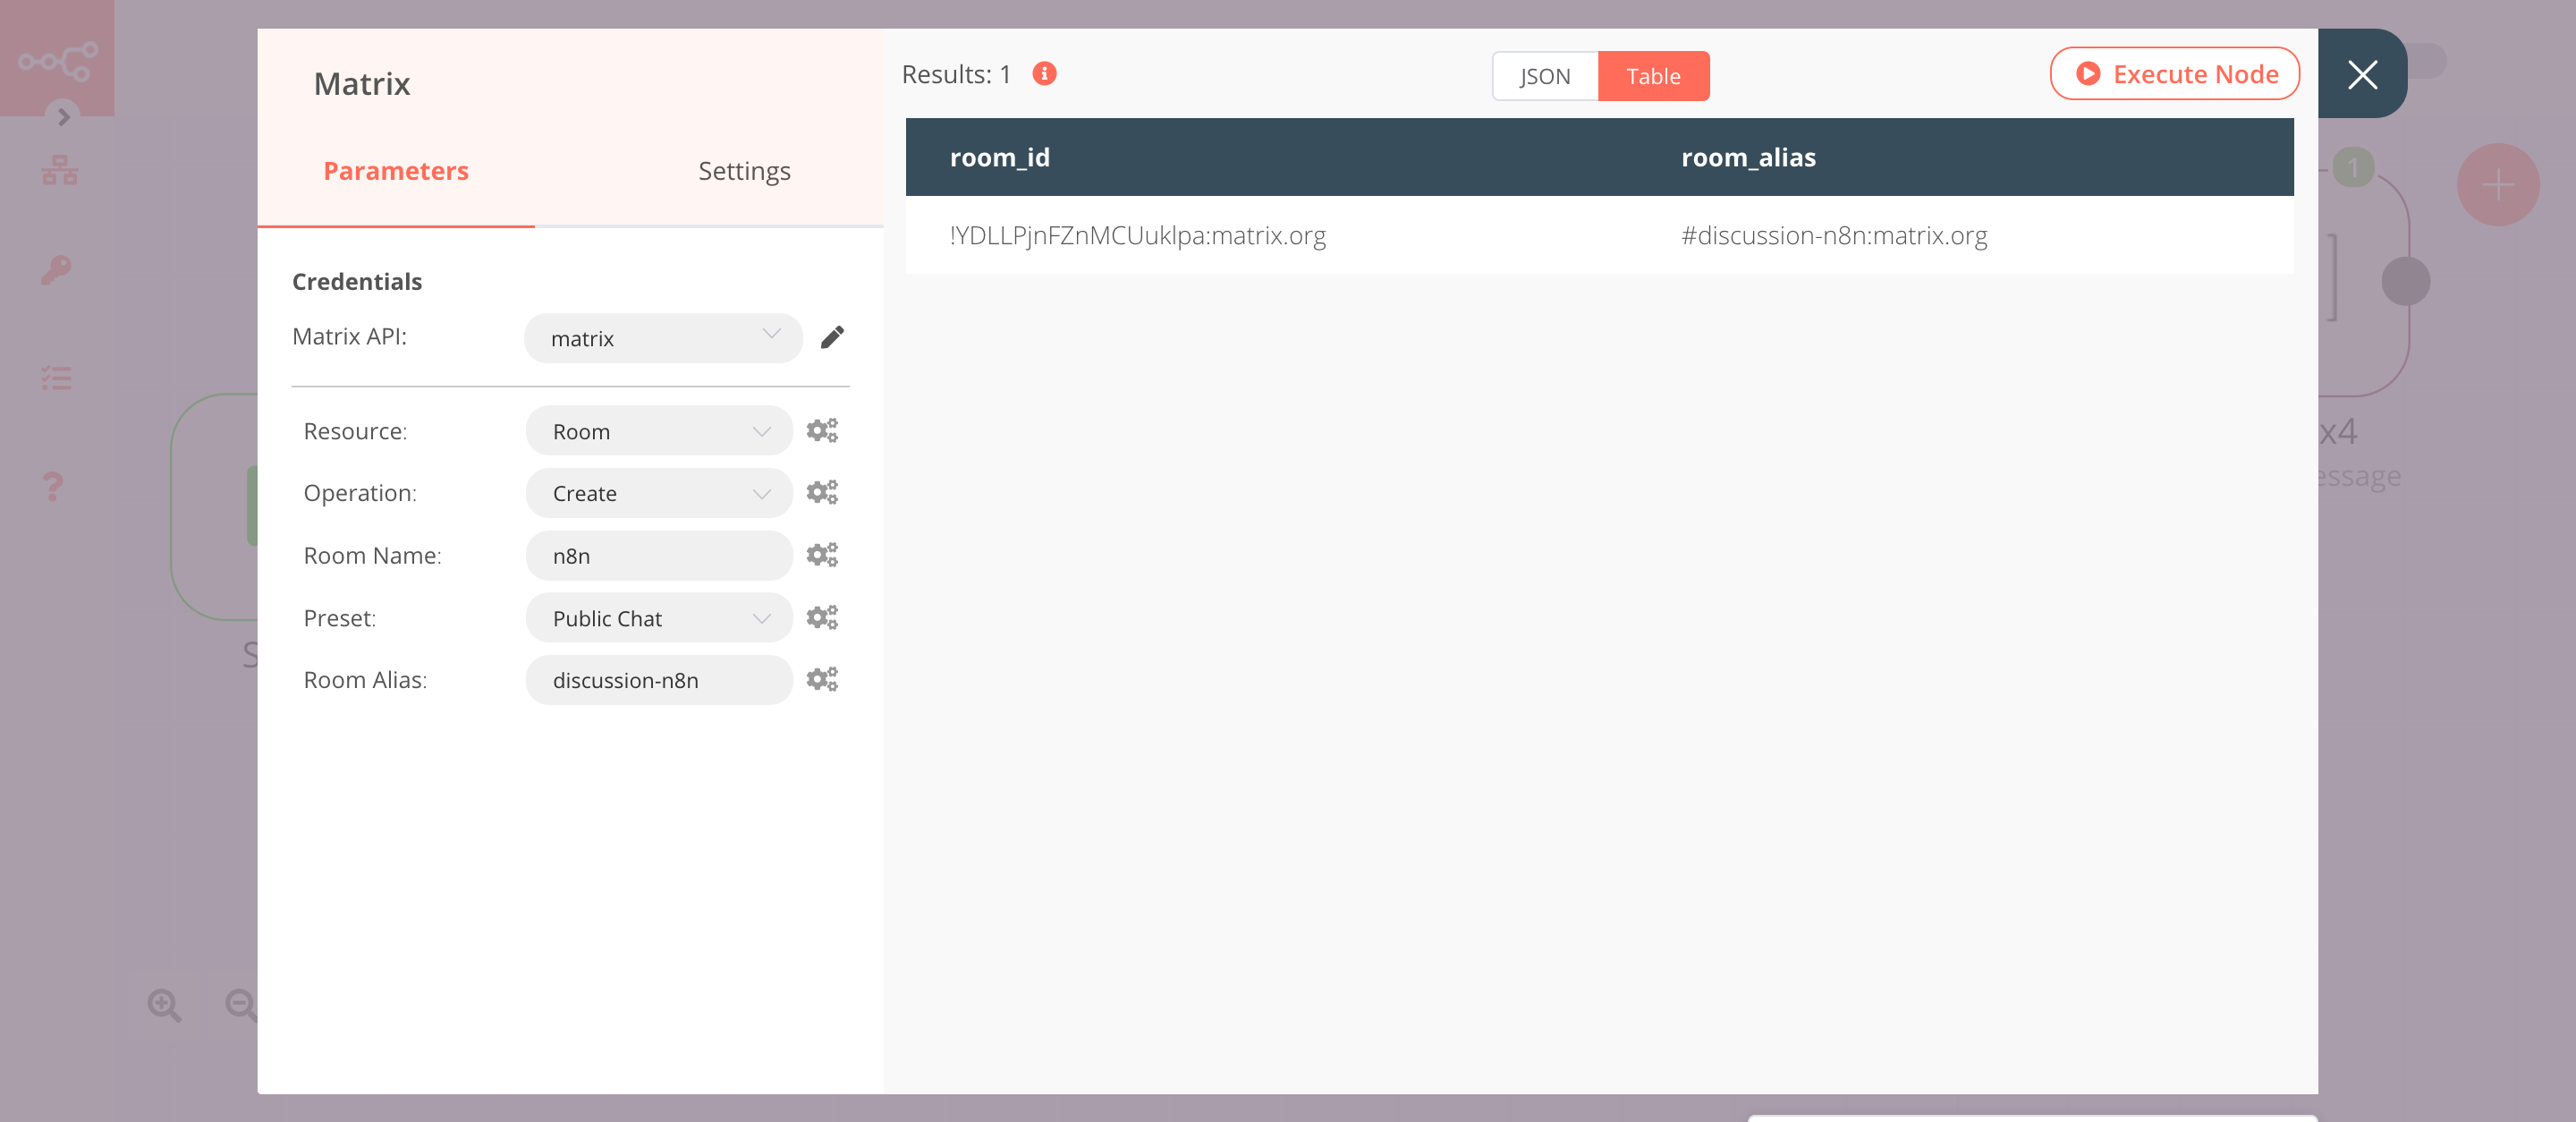
2. Matrix node (create: room)#
This node will create a new room called n8n on the Matrix server.
-
First of all, you'll have to enter credentials for the Matrix node. You can find out how to do that here.
-
Select 'Room' from the Resource dropdown list.
- Enter
n8nin the Room Name field. You can also enter a different name for the room. - Enter an alias for the room in the Room Alias field.
- Click on Execute Node to run the node.
In the screenshot below, you will notice that the node creates a room n8n with an alias #discussion-n8n:matrix.org.
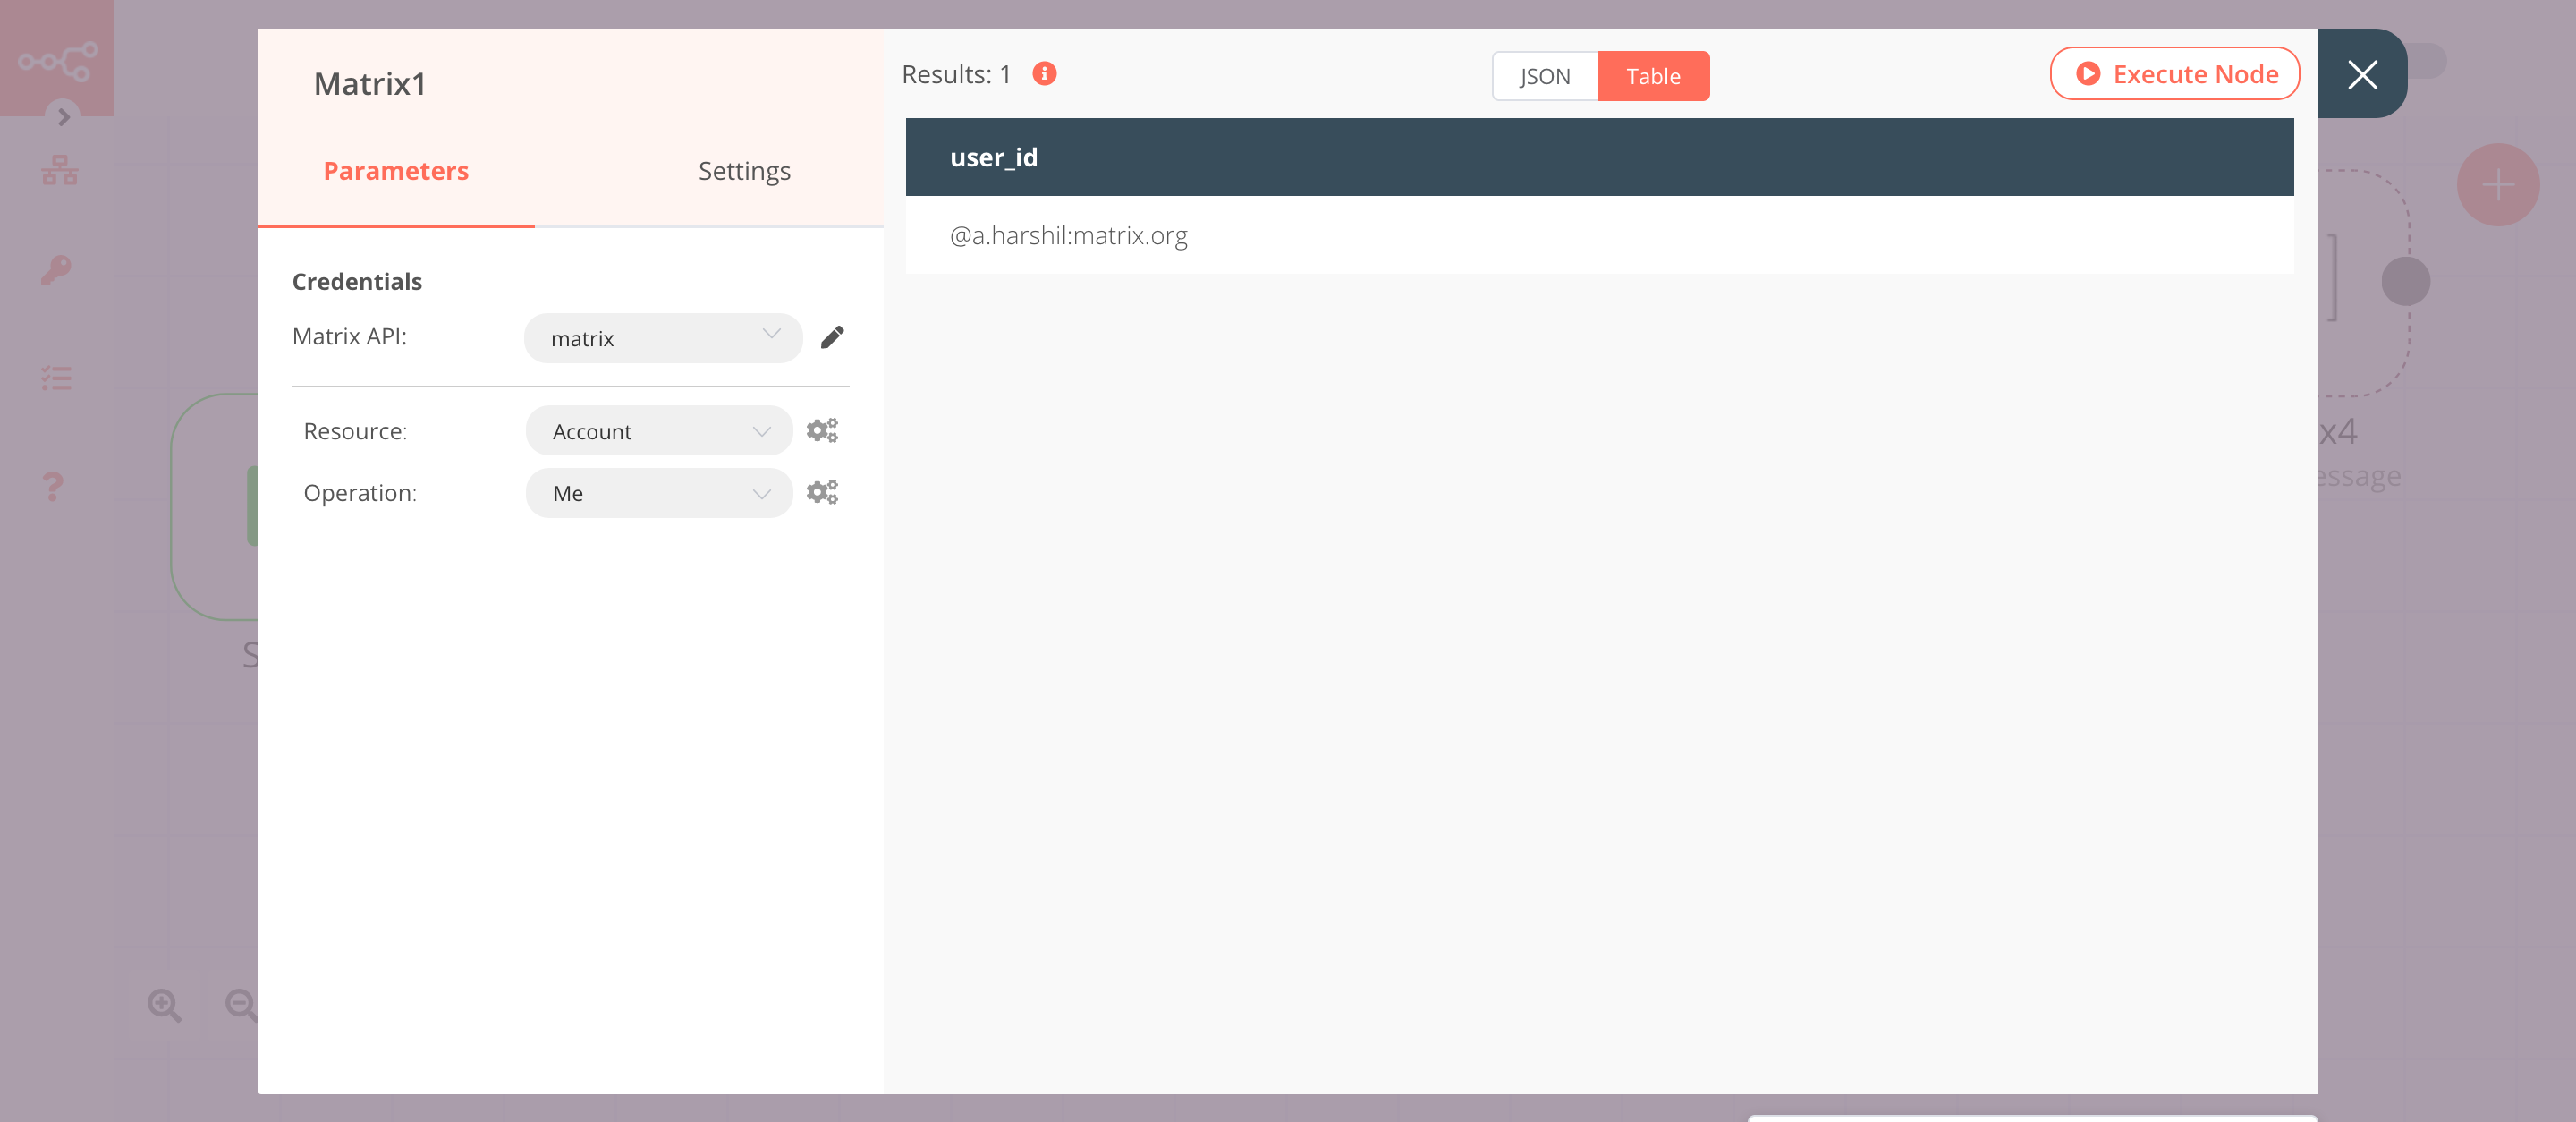
3. Matrix1 node (me: account)#
This node will get your account information from the Matrix server. We are doing this because Matrix will send an invite to all members of the room, including you. Since you are already a member of the room, you will get an error. We will use the data from this node later on to make sure that you don't send an invite to yourself.
- Select the credentials that you entered in the previous node.
- Select 'Account' from the Resource dropdown list.
- Click on Execute Node to run the node.
In the screenshot below, you will notice that the node returns your user ID.
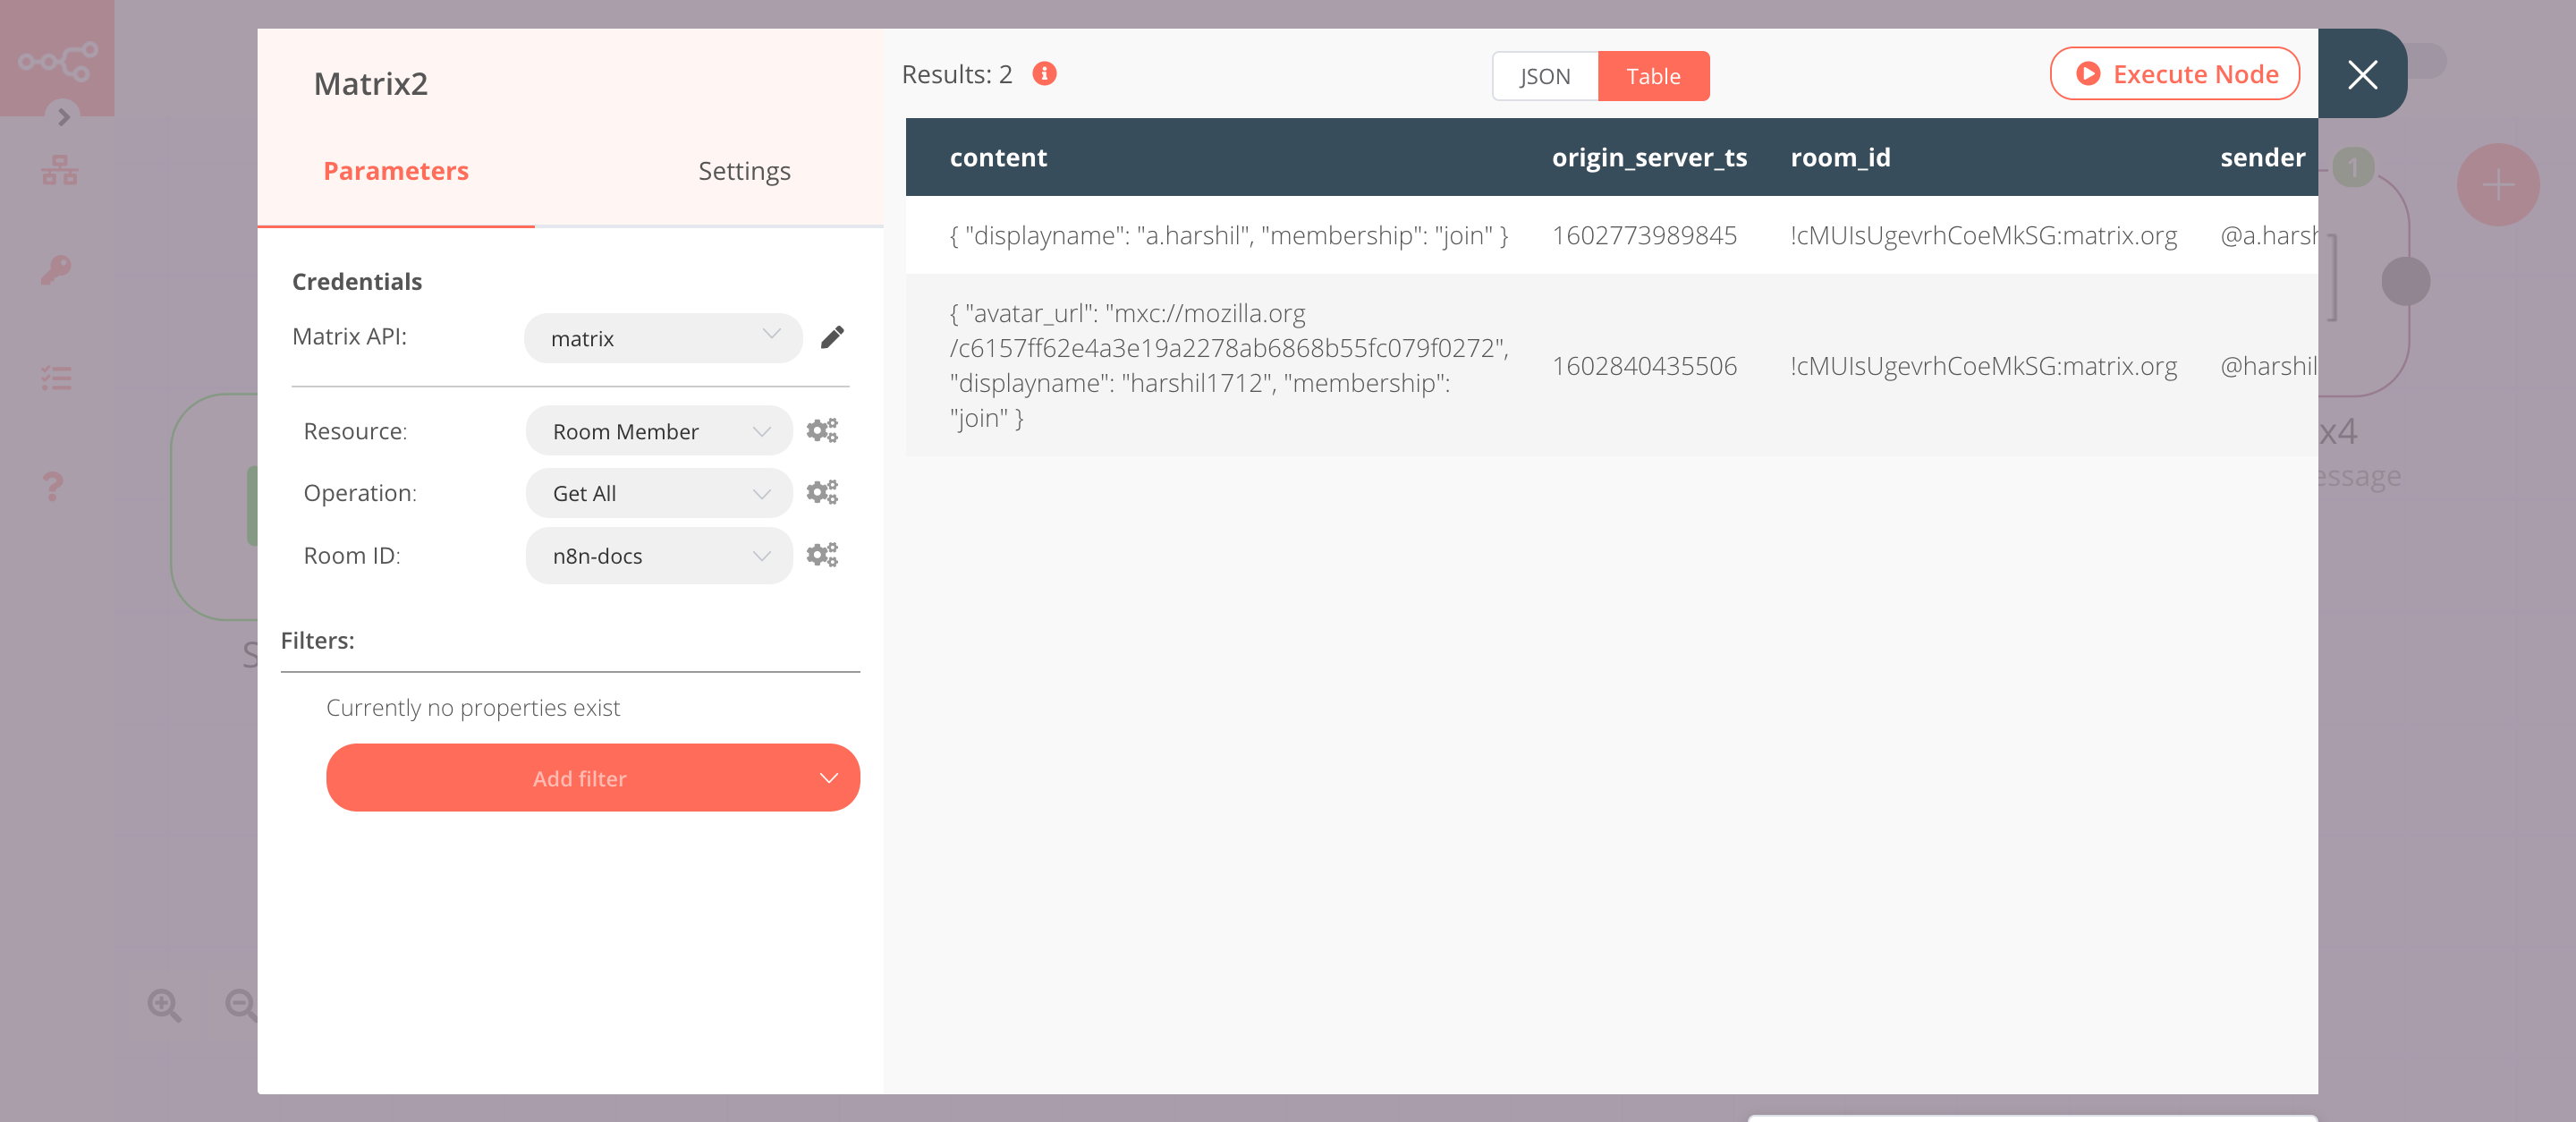
3. Matrix2 node (getAll: roomMember)#
This node will return the information of all the members in a room.
- Select the credentials that you entered in the previous node.
- Select 'Room Member' from the Resource dropdown list.
- Select a room from the Room ID dropdown list. We will invite the members of this room later on in the workflow.
- Click on Execute Node to run the node.
In the screenshot below, you will notice that the node returns the information of all the members in the room that we specified. The output of this node will be passed on to the next nodes in the workflow.
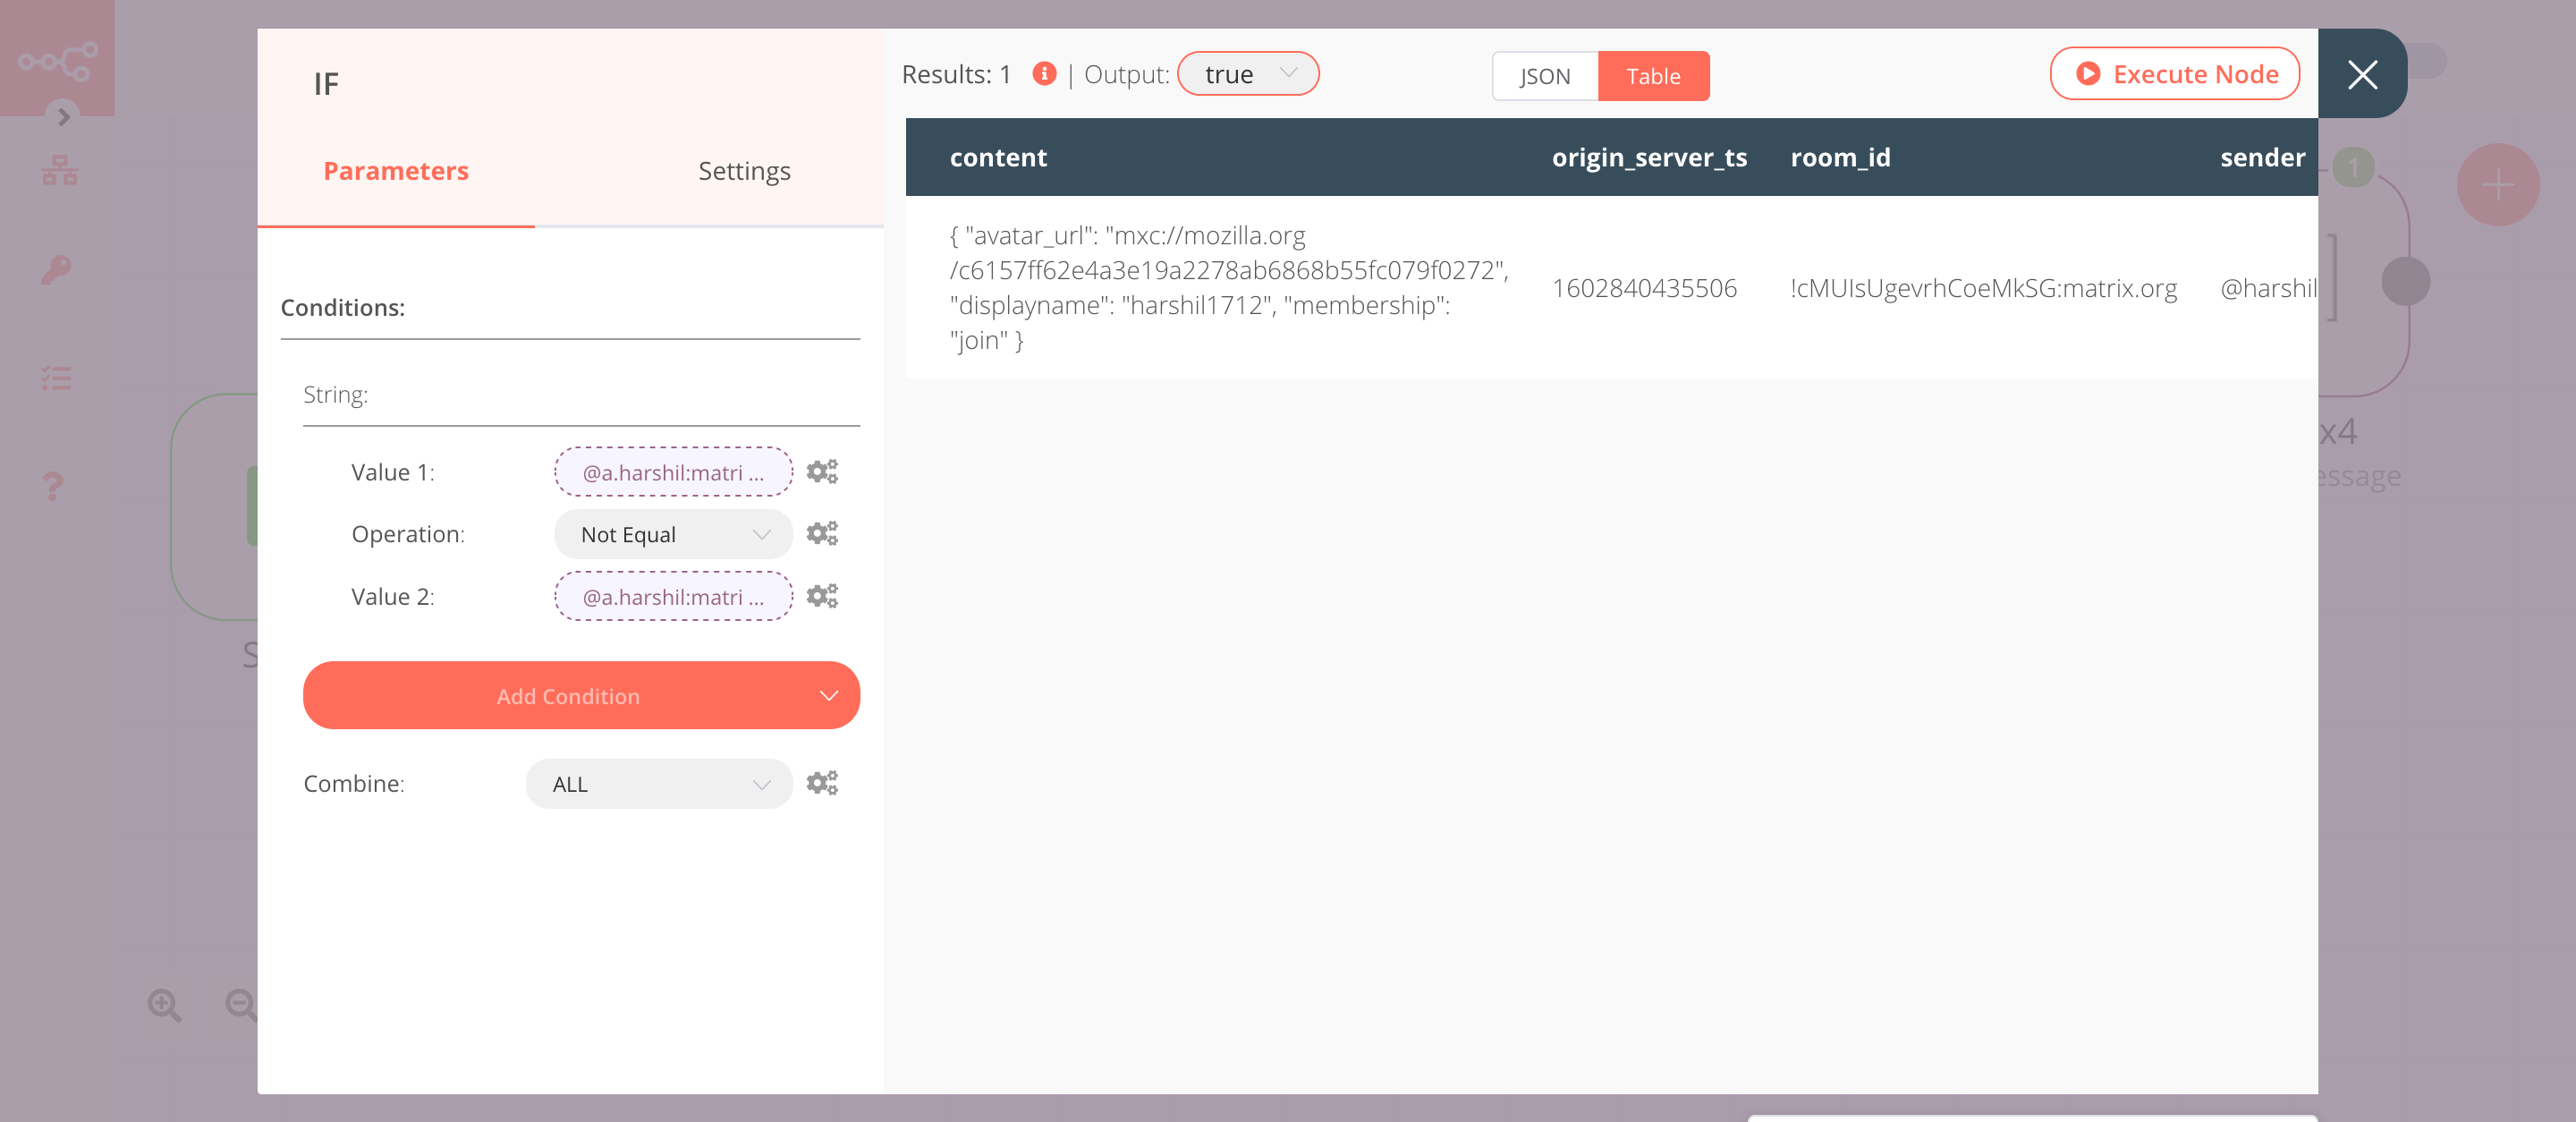
4. IF node#
This node will compare your user ID with the user ID of other members. If the user IDs are not equal, the output will be true.
- Click on Add Condition and select 'String'.
- Click on the gears icon next to the Value 1 field and click on Add Expression.
- Select the following in the Variable Selector section: Nodes > Matrix1 > Output Data > JSON > user_id. You can also add the following expression:
{{$node["Matrix1"].json["user_id"]}}. - Select 'Not Equal' from the Operation dropdown list.
- Click on the gears icon next to the Value 2 field and click on Add Expression.
- Select the following in the Variable Selector section: Nodes > Matrix2 > Output Data > JSON > user_id. You can also add the following expression:
{{$node["Matrix2"].json["user_id"]}}. - Click on Execute Node to run the node.
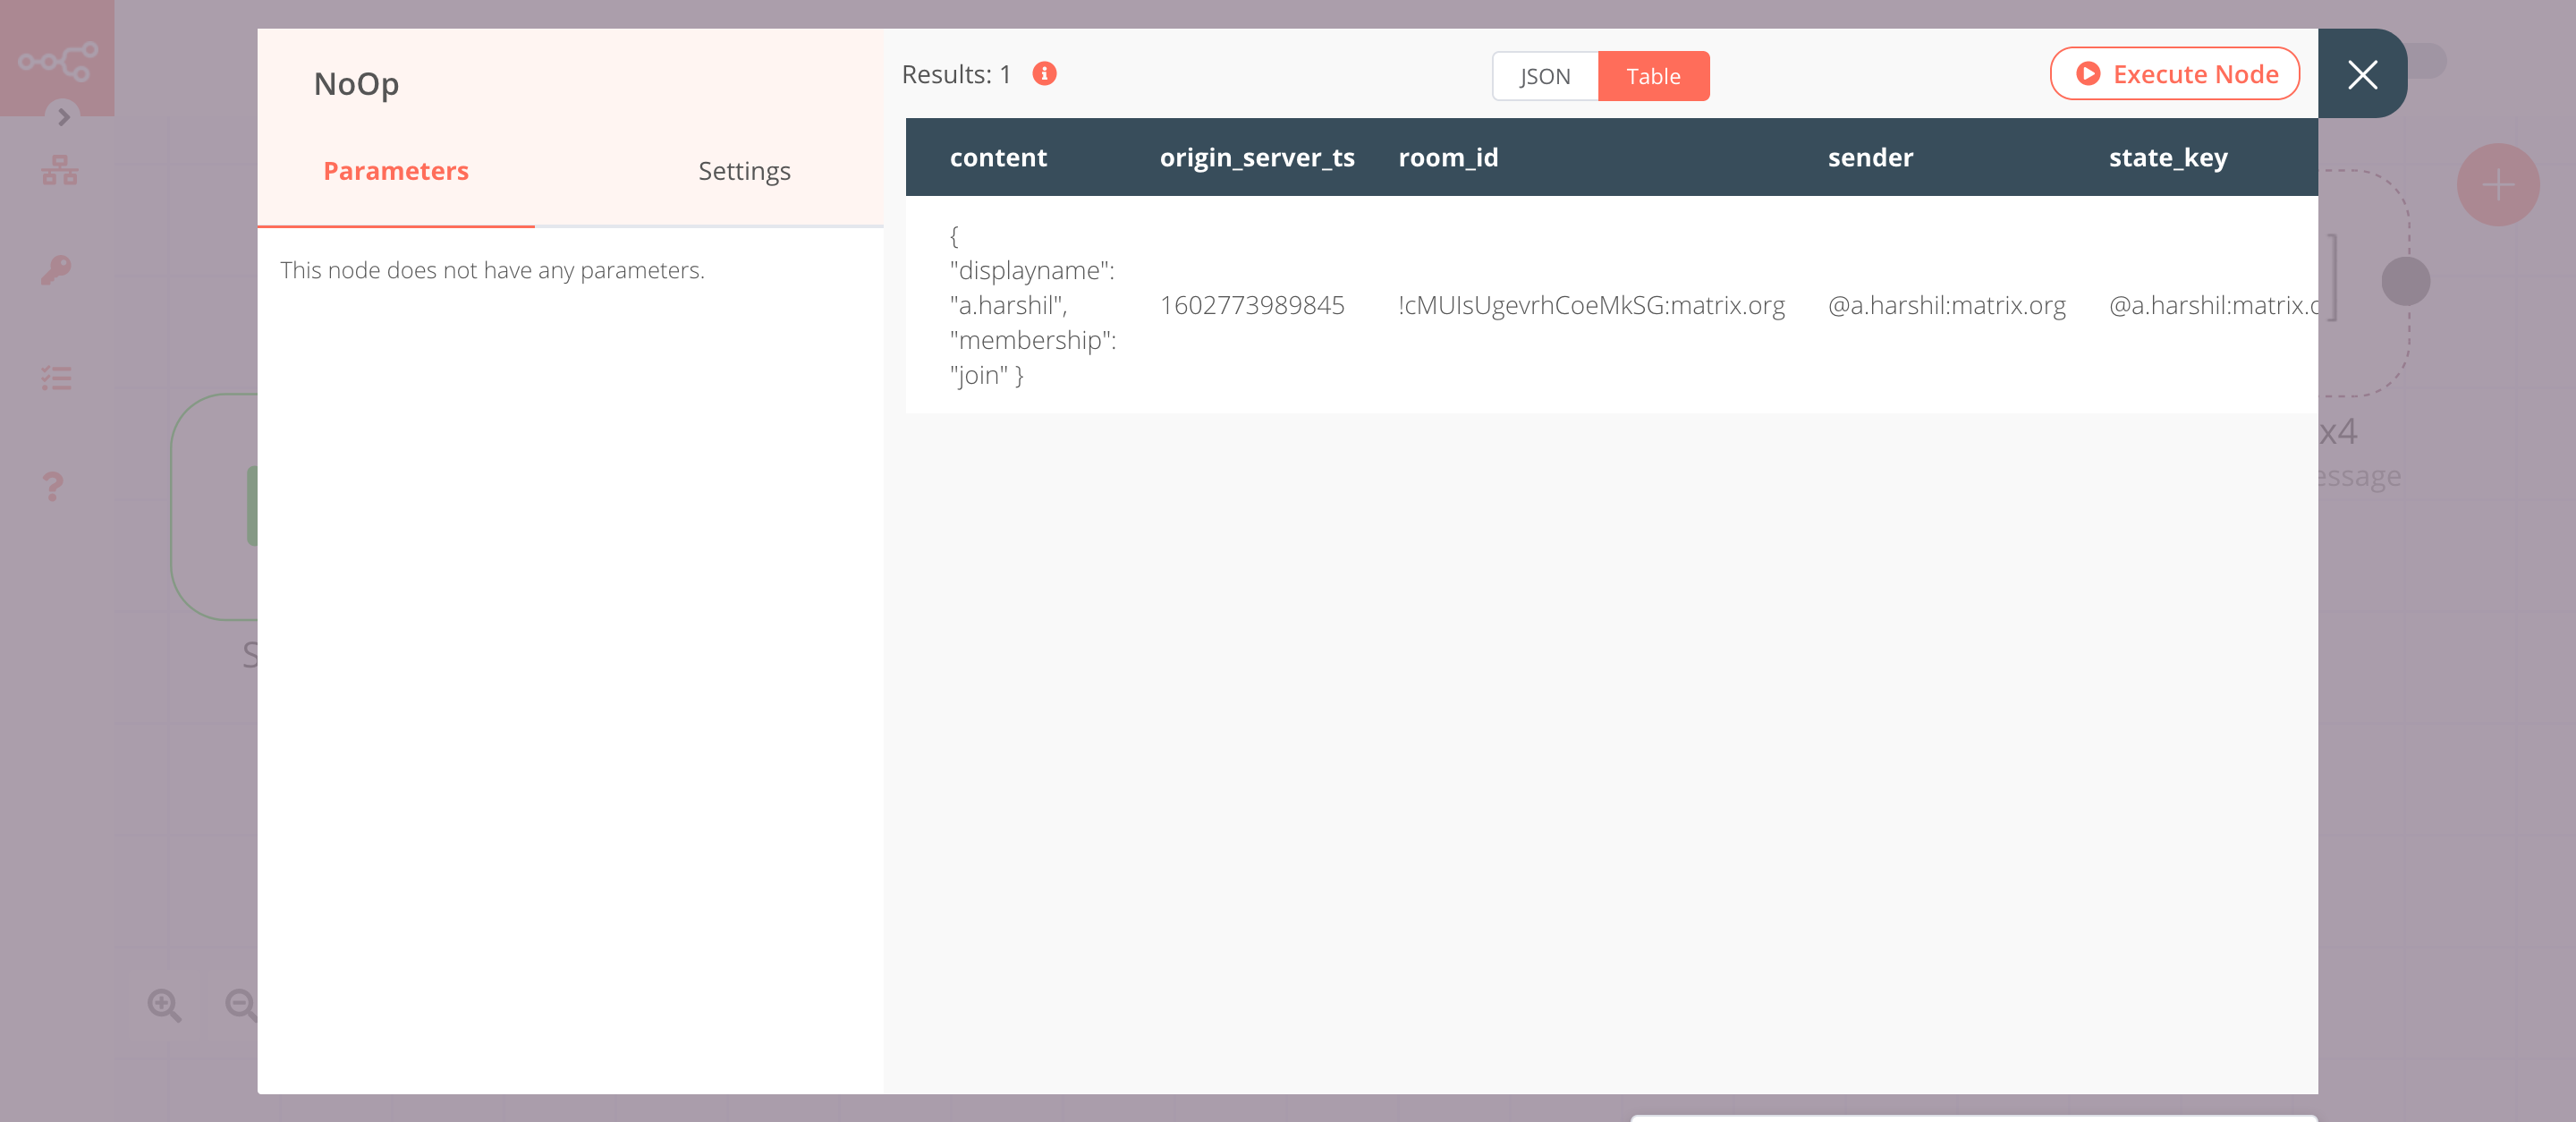
In the screenshot below, you will notice that the node returns the information of all the members of the room except your own.
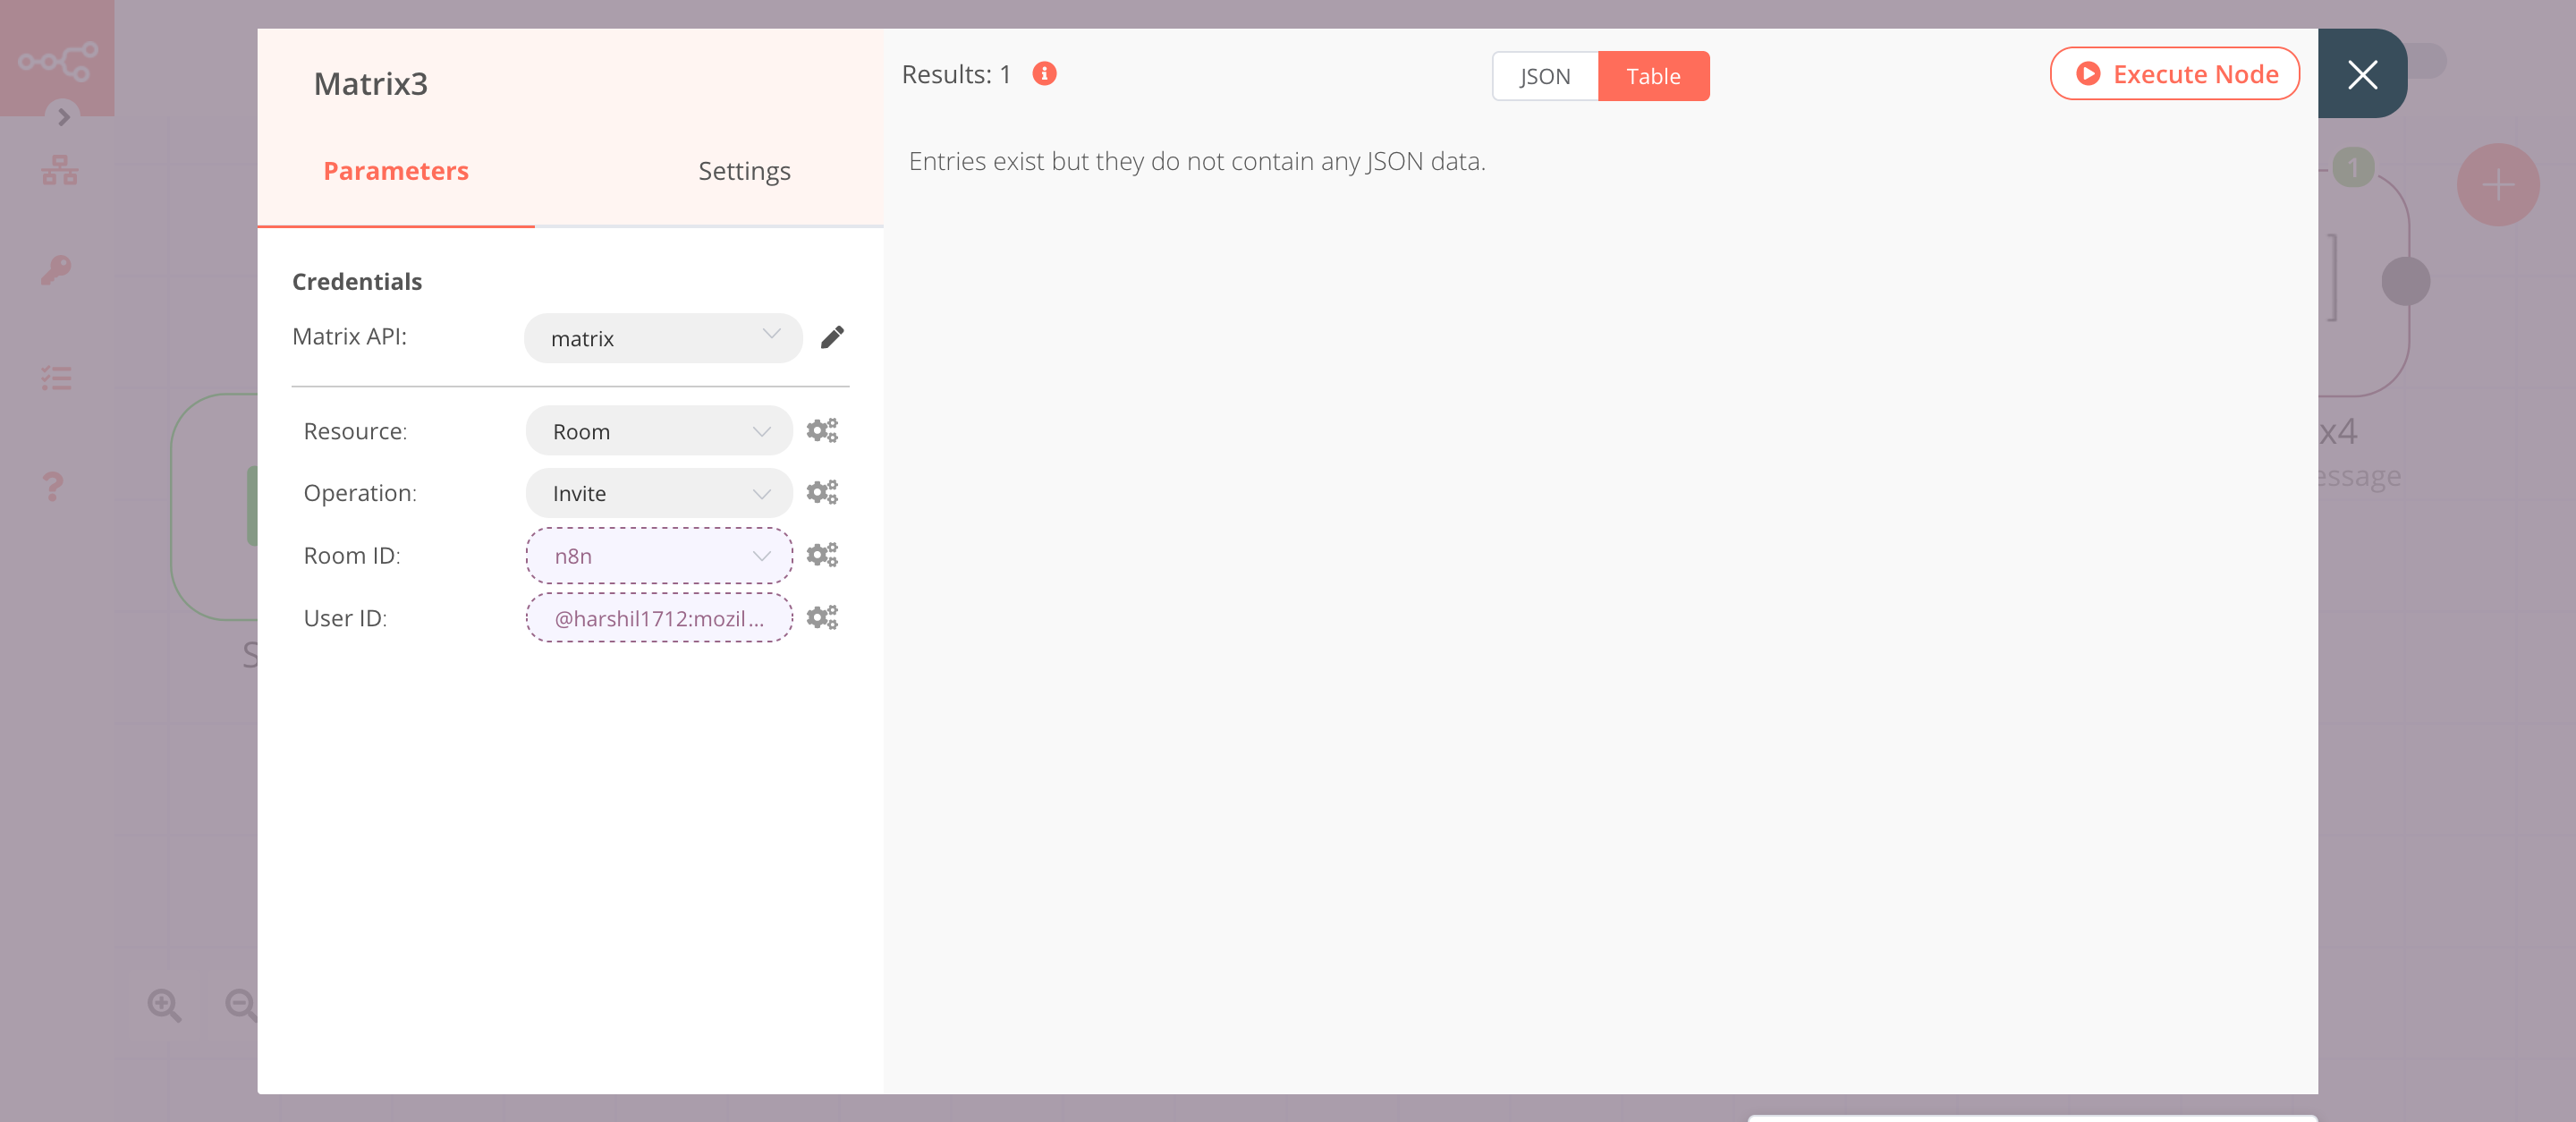
4. Matrix3 node (invite: room)#
This node will send an invitation to the members returned by the previous node to join the room that we created using the Matrix node.
- Connect the node to the 'true' output of the IF node
- Select the credentials that you entered in the previous node.
- Select 'Room' from the Resource dropdown list.
- Select 'Invite' from the Operation dropdown list.
- Click on the gears icon next to the Room ID field and click on Add Expression.
- Select the following in the Variable Selector section: Nodes > Matrix > Output Data > JSON > room_id. You can also add the following expression:
{{$node["Matrix"].json["room_id"]}}. - Click on the gears icon next to the User ID field and click on Add Expression.
- Select the following in the Variable Selector section: Nodes > IF > Output Data > JSON > user_id. You can also add the following expression:
{{$node["IF"].json["user_id"]}}. - Click on Execute Node to run the node.
In the screenshot below, you will notice that the node sends an invite to join the n8n room to the members of the other room.
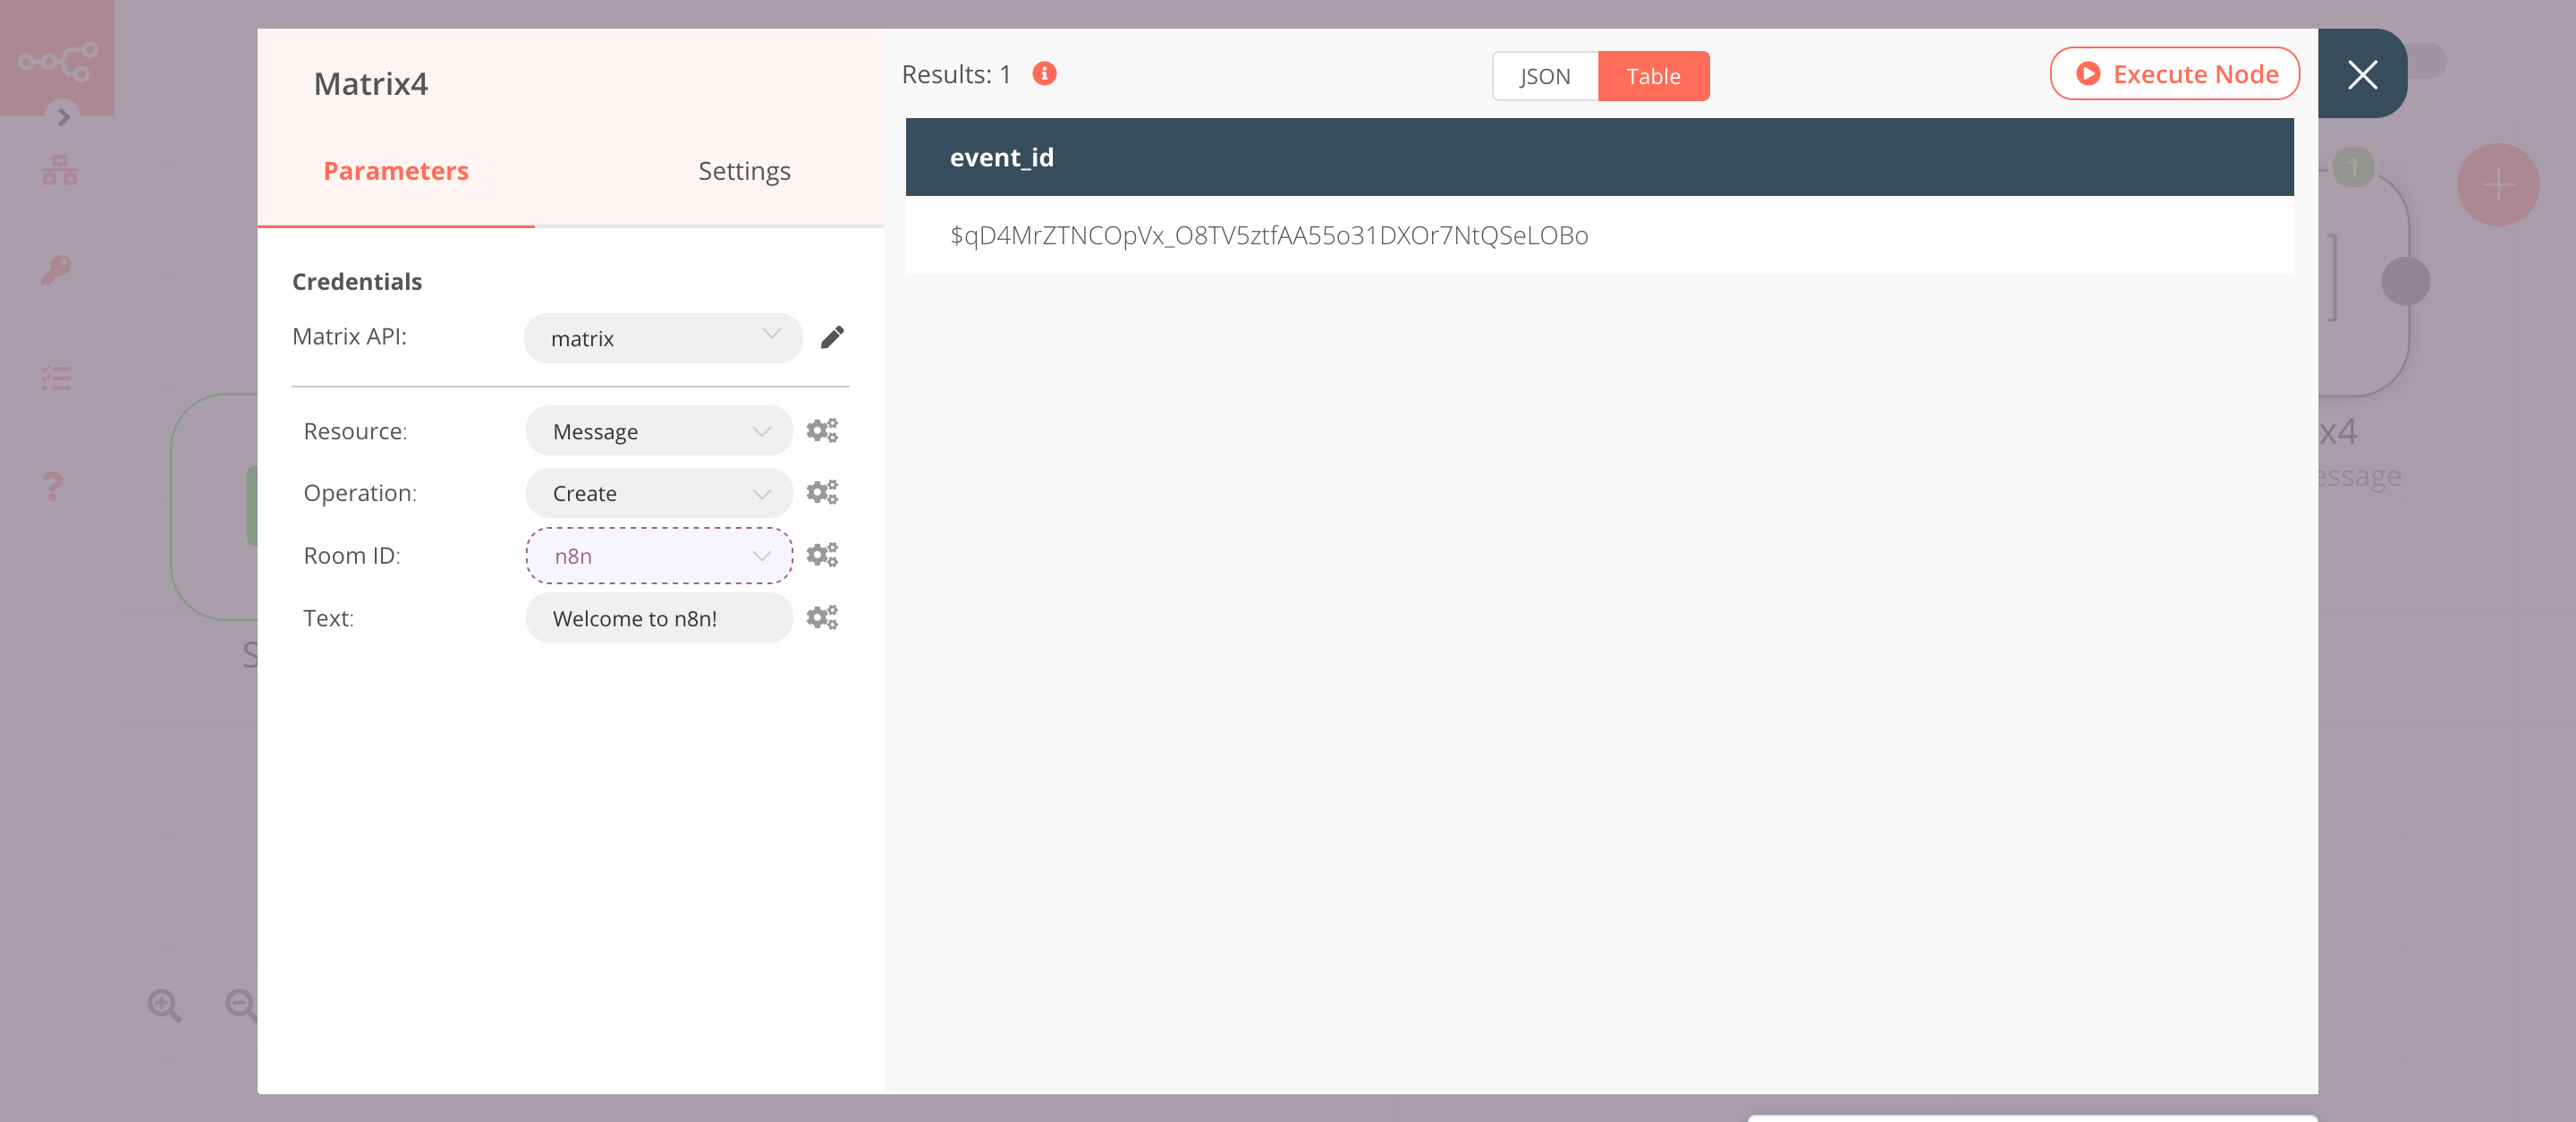
5. Matrix4 node (create: message)#
This node will send a message to the new room that we created using the Matrix node.
- Select the credentials that you entered in the previous node.
- Click on the gears icon next to the Room ID field and click on Add Expression.
- Select the following in the Variable Selector section: Nodes > Matrix > Output Data > JSON > room_id. You can also add the following expression:
{{$node["Matrix"].json["room_id"]}}. - Enter a message in the Text field.
- Click on Execute Node to run the node.
In the screenshot below, you will notice that the node sends a message to the room that we created with the Matrix node.
6. NoOp node#
Adding this node here is optional, as the absence of this node won't make a difference to the functioning of the workflow. We've added this as it can sometimes help others with a better understanding of the workflow, visually.
- Create a NoOp node connected to the 'false' output of the IF node.
- Click on Execute Node to run the node.